Gallery:Armos: Difference between revisions
(Created page with "{{stub}} A gallery of official artwork, sprites, models, and screenshots focusing on '''Armos'''. ===The Legend of Zelda=== <gallery> File:Armos-LoZ-Sprite.png|Sprite Im...") |
No edit summary |
||
| Line 3: | Line 3: | ||
A gallery of official artwork, sprites, models, and screenshots focusing on '''[[Armos]]'''. | A gallery of official artwork, sprites, models, and screenshots focusing on '''[[Armos]]'''. | ||
== | ==Sprites and in-game models== | ||
<gallery> | <gallery> | ||
File:Armos-LoZ-Sprite.png|Sprite Image | File:Armos-LoZ-Sprite.png|Sprite Image | ||
File:Armos-Sprite-1.png|Sprite from ''[[The Legend of Zelda: A Link to the Past|A Link to the Past]]'' | |||
File:Armos-Sprite-2.png|Sprite from ''A Link to the Past'' | |||
File:Armos-LA-Sprite.png|Sprite from ''[[The Legend of Zelda: Link's Awakening DX|Link's Awakening DX]]'' | |||
File:Armos OoT In Game.png|Model from ''[[The Legend of Zelda: Ocarina of Time|Ocarina of Time]]'' | |||
File:Armos.png|Armos from ''Majora's Mask'' | |||
File:Armos-Blue-Oracle-Sprite.png|Sprite from ''Oracle of Seasons'' | |||
File:Armos-Red-Oracle-Sprite.png|Sprite from ''Oracle of Ages'' | |||
File:Armos-Sprite-MC.gif|Sprite from ''The Minish Cap'' | |||
File:Armos_Figurine.gif|Figurine from ''The Minish Cap'' | |||
File:PH-Armos.png|Armos from ''Phantom Hourglass'' | |||
File:ST-Armos.png|Armos from ''Spirit Tracks'' | |||
File:Armos-CDI.png|Armos from ''The Faces of Evil'' and ''The Wand of Gamelon'' | |||
</gallery> | |||
==Artwork== | |||
===''The Legend of Zelda''=== | |||
<gallery> | |||
File:Armos-LoZ-Art.png|Artwork from the [[The Legend of Zelda Instruction Manual|Instruction Booklet]] | File:Armos-LoZ-Art.png|Artwork from the [[The Legend of Zelda Instruction Manual|Instruction Booklet]] | ||
File:Arts-Artifacts-Armos.jpg|Artwork from [[The Legend of Zelda: Art & Artifacts|Art & Artifacts]] | File:Arts-Artifacts-Armos.jpg|Artwork from [[The Legend of Zelda: Art & Artifacts|Art & Artifacts]] | ||
| Line 19: | Line 37: | ||
File:Kodakawa-Shoten-Armos.png|Artwork from [[Kadokawa Shoten The Legend of Zelda Strategy Guide|Kodokawa Shoten Guide]] | File:Kodakawa-Shoten-Armos.png|Artwork from [[Kadokawa Shoten The Legend of Zelda Strategy Guide|Kodokawa Shoten Guide]] | ||
File:Soft-Bank-Armos.png|Artwork from [[Soft Bank Beep The Legend of Zelda Strategy Guide|Soft Bank Beep Guide]] | File:Soft-Bank-Armos.png|Artwork from [[Soft Bank Beep The Legend of Zelda Strategy Guide|Soft Bank Beep Guide]] | ||
</gallery> | |||
===''Ocarina of Time''=== | |||
<gallery> | |||
File:OoT-Armos-Artwork.png|Artwork from ''[[The Legend of Zelda: Ocarina of Time|Ocarina of Time]]'' | |||
</gallery> | |||
===''Skyward Sword''=== | |||
<gallery> | |||
File:Armos-Medium.png|Armos from ''[[The Legend of Zelda: Skyward Sword|Skyward Sword]]'' | |||
</gallery> | </gallery> | ||
{{Galleries}} | {{Galleries}} | ||
{{Cat|Character Galleries}} | {{Cat|Character Galleries}} | ||
Latest revision as of 23:41, November 24, 2021
| This article is a stub. You can help the Zelda Dungeon Wiki by expanding it. |
A gallery of official artwork, sprites, models, and screenshots focusing on Armos.
Sprites and in-game models

Sprite Image

Sprite from A Link to the Past

Sprite from A Link to the Past

Sprite from Link's Awakening DX

Model from Ocarina of Time

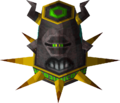
Armos from Majora's Mask

Sprite from Oracle of Seasons

Sprite from Oracle of Ages

Sprite from The Minish Cap

Figurine from The Minish Cap

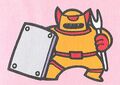
Armos from Phantom Hourglass
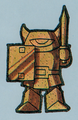
Armos from Spirit Tracks

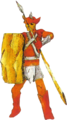
Armos from The Faces of Evil and The Wand of Gamelon


Artwork
The Legend of Zelda
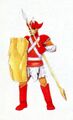
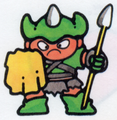
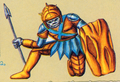
Artwork from the Instruction Booklet
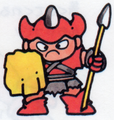
Artwork from Art & Artifacts
Artwork from Futami Guide

Artwork from Million Publications Guide
Artwork from Shinsea Publishing Guide
Artwork from Shinsea Publishing Guide
Artwork from Futabasha (1986) Guide
Artwork from Jitsugyo no Nihon Sha Guide
Artwork from Dawn Publications Guide
Artwork from Keibunsha Guide

Artwork from Keibunsha Guide
Artwork from Kodokawa Shoten Guide
Artwork from Soft Bank Beep Guide


Ocarina of Time

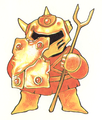
Artwork from Ocarina of Time

Skyward Sword

Armos from Skyward Sword
