- Chapter 1 – Spirit’s Grave
- Chapter 2 – Wing Dungeon
- Chapter 3 – Moonlit Grotto
- Chapter 4 – Skull Dungeon
- Chapter 5 – Crown Dungeon
- Chapter 6 – Mermaid’s Cave
- Chapter 7 – Jabu-Jabu’s Belly
- Chapter 8 – Ancient Tomb
- Chapter 9 – The Black Tower
- Chapter 10 – Room of Rites
1.1 Welcome to Labrynna


From deep within Hyrule Castle, the Essence of the Triforce calls out to the legendary hero, Link. Upon the request of the Triforce, Link is teleported to the land of Labrynna, dropping into an empty, wooded area known as the Forest of Time, at which point control of him can be taken.


Walk up two screens to find a woman being ambushed by monsters. Upon Link approaching, the monsters will flee, and the mysterious blue woman will reveal her name to be Impa, who reveals her role as Hyrule’s Princess Zelda’s nurse and requests Link’s help. Continue up and left one screen each to find a large boulder with a triangular shape upon it. Push the stone from either side to clear the path, then head up two screens toward the sound of music.


Here, we find the source of the music to be a woman dressed in blue singing to an audience people and animals alike. Speak with each of the listeners, saving the red bear for last, who will move aside and allow Link a closer listen. Stand where the bear was to meet Nayru.


After speaking with Nayru, Link will then meet Ralph, a longtime frined of Nayru’s. Moments later, Impa will begin laughing before revealing her true self as that of Veran, an evil sorceress and main antagonist of the game. Veran releases control of Impa’s body and possesses Nayru, taking over the body and powers of the Oracle of Ages. Veran uses these new powers to travel to the past and stop time across Labrynna, freezing many townsfolk in place as well. The scene ends with Ralph running off to find and rescue Nayru, while Impa regains consciousness and gives Link the Wooden Sword, entrusted to her by Zelda.


Impa will head off to Nayru’s house and ask that Link go talk with the Maku Tree in Lynna City. Head down three screens and slash one of the bushes on the left to clear the path. Continue left one screen to enter Lynna City.

Upon first entering Lynna City, head up one screen to find a small shop adorned with a ring upon its roof known as Vasu Jewelers. Speak with the shop owner, Vasu, who will give Link the L-1 Ring Box, as well as his first Magical Ring. Vasu will then offer to appraise Link’s first ring for free, that becoming the Friendship Ring if he chooses the one Vasu just gave to him. Additional Magical Rings will cost 20 Rupees to appraise, however Vasu will give Link 30 Rupees if the appraised ring is one he already owns.
Optional: L-1 Ring Box & Friendship Ring


Magical Ring: Friendship Ring
From the Ring Shop, head up and left one screen to find Bipin's and Blossom's House. Inside, Link will find Bipin and Blossom, a couple who have just recently added a newborn baby to their family. Blossom will ask Link to suggest a name for the child and settle on whatever name is suggested. At certain times throughout his quest, Link can come back here to assist further with the growth of Bipin and Blossom's Son.
Optional: Bipin and Blossom's Son


Three screens west of the Ring Shop, Link will find the Know-It-All Birds Hut. Here, Link can speak with the Know-It-All Birds and find out some basic mechanics on how to use the menus, as well as some of Link’s basic inventory items that he will soon acquire.
Optional: Helpful Tips from the Know-It-All Birds


Head over to the eastern part of Lynna City and go one screen north of the Ring Shop. Enter the cave on the left side of the large gate ahead, bringing Link into Maku Road. Walk up four screens through the cave to find the exit. Link will resurface in the Maku Tree’s area where a cutscene will play. The Maku Tree will recognize Link as the Hero destined to save the land and tell him that he must put a stop to Veran’s attempts to flood the land of Labrynna with sorrow. After telling Link he will need an important item to do so, the Maku Tree will begin to show distress and change colors before claiming something must be happening to her in the past and disappearing. Walk right one screen for a short cutscene with Ralph to play, then enter the Time Portal to travel to the past.


Startling a nearby resident, Link will emerge from the portal 500 years in the past kingdom of Labrynna. Climb off the small ledge along the vines and head down and left one screen each into Lynna Village In the past, the entrance to Maku Road is blocked by piles of dirt which must be removed first before Link can enter, so head toward the western side of the village by going down one and left three screens, then continue down three more screens into the Black Tower area.


Speak with the construction worker and then head up two screens into the Black Tower. Once inside, head right, up, and left one screen each along the path and speak with the construction worker holding what appears to be plans. He will give Link the Shovel which can be used dig the dirt on the right and exit the Black Tower by going down two screens.
After exiting the Black Tower, head down one screen and dig the piles of dirt on the right to access and obtain the first Piece of Heart. When Link obtains four of these pieces, a full Heart Container will be added to his stock.
Optional: Heart Piece #1


At the northwest edge of Lynna Village, enter the building to meet Pippin. He will give Link a Gasha Seed. Exit the house and head down one screen to find a Soft Soil location where Link can plant the Gasha Seed. Each Soft Soil location is rated by tier which ultimately decides what kind of item the Gasha Nut will produce. This particular location is a common location and will only produce common items.
Optional: Gasha Seed & Soft Soil Location #1 - Lynna Village (Tier 1-2)


We now want to return to Maku Road. Make your way to the northeast portion of Lynna Village. Use the shovel to clear the dirt and enter the cave, though this time it will not be so simple to navigate.
1.2 Rescuing the Maku Tree


Inside Maku Road, head up one screen and push the red block UP to unlock the doorway above. Head up a screen and push the red block either RIGHT or LEFT to clear a path. Avoid or defeat the three Keese in this room and continue right one screen. Three Gels will hop about this room and attempt to latch onto Link, slowing him down but not doing any damage in the process. Simply defeat the enemies, unlocking both doorways in this room, and head up one screen.


Push the red block UP and into the pit, then walk along the path on the right until Link reaches two more red blocks. Push the left block UP and the right one RIGHT to clear the way, then continue along the path and step on the switch at the end. A chest will appear on the yellow tile in the center of the room. Navigate back along the path and then along the one on the left to reach the chest. Open it to obtain a Small Key.


After grabbing the Small Key, head down one and left two screens through the locked doorway. In this room, two identical arrangements of red blocks will be found. Mentioned below is an optional task explaining the arrangement on the right. Of this leftmost set of blocks, push the second one in the first vertical row on the right LEFT, push the one that was above it UP, then the one that was to the left of the previous one LEFT. Link should be able to now step onto the switch, unlocking the door at the top of the room. Head up one screen through the unlocked doorway.
On the right set of blocks, Link can push the second block in the first vertical row to the RIGHT, and then push the one just above it UP. Then push the next block to the RIGHT and a staircase will appear. In this underground area, there is a single blue Rupee that can be obtained worth 30 rupees. After climbing out of this cave, push the blocks on the right side to clear a path.
Optional: 30 Rupees


This room contains two Blue Stalfos which are among the easiest of their kind to defeat. Defeat them and push the lone block in this room in any direction to unlock the two doorways in the room. See the optional box below regarding the Piece of Heart in this room, then head right one screen.
At the top-left corner of the room is a Piece of Heart is being guarded by four red blocks. Push the leftmost block in the horizontal row below the heart piece UP, then push the one to the right of it LEFT. Walk up and grab Piece of Heart #2.
Optional: Heart Piece #2


Climb the steps and head up the staircase in this room to emerge in the Maku Tree’s area, where Link finds two Red Pig Warriors attempting to attack the young Maku Tree. Walk up towards the Moblins to have them come after Link, at which point he must defeat both. The Maku Tree will be so overjoyed about her hero that she will not only open the gate blocking her area for him, but also go as far as to say she will be his bride in the future! Exit the Maku Tree’s area and enter the active portal outside to return to the present.


Head back up one screen into the Maku Tree’s area and speak to her. She will remember Link having saved her in the past, though her recollection of their marriage plans is a bit off, and also offer him some encouragement in stopping Veran’s evil plans. With the flow of time disrupted, the Maku Tree’s memory and power has faded and requires Link gathering the eight Essences of Time to restore both. Finally, she will inform Link that the first Essence can be found to the east in Yoll Graveyard and give him the Seed Satchel, already stocked with 20 Ember Seeds. Throughout Link’s journey, this useful tool will be used to stock a variety of seed types, all of which have some sort of special ability.
Exit the Maku Tree’s area down one screen back into Lynna City. Equip the Ember Seeds and use one on the shrub to the right, burning it down and clearing a path. Head along this path right one screen to reach a chest containing 30 Rupees! Now, head left one and down two screens to the Lynna City Shop and enter. Among the items sold here include the Wooden Shield, which Link can purchase by picking it up from the shelf ahead using the “A” button and speaking to the shopkeeper, Stockwell. From outside the Shop, Link can head down one screen to find an Ember Seed Tree, where he can restock the seeds by swiping them down using his sword.
Optional: Rupees, Ember Seeds, and the Wooden Shield


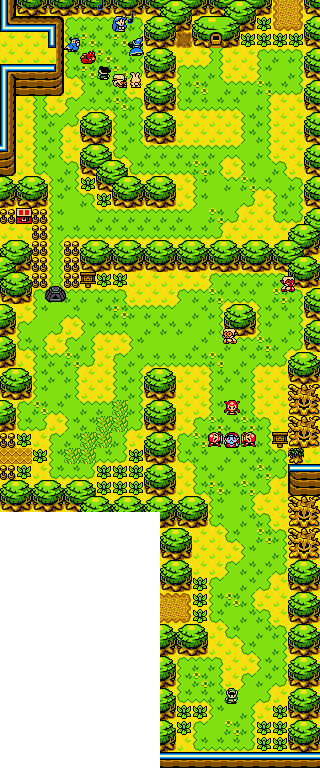
From the Lynna Village Shop at the east side of town, head right a screen into the Forest of Time. From here head up one, right one, and down one screen. Burn down the shrub on the right and head right one screen into Yoll Graveyard. Burn the next shrub to actually get inside the graveyard area, then head right one, down one, and left one screen. Link will come to an area where three kids can be heard talking about a grave underneath a tree where a ghost apparently lives. Continue down one screen along the bridge, then right two screens. Burn the bottom of the two shrubs here and descend the staircase hidden beneath.


Inside this cave, light both torches on each side of the room using Ember Seeds to have the Graveyard Key fall onto the skull-head tiles in the center. Pick it up and exit this cave, then head back left two screens, up one along the bridge again, then right one screen to the area with the ghost. Continue up two screens from here to reach a locked gate. Push against the center of the gate to open it using the Graveyard Key, then head right one and down three screens. Along this path, Link will encounter Crows that will fly at him if he gets too close, so stay along the center of the screen to avoid them. Enter the building here which is actually the first dungeon of Link’s quest, the Spirit's Grave.
1.3 Level 1: Spirit's Grave
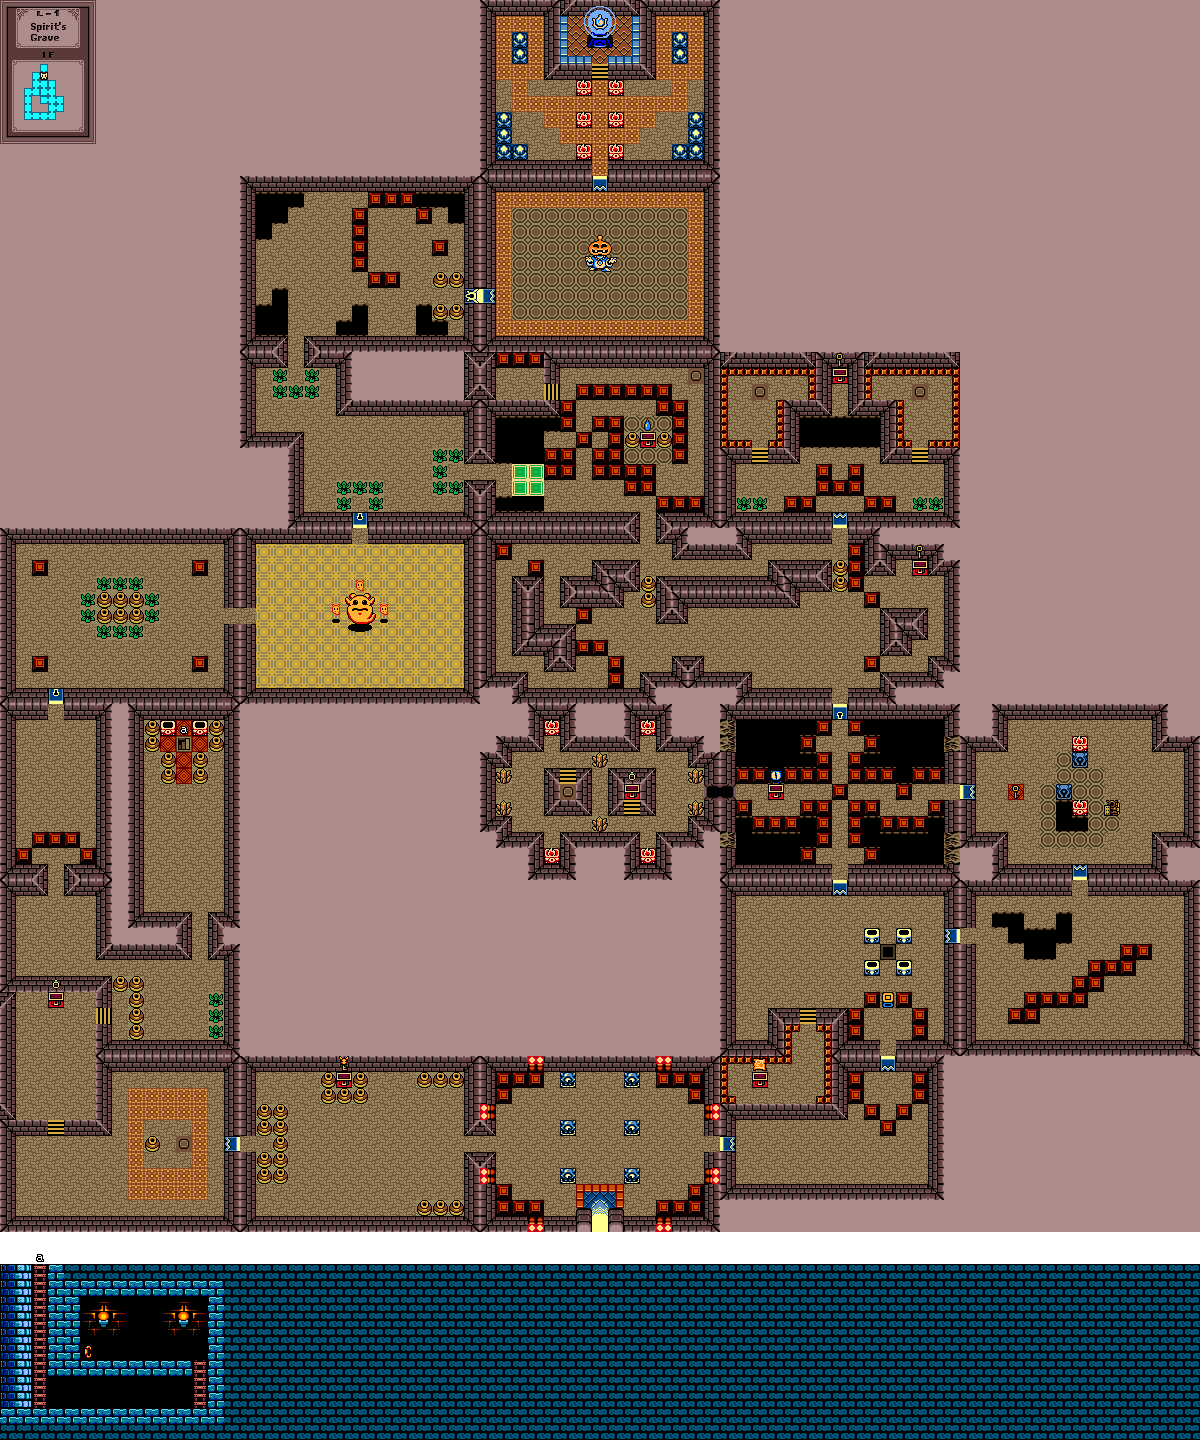


From the start, head right a screen to find a room with three Red Zols. Striking a Red Zol with the Wooden Sword will cause the enemy to split into two Gels, so keep slashing when using the Wooden Sword to completely defeat the Red Zols. Next, head over to the red blocks on the right side of the room. Push the bottom one LEFT or RIGHT and head through the path up one screen.


Push the puzzle block straight ahead UP a couple of times and head up the steps on the left. Continue down one screen to a ledge where a chest containing the Dungeon Map can be found.


Jump off this ledge and push the lowest red block on the right as before, then continue up one screen, pushing the puzzle block up and onto the black square ahead. With the blue side of the puzzle block facing up, the unlit torches will ignite a blue flame, opening the doorway on the right. From here, continue right one and up one screen.


Defeat the Ghini in this room to unlock the doors to the south and west, as well as cause a Small Key to fall onto the red tile on the left. Pick up the Small Key and head left one screen through the newly unlocked doorway. In this block-filled room, walk over and push the center block to the LEFT, then head up one screen.


Immediately head back down one screen and push the center block DOWN, now allowing access to the chest on the left. Open it to receive the Compass! Combined with the Dungeon Map, the Compass assists greatly in locating unopened chests and Small Keys throughout the respective dungeon in which it is found.
To the left of the Compass chest, use an Ember Seed on the vines growing up the wall to uncover a passage. Head left one screen and defeat the two Ropes in this room. Step on the switch on the leftmost altar, revealing a chest on the rightmost altar. Open this chest to obtain a Magical Ring that will appraise as the Power Ring L-1!
Optional: Power Ring L-1


Push the lowest red block on the right UP or DOWN, then head along the path behind it to reach a chest containing a Small Key. Push the out-of-place red block on the left to the LEFT, then continue left one screen. Of the two horizontal red blocks in this room, push the left one DOWN and the right one LEFT to clear a path, then follow it clockwise and continue right one screen.


Head up through the opened path and the door will close behind Link when entered. Ignore the red blocks to the left and right; the five uppermost blocks are the ones which need to be moved. Start by pushing the center block UP, then the one that was to the left of it LEFT and the one that was above the previous one UP. On the other side, push the lower block RIGHT and the one that was above it UP. This will clear a path to the door Link came in, as well as to both sides of this room.


Head over to the left side of the room, walk up the steps, and step on the switch here. A chest will appear in the center of the room on the other side of the pit. Now, walk to the right side of the room, climb the steps there, and step on that switch. A green platform will appear above the pit, moving side-to-side. Use this green platform to access the chest which holds a Small Key.


Leave this room down one screen, then walk along the path left and up one screen through the passage. On the left side of the room, cross the moving green platform and continue through the passageway left one screen.
Link can ride the green platform up and push the red block to the RIGHT. Follow this path and step on the switch at the end, making a chest appear. Open this chest to receive a Gasha Seed! From here, jump off the higher ledge onto the moving green platform and head left a screen.
Optional: Gasha Seed


Slash the bushes out of Link’s way and head toward the left side of the room. Slash the bushes below blocking the locked door and head through it into the domain of the dungeon’s mini-boss, Giant Ghini.


Giant Ghini will surround itself with three smaller ghosts that will attempt to attach themselves to Link. Much like Mini Zols, these smaller ghosts will slow Link down and prevent him from swinging his sword, allowing Giant Ghini to charge into and damage him without fear of being attacked itself. If the mini-boss lands its attack, the smaller ghosts will dissipate and allow a few moments for Link to move in for an attack before respawning around Giant Ghini.


Simply slash these smaller ghosts once to defeat them and continuously slash away at Giant Ghini until it is defeated. A decent strategy is to stand above Giant Ghini while slashing as the three smaller ghosts will spawn to the sides and above the mini-boss, therefore allowing Link to quickly defeat them when they rush towards him. Link will also be in close enough range that these slashes will strike Giant Ghini when the smaller ghosts are defeated, making for a fairly easy battle.


Upon defeating Giant Ghini, a Fairy will emerge from where the mini-boss disappeared. Head left one screen to a large room with two Red Moblins roaming about. Defeat or simply avoid them and continue on down one screen through the locked door. Link will come to a horizontal row of three red blocks, the right and left of which need to be pushed DOWN and the center one RIGHT or LEFT to clear the path. Continue down one screen and defeat the four Blue Stalfos here. Head up one screen along the path on the right side of the room.


Defeat the two Blue Stalfos and light the torches at the top of this room using Ember Seeds. Head down the stairwell that appears to a single-room dungeon area below, where the Power Bracelet will be found!


Climb out of this area and head down one screen. Lift the vases on the left and toss them aside, then head up the steps and open the chest Link can now access to obtain a Magical Ring that will appraise as the Discovery Ring!


Head down one screen and walk down the steps. Push the lone vase on the right over and onto the switch, unlocking the doorway on the right. Head through this opened doorway and lift the vases that are in the way. Lift the vases blocking the chest at the top of this room and open it to finally obtain the Boss Key! Head right one screen, which brings you back to the entrance of the dungeon. Take the warp portal to return to the mini-boss room where Link faced the Giant Ghini.


Head up one screen and clear the bushes, then continue towards the upper-left side of this room. Clear the bushes here and head up one screen through the path. Try to keep moving in this room as a Wallmaster will often fall from the ceiling and attempt to take Link back to the start of the dungeon. No matter how many times Link defeats this foe, another will respawn in its place, so its best to just head directly to the right and through the locked boss room door to face Pumpkin Head.


Pumpkin Head will walk slowly about the room, often attempting to jump on Link though avoiding this attack is painfully easy. His only other attack involves spitting three orbs towards Link in a spraying pattern. Given the amount of space in the room and the slowness of this boss, none of its attacks pose much of a threat if Link keeps his distance.


Simply slash at Pumpkin Head’s body until it disappears, leaving only his head, then lift the head using the Power Bracelet to reveal the boss’ true form of a small ghost hiding beneath. The head can be tossed back onto the ghost for maximum damage, although another strategy is to toss the head far away and slash the ghost with Link’s sword as it tries to get back to the head. If the ghost is successful, Pumpkin Head’s body will return and the process will have to be repeated, though the boss can be defeated in one go if the ghost is hit enough times before returning to the head.


Once Pumpkin Head has been defeated, grab the Heart Container that appears in the center of the room, then head up one screen. Walk up the steps here onto the altar to obtain the first Essence of Time, the Eternal Spirit! Upon receiving the first Essence, the Maku Tree will have a brief message for Link, informing him that the next essence can be heard echoing from the Western Woods…
