- Chapter 1 – The Beginning
- Chapter 2 – The Forest Realm
- Chapter 3 – Tower of Spirits 2
- Chapter 4 – The Snow Realm
- Chapter 5 – Tower of Spirits 3
- Chapter 6 – The Ocean Realm
- Chapter 7 – Tower of Spirits 4
- Chapter 8 – The Fire Realm
- Chapter 9 – Tower of Spirits 5
- Chapter 10 – The Sand Realm
- Chapter 11 – Tower of Spirits 6
- Chapter 12 – The Dark Realm
4.1 Back to Aboda Village
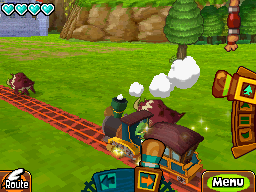
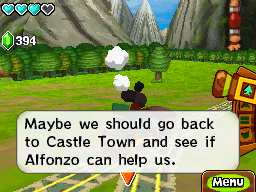
As soon as you start traveling out with your train, you’ll notice that there is new enemy known as Bullbo running around near the track. Unlike the moinks that would be scamper off when you blow the train whistle, these fellows will go so far as ramming right into your train, causing damage! Princess Zelda suggests that we go visit Alfonzo at Castle Town, so let’s make that our next stop.

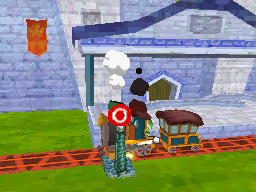
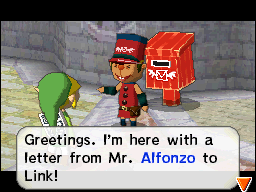
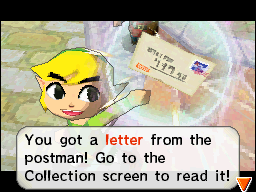
Once you enter, head toward the Castle and you’ll see the mailbox shaking. The postman will deliver a letter from…Alfonzo, which basically says that you should come pick him up and take him back to Aboda Village. Walk into Hyrule Castle and make your way to the rest area where we lost saw Alfonzo.


Alfonzo is now back on his feet and is ready to go. After some small talk he’ll agree to meet you at the train and then limps off. There is very little to do here in Castle Town at the moment, so you can go ahead and head back to the train.


Jump on board and draw out your route all the way back to Aboda Village. Remember, you’ll have to navigate around the dark trains that block the path, as well as keeping your eyes open for pesky bird enemies that try to hurt you.
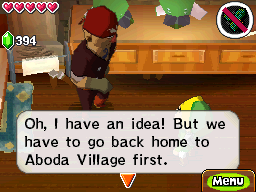
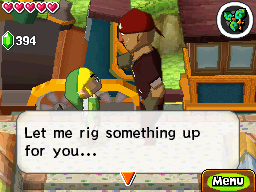
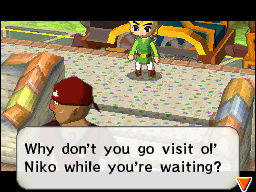
Once you arrive back at Aboda Village Alfonzo will offer to make something for your train. It is going to take some time, however, so he suggests going to see what Niko is up to. Run around town for a bit and then go visit Niko.

Niko is glad to see you and tells you a story of his younger days when he was a traveler. He loved stamps but never had a Stamp Book at the time to collect them. However, he now has one and he gives it to Link in hopes that Link will fulfill Niko’s request to collect stamps from all over the world! Niko even mentions that he’ll give Link something special if he can collect a bunch of stamps.

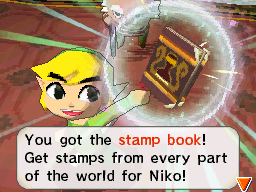

Leave the house and walk to the north where you will find a Stamp Station! Use the stamp station to stamp Aboda Village into your recently acquired Stamp Book! You can view the stamp book in your collection screen and it shows a map of all the locations that you have stamped. We will be filling this out as we continue through the game.Optional: Aboda Village Stamp Station


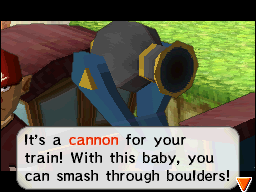
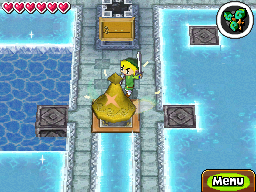
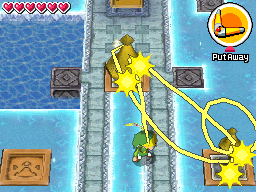
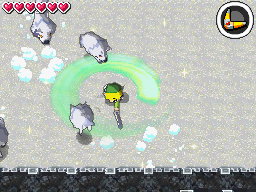
It’s been a few minutes so let’s go check on Alfonzo. Walk over to the train station and Alfonzo will roll out Link’s newly upgraded train. It is now equipped with a Cannon! The cannon will allow Link to shoot at enemies that surround his train and also to break boulders that he sees as he goes. Jump back on the train and move on out!

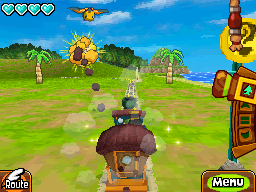

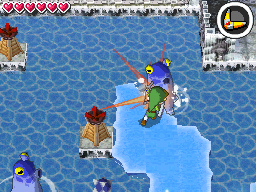
For now, start heading to the Snow area by taking the tracks in the northwest corner of the map. Once you finally emerge from the wooded area, you’ll come to a large boulder that is blocking the path! Use the newly acquired cannon a few times and blast away at this nuisance.
4.2 Some Extras in the Forest Realm
Note: All content in this section contains optional collectibles; if you are not interested, skip to 4.3 for more main quest material.
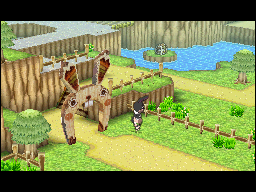
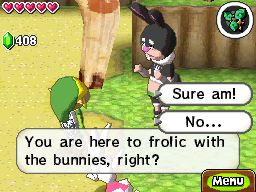
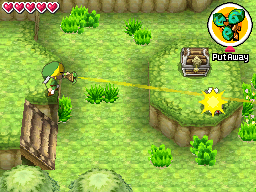
Continue onward and you’ll find another station. Stop here to find the Rabbitland Rescue! What a strange place…it’s a haven for rabbits! Talk to the nearby Rabbit Man and he’ll tell you all about the place. Tell him how excited you are about the Rescue and, after you’ve convinced him, he will give Link the Rabbit Net! The rabbit man then tells you how to catch bunnies. When riding on the train, you’ll notice that there are some rabbits peeking out from behind some boulders. Once you spot it, blow your whistle and the rabbit will jump up making it easier to spot. Blast away at the boulder that it hides behind and then the hunt is on. At this point you’ll automatically switch to the rabbit net. Just try to tap the rabbit with the right timing to catch it. Isn’t that dandy? Before we leave here, you may want to grab the treasure chest in the center pond of this station. Link can reach this area by jumping from the higher cliff to the northeast. It’s a tough jump, but certainly reachable. Open the treasure chest to get a random piece of treasure! There is nothing else of importance here, so get back on the train.Optional: Rabbitland Rescue
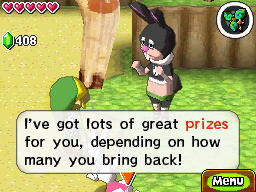


Since we now have the Rabbit Net and the Stamp Book, we can actually catch up to 4 Grass Rabbits and 3 more stamps. This is totally optional, so if you don’t want to do this, go ahead and skip to the next section of the walkthrough. You have been warned! =)
Upon leaving Rabbitland Rescue head back south. At the corner of the tracks, just before going back into the woods, you’ll see a rock with a rabbit behind it. Blast it away with the cannon to initiate your first rabbit hunt! Simply follow it with your stylus and tap the screen once it stops hopping around to catch Grass Rabbit #1. YAY!Optional: Grass Rabbit #1


Our next stop is at the Forest Sanctuary. There is a Stamp Station near the top-middle portion of the map. Use bombs on the switch to cross the bridge or blow up the boulders if you haven’t already. Once you can reach it, stamp your notebook for the second stamp! There is one other thing to do here at the Forest Sanctuary. At the south part of the map, there is a treasure chest with a Cucco nearby. Stand on the higher platform to the left and use the whirlwind to blow the cucco off the platform with the chest. Then run and pick up the cucco and return to the previous platform. Use the cucco to float over to the treasure chest and open it up to get 200 rupees! Return to the train.Optional: Forest Sanctuary

Go south, heading towards Aboda Village. Along the way, on the straight stretch between Aboda Village and Whittleton, is a rock on the east side near the corner. There is a bunny hiding behind it, so blast the rock away and catch Grass Rabbit #2!Optional: Grass Rabbit #2


Next, ride over to Whittleton Village and run to the north part of the village. Take the exit at the northeast trees, and you will find a Stamp Station here. Stamp your newly acquired stamp book with our third stamp!Optional: Whittleton Village Stamp Station


Hop back on the train and work your way north near the Hyrule Castle area, sneaking past the Dark Trains that are patrolling back and forth. In the northwest corner, next to the lake near Hyrule Castle, is Grass Rabbit #3.Optional: Grass Rabbit #3


Our last stop is at the Forest Temple. As you approach it look off to the right to find Grass Rabbit #4!Optional: Grass Rabbit #4


We have one more Stamp Station to get inside the temple itself. It’s at the top-right portion of the first floor of the temple. Use the whirlwind to clear the fog that is blocking your path. Stamp your notebook and then head back to the train. Now we can move onward to the north lands of Hyrule!Optional: Forest Temple Stamp Station


4.3 Anouki Village
Let’s make our way north to the Snow Realm. The path is rather clear once you pass the Rabbitland Rescue. There are a few bullbos in your path that you can blast away with the cannon and then finally make your way to the Snow Realm.
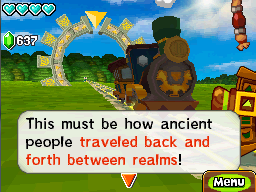
After you are done marveling at the great snow filled land, you’ll realize that there are very few places you can travel to in this new territory. There is a small village, which is the only village Link can currently stop his train at in this territory. However, this land does open new possibilities for Link. Link can access his first Warp Gate here. Warp gates are stone arches that extend over the Spirit Tracks. Each warp gate has a corresponding gate located somewhere else in the overworld, creating a main location and a secondary location. Link first needs to visit the main location of each of these warp gates and strike the gem that is on top of the stone arch. This will activate the warp gate, at which point Link can then use it to warp between the gates that are in the overworld.

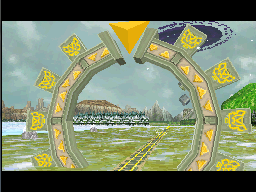
At the first fork in the road, turn to the right and straight ahead you’ll find Warp Gate A. Strike the triangle above the stone arch with the cannon to activate the warp gate. Now anytime you ride your train by the warp gate, simply pull the train whistle and a portal will appear. This particular warp gate will send you to the center part of the Forest Realm, just north of Whittleton Village. Our next stop is Anouki Village, which is the only town we have access to, so ride over with your train.
If you’d like, you can take a quick detour and find the first Snow Rabbit. It is located just west of the village on the north side of the tracks. After you’ve captured the bunny, ride on over to Anouki Village.Optional: Snow Rabbit #1


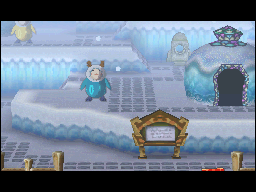
The Anouki are a snow based tribe that live in very cold climates. If you played Phantom Hourglass, you may remember the Anouki inhabited the Isle of Frost. There are six buildings here and there are Anouki all over the place. You can run around and speak with all of the Anouki if you’d like.

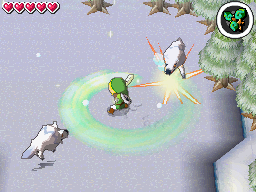
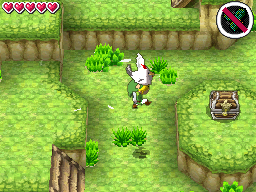
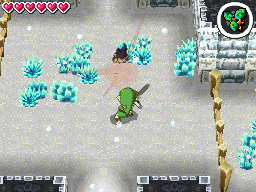
Running around the village you’ll notice a familiar enemy that appears from the snow. It is a ChuChu, but this time it is of the ice variation. Don’t touch them or else Link will become frozen and take damage. Instead, use the whirlwind to stun them, and then finish them off with a few simple sword strikes. Another new enemy, White Wolfos, will appear from underground and dash at Link. They are also quite skillful at dodging Link’s attacks, but only for a second. Just continuously try to hit the wolfos and you’ll get past their defenses.
Since we are in a new town, there is a Stamp Station location for us to find! It is located at the northeast corner of the village. From the train station, just run to the east and then north, navigating through the trees to find the stamp station. Use the station to get your fifth stamp into Niko’s stamp book.Optional: Anouki Village Stamp Station


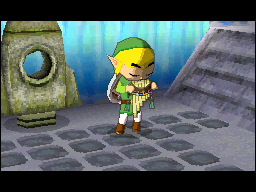
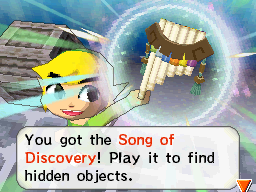
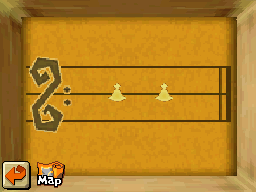
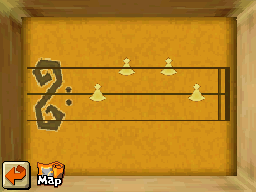
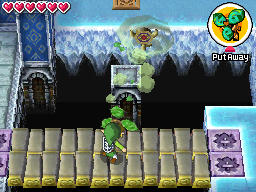
In the center of the village there is another statue that makes noise. Tap on the statue and you’ll see four notes coming out from the statue…orange, yellow, orange, and turquoise. Play the song and the statue will shoot into the air, signifying Link has learned the Song of Discovery! A treasure chest will appear in place of the statue. Open up the treasure chest to get a red potion!


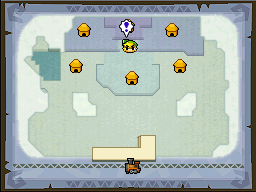
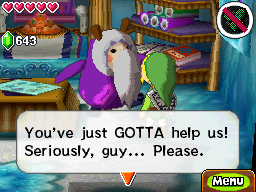
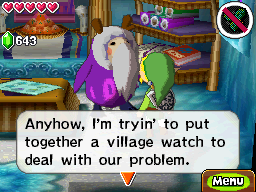
Continue talking to the Anouki if you’d like and you’ll find out that the honcho lives in the house that is on the highest hill. You will further learn that Honcho isn’t just a title, it’s his actual name. Honcho will say there are monsters all over and he is trying to put together a village watch. He wants to pair up all the Anouki, but needs your help as several of the Anouki have strict requirements as to who they will work with. It is up to Link to find out who is paired with whom!
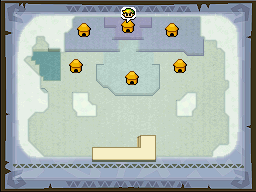
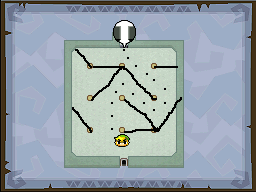
There are six houses and an Anouki is either inside or just outside each one of the houses. We will number these houses from top-left to bottom-right to keep things organized.
 Yeko Yeko |
 Honcho Honcho |
 Kofu Kofu |
 Yefu Yefu |
 Noko Noko |
 Bulu Bulu |
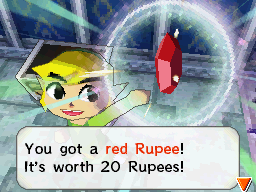
Based on all that information, we can come to the conclusion that the pairs will be 1 and 6, 2 and 4, and 3 and 5. Run back to Honcho and speak with him. He gives you a sheet and you have to connect a line between the Anouki that should be paired with one another. Match the Anouki based on the numbers above to solve this dilemma for them. As a thank you gift, Honcho will give Link a red rupee.
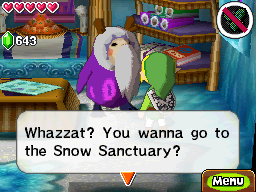
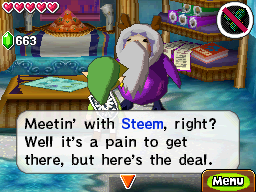
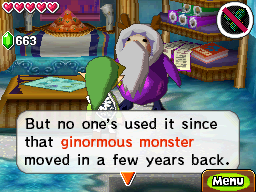
More importantly, however, Honcho will talk about the next Sage Steem and the Snow Sanctuary. Honcho mentions that they do not have access since a ‘ginormous monster’ lives in the cave that blocks the path.
Since we’ve completed Honcho’s task and know where the Snow Sanctuary is, let’s head back to our train and jump aboard.

If you haven’t already, capture the snow rabbit that is on the north side of the tracks just west of Anouki Village. This is an important rabbit as it our fifth rabbit overall. Now that we have captured five rabbits, let’s head back to the Rabbitland Rescue/Rabbit Haven. Once you arrive speak with the owner, and as a reward for catching five rabbits, he will give a new Heart Container! This brings our total life up to 6 hearts! Leave the rescue and ride back north to the Snow Realm.
Optional: Heart Container #3


4.4 Snow Sanctuary
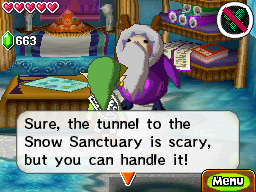
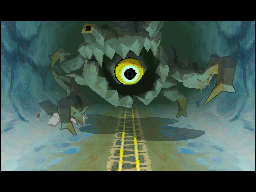
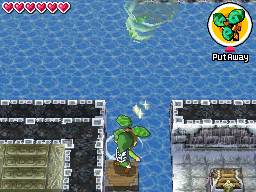
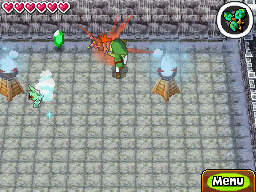
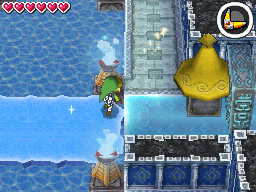
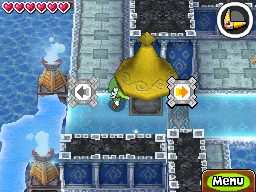
Ride the train to the tunnel and you’ll find that it is in fact inhabited by a giant one eyed Rocktite. As you probably could have guessed, its massive eye is its weak spot. It will continuously try to crawl towards Link and use its large body to jump onto the train. You will need to continuously hit him in the eye with your cannon to avoid this. Just keep tapping where you are anticipating the eye to be and it will keep the Rocktite at bay. Just repeat this process several times until Link finally makes it past the cave and through to the other side. You’ll immediately appear at the Snow Sanctuary.


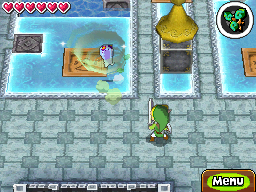
You can enter the nearby hut to see that a full heart container is for sale, but it’s selling for a very pricey 2000 rupees! We will certainly be back later on to pick up this gem, but for now, let’s skip over it. This is also the first time Link can get his hands on the Purple Potion, which will fill up 8 hearts rather than just 6 like the red potion. They have a shield here, but it is pricier here than in other shops. There is really nothing of interest outside the heart container so let’s leave the shop.Optional: Snow Sanctuary Shop


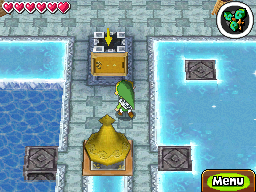
You’ll notice that there is a Stamp Station near the left side of the station. Climb up to it and stamp the Snow Sanctuary into your stamp book. Optional: Snow Sanctuary Stamp Station


Walk around and defeat the various enemies that appear, since this place is just saturated with Ice ChuChus and White Wolfos. Continue navigating this area, progressing to the top-right of the map.

Navigate through the rest of the area and defeat several ice chuchus along your path. Enter the cave at the top-left corner and tap the tablet inside. You’ll see that once the switch is stepped on, you cannot cross in the line of the statues. It’s a good idea to run around and see where all the statues are looking at, so you can understand the path you need to take.


Once you are ready, step on the switch. Take the path that is just left to the statue immediately in front of you and walk northward to the middle statue. Wrap around the middle statue and make your way to the right side of the room, walking below the middle statue on the right. Wrap around the statue on the right and then walk diagonally to the door. It really isn’t overly difficult to find the right path. Walk through the door.
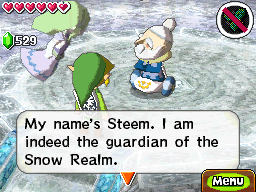
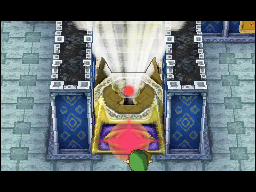
Walk up the steps to meet up with Steem, the Lokomo of the Snow Sanctuary. Just like with the Lokomo we met at the Forest Sanctuary/Woodland Sanctuary, Steem has a new song to teach you. This one is a bit more challenging as it has four notes. It starts with the turquoise note, and then quickly goes silver, turquoise, and orange. Be sure to practice a bit with Steem for awhile and then get ready for the real deal. This one was a bit more challenging for me so it may take a bit more effort. Once you’ve finally got it down and have played the duet with Steem, portions of the Spirit Tracks in this realm will return and allow Link to access the Snow Temple! Link also has quicker access to the Anouki Village from here. Leave the area and head all the way back to the train.

4.5 Getting to the Snow Temple
Real quick, before we do anything, there’s a Snow Rabbit that’s available to us now that we have more tracks. Upon leaving the Snow Sanctuary, take the first right which is a set of tracks that connects to the Anouki Village area. You’ll find a Snow Rabbit on the west side of the tracks, our 6th rabbit overall.Optional: Snow Rabbit #2


At this point, if you try to head to the Snow Temple, you’ll find yourself in a terrible blizzard that will eventually push you back to the entrance of the maze. As lame as that is, we cannot progress to the temple for now. If you head back to Anouki Village, you can talk to Honcho and he’ll tell you to seek out a guy named Ferrus who lives to the east and is crazy about trains.


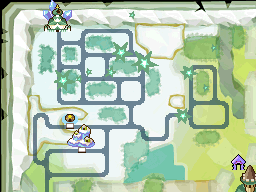
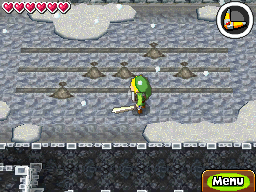
Let’s take Honcho’s advice and head east to that area where the Dark Train is patrolling. On your way, you’ll encounter a new type of enemy: Sir Frosty. Shoot their snowball projectiles with your cannon to defend yourself, then shoot the bodies to defeat them as you pass by. After emerging from the forest area and rounding the corner, you’ll come to a station that isn’t on the map.
If you explore the area you’ll find several white wolfos jumping around as well as a crow perched on top of a tree. Ignore these enemies and enter the small house on the right side of the map. Nobody is home but there is a note on the table that Princess Zelda points out. Read it and you’ll see some scribble resemblance of a map to the area that is just east of where you are, where the dark train is patrolling. Mark these locations on your map. There is also a note along the wall in the room and it discusses other forms of travel. The note mentions that one of these special locations is located south of Anouki Village. This is a reference to the warp gate that we found earlier. Anyway, leave the hut and head back to the train.


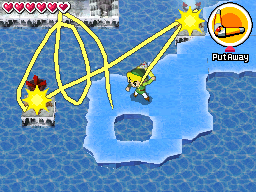
We want to take a look at these locations that were on the map. Head eastward and at the next fork in the road, make a right and travel all the way to where the first location was on the map. You will see a man beside the rails and he is taking snapshots. Slow down the train and stop right in front of him, which will trigger a conversation. The man introduces himself as Ferrus and asks where you are headed. Tell him you are headed to the Temple. He mentions an alternate way and then shows you an outdated map. Blow on the microphone to wipe it clean and you’ll notice a path is drawn on the map. Be sure to jot down that route on your map.


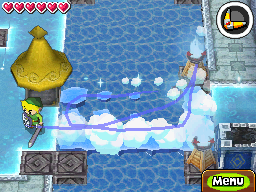
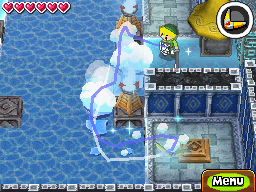
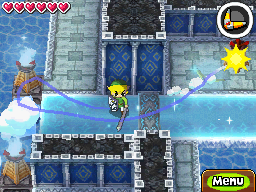
Back on the train, trace a route all the way to the Snow Temple, using the route that Ferrus showed you on his map. You can maneuver around one of the forks in the road to turn your train around so you are facing the right direction. Follow along the long path, defeating various snowmen that you see.
The blizzard portion of the track will greatly reduce your line of vision. However, since we have the path already traced on our map, there is no reason for us to get lost. Travel all the way into the next dungeon, the Snow/Blizzard Temple!
4.6 Snow Temple
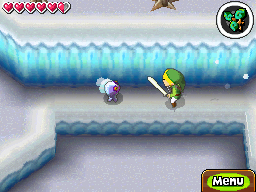
Walk through the door to the north and enter the next room. Continue straight ahead and defeat the keese here. You can’t really do much else, so continue walking straight northward to the main room of the dungeon.
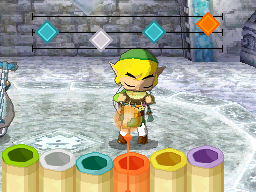
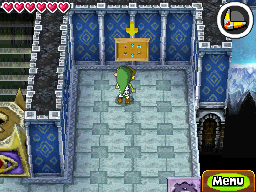
Upon entering Princess Zelda notices a large bell, and it becomes apparent that these bells will play a big role in this dungeon. If you look on the ground, you’ll see that there are three squares with bell symbols on them. There are three bells that we will find in this dungeon and we want to push the bells to land on top of these bell looking squares.

The first large bell is right here and the square it falls on is just to the north. Push the bell so that it falls on top. The bell is now lower so Link can strike at it with his sword. Just north of the bell there is a sign on the wall. Check it out and you’ll see two bell notes along the middle line. This is actually a clue on what you need to do, but at this point it’s so easy that it might actually seem confusing. Just run over to the bell and slash at it twice with your sword. This will cause the door at the bottom-right of this area to open up.
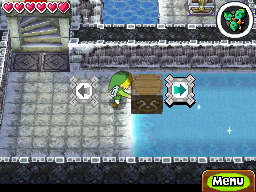
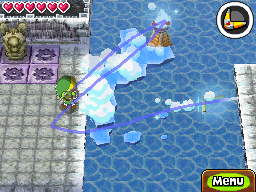
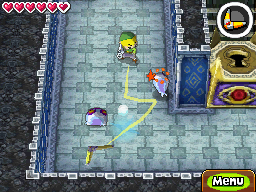
Walk through the door and you’ll see a small staircase here, but you cannot jump across to the platform to the right as the gap is too large. Elsewhere in the room, you’ll see a block sitting on top of some ice. (Enter classic Zelda puzzle solving). We want to get this block to the top of the room so that we can jump on it to get across the gap. It’s quite simple actually; just push the block down and it will slide across the ice. Push it left, up, right, and then up to get it in place. Now climb the steps, jump onto the block, and then jump over to the right side.


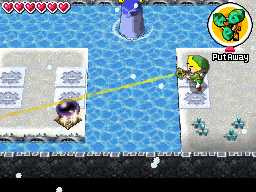
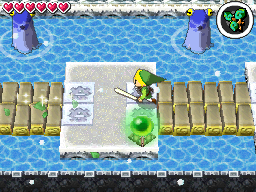
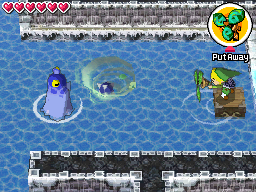
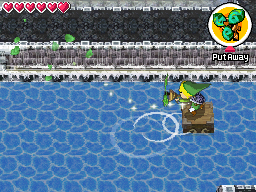
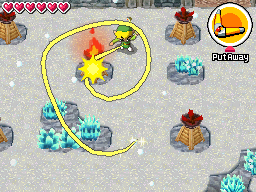
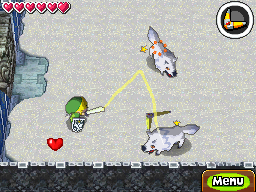
Walk to the south corner of the map and you’ll find a brand new enemy here. These enemies are known as Octives, and they act very similar to water octoroks or water toadpolis from previous Zelda titles. They will come up from underwater and will shoot rocks out of their mouth. If you walk to the edge you’ll see there is a switch across the water. Pull out the whirlwind and then time a gust at the rock that is being shot of the enemy’s mouth. The goal is to send out a gust that will cause the rock to hit the switch. It may take a few tries, but upon successfully doing so a bridge will form. Cross the bridge and head down the staircase.
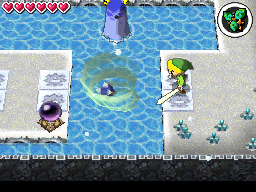
Push the block to the right and it will glide across the ice and fall into the water. Jump on top of the block and then pull out the whirlwind. Aim to the left and use the whirlwind, creating a gust that will cause Link and the block to float to the right. There is a totem over here, so pull out the whirlwind once again and use it to spin the totem. This will open up a door that is just to the north.
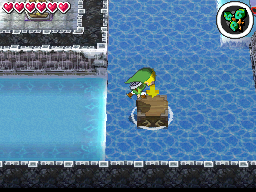


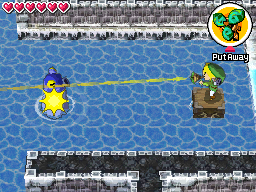
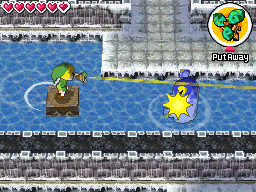
Also to the north is a new enemy known as a Mini-Freezard. If Link hits them or blows them with the whirlwind, they will move at crazy speeds along the ice. Use the whirlwind to get over to the freezard and then use your sword or whirlwind on it. This will hopefully send the enemy flying into the water where it won’t cause any more problems. Use the whirlwind if you need to in order to get to the platform, and then head up.


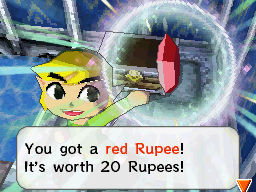
There is another block here so push it to the left and it will land in some more water. There are more octives here that will shoot rocks out towards Link. Use the whirlwind and redirect the rocks back at them in order to defeat them. Use the whirlwind to move along the water and to the area at the south, where there is a treasure chest containing a red rupee.

Jump back on the block and make your way around the water defeating all the octives in your way. There are three octives in the water and if you defeat all three a treasure chest will appear. Open it up to get a random piece of treasure.
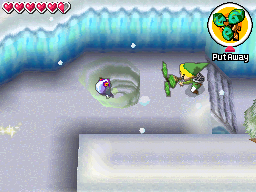
Walk up and to the left and a door will close behind you. This room is filled with three Ice Keese. These bats are covered in ice and will freeze Link if he tries to hit them. Instead use the whirlwind on the keese to stun them. This will also make them lose their ice surroundings, making them vulnerable to Link’s sword. Defeat all three of these enemies and a large treasure chest will appear. Open it up to get the dungeon item, the Boomerang!
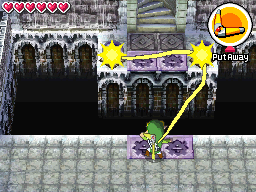
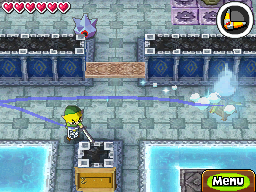
Walk back to the room at the right and pull out the boomerang. Across the gap there are two switches. Use the boomerang and trace a path so that it will hit both of the switches. Doing so will create a bridge and allow Link to cross. Cross it and then head up the staircase here.


Walk around the corner here and you’ll see a few ice keese flying around. Use the boomerang to defeat them and then trace a path with your boomerang so that it hits the switch here. This causes the door to the left to open up, which leads to the main room of the dungeon. Also, if you defeat both of the keese here a treasure chest will appear in the corner of the room. Run on over and open it to get a random piece of treasure.
Now run over to the bell, and just above it you’ll notice another sign on the wall. Take a look at it and it will show a series of bells. If you recall, the middle line was for the bell already in the center room, so the top line must be for this bell. The goal is to push it back to the main room and onto the square bell switch on the right side. In order to do that, push the bell in the following order and just let it slide across the ice. Push it down, left, up, and left, which will place it in the top-left corner. From here push it down, right, down, left, and then down, and it will fall onto the square block.
Now if you remember the sign we just saw, the order was middle, top, top, and middle. Since the middle represented the center bell, that is the one we hit first. Pull out the boomerang and trace a line so it hits the middle bell, then the right bell, then the right bell again, and finally the middle bell. If done correctly this will cause the door at the southwest corner of the room to open up, so head through it.
There is one lit torch and four unlit torches here, but the trick in this room is that you must light the torches in the proper order. If you use the boomerang and then trace paths over all of the snow, they will melt away so Link can see the ground. On the ground next to each torch you can see a symbol with a number of dots, which reveals the proper order to light the torches in. The order is; top-right, bottom-right, top-left, and then bottom-left. This will cause the door at the corner of the room to unlock, so head down the stairs.
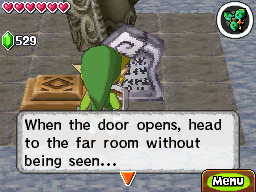
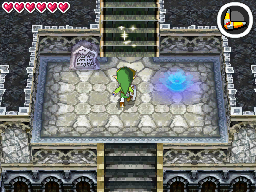
Walk past the locked door and you’ll see one of those statues here. You can awaken it by playing the Song of Awakening, but all it will do is ask for 20 rupees in order to tell you where two treasure chests are on this floor. Since we’ll be getting these treasure chests anyway there is little reason to pay the rupees.
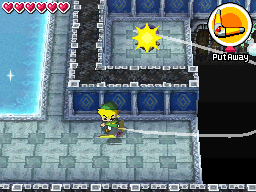
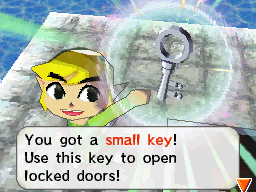
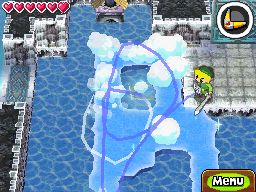
There is a flame of ice in the center of the water. Use the boomerang and trace a path in the water with your boomerang, causing those parts of the water to turn into ice! The ice is sturdy enough for Link to run across, but it won’t last forever so you’ll have to move quickly. Trace a path to the right, where there is a treasure chest that contains a small key. Now get back to the left side and use the key on the locked door.


Walk up and the door will close behind you. There are four mini-freezards in this room as well as a torch flame. Use the boomerang and target the torch, and then target the mini-freezards. Hitting a mini-freezard with the flamed boomerang will cause it to turn into a standard octorok. Finish all four octoroks off with the sword and two doors in this room will open up.

Walk to the right and you’ll see there is a totem in the water that is frozen solid. Use the boomerang and target the torch back in the room. Trace a path all the way to the totem and it will cause it to melt.
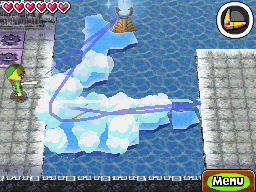
You cannot use the whirlwind on the totem from here as the wall blocks the direct line of sight. Instead, use the boomerang on the flame of ice that is in the middle of the water and create a path extending over the water. Walk onto the newly created ice and pull out the whirlwind. Use it to spin the totem, which will open the door to the right. Finish off the path of ice with the boomerang and then head up.
There are several octives that will pop up from underwater. Use the whirlwind and launch their rocks right back at them to defeat them. Alternatively you can stun them using the boomerang, and when you are close enough, strike them with your sword to defeat them. Using the blocks of ice on the water make your way to the northeast portion of the area.
There is a Stamp Station located here so pull out your stamp book and get the book stamped. There are four water enemies in total here, as well as several torches. Use the boomerang to light up the torches while creating paths for Link to walk on. Defeat all four of the enemies and a treasure chest will appear at the platform in the corner of the room. Make your way to the corner of the room and open the treasure chest to get 100 rupees! Walk up the stairs to get back to the 1st floor.

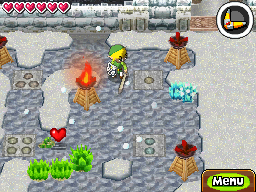
You’ll notice the third and final bell is found here but there is something else we want to do before dealing with this thing. Walk south and head into the room at the end. There are four Fire Keese that are found in this room. Use the boomerang to defeat them quite easily. There is a bunch of snow on the ground, as well as two torch flames. Use the boomerang to target the torches and then trace over all of the snow to melt everything away. Underneath is the third and final order that you need to play the bells in. Remember, the new bell that we are getting here represents the bell not on the bottom line. The order is bottom, middle, middle, top, middle. Walk back up to the room with the third bell.


Push the bell up, right, down, left, and then up so the bell is along the left side near the middle of the ice. If you look across the water Link can now make a direct line of ice so that if he pushes the block, it will slide all the way back to the main room.


However, a door currently blocks your way there. There is a switch just south of where the door is located. Use the boomerang on the flame of ice and create an ice path so you can access the switch. Step on and the door leading to the main room will open up. Also, at the very top of the screen in this room is a treasure chest. Trace a path of ice to get to it and then open it to get a red rupee!
Now let’s use the boomerang and create some ice over the water so that we can push the block. Once a full line of ice is created, run over to the block and push it to the right to send it into the main room.
There is an unlit torch in the main room. Use the boomerang to target the torch from the room to the left and then light up the torch in the main room. Now use this torch and the boomerang to create ice over the water area below. Once ice is created we want to push the block down, left, and then down to send it to the solid ice area below. From here, push it left, up, and right and it will fall into place.


With all three bells in place we can now hit the bells in the final order. Remember, the order was bottom, middle, middle, top, middle. Relating this to three bells in this large room, this means we need to hit them in the order of left, middle, middle, right, middle. Trace a path with the boomerang so that it hits the bells in this exact order and it will cause the door above to open up!

Walk towards the door and you’ll see another unlit torch on the right side. Use the torch we just lit on the left side to light up the right one, and this will cause a treasure chest to appear along the north wall. Open it up to get a red rupee! There is a statue here, but like all the statues in dungeons, it just tells you how many treasure chests are available on the current floor. Disregard it as well as the freezard and head up the stairs.
Walk to the south and you’ll find three more ice chuchus as well as the boss key lock. However, now that we have the boomerang we can stun the chuchus more easily. Defeat all three and then walk around the corner to find a sign on the wall. It shows six torches and labels three as fire and three as ice. You can jot this information down on your map if you’d like and then head to northwest corner of the map.

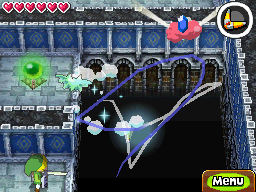
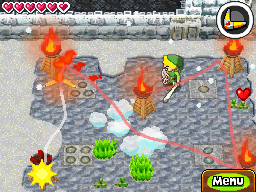
There are two lit torches and six unlit torches. The sign on the wall showed which torches need to be lit with fire and which with ice. The two torches on the left, as well as the one at the bottom-right are the ones that Link needs to light up with fire. The other three need to be lit up with ice. However, Link must light up all six of the torches with one toss of the boomerang. You’ll first want to light up the ice torches. Use the boomerang and trace a line from the ice torch to the one at the top-right, top, bottom, then to the fire torch, the top-left, bottom-left, and then bottom-right. This is close to the maximum length that you can trace your boomerang so there is little room for error with the tracing. Once you’ve lit all the torches a door on the right side will open up, so head through it.
The door will close behind you and four white wolfos will appear. Aggressively go after these enemies and once all four of them are done away with, the door to the right will open up.

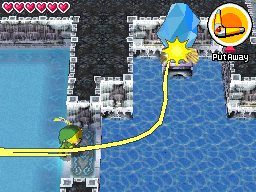
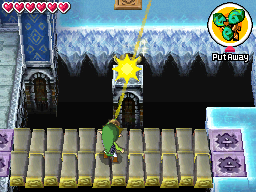
Walk around the corner and you’ll reach some ice. On the north side of the ice there is a switch. Step on it and it will create a bridge. Stand close to the edge, pull out the whirlwind and target the big key. The gust for the whirlwind will place the key on the bridge that you just created. Walk around and pick up the Boss Key! Walk across the bridge and toss it on the giant lock. Walk up the staircase to the next area.
There are pots on both sides of this room. You can use the boomerang on the pots in order to refill your hearts. Tap on the stone tablet here and it creates a warp point to the beginning of the dungeon. Once you are ready for battle, head on up the stairs to take on Fraaz, Master of Icy Fire.
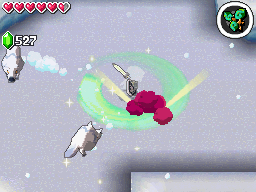
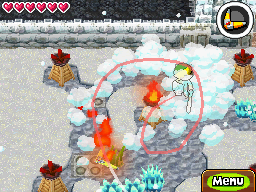
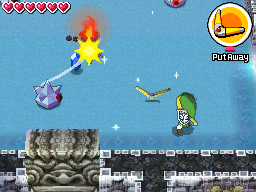
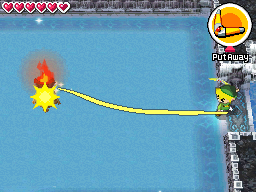
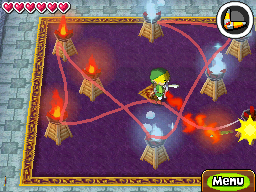
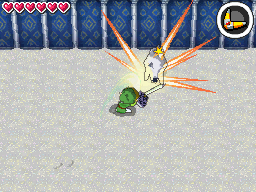
There are alternating forms of Fraaz as well as two phases. The first form is when Fraaz is together as one large goblin like creature. Fraaz will suck up energy of either fire or ice and this can easily be distinguished by whether he lights up blue or red. If Fraaz sucks in ice use the boomerang and target the fire torch; then target Fraaz. The boomerang will pick up the flame and then hit Fraaz, causing his body to shrink. If Fraaz has already sucked in a lot of air and his body is huge, then it will take two hits with the other element type to stun Fraaz. Once Fraaz is stunned run on over and slash away with your sword. Repeat this process until Fraaz separates into two smaller creatures.


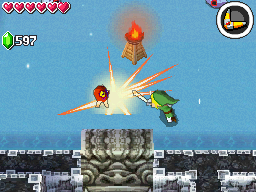
This form of Fraaz can be quite annoying. One of the creatures will light up with fire and the other with ice. The goal in this phase is to use the elements against each other. Hit the one of fire with ice, and vice versa. When the creatures stop running, target one of the torches and then glance at your map above. Each of the separated mini goblins will have a blue or red icon, signifying what element they are. If you target the blue flame, then target the creature with the red icon. Once you’ve stunned this mini part of Fraaz, run on over slash away with your sword. Once one of them is down, the other one might try to revive its partner by using a purple and blog spirit ball. Just defeat both of them as quickly as you can to prevent them from thing this. After both have been defeated, they will combine to form the larger Fraaz once again.


Fraaz then gets intelligent and will destroy the two torches that are in the boss arena. During this phase, you have to wait for Fraaz to shoot either fire or ice at Link. Dodge the attacks and the fire or ice will remain on the floor. When Fraaz switches to the opposite element, use the boomerang to target the fire or ice and then hit Fraaz to stun him. Once stunned, slash away with your sword. Repeat this process until Fraaz once again breaks until smaller forms.
Since there are no torches, you’ll have to wait for the little versions of Fraaz to shoot out either fire or ice. They’ll leave their mark on the ground, at which you can use the boomerang to once again to grab the fire and ice and hit the respective creature. Repeat this process until you’ve both of the little guys. Remember, you have to be quick otherwise they will revive one another.
The final phase is a combined Fraaz once again and this time he is more relentless. He shoots out fire and ice even quicker than before and in larger amounts! Just repeat the strategies that we have been using to finally defeat Fraaz.


After the rather difficult battle with Fraaz is complete a cutscene kicks in. It is very similar to the scene when we beat the Forest Temple. A statue is formed and a silver force gem can be seen. The Spirit Tracks are revived and the next section of the Tower of Spirits is now back in place!
Afterwards the snow rail map glows and a new path is opened up, which serves as a shortcut to getting to the Tower of Spirits. After some small talk from Princess Zelda, walk over and open the treasure chest to get a full Heart Container! Then step into the blue warp portal and you’ll be sent to the temple entrance. That concludes chapter 4 of the Spirit Tracks Walkthrough.


- Chapter 1 – The Beginning
- Chapter 2 – The Forest Realm
- Chapter 3 – Tower of Spirits 2
- Chapter 4 – The Snow Realm
- Chapter 5 – Tower of Spirits 3
- Chapter 6 – The Ocean Realm
- Chapter 7 – Tower of Spirits 4
- Chapter 8 – The Fire Realm
- Chapter 9 – Tower of Spirits 5
- Chapter 10 – The Sand Realm
- Chapter 11 – Tower of Spirits 6
- Chapter 12 – The Dark Realm
