- Chapter 1 – Mercay Island
- Chapter 2 – Temple of Fire
- Chapter 3 – Ocean King Part II
- Chapter 4 – Temple of Wind
- Chapter 5 – Ocean King Part III
- Chapter 6 – Temple of Courage
- Chapter 7 – Ghost Ship
- Chapter 8 – Ocean King Part IV
- Chapter 9 – Goron Temple
- Chapter 10 – Temple of Ice
- Chapter 11 – Ocean King Part V
- Chapter 12 – Mutoh’s Temple
- Chapter 13 – Ocean King Part VI
4.1 Northwest Quadrant
Sail north from Molida Island to once again enter the northwest quadrant. Trace the pathway that corresponds to the map that you saw back at Molida Island. During this journey through the fog, watch out for explosive barrels and enemies.


NOTE: Once you make it through the fog you’ll be near the center of the quadrant. The next major destination is over at the Isle of Gust, which is the large island near the center of the map. However, there are a ton of optional goodies for us to collect right now. Skip ahead to the next section to continue onward with the main quest.
There is a large island at the northeast part of the quadrant. Sail on over and dock at Bannan Island. Enter the lone hut that is on this island and speak with the Old Wayfarer that is inside. He will explain to you that he is in search of a mermaid. Back outside, defeat all of the enemies that are on the island and then carefully walk along the edge of the island, glancing at the water in search of a nearby mermaid. If Link comes to close, the mermaid will dive underwater. If she does so, enter the building and head back outside to reset the mermaid. Use your Boomerang to stretch out a pathway from a distance and strike the mermaid. Once you hit the mermaid, she will yell at you and demand an apology. After you tell her of the Old Wayfarer, she states that she is going to go to the hut and visit him. You can then go back and speak with the Old Wayfarer and let him know that you have found the mermaid. Return to Linebeck and you’ll find that the mermaid came and started to talk with him. After talking to Linebeck, you can return to the Wayfarer’s hut and you’ll find the mermaid inside of the pool. Speak with the Wayfarer and he’ll thank you for your involvement, giving you the Fishing Rod! Return to Linebeck and set sail.Optional: Bannan Island - Fishing Rod


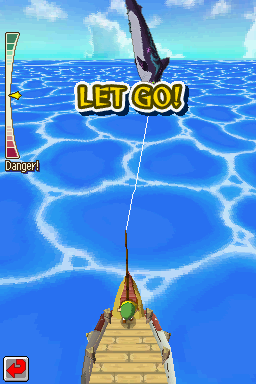
Now that you have the Fishing Rod you’ll notice a fish symbol on your map. Set sail so that your boat overlaps with the fish symbol. At this point, click Menu and then Fish to begin fishing. Once Link tosses the fishing line out, wait until the fish grabs on and then quickly pull back on the rod. Pull back on the line with the stylus and always pull in the opposite direction of the fish. If it is on the left side, pull towards the bottom-right, and if it is on the right side, pull towards the bottom-left. Once the meter on the left is in the green, you can use the stylus to quickly sketch small circles, causing Link to start reeling in the fish. Be sure to keep an eye out on the meter to the left. If it drops close to the red, stop reeling in and instead just pull back once again. If the fish jumps at anytime, quickly release the stylus and wait until it falls back into the water. Keep up this process until the fish has been caught. The first fish Link can catch is a small Skippyjack. As soon as he catches the fish, he can take it back to the Old Wayfarer, but he does not reward Link for it. Link can also catch a Toona and a much larger Loovar. These fish move left and right much more often and will also jump out of the water quite frequently. Reel them in the same way you did the Skippyjack. Once you have caught a Loovar, make your way back to Bannan Island and speak with the Old Wayfarer. After showing him the Loovar, he will reward Link with the Big Catch Lure! This will now allow Link to find even bigger fish on the Great Sea. Return to the Great Sea and with your new Big Catch Lure, attempt to catch the large Rusty Swordfish. It is completely random whether you will find a Toona, Loovar, or a Rusty Swordfish, so just keep at it. The Rusty Swordfish is even more aggressive than the Loovar and will take some time to reel in. Once you have caught the Rusty Swordfish, return once again to Bannan Island and speak with the Old Wayfarer. As a reward for catching the fish, he will give you a ship part. He then talks about the legendary fish, Neptoona which will now occasionally appear on the Great sea. Run back to Linebeck and set sail. While riding on the great sea a second fish symbol will now occasionally appear. This one is a large symbol that resembles a swordfish. The symbol does not appear often and when it does, it moves rather quickly. It seems that the more regular fish you catch, the more of a chance the swordfish appears. However, you could be waiting for quite sometime before this swordfish appears. It may be a good idea to just advance in the quest and get this fish whenever you happen to see a swordfish on your map. If you do see the symbol pop up, quickly try to intersect it and begin fishing. You may encounter another Rusty Swordfish, but if you are lucky, you will encounter the legendary Neptoona. It could take a number of tries before you end up bumping into Neptoona. One good thing about running into a Rusty Swordfish, as well as a Loovar, is that there is a chance there is a Stowfish attached to the large fish you catch. If you do happen to catch a Stowfish, you can take it back to the Old Wayfarer and he will give you another ship part. When you finally run into Neptoona, you will find that it is even more challenging to catch than the Rusty Swordfish. Neptoona looks very similar to a swordfish, except it has a darker color. Neptoona is larger and will jump up even more often. Slowly reel in the legendary fish and take it to the Old Wayfarer. He will reward Link with a Heart Container.Optional: Fishing Quest Heart Container


Our next stop is over at Zauz’s Island, an uncharted island located just to the west of Bannan Island. As you draw near to the island, you will spot it and chart it on your map. You can enter the hut to speak with Zauz the blacksmith, but he has nothing of importance to offer at this point.Optional: Zauz's Island


At the far north end of the island you will find a stone tablet. Similar to what you did on Molida Island, it hints that you should draw lines between the stones on the island and search for a secret at the point where those lines intersect. Run around the island, jot down the four locations of the stones and then trace the two lines. The two lines intersect near a palm tree at the south end of the island. Dig where they intersect and you’ll find a Treasure Map.Optional: Treasure Map #5


On the right side of the island there is a treasure chest on a higher platform that appears to be unreachable. Next to the hut on the island there are two Cuccos. Grab one of them and then walk to the right side of the fence. While holding the Cucco, glide over to the higher platform and open the treasure chest to get a Wisdom Gem.Optional: Wisdom Gem #2


There is another island in this quadrant that is not on your map. Sail just south and then east of Bannan Island and then dock at the Uncharted Island. There are a number of stone statues on this island, but none of them say anything at first, except for the one near the center of the island by a body of water. He gives you a cryptic puzzle to solve, and the answer lies in the layout of the island itself. Make your way around the perimeter of the island and sketch the map of the island. Your map will resemble a whale. The clue, “It steers with a rudder, then makes a spray! And third, it paddles, then sees a way!” references the order you must hit the statues. After hitting the four statues in the correct order, a bridge will appear. Cross the bridge and enter the cave. Inside you will meet up with the Golden Chief Cylos. Speak with him and he’ll give you the Cyclone Slate. Now when you meet with a Golden Frog, you can learn a special symbol, allowing you to quickly warp over to that location.Optional: Cyclone Slate


Before leaving the Uncharted Island, there is one more secret to find. On the west side of the island, just near the ‘eye’ of the whale, there is a stone statue. Use the Shovel to dig up the soil directly in front of the statue to uncover a Treasure Map. With map in hand, return to Linebeck and set sail.Optional: Treasure Map #6


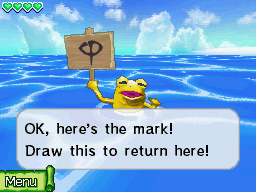
Now that we have the Cyclone Slate, let’s look for the Golden Frogs. There is one here in the northwest quadrant, located just north of the Isle of Gust and southwest of Bannan Island. When you spot the frog leaping out of the sea, fire your cannon to hit it. If you’re successful, the frog will stop and show you a symbol. To warp over to this location in the future, you’ll have to draw a backwards N. There are two more Golden Frogs that are back in the southwest quadrant. You can easily get back to the southwest quadrant by just sailing southward. Once you arrive though, a whirlwind will send you flying to the center of the area. You’ll need to either travel back through the fog or use the Cyclone Slate to get back to the northwest quadrant. There is a Golden Frog right between Mercay Island and the Isle of Ember, so sail on over, and repeat the process. The third Golden Frog that we can find at this point is located just north of Molida Island and just west of the gap between the rocks. Remember, when drawing the symbols on the Cyclone Slate, you have to do so in one swipe without releasing the stylus.Optional: Golden Frogs


Back in the northwest quadrant, set sail for the ship icon that you’ve likely seen floating around. Speak to the man on the ship and he talks about how he is a hero who travels on the Prince of Red Lions ship. Sound familiar? He will label you as his apprentice and after talking to him again, he will offer to train you. Strike at him a few times and he’ll be impressed, rewarding Link with the label of ‘Apprentice to the Hero’, along with a treasure. Leave the ship and return to battle him once again. Hit him a few times and he’ll refer to you as ‘Half a Hero’ and will reward you with a second treasure. Leave and return once again. Repeatedly strike at him and he’ll give in once again, this time referring to you as ‘Two Thirds a Hero’. He will give Link yet another treasure. Leave and then return for a fourth battle. This time the challenge is much more difficult as the hero will strike back at Link. The goal here is to hit the hero 100 times before he strikes you 3 times. If you successfully hit him over 100 times, he will reward you with a Heart Container. You can come back and battle him at any time and if you get a higher score, he’ll reward you with more treasure. Score over 200 points and he’ll give you a ship part.Optional: Traveler's Ship Heart Container


Lastly, while traveling across the sea, you may see the Masked Ship. This is Beedle’s secret shop ship in which he wears a mask and has different items. This ship will appear when the internal clock on your console is between 10pm and 12am on weekdays, and between 10am and 12pm on weekends. At this point, the Heart Container that he sells is still a bit expensive, but you should have enough to purchase the Courage Gem for 500 rupees, so be sure to snag it. If you don’t want to wait for this specific time, you can manually go in and change the internal clock on your device.Optional: Courage Gem #2


4.2 Isle of Gust
As its name suggests, the Isle of Gust is quite the windy place, with powerful gusts occurring every few seconds. Travel eastward, defeating the Miniblins and ChuChus along the way. You’ll have to jump over small gaps, making sure to only make the jump when the wind settles down. If you try to jump while the wind is blowing, you’ll fall right down into the water below.


Once you reach the far right of the map, you’ll see a sign alerting you to gusty winds ahead. Ignore it for now and climb down the steps. There is a cracked wall nearby and you can use the nearby bomb flower to blow it open. Inside you’ll find a treasure chest that contains a Courage Gem. There is also a journal entry from the Old Wayfarer, but we’ve already completed the relevant material.Optional: Courage Gem #3


Make your way to the sign that indicates there are strong winds ahead at the far east of the island. Once the wind is gusting, jump to the left and you’ll be able to make it across the large gap. Jump across the second gap and then head down the steps to the left. Defeat the enemies and you’ll notice three soil spots that can be dug up. Do so to find three red rupees and then go ahead and enter the nearby cave.


Walk to the right and if you’d like, you can make your way to the southeast corner of the cave, avoiding all the enemies.
Located within the pit of Miniblins. There is a treasure chest right in the center of this room and if you open it up, you will find the Wisdom Gem.Optional: Wisdom Gem #3

Jump down into the pit of Miniblins. Defeat all of the enemies and a treasure chest will appear. The top treasure chest contains a Treasure Map.Optional: Treasure Map #7

Walk to the wind geyser and allow it to bring Link up to the higher platform. From here, use the wind to jump over to the left and continue all the way in that direction. The entrance to the dungeon is just to the north, and if you head in this direction you can find a map that has an X at the top-left corner. There is also a nearby tablet that gives you a hint on how to enter the dungeon. Go back down a screen and use the wind geyser to the left to bring you up to the higher platform. Walk back north a screen, this time on the higher ledge.


The door above is locked, so head down along the left side. Jump off the ledge and run to the left side of the area. Use the Shovel to dig up the soil spots to cause geysers to appear. At the top-left of the area you can use the Shovel to dig up the soil and then head up a screen.
On the screen where you can dig up all of the geysers with the Shovel, run to the far west portion of the island. Dig up the soil spot here and ride the geyser to the higher platform. Open the treasure chest found here to get the Power Gem.
Optional: Power Gem #3


Dig up the spot on the left side to unveil another air geyser and ride it to the higher platform. Climb down the steps and you’ll find a nearby soft soil location. Jump off the ledge and you’ll find another geyser to the north. This time use the Shovel to cover up the air geyser, allowing you to pass to the left.


Use the next air geyser to get to the higher platform and then jump off the ledge to the left. Dig up the nearby soft soil spot to find a big green rupee. Walk up and use the geyser to reach the higher ledge. Read the tablet to get a hint on what you need to do and then check out the map on the wall. Be sure to jot these locations down.


Jump back off the ledge and bury the geysers so that you can pass. Once you walk into the sandy area to the right, you’ll be greeted by pesky Sandworms. These enemies will gobble you up and then spit you out. If you walk slowly across the sand, these enemies will not bother you at all. Alternatively, if you find a bomb flower, you can toss it in the direction of the enemy and it will gobble it up, defeating it in the process. If you can, just run to a higher ledge so that the Sandworms cannot harm you.
There are a number of windmills in this area, and you will need to activate the three windmills that were indicated on the map. This includes the two on the far left and the one at the bottom-right. In order to activate these windmills, stand right in front of them and blow into the microphone. Once all three windmills are activated, the two doors near the center of the map will open up.
Check out the southeast corner of the sandy area and you’ll find a treasure chest. Open it up to acquire another Treasure Map.Optional: Treasure Map #8

Now head through either one of the opened gates and jump off the ledge. Go ahead and head up to enter the Temple of Wind.


4.3 Temple of the Wind
From the dungeon entrance, run northward past the gusts of wind. Grab the bomb flower that you come across and toss it northward across the gap. You’ll want it to land on the square right between the bomb flowers. This will cause all the bombs to explode, hitting the two switches and extending a nearby bridge.


Run northward and then push the block to the east, so that it is blocking the wind. Hit the crystal switch to the right to cause the second gust of wind to disappear, clearing the pathway.


Continue southward and tap on the door to the south to open it up. Step on the nearby floor switch, giving you quick access to the dungeon entrance. Climb the steps to the right and carefully walk across the narrow pathway. Be careful of the Keese, as well as the wind gusts that will try to blow you off the pathway.


Walk northward and you’ll encounter a number of Ropes. Defeat them and then continue westward. Grab the rupees as a reward and then push the nearby block to the left. You’ll find yourself at the entrance to the boss room, but we still have quite a ways to go before we can enter it.
To the left there is a wind jar that can be pushed. Push it down twice and then to the left four times, so that it sits on top of the tile symbol that is on the floor. Run and use the wind to carry yourself over the gap to the left. Step on the nearby floor switch to allow for quicker access to this area. Climb down the steps to reach floor B1.


Walk forward and the door will shut behind you. If you walk around the room, some of the rocks will break and start moving towards you. These enemy Rock ChuChu cannot be defeated with your sword. Instead you will need to pickup one of the bomb flowers and toss it at the ChuChu to break the rock, then swipe with your sword to finish off the enemy. Once all three enemies have been defeated, the door to the right will open.


In the large chamber you can run around and defeat the various enemies. Step on the floor switch near the center of the map. Make your way to the southeast corner of the map and open the treasure chest to get a treasure piece.


Walk back to the air geysers and jump into the first one. Allow them to carry you northward towards a higher platform to find a treasure chest that contains a Courage Gem.Optional: Courage Gem #4


Return to the southern geyser and this time just jump off the ledge to the north. Push the block up twice and right twice so that it is right next to the adjacent block. Walk back down to the lower geyser and ride it to get on top of the block. Leap off the ledge to the right and go down the stairs to get to floor B2.


Grab one of the nearby bomb flowers and toss it at the crack in the wall to open up a passage. Be careful in this room, as those pesky Sandworms have returned. Carefully walk across the sand to reach the center of the map. Read the map and it will show four X’s, indicated which geysers in the room you’ll have to dig up.


Carefully walk around the room and use the Shovel on the four locations indicated on the map. Once all four geysers have been dug up, the two doors in the room will open. Climb the steps at the southwest corner of the room and head back to floor B1.
Carefully make your way to the west of the room on Floor B2, avoiding the Sandworms. Open the treasure chest that is found here to get a Power Gem.Optional: Power Gem #4

Climb the steps and you’ll find a gust jar. Grab hold of it and pull it to the left twice. This will cause the gust of wind to line up with the windmill, making it spin. Return to the left side of the room and head back down the staircase.


This time make your way to the door at the north end of the map. In this room you’ll see a big green rupee to the left. Don’t mind this for now as we’ll deal with it in just a bit. Grab a nearby bomb flower and break up the cracked blocks that are blocking the way. Climb back up the stairs to reach floor B1 once again.


Cross the bridge and you’ll find another gust jar. Push it to the left two squares, causing the second windmill to start spinning. With both windmills now spinning, a small key will drop to the floor. Jump off the ledge and collect the key. Use the geysers once again to reach the staircase at the southeast corner of the room and head back down to floor B2.


Make your way to the northeast corner of the room and use the small key to unlock the door. Climb the steps and open the treasure chest to get the dungeon item: Bombs. Now you will no longer need to rely on bomb flowers being nearby.


There are a few goodies for us to collect here in this room. Walk over to the door at the north end of the room and just to the west is a secret that is not indicated on your map or by any crack in the wall. There are small vertical columns on the wall and the third one from the right is the one you can blow up. Do so and head inside to find a big green rupee.Optional: Big Green Rupee


Back in the main chamber, make your way to the northwest corner of the map where there is another cracked wall. Toss a bomb to blow it open and then head through. Toss a bomb on top of the wind geyser and it will cause the cracked block above to blow up. Ride the geyser to the higher platform and then climb the steps to return to floor B1.


Walk to the right and defeat all of the enemy ChuChu. Toss a bomb onto the geyser and it will float upward. Once it explodes, it will blow up a number of bomb flowers before hitting a switch and opening the nearby door. You will have to hurry though, as the door will close after a few seconds.


To the right you’ll find a square tile that is different from the rest. Drop a bomb onto this tile and it will blow open a hole in the wall. Walk around the room and open the door on the right side. Climb the steps to get back up to floor 1F.


The wall to the north has a square tile on the other side, indicating where you can bomb it. Drop a bomb to blow open a hole and then head through. In the next area there are two switches and a number of bomb flowers. Place two bombs on the square tiles at the same time. The explosion will cause both crystal switches to be hit at the same time, opening the nearby door.


Open the treasure chest to get the Boss Key and then leap off the ledge to the left. Toss the key aside for a moment and then toss a bomb onto the geyser, causing the cracked blocks to break. Grab the key and ride up the geyser. Use it on the locked block and then head through the door.


Ride the geysers up and open the door. Be sure to read the nearby tablet, causing a warp portal to appear that takes you back to the dungeon entrance. Break the pots to fill up on bombs and hearts. Once you are ready, climb the steps to take on the temple boss, Cyclok.
Cyclok will float above you, occasionally sending cyclones down towards Link. Cyclok will occasionally drop to the ground level and quickly dash towards Link. Both of these simplistic attacks are very easy to avoid.


There are three locations on the ground floor that will occasionally have a cyclone swirling. You can toss a bomb into this cyclone and the bomb will swirl up to the top screen. The trick here is to wait until Cyclok is directly above one of these cyclones, and then toss a bomb. If a bomb hits Cyclok, it will be stunned, sending it crashing to the ground. Run over and deliver a number of sword slashes.


Later in the battle Cyclok will begin to toss two cyclones down at Link at the same time, and then later three cyclones. He’ll also move slightly faster, so it will be more difficult to hit him with bombs. If you run out of bombs, there are a number of bomb flowers along the perimeter of the boss room. Repeat this same process until Cyclok has been defeated.


After defeating Cyclok, Link will collect two more minutes of sand for his hourglass. Link will also meet up with Neri, the Spirit of Wisdom. After a short talk, be sure to open the treasure chest to get a Heart Container. Step into the blue warp portal to get back outside of the dungeon.
- Chapter 1 – Mercay Island
- Chapter 2 – Temple of Fire
- Chapter 3 – Ocean King Part II
- Chapter 4 – Temple of Wind
- Chapter 5 – Ocean King Part III
- Chapter 6 – Temple of Courage
- Chapter 7 – Ghost Ship
- Chapter 8 – Ocean King Part IV
- Chapter 9 – Goron Temple
- Chapter 10 – Temple of Ice
- Chapter 11 – Ocean King Part V
- Chapter 12 – Mutoh’s Temple
- Chapter 13 – Ocean King Part VI
