- Chapter 1 – Inside The Great Deku Tree
- Chapter 2 – Princess of Destiny
- Chapter 3 – The Mighty Collection
- Chapter 4 – Dodongo’s Cavern
- Chapter 5 – Inside Jabu-Jabu’s Belly
- Chapter 6 – Timely Appearance
- Chapter 7 – Forest Temple
- Chapter 8 – Fire Temple
- Chapter 9 – Ice Cavern
- Chapter 10 – Water Temple
- Chapter 11 – Bottom of the Well
- Chapter 12 – Shadow Temple
- Chapter 13 – Spirit Temple
- Chapter 14 – Ganon’s Castle
5.1 Zora's Domain

Our next destination is over at Zora’s Domain, located at the east side of Hyrule Field, between Kokiri Forest and Kakariko Village. From Hyrule Field, follow the river from Hyrule Town drawbridge upstream and go through the passage to Zora’s River.
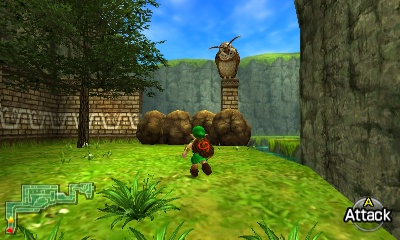
Remember This! – Run forward as soon as you enter the area and you’ll have another encounter with the owl. Before you scream, pay attention to what he says. To summarize: at the end of this area, you need to play Zelda’s Lullaby in order to enter Zora’s Domain. Good to know, huh? After he flies away, roll into the tree on your left to make a Gold Skulltula pop out. Kill it and collect the token..

Optional: Gold Skulltula #28


Die Boulders! – Next up, you’ll notice there are some boulders blocking the way onward. Blast them I say, blast them! After the rubble clears, you’ll see a Cucco straight ahead. Make note of that and round the corner.
Beans, Beans, A Magical Fruit… – Here you’ll meet a chubby fellow eating something out of a bag. Turns out he’s willing to sell you some of the “Magic Beans” he’s eating.
Every time you purchase one though, the price goes up. As lame as that is, these are quite valuable and this is the only place you can get them, so fork over all the Rupees you have. You’ll probably be able to purchase at least three. Test one out on the soft soil next to him. It won’t do anything for awhile yet, but it’ll more than pay for itself when the time comes. Strangely enough, this is the ONLY soft soil location in the entire game where there is no Gold Skulltula, so don’t worry about dropping any bugs.


If you want to purchase more Magic Beans right now, there is an easy Gold Rupee we can collect. Run back over to Kakariko VIllage. Just beyond the first tree, the Shard of Agony starts making noise, indicating a secret. Drop a bomb to find a secret grotto. Defeat the two Redead inside to find a treasure chest with a Gold Rupee. That is worth 200 rupees and should allow you to purchase plenty of Magic Beans for now.Optional: Gold Rupee


Stroll Along The River – With that, it’s time we head through this area. If you’d like some secrets along the way, head back and pickup that suspicious Cucco. If at any point you lose the Cucco (if it touches the water) it’ll appear back here. Jump to the opposite side of the river and follow it until you get to the corner. You’ll encounter a new enemy in the water called an Octorok. Just keep running to avoid it’s rocks and jump over the river once more at the shortest point up here.


Run forward and follow the path to the left, hopping over the little jump and working your way around. You’ll see that there’s another new enemy in the water, another variation of the Tektites we faced earlier. At this point, there’s a Heart Piece you can snag if you brought the chicken. Simply jump at the platform ahead of you, drop the chicken in mid air as you’re touching the platform and you’ll grab hold. Pull yourself up and jump for the prize, Heart Piece!
Heart Piece #15


Hop down to the platform below, avoiding the new enemies here: Blue Tektites. If you’d like yet another Heart Piece, pick up the chicken again and continue along to your right. When you come to the platform, toss the chicken up, climb up yourself, then pick it up again. Turn right and go through the water, repeating the process.
Once done with the two sets of platforms, go left across the water and follow the path across the bridge until you get to an open area with twisting platforms going everywhere. Hop to the next platform once you get a chance (on the right) then follow this one up to the top, closest to the waterfall.
Now here, if you brought the chicken, go to the highest point in the area and turn around. You’ll see a Heart Piece in the corner on a platform all by its lonesome. Using the chicken, you can jump all the way to it and claim it early. Mwahaha!
Heart Piece #16


Next up real quick, play the Sun’s Song to make it night. You’ll hear a Gold Skulltula on a nearby ladder. Hop down into that shallow portion of water and slay the spider to collect our token.
At the end of Zora’s River, right near the waterfall, there is a ladder leading out of the water. At nighttime a Skulltula can be found here. Shoot it down with a Slingshot and collect the token.Optional: Gold Skulltula #29


Parting The Waters – At long last, get on the top platform in front of the waterfall and you’ll find a square, grate-looking thing. Stand on top of it and play Zelda’s Lullaby like the Owl told you to do earlier. The waterfall will then part, revealing the entrance to Zora’s Domain. Nice work Moses!


5.2 Zora's Domain
Run around and familiarize yourself with the area real quick. It’s pretty straight forward. The spiral ramp in the middle takes you up or down and you can just jump in the water below to go down quickly anyway. There’s a shop nearby, but they don’t sell anything too exciting.
Heart Piece – For starters, let’s head upstairs. At the top, you’ll see the fat King Zora sitting away. Rock on dude. There’s a Piece of a Heart you can get pretty easily using the torches nearby. If you don’t have any Deku Sticks, there’s one in the jars along the ramp. We’re going to light the torches in the following order:
- Run down the stairs and light the first torch.
- Continue downstairs and light the torch in front of the shop.
- Light the torch in the water, near the circle of rocks.
- Light the two torches behind the waterfall.
Once all five torches are lit at once, a large chest will appear behind the waterfall, containing a Piece of a Heart!
Heart Piece #17


Diving Game – With that, go back to the top of the area and take a left when you come to King Zora. The water will lead you to the top of the waterfall, where a Zora awaits with a fun mini-game you can play.
This simple game allows you to get some easy rupees. Pay the Zora at the top of the waterfall in Zora’s Domain and he’ll toss those as well as some extra Rupees into the water below and give you 50 seconds. Jump off the waterfall and hold A to dive repeatedly to get the goodies. Remember that you can swim while underwater, so try to grab two or more Rupees at once. If you’re getting disoriented, use Z to redirect yourself.
If your time limit runs out, the Rupees disappear. There is no other prizes for this mini-game other than the Silver Scale and the extra Rupees you get for playing (if you get them all that is). Occasionally though, he’ll throw pink Rupees worth a whopping 50! He might even throw a very rare gold Rupee!


The game’s pretty easy. Keep playing until you successfully get all of them, then go back up to get your prize. Cool. Once you have that in hand, jump back down into the water and dive for the deepest part, where you’ll find a hole. There are several of these throughout the game that are shortcuts to other places in Hyrule. Swim through it.


Message In A Bottle… Quite Literally…! – Near the edge of the water (where the stone pillar ruins are) there’s something in the water that Navi will fly to and glow green. Swim to it, then dive down to get it.
A bottle…! Except it has a letter in it… from the missing Zora princess! As nifty as that is, we can’t actually use the bottle until we give the letter to King Zora.


NOTE: If you haven’t explored Lake Hylia yet, there are a handful of things that you can do here. Refer to Chapter 3, The Mighty Collection for all the goodies you can collect here. When you’re ready, go ahead and swim back through the hole to get back to Zora’s Domain.
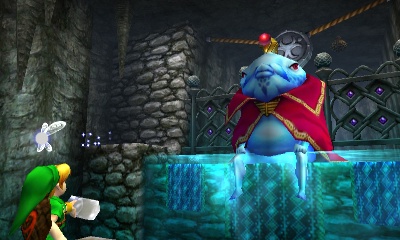
Go on upstairs and stand on the platform, then whip out your bottle with a letter in it to show it to the king. After a short conversation and one of the lengthiest butt hopping I’ve seen in my entire life, you’ll be allowed to proceed onto Jabu Jabu’s fountain. Before we head back there, however, there’s more more thing we need.

Go back downstairs (or dive off the waterfall) and snag a fish from the shallow water with your newly emptied bottle. They’re easy to spot and they tend to hang around a circle of stones. Alternatively you can buy one from the Shop for 200 Rupees… Or not… With fish in hand, head back upstairs and go through the secret area King Zora was hiding from us previously.


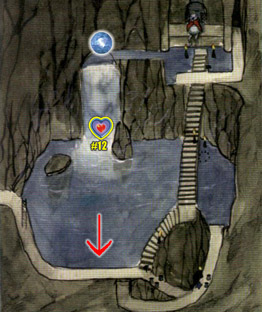
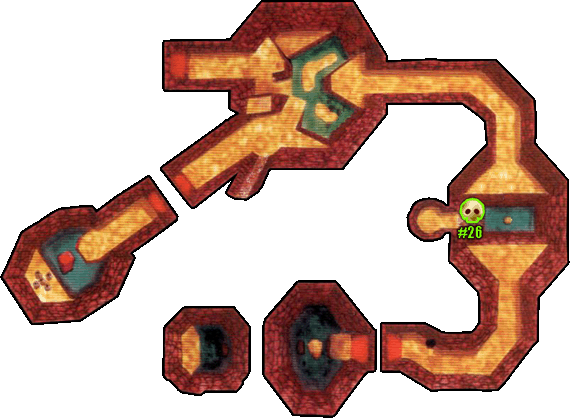
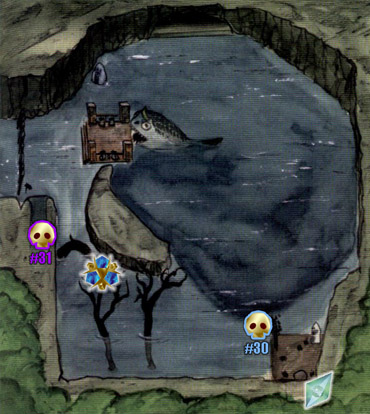
Once you arrive at Zora’s Fountain, swim to that small piece of land off in the corner (bottom right of the map). Roll into the lone tree out here to make a Gold Skulltula pop out.
At the southeast portion of Zora’s Fountain, roll into the lone tree here and the Skulltula will pop out.Optional: Gold Skulltula #30


If you look against the wall here you’ll find two boulders. We can’t actually move the silver one yet, but if you could, you’d find a crack in the wall that clues you into the fact that it’s bombable. Lay a Bomb next to the silver boulder, then head inside the cave that’s revealed.


Play Zelda’s Lullaby on the Triforce symbol inside to make the Great Fairy of Magic appear. She’ll gift you with Farore’s Wind, a spell that lets you mark an area, then teleport back whenever you want. It only works in dungeons, but it’s still cool. Wish you could get this in the next game (Majora’s Mask)…
NOTE: At this point we have collected 30 Gold Skulltulas. You can march your way all the way over to Kakariko Village to get the next reward, the Giant’s Wallet. However, it’s totally out of the way right now. You likely should have spent many of your existing rupees on Magic Beans anyway, so you probably have some room in your existing wallet.
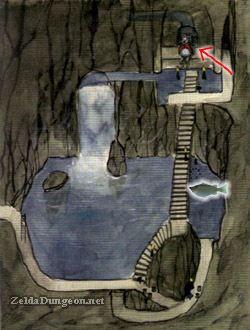
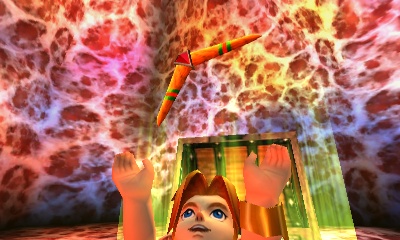
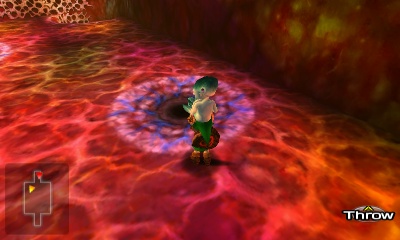
It’s now time to enter the next dungeon. Walk on over to Jabu-Jabu, the great fish lord thing that the Zora worship… Anyway, there isn’t much to do, but if you talked with some of the Zora down below, one of them will tell you to bring a fish offering. Whip out the fish in the bottle I told you to snag earlier and lay it on the ground, which will cause you to be inhaled. Well that’s something you can write home about, no?


5.3 Inside Jabu-Jabu's Belly
Mouth (Entrance) – Even though that previous little clip made it seem like you’re trapped inside this giant fish, you can actually exit by… walking through his teeth… Why of course! With that totally logical escape route in mind, let’s continue.
Upon taking a step forward, two Octoroks will pop out of the water. Use the Deku Shield to reflect their attacks back at them or just dodge their projectiles and shoot them with your slingshot.


Either way, once they’re dead, you need to figure out how to open the veiny door ahead. You can kill the Shaboms (bubbles) if you like, but they’re pretty harmless. Generally speaking you can use your sword to defeat them, but tossing a Deku Nut is clearly the best way to get rid of them, especially when they are in bunches. At the end of the corridor where the room gets smaller, there’s a small nob on the ceiling that Navi will fly to. Shoot it with your Slingshot to open the door.
Throat (Elevator Room) – In the next small room, you’ll meet your first Biri, basically a floating electric jellyfish. You’re probably best off just avoiding them for now. If you’d like to kill it, use Deku Nuts. Make your way around and enter the opposite door.
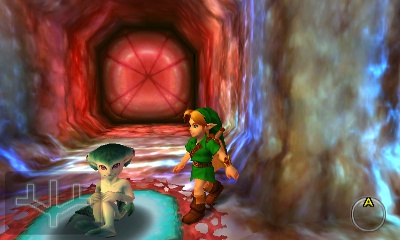
Upper Stomach (Ruto Room) – Triumphant music! It’s the Zora Princess…! Who claims to know nothing of a letter in a bottle and certainly doesn’t want your help. Well fine then. After a quick smack talk, she’ll fall down a hole. Sigh… Go on after her…
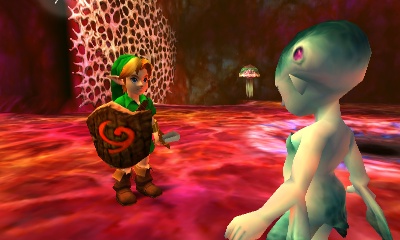

Lower Stomach (Room with Biri) – Upon falling down, talk with her multiple times to make her stop complaining. She mentions her “precious stone”, which must be the Spiritual Stone of Water we’re looking for… Anyway, she’ll crouch into a little ball, to give you the honor of carrying her around. Lazy fishface… So for this little endeaver, you’ll carry her around, but if you drown her, leave the room without her, etc… She’ll appear back at this point. Go ahead and pick her up before too many Biri get close and enter the door nearby.
Switch Puzzle – In the next room, you’ll find yourself in a hallway with several Shaboms. If you just wait a bit, they’ll float into the larger part of the room, or you can kill them with your sword, or even toss the princess to pop them; It’s great fun! A single Deku Nut will defeat them all.
Round the corner and you’ll be met with a small puzzle. Jump down into the lower water and be wary of the Stingers in the water. You should kill them now while the water is low, as they can be frustratingly hard to avoid while you’re swimming. A good way to kill them is to actually toss the princess at them while they’re still burrowed (or whatever you want to call that) – it’ll kill them one hit.


Now, you can’t climb up the other side, so you’ll have to use the switch in the middle of this pit to raise the water level. Before that however, toss Ruto up to the other side so she’s safe. If you sink her, she’ll appear back in the previous room and be angry with you. After stepping on the switch, you may want to get the Skulltula token nearby and the fairy in the jars above to keep in a bottle for later.
After meeting Ruto and falling down below. You’ll pick her up and bring her to a room with a floor switch. Shoot the Skulltula on the side wall and climb up to get the token.Optional: Gold Skulltula #31


After using the raised water to climb up the other side, pick up the princess and continue down the Shabom infested hallway. You’ll find another “closed” door. Once again, shoot the dangly nob from the ceiling and head on through.


Throat (Elevator Room) – In this next room, quickly put the princess down and use your shield to reflect the Octorok’s attack. Now, if you’re in need of some Deku Nuts, there’s a Business Scrub nearby that can supply them; simply dive through the hole straight ahead and reflect his nuts to buy some for 20 Rupees if you so desire.


In either case, pick up Ruto and wait for the spiked platform to come your way. Jump on and let it take you back to the small hallway we were in earlier. Jump onto the side and enter the door that leads to the room you first met Ruto in.
Upper Stomach (Ruto Room) – From now on, if you lose Ruto, she’ll appear in this room. With that in mind, make your way to the opposite side of the room to the door we’ve ignored until now. Be careful, as there are some Biri and new Bari that will drop from the ceiling. The latter is harder to defeat and will split into three Biri when defeated. Enter the door.

Intestines? (Hallways) – This branching hallway has many doors that you can’t access yet. There’s also a new enemy here, the Tailpasaran, which are electric floating monsters. You can’t even hurt them yet, so simply head right for now and jump on the switch; you’ll need Ruto to press it down all the way. Go through the door it opens.


Stinger Room: Boomerang – In this next small room, there are four Stingers hiding in the floor. Just set Ruto down near the entrance and slaughter them. After they’ve been defeated, a large chest will appear with the Boomerang! Nice. Equip your new found weapon, pick Ruto back up and exit the door.

Intestines? (Hallways) – Now that we can actually hurt all of the enemies in this place, you can actually set Ruto down and kill the Tailpasaran if you so desire. In any case, make your way to the opposite side of the room to the other door with the switch. Once again, use Ruto to step down on it. This time however, it’ll pop back up once you step off it, so set her down on it and go through the door without her. What a shame. =)
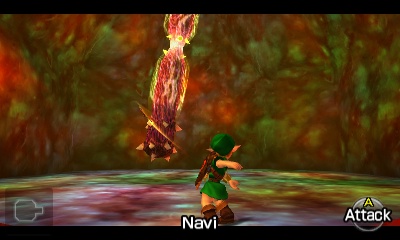
Red Tail (Dungeon Map) – In this next room, you’ll meet your first Parasitic Tentacle. Simply Z target it, get close, and circle around it while continually using your Boomerang. After a few good hits, it’ll die, leaving behind a large chest with the Dungeon Map inside. Exit the room.
Intestines? (Hallways) – Ruto is annoyed that you left her, and actually, every other room will make her disappear if you leave her behind. That would be fine for now, so if you don’t feel like bringing her along, you don’t have to. Anyway, if you’d like to get the compass, just round the corner and enter the nearby door, to which Navi will exclaim that this half of the Parasitic Tentacle is now gone. Nifty.
Shabom Room (Compass) – In this small room, should you choose to go this way, you’ll find tons of Shaboms (bubbles) and a time limit! If you don’t kill the bubbles within 40 seconds, you’ll start this room over again and lose some health. No real explanation as to why… but… hurry up! I find it’s easiest to simply Z target and use your Boomerang. If you’re feeling daring, try a spin attack to nab a bunch of them at once. Once you’ve put the pop on them, a chest will appear containing the Compass. Woot.


Intestines? (Hallways) – Whether you did that last room or not, head back to the opposite side of this massive, hallway room to where you found the Boomerang. The room right next to it is now open, so head on in.
Blue Tail – Inside, there’s another lone Parasitic Tentacle. It should be simple for you to kill at this point. After doing so, exit this room and make your way for the middle, as well as the final, hallway.

Green Tail – Once inside, there’s the last Tentacle, but watch out for the Biri surrounding it. I suggest you kill them first before you tackle the large enemy, as it can slap you into the others otherwise. Once you’ve defeated them all, the door will open. Head back to the main room (where you first found Ruto).

Upper Stomach (Ruto Room) – The hole closest to the top left (opposite where you first saw Ruto) used to have a large tentacle sticking through it that has now disappeared. Fall down this hole to land on a new platform you couldn’t reach before.


Lower Stomach (Room with Biri) – There are two Gold Skulltulas on the wall here, which you can now grab their tokens with using the Boomerang! After doing so, head through the only hallway on this platform and enter the door.
After falling down to the lower floor for a second time, you’ll find two Skulltulas on the wall. Defeat them and use the Boomerang to grab the closer token.Optional: Gold Skulltula #32


After falling down to the lower floor for a second time, you’ll find two Skulltulas on the wall. Defeat them and use the Boomerang to grab the further token.Optional: Gold Skulltula #33


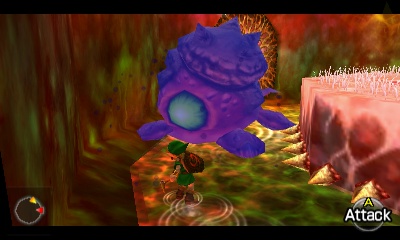
Big Octo’s Lair – Inside, Ruto will begin squirming around and demanding you throw her on the platform in the center of the room. After doing so, a short clip will begin and she’ll get the Spiritual Stone of Water! Lame… take a step forward and… oh no… that’s really… too bad… =)


This giant Octorok isn’t stuck in the confines of the water alike his brothers. He circles around a spinning spiked platform of doom trying to run you over, and he runs just about as fast as you do, so it’s difficult to catch up to him. Once he rams into you, he’ll then turn around and start over again. Occasionally, he’ll disappear and reappear on the opposite side of the track. Just watch the spikes to know which way he’s traveling.
As is pretty obvious, you’re going to have to stun him using your new-found Boomerang. You can hit him anywhere with it to stun him, but he’s only vulnerable to your sword from the backside once stunned. Below are the two ways to defeating him:

Catching Up (Hard) – The first method is to run away from him, sticking close to the spikes so you gradually catch up. Once you’re close enough, Z target, Boomerang, slash his backside. Simple, but lengthy and he can be tricky at times, suddenly turning on you or burrowing to the opposite side. (When I first played, I thought this was the only way to do it!)
Standing Still (Easy) – The easy way is to understand one thing: he turns around if he hits you or occasionally when you stun him. What does this mean?
Stand still and get mowed over on purpose, then stun him and slash away. Repeat.
OR…
Stun him with Boomerang. Wait until stun wears off, let him spin around a little bit, stun him again while he’s facing away. Smack him. Repeat.
The second method makes this battle pathetically easy once you notice the way he moves. Either way, after four sword slashes (or two jump attacks) to his vulnerable spot, Big Octo will be a Big Loser.

Generally, he drops three hearts when he dies, so pick those up, then step onto the platform to go up to the next level. Once there, you may want to snag the fairy in the jar and put it in a bottle if you’re not full. Head for the only exit, killing the Biri along the way.

Red Jelly Puzzle – The next room has some wiggly electric jelly blobs that hate you. Before tackling them though, you may want to kill the Octorok below. After doing so, stand on the platform near the door you entered from and use your Boomerang on the first angry tofu, which will freeze it, allowing you to use it as a platform. Jump onto it and freeze the second and make your way to the next door.


Throat (Elevator Room) – You’ll appear in a small area with a lone platform across the way. Jump onto it and it’ll lower to connect an old platform to a door we have yet to venture. There’s a switch to open the door, but it pops back open if you step off it. Unfortunately, we no longer have Ruto, so just snag one of the nearby boxes and use it instead.


Biri Room – In this last room, kill all the Biri real quick then go to the far side of the room. You’ll find a Gold Skulltula on some vines nearby. After killing it, climb the vines (snagging the token along the way) and get on top.
In the final room before the boss, there is a Gold Skulltula on the vines. Defeat it and grab the token.Optional: Gold Skulltula #34


Once there, you’ll notice another switch thing hanging from the ceiling. There’s a spider-web like barrier blocking the way though. Simply Z target it and use your Boomerang. It may take a few tries to get the distance right, but once you hit it, the door leading to the boss will open. When you think you’re ready, head on in.


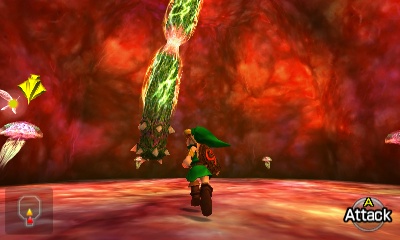
Phase 1: Tentacles – The battle starts out by slicing off the three appendages that are attached to the ceiling, sucking energy out of Lord Jabu-Jabu. The natural conclusion is to use the Boomerang. Target one at a time and dismember them as you circle around to avoid the electric beams.

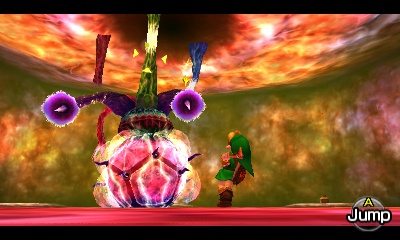
Phase 2: Jellyfish – The next phase is a little harder. He releases the top row of jellyfish and allows them to orbit around the main body. The electric “connection” to them is dangerous as well, so try to weave in and out to get close. Once you’re close enough, use your Boomerang on the main body (which is now slightly vulnerable). This causes the connection to the outer jellyfish to break momentarily, making them no longer invincible. You can also just wait awhile and he’ll disconnect, but he’ll shoot while disconnected. Slash up the jellies, stun the main body again before it comes back to life, repeat. Your sword and Din’s Fire work for killing them, but Deku Nuts and the Boomerang get my vote for the best methods.


Phase 3: Spinning Defense – After the first set of biri die out, he’ll send out his last line of defense, spinning around the main body quickly as he zips around the room. Target the main body and try to keep some distance between you as you continually use your Boomerang. Once you make it through the jellyfish, they’ll be separated again. This time however, he can shoot you while stunned. Quickly run forward and throw a Deku Nut at the main body (to hopefully take them all out at once), or use the previous methods.


Phase 4: Vulnerable At Last! – Once all of the biri are gone, he’ll zip around the room a little more aggressively and shoot faster. Just keep moving and using your Boomerang to stun him once again. Once you get him, go slash away at the main body with your sword. After a couple slashes, he’ll sink down into the ground to protect the body. Run away for a bit until he gets back up. Repeat. After a good ten sword slashes or so, Barinade will explode.


I never realized electric fish thingies grew tons of zits when they died… Grab the Heart Container and go meet up with Ruto in the blue light for a quick scolding on how long it took you to save her. Yeah, sure am glad I saved you…


5.4 Spiritual Stone of Water
Upon exit, there’s a quick scene with Ruto quickly changing her mind and wanting to make Link her personal slave. She gives you the choice of saying what you want, but either way, she’ll hint at it being an engagement gift for the two of you. Whoa nelly! Either way, you get the Spiritual Stone of Water! I love how cool the water looks right here…
Once the movie finally ends, you’ll be floating in the water in Zora’s Fountain. Our next objective is to head back to Hyrule Castle Town, but there’s tons of stuff we can get with our new found Boomerang. First of all, let’s take care of the few remaining goodies here.
Back outside, play the Sun’s Song to make it night, then swim towards the exit. Along the way, you’ll see a log that arches out of the water (on Jabu-Jabu’s left) right before the exit back to Zora’s Domain. Get on the log and kill the Gold Skulltula on the wall. Use our new Boomerang to collect the token [#35].


At Zora’s Fountain, stand on the log just south of Lord Jabu-Jabu. At nighttime there will be a Skulltula crawling around on the wall. Toss your boomerang at it to defeat it and collect the tokent.Optional: Gold Skulltula #35


5.5 Fun With The Boomerang
At this point we can make our way over to Castle Town to continue with the main quest. However, now that we have the Boomerang, there are a ton of goodies all over the world for us to collect. Most of this stuff is spaced out all over the place, but there is quite a bit we can get. There are Skulltulas for us to collect Inside the Great Deku Tree, at Lon Lon Ranch, Hyrule Field, Gerudo Valley, Lake Hylia, the Graveyard, and at Dodongo’s Cavern.
Way back inside of the Great Deku Tree. There was a room in the first Basement at the northwest corner of the map that we previously never entered. Burn the spider-web and then blast the boulder away with a bomb. Inside you will find a Gold Skulltula on the wall. Use the Boomerang to snag the token.Optional: Gold Skulltula #36


Once you enter Lon Lon Ranch at nighttime, you will find a Gold Skulltula on the window of the building on the left side. Defeat the spider and collect the token with the Boomerang.Optional: Gold Skulltula #37


At Lon Lon Ranch at nighttime, make your way to the far southwest side of the map. Higher up on the edge you will find a Skulltula. Defeat it and retrieve the token with the Boomerang.Optional: Gold Skulltula #38


At the west end of Hyrule Field, near the entrance of Gerudo Valley, you will find a circle of rocks. The Shard of Agony will chime if you stand in the middle. Drop a bomb to blast open a hole to reveal an underground grotto. Use Din’s Fire to burn all of the spider webs and you’ll find a Cow. Behind the cow up near the top, there is a Gold Skulltula. Use the Boomerang to retrieve the token.Optional: Gold Skulltula #39


Once you enter Gerudo Valley, walk forward and you’ll come to a wooden ramp. If you turn to the right, there is some water coming out of a hole in the wall. At nighttime the Gold Skulltula can be found here.Optional: Gold Skulltula #40


At the northwest side of Lake Hylia, walk onto the bridge near the Lakeside Laboratory. At nighttime look at the building and you’ll find a Skulltula. Defeat it and use the Boomerang to snag the token.Optional: Gold Skulltula #41


Located in Hyrule Field, right near the entrance to Kakariko Village. Just north of the small bridge that is between Castle Town and Kakariko Village, you will find a tree. The Shard of Agony will chime when you are nearby. Inside you will find a Big Skulltula and a Gold Skulltula higher up on the wall.Optional: Gold Skulltula #42


Found on the wall at the southeast corner of the Graveyard. The Skulltula can be found at nighttime and you’ll need the Boomerang to retrieve the token.Optional: Gold Skulltula #43


The Gold Skulltula is located in Dodongo’s Cavern, within the room with the massive explodable staircase. However, you’ll have to go the long route to get this one. Ride the tall pillar up to the second floor and head west a room. Drop down below and climb the ladder at the southwest portion of the room before returning to the main room. Cross the large bridge to get back to the room with the Armos statues. Push the statue, climb the ladder, and step on the switch to unlock the door. At last, you’ll be back in the room with the giant staircase. The Skulltula is located at the top of the staircase in a cubby hole. Either go around the left side and climb the vines or jump off so you land on the steps themselves in order to find this hidden area. You’ll need the Boomerang to collect the token.Optional: Gold Skulltula #44


The reward for getting 40 Skulltulas is kind of lame: Bombchus. You might have already gotten some from the Bombchu Bowling Alley. If you never picked up the reward for getting 30 Skulltulas, do so now as that is the Giant Wallet, allowing you to hold up to 500 rupees.
- Chapter 1 – Inside The Great Deku Tree
- Chapter 2 – Princess of Destiny
- Chapter 3 – The Mighty Collection
- Chapter 4 – Dodongo’s Cavern
- Chapter 5 – Inside Jabu-Jabu’s Belly
- Chapter 6 – Timely Appearance
- Chapter 7 – Forest Temple
- Chapter 8 – Fire Temple
- Chapter 9 – Ice Cavern
- Chapter 10 – Water Temple
- Chapter 11 – Bottom of the Well
- Chapter 12 – Shadow Temple
- Chapter 13 – Spirit Temple
- Chapter 14 – Ganon’s Castle
