Tears of the Kingdom Memories: Difference between revisions
(Will do this properly in a few minutes, making header changes just now) |
No edit summary |
||
| Line 1: | Line 1: | ||
==Memory #01 - The Master Sword's Power== | |||
[[File:The Master Sword's Power - TotK Memory.png|right|300px]] | |||
{{main|The Master Sword's Power}} | {{main|The Master Sword's Power}} | ||
{{quote|Link recovers the Master Sword in the Lost Woods after it's been restored. Zelda is astonished to learn from the Deku Tree that the Master Sword will become even stronger when flooded with sacred power.|In-game description}} | |||
{{clear}} | |||
==Memory #02 - The Awakening== | |||
[[File:The Awakening - TotK Memory.png|right|300px]] | |||
{{main|The Awakening}} | {{main|The Awakening}} | ||
{{quote|While investigating the mysterious gloom under Hyrule Castle, Link and Zelda encounter a mummy that attacks them. Events spiral out of control when the Master Sword shatters, Zelda falls into the depths of the earth, and Link, gripped by a mysterious arm, is enveloped in light.|In-game description}} | |||
{{clear}} | |||
==Memory #03 - Where Am I?, Tear of the Dragon #1== | |||
[[File:Where Am I - TotK Memory.png|right|300px]] | |||
{{main|Where Am I?}} | {{main|Where Am I?}} | ||
{{quote|After disappearing into the depths under the castle, Zelda wakes up and meets two strangers who introduce themselves as King Rauru and Queen Sonia. She's left startled by a suspicion that she's heard those names before.|In-game description}} | |||
{{clear}} | |||
==Memory #04 - An Unfamiliar World, Tear of the Dragon #2== | |||
[[File:An Unfamiliar World - TotK Memory.png|right|300px]] | |||
{{main|An Unfamiliar World}} | {{main|An Unfamiliar World}} | ||
{{quote|Looking out across the world she's found herself in, Zelda realizes she's traveled to the ancient past and questions how she can get back to her own time. Sonia offers some helpful thoughts, but it's Rauru who realizes his older sister, Mineru, might know a way Zelda can travel forward in time.|In-game description}} | |||
{{clear}} | |||
==Memory #05 - Mineru's Counsel, Tear of the Dragon #3== | |||
[[File:Mineru's Counsel - TotK Memory.png|right|300px]] | |||
{{main|Mineru's Counsel}} | {{main|Mineru's Counsel}} | ||
{{quote|After examining the Purah Pad, Mineru accepts that Zelda is from a different time and explains the only way she might get to the future is by using draconification. It's a forbidden act, however, because Zelda would need to sacrifice her sense of self. Rauru tells a disappointed Zelda to speak with Sonia and learn more about her power over time itself.|In-game description}} | |||
{{clear}} | |||
==Memory #06 - The Gerudo Assault, Tear of the Dragon #4== | |||
[[File:The Gerudo Assault - TotK Memory.png|right|300px]] | |||
{{main|The Gerudo Assault}} | {{main|The Gerudo Assault}} | ||
{{quote|The Gerudo chief, Ganondorf, in his push to conquer Hyrule, uses a swarm of Molduga to assault the castle. When Rauru uses his powers to unleash an attack that destroys the swarm, Ganondorf notices the Zonai secret stone on Rauru's right hand. The sight of it draws a sinister smile from Ganondorf.|In-game description}} | |||
{{clear}} | |||
==Memory #07 - A Show of Fealty, Tear of the Dragon #5== | |||
[[File:A Show of Fealty - TotK Memory.png|right|300px]] | |||
{{main|A Show of Fealty}} | {{main|A Show of Fealty}} | ||
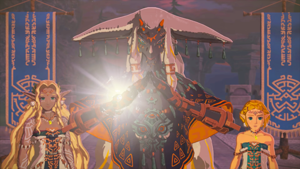
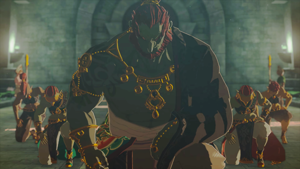
{{quote|Invited before the court of Hyrule, Ganondorf kneels before King Rauru and pledges his fealty—while concealing a smile that says otherwise. Still, Zelda is uneasy, and tells Rauru that she's certain the chief has treachery on his mind. Rauru assures her that he's been fully aware of it.|In-game description}} | |||
{{clear}} | |||
==Memory #08 - Zelda and Sonia, Tear of the Dragon #6== | |||
[[File:Zelda and Sonia - TotK Memory.png|right|300px]] | |||
{{main|Zelda and Sonia}} | {{main|Zelda and Sonia}} | ||
{{quote|When Zelda speaks with Sonia to learn how to use her own time powers, she's surprised by the queen's techniques. Sonia then speaks with Zelda about everything she must be struggling with, and the princess then mentions Link. Rauru has never heard of him before, and as Zelda explains who he is, her faith in her friend and hero shines.|In-game description}} | |||
{{clear}} | |||
==Memory #09 - Sonia is Caught by Treachery, Tear of the Dragon #7== | |||
[[File:Sonia is Caught by Treachery - TotK Memory.png|right|300px]] | |||
{{main|Sonia is Caught by Treachery}} | {{main|Sonia is Caught by Treachery}} | ||
{{quote|Sonia meets with Zelda in private, and when the princess is revealed to be a creature under Ganondorf's command, Sonia and the real Zelda address the threat with confidence. The false Zelda laughs eerily and vanishes in a mist of gloom. In that moment, Ganondorf steps up behind Sonia and catches the queen by surprise. She falls victim to the scheme.|In-game description}} | |||
{{clear}} | |||
==Memory #10 - Birth of the Demon King, Tear of the Dragon #8== | |||
[[File:Birth of the Demon King - TotK Memory.png|right|300px]] | |||
{{main|Birth of the Demon King}} | {{main|Birth of the Demon King}} | ||
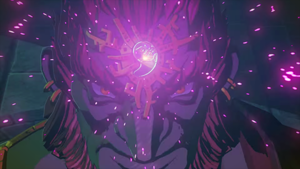
{{quote|With the secret stone he took from Sonia, Ganondorf turns into the Demon King. The gloom that issues from his body creates countless monsters that howl across the world. Rauru goes to Sonia's side to help his fallen queen. Though furious at Ganondorf, he knows the Demon King is too powerful to confront at that moment. He retreats with Zelda.|In-game description}} | |||
{{clear}} | |||
==Memory #11 - The Demon King's Army== | |||
[[File:The Demon King's Army - TotK Memory.png|right|300px]] | |||
{{main|The Demon King's Army}} | {{main|The Demon King's Army}} | ||
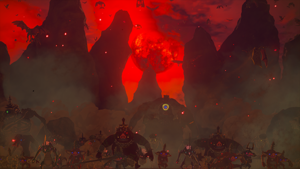
{{quote|Having turned into the Demon King, Ganondorf uses his terrifying power to cover the world in gloom and send his army of monsters across Hyrule, attacking the peoples of all territories who oppose him.|In-game description}} | |||
{{clear}} | |||
==Memory #12 - The Sages' Vow, Tear of the Dragon #9== | |||
[[File:The Sages' Vow - TotK Memory.png|right|300px]] | |||
{{main|The Sages' Vow}} | {{main|The Sages' Vow}} | ||
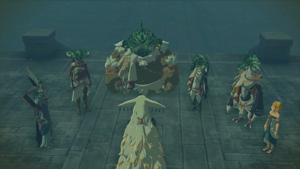
{{quote|Backed into a corner by the attacks in all parts of Hyrule, leaders facing the Demon King's forces gather at Rauru's call. He gives each a Zonai secret stone, making them sages with powers amplified by the stones. All of the sages raise their voices as one, pledging to fight with King Rauru to the end.|In-game description}} | |||
{{clear}} | |||
==Memory #13 - A King's Duty, Tear of the Dragon #10== | |||
[[File:A King's Duty - TotK Memory.png|right|300px]] | |||
{{main|A King's Duty}} | {{main|A King's Duty}} | ||
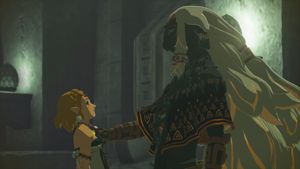
{{quote|On the eve of battle, Zelda tells Rauru that in her future, she's seen that the Demon King is alive, and that it means they won't defeat him the next day. Rauru says that he will still do what he must, even at the cost of his life. If they fail, their last line of defense will be the knight in the future, who wields the sword that seals the darkness.|In-game description}} | |||
{{clear}} | |||
==Memory #14 - The Imprisoning War== | |||
[[File:The Imprisoning War - TotK Memory.png|right|300px]] | |||
{{main|The Imprisoning War}} | {{main|The Imprisoning War}} | ||
{{quote|In the battle against Demon King Ganondorf, King Rauru realizes that he and his allies have found themselves in a fatal moment. Knowing he is at fault for Ganondorf's rise in Hyrule and for the theft of the secret stone, Rauru risks his life to imprison the tyrant.|In-game description}} | |||
{{clear}} | |||
==Memory #15 - A Master Sword in Time, Tear of the Dragon #11== | |||
[[File:A Master Sword in Time - TotK Memory.png|right|300px]] | |||
{{main|A Master Sword in Time}} | {{main|A Master Sword in Time}} | ||
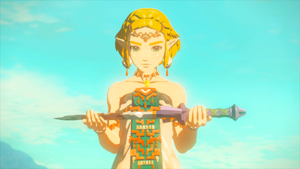
{{quote|As Zelda worries about the Demon King breaking free in the future, a decayed Master Sword appears before her, delivering the news to Zelda that Link is safe in her time. This helps Zelda realize the reason behind her traveling to the ancient days of Hyrule—she finally knows what she must do.|In-game description}} | |||
{{clear}} | |||
==Memory #16 - Critical Decisions== | |||
[[File:Critical Decisions - TotK Memory.png|right|300px]] | |||
{{main|Critical Decisions}} | {{main|Critical Decisions}} | ||
{{quote|Zelda informs Mineru that she has come up with a plan to restore the Master Sword by performing an act that Mineru herself has said is expressly forbidden. It will consume Zelda's sense of self, but the princess insists that she will make this ultimate sacrifice. Mineru is gravely opposed, but promises to help to the best of her abilities.|In-game description}} | |||
{{clear}} | |||
==Memory #17 - Tears of the Dragon, Tear of the Dragon #12== | |||
[[File:Tears of the Dragon - TotK Memory.png|right|300px]] | |||
{{main|Tears of the Dragon}} | {{main|Tears of the Dragon}} | ||
{{quote|After leaving the Purah Pad in Mineru's care, Zelda swallows the secret stone, holding a hope for Link's future in her heart. As bright light washes over her, Zelda transforms into the Light Dragon, roaring as she ascends into the sky. Tears fall from her eyes and rain from the heavens as the Light Dragon vanishes into an expanse of clouds.|In-game description}} | |||
{{clear}} | |||
==Memory #18 - Zelda's Wish== | |||
[[File:Zelda's Wish - TotK Memory.png|right|300px]] | |||
{{main|Zelda's Wish}} | {{main|Zelda's Wish}} | ||
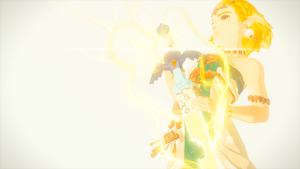
{{quote|Zelda clutches the decayed Master Sword close to her chest and calls to Link, hoping that the sword, which she's suffusing with new power, can find a way to him somehow.|In-game description}} | |||
{{clear}} | |||
{{Cat|Tears of the Kingdom Memories}} | |||
{{cat|Tears of the Kingdom Memories| *}} | |||
{{cat|Listings}} | |||
Revision as of 21:05, June 11, 2023
Memory #01 - The Master Sword's Power
- Main article: The Master Sword's Power
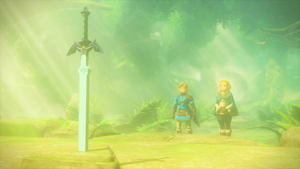
"Link recovers the Master Sword in the Lost Woods after it's been restored. Zelda is astonished to learn from the Deku Tree that the Master Sword will become even stronger when flooded with sacred power."
Memory #02 - The Awakening
- Main article: The Awakening
"While investigating the mysterious gloom under Hyrule Castle, Link and Zelda encounter a mummy that attacks them. Events spiral out of control when the Master Sword shatters, Zelda falls into the depths of the earth, and Link, gripped by a mysterious arm, is enveloped in light."
Memory #03 - Where Am I?, Tear of the Dragon #1
- Main article: Where Am I?
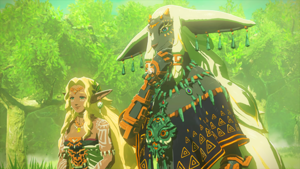
"After disappearing into the depths under the castle, Zelda wakes up and meets two strangers who introduce themselves as King Rauru and Queen Sonia. She's left startled by a suspicion that she's heard those names before."
Memory #04 - An Unfamiliar World, Tear of the Dragon #2
- Main article: An Unfamiliar World
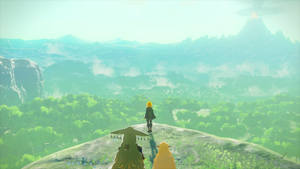
"Looking out across the world she's found herself in, Zelda realizes she's traveled to the ancient past and questions how she can get back to her own time. Sonia offers some helpful thoughts, but it's Rauru who realizes his older sister, Mineru, might know a way Zelda can travel forward in time."
Memory #05 - Mineru's Counsel, Tear of the Dragon #3
- Main article: Mineru's Counsel
"After examining the Purah Pad, Mineru accepts that Zelda is from a different time and explains the only way she might get to the future is by using draconification. It's a forbidden act, however, because Zelda would need to sacrifice her sense of self. Rauru tells a disappointed Zelda to speak with Sonia and learn more about her power over time itself."
Memory #06 - The Gerudo Assault, Tear of the Dragon #4
- Main article: The Gerudo Assault
"The Gerudo chief, Ganondorf, in his push to conquer Hyrule, uses a swarm of Molduga to assault the castle. When Rauru uses his powers to unleash an attack that destroys the swarm, Ganondorf notices the Zonai secret stone on Rauru's right hand. The sight of it draws a sinister smile from Ganondorf."
Memory #07 - A Show of Fealty, Tear of the Dragon #5
- Main article: A Show of Fealty
"Invited before the court of Hyrule, Ganondorf kneels before King Rauru and pledges his fealty—while concealing a smile that says otherwise. Still, Zelda is uneasy, and tells Rauru that she's certain the chief has treachery on his mind. Rauru assures her that he's been fully aware of it."
Memory #08 - Zelda and Sonia, Tear of the Dragon #6
- Main article: Zelda and Sonia
"When Zelda speaks with Sonia to learn how to use her own time powers, she's surprised by the queen's techniques. Sonia then speaks with Zelda about everything she must be struggling with, and the princess then mentions Link. Rauru has never heard of him before, and as Zelda explains who he is, her faith in her friend and hero shines."
Memory #09 - Sonia is Caught by Treachery, Tear of the Dragon #7
- Main article: Sonia is Caught by Treachery
"Sonia meets with Zelda in private, and when the princess is revealed to be a creature under Ganondorf's command, Sonia and the real Zelda address the threat with confidence. The false Zelda laughs eerily and vanishes in a mist of gloom. In that moment, Ganondorf steps up behind Sonia and catches the queen by surprise. She falls victim to the scheme."
Memory #10 - Birth of the Demon King, Tear of the Dragon #8
- Main article: Birth of the Demon King
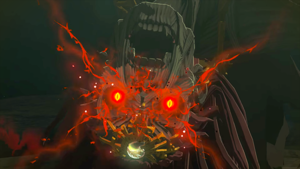
"With the secret stone he took from Sonia, Ganondorf turns into the Demon King. The gloom that issues from his body creates countless monsters that howl across the world. Rauru goes to Sonia's side to help his fallen queen. Though furious at Ganondorf, he knows the Demon King is too powerful to confront at that moment. He retreats with Zelda."
Memory #11 - The Demon King's Army
- Main article: The Demon King's Army
"Having turned into the Demon King, Ganondorf uses his terrifying power to cover the world in gloom and send his army of monsters across Hyrule, attacking the peoples of all territories who oppose him."
Memory #12 - The Sages' Vow, Tear of the Dragon #9
- Main article: The Sages' Vow
"Backed into a corner by the attacks in all parts of Hyrule, leaders facing the Demon King's forces gather at Rauru's call. He gives each a Zonai secret stone, making them sages with powers amplified by the stones. All of the sages raise their voices as one, pledging to fight with King Rauru to the end."
Memory #13 - A King's Duty, Tear of the Dragon #10
- Main article: A King's Duty
"On the eve of battle, Zelda tells Rauru that in her future, she's seen that the Demon King is alive, and that it means they won't defeat him the next day. Rauru says that he will still do what he must, even at the cost of his life. If they fail, their last line of defense will be the knight in the future, who wields the sword that seals the darkness."
Memory #14 - The Imprisoning War
- Main article: The Imprisoning War
"In the battle against Demon King Ganondorf, King Rauru realizes that he and his allies have found themselves in a fatal moment. Knowing he is at fault for Ganondorf's rise in Hyrule and for the theft of the secret stone, Rauru risks his life to imprison the tyrant."
Memory #15 - A Master Sword in Time, Tear of the Dragon #11
- Main article: A Master Sword in Time
"As Zelda worries about the Demon King breaking free in the future, a decayed Master Sword appears before her, delivering the news to Zelda that Link is safe in her time. This helps Zelda realize the reason behind her traveling to the ancient days of Hyrule—she finally knows what she must do."
Memory #16 - Critical Decisions
- Main article: Critical Decisions
"Zelda informs Mineru that she has come up with a plan to restore the Master Sword by performing an act that Mineru herself has said is expressly forbidden. It will consume Zelda's sense of self, but the princess insists that she will make this ultimate sacrifice. Mineru is gravely opposed, but promises to help to the best of her abilities."
Memory #17 - Tears of the Dragon, Tear of the Dragon #12
- Main article: Tears of the Dragon
"After leaving the Purah Pad in Mineru's care, Zelda swallows the secret stone, holding a hope for Link's future in her heart. As bright light washes over her, Zelda transforms into the Light Dragon, roaring as she ascends into the sky. Tears fall from her eyes and rain from the heavens as the Light Dragon vanishes into an expanse of clouds."
Memory #18 - Zelda's Wish
- Main article: Zelda's Wish
"Zelda clutches the decayed Master Sword close to her chest and calls to Link, hoping that the sword, which she's suffusing with new power, can find a way to him somehow."


