Category:The Wind Waker HD Screenshot Files
Jump to navigation
Jump to search
Want an adless experience? Log in or Create an account.
Media in category "The Wind Waker HD Screenshot Files"
The following 200 files are in this category, out of 487 total.
(previous page) (next page)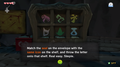 Mail-Sorting-Instructions.png 1,227 × 690; 547 KB
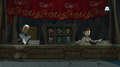
 Mail-Sorting-Koboli.png 1,227 × 690; 630 KB
 Mailing-Center.png 1,227 × 690; 605 KB
 Mako-Pirate-Ship.png 1,227 × 690; 552 KB
 Medli-Dragon-Roost-Intro.png 1,227 × 690; 741 KB
 Medli2 WW HD.jpg 800 × 450; 320 KB
 Mesa-Inside.png 1,227 × 690; 495 KB
 Mesas-House-Interior.png 1,227 × 690; 622 KB
 Mesas-House-Outside.png 1,227 × 690; 741 KB
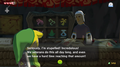
 Milas-Father-Concerned.png 1,227 × 690; 653 KB
 Minenco-Standing-Chu-Jelly-Shop.png 1,227 × 690; 627 KB
 Moblin-Bust-Activated.png 400 × 225; 60 KB
 Moblin-Bust-Fire.png 500 × 282; 135 KB
 Moblin-Bust-Forsaken-Fortress-Inside.png 600 × 338; 193 KB
 Moblin-Bust-Forsaken-Fortress-Outside.png 400 × 225; 82 KB
 Moblin-Bust-Laser.png 400 × 225; 62 KB
 Moblin-Bust-Savage-Labyrinth.png 801 × 451; 218 KB
 Moblin-Bust-Shield.png 400 × 225; 111 KB
 Moblin-Bust.png 400 × 225; 53 KB
 Molgera Boss Room.jpg 1,280 × 720; 196 KB
 Mrs-Marie-Classroom.png 1,227 × 690; 427 KB
 My-Grandma.jpg 1,920 × 1,080; 224 KB
 Namali-Walking-Around.png 1,227 × 690; 555 KB
 Nudge-Pirate-Ship.png 1,227 × 690; 346 KB
 Open-Treasure-Box.png 1,227 × 690; 632 KB
 Orca-and-Sturgeons-House-Inside-1.png 1,227 × 690; 315 KB
 Orca-and-Sturgeons-House-Inside-2.png 1,227 × 690; 514 KB
 Orca-and-Sturgeons-House-Inside-3.png 1,227 × 690; 546 KB
 Orca-and-Sturgeons-House.png 1,227 × 690; 804 KB
 Orca-Link-1.png 1,227 × 690; 398 KB
 Orca-Link-2.png 1,227 × 690; 366 KB
 Outset-Island-Bridge-1.png 1,227 × 690; 807 KB
 Outset-Island-Bridge-2.png 1,227 × 690; 743 KB
 Outset-Island-Pirate-Ship.png 1,227 × 690; 686 KB
 Outset-Island-Residents.png 1,227 × 690; 574 KB
 Outset-Island-Theme.jpg 1,920 × 1,080; 463 KB
 Parry-Attack-Wind-Waker.png 1,227 × 690; 483 KB
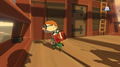
 Part-Time-Job-1.png 1,280 × 720; 630 KB
 Part-Time-Job-2.png 1,280 × 720; 676 KB
 Part-Time-Job-3.png 1,227 × 690; 527 KB
 Part-Time-Job-4.png 1,227 × 690; 540 KB
 Pashli-Walking-Around.png 1,227 × 690; 568 KB
 Pawprint-Isle-1.png 1,227 × 690; 1.13 MB
 Pawprint-Isle-2.png 1,227 × 690; 791 KB
 Pawprint-Isle-3.png 1,227 × 690; 527 KB
 Pawprint-Isle-4.png 1,227 × 690; 502 KB
 Pawprint-Isle-5.png 1,227 × 690; 573 KB
 Pictograph-ChuChus.jpg 1,280 × 720; 116 KB
 Pictograph-Gallery.png 1,227 × 690; 586 KB
 Pirates.jpg 1,920 × 1,080; 440 KB
 Playing-Cupid-1.png 1,227 × 690; 687 KB
 Playing-Cupid-2.png 1,227 × 690; 224 KB
 Playing-Cupid-3.png 1,227 × 690; 584 KB
 Playing-Cupid-4.png 1,227 × 690; 865 KB
 Playing-Cupid-5.png 1,227 × 690; 632 KB
 Potova-Wind-Waker-HD.png 1,227 × 690; 641 KB
 Puppet Ganon form three.png 1,280 × 720; 806 KB
 Putting-the-Rumors-to-Rest-01.png 1,227 × 690; 563 KB
 Putting-the-Rumors-to-Rest-02.png 1,227 × 690; 821 KB
 Putting-the-Rumors-to-Rest-03.png 1,227 × 690; 370 KB
 Putting-the-Rumors-to-Rest-04.png 1,227 × 690; 199 KB
 Putting-the-Rumors-to-Rest-05.png 1,227 × 690; 990 KB
 Putting-the-Rumors-to-Rest-06.png 1,227 × 690; 730 KB
 Putting-the-Rumors-to-Rest-07.png 1,227 × 690; 781 KB
 Putting-the-Rumors-to-Rest-08.png 1,227 × 690; 749 KB
 Putting-the-Rumors-to-Rest-09.png 1,227 × 690; 430 KB
 Putting-the-Rumors-to-Rest-10.png 1,227 × 690; 395 KB
 Putting-the-Rumors-to-Rest-11.png 1,227 × 690; 162 KB
 Putting-the-Rumors-to-Rest-12.png 1,227 × 690; 811 KB
 Queen of Fairies Legendary Pictograph.jpg 800 × 450; 320 KB
 Quill-Standing.png 1,227 × 690; 616 KB
 Rendezvous-With-The-Ship-1.jpg 1,920 × 1,080; 278 KB
 Rendezvous-With-The-Ship-2.jpg 1,920 × 1,080; 295 KB
 Rendezvous-With-The-Ship-3.jpg 1,920 × 1,080; 493 KB
 Reunion-With-Sister.jpg 1,920 × 1,080; 240 KB
 Rito-Aerie-1.png 1,227 × 690; 596 KB
 Rito-Aerie-2.png 1,227 × 690; 643 KB
 Rito-Aerie-3.png 1,227 × 690; 687 KB
 Rito-Chieftain-1.png 1,227 × 690; 683 KB
 Rito-Chieftain-2.png 1,227 × 690; 569 KB
 Rito-Chieftain-3.png 1,227 × 690; 557 KB
 Rolling-Attack-Wind-Waker.png 1,227 × 690; 507 KB
 Rose-Inside.png 1,227 × 690; 403 KB
 Rose-Wind-Waker-HD.png 1,227 × 690; 580 KB
 Sam-Sitting-Bench.png 397 × 457; 179 KB
 Savage-Labyrinth-1.png 1,280 × 720; 488 KB
 Savage-Labyrinth-2.png 1,280 × 720; 511 KB
 Savage-Labyrinth-3.png 1,280 × 720; 707 KB
 Savage-Labyrinth-4.png 1,280 × 720; 730 KB
 Savage-Labyrinth-Entrance-1.png 1,280 × 720; 560 KB
 Savage-Labyrinth-Entrance-2.png 1,280 × 720; 576 KB
 Senza-Pirate-Ship.png 1,227 × 690; 456 KB
 Senza-Screenshot-Wind-Waker-HD.png 1,227 × 690; 767 KB
 Sinking-Ships-1.png 1,227 × 690; 527 KB
 Sinking-Ships-2.png 1,227 × 690; 660 KB
 Sinking-Ships-3.png 1,227 × 690; 624 KB
 Sinking-Ships-4.png 1,227 × 690; 521 KB
 Sinking-Ships-5.png 1,227 × 690; 553 KB
 Sinking-Ships-6.png 1,227 × 690; 664 KB
 Sinking-Ships-7.png 1,227 × 690; 645 KB
 Sinking-Ships-8.png 1,227 × 690; 618 KB
 Sinking-Ships-9.png 1,227 × 690; 554 KB
 Sinking-Ships-Outside.png 1,280 × 720; 953 KB
 Spin-Attack-Wind-Waker.png 1,227 × 690; 476 KB
 Stimpy Hero Of Winds.jpg 1,920 × 1,088; 185 KB
 Sturgeon-and-Link-1.png 1,227 × 690; 518 KB
 Sturgeon-and-Link-2.png 1,227 × 690; 556 KB
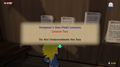
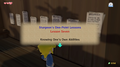
 Sturgeons-One-Point-Lessons-01.png 1,227 × 690; 508 KB
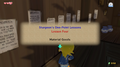
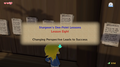
 Sturgeons-One-Point-Lessons-02.png 1,227 × 690; 556 KB
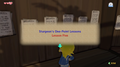
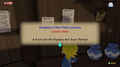
 Sturgeons-One-Point-Lessons-03.png 1,227 × 690; 573 KB
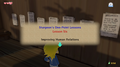
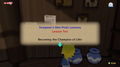
 Sturgeons-One-Point-Lessons-04.png 1,227 × 690; 603 KB
 Sturgeons-One-Point-Lessons-05.png 1,227 × 690; 558 KB
 Sturgeons-One-Point-Lessons-06.png 1,227 × 690; 628 KB
 Sturgeons-One-Point-Lessons-07.png 1,227 × 690; 592 KB
 Sturgeons-One-Point-Lessons-08.png 1,227 × 690; 576 KB
 Sturgeons-One-Point-Lessons-09.png 1,227 × 690; 558 KB
 Sturgeons-One-Point-Lessons-10.png 1,227 × 690; 522 KB
 Submarine-Chart-1.png 1,280 × 720; 618 KB
 Submarine-Chart-2.png 1,280 × 720; 582 KB
 Sue-Belle-Sturgeon-Inside.png 1,227 × 690; 530 KB
 Sue-Belle-Walking.png 1,227 × 690; 648 KB
 Tetra-Discovered.jpg 1,920 × 1,080; 283 KB
 Tetras-Pirates-Firing-at-Helmaroc-King.png 1,227 × 690; 637 KB
 The-Face-of-Fear-1.png 1,280 × 720; 860 KB
 The-Face-of-Fear-2.png 1,280 × 720; 229 KB
 The-Forest-of-Outset-Island.jpg 1,920 × 1,080; 276 KB
 The-Legendary-Hero.jpg 1,920 × 1,080; 747 KB
 The-Secret-Couple-1.png 1,280 × 720; 275 KB
 The-Secret-Couple-2.png 1,280 × 720; 230 KB
 The-Wind-Waker-Menu-Select.png 1,227 × 690; 839 KB
 The-Wind-Waker-Title.png 1,227 × 690; 718 KB
 Thrust-Wind-Waker.png 1,227 × 690; 508 KB
 Tingle-Bottle-Paper.png 810 × 380; 373 KB
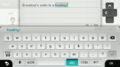 Tingle-Bottle-Writing.png 810 × 452; 213 KB
 Towerofthegodstinglestatue.jpg 800 × 450; 72 KB
 Town-Jail-Exterior.png 1,227 × 690; 773 KB
 Town-Jail-Interior.png 1,227 × 690; 520 KB
 Town-Jail-Tingle-1.png 1,227 × 690; 350 KB
 Town-Jail-Tingle-2.png 1,227 × 690; 411 KB
 Town-Jail-Tingle-3.png 1,227 × 690; 405 KB
 Treasure-Chart-01-1.png 1,280 × 720; 564 KB
 Treasure-Chart-01-2.png 1,280 × 720; 452 KB
 Treasure-Chart-03-1.png 1,227 × 690; 515 KB
 Treasure-Chart-03-2.png 1,227 × 690; 358 KB
 Treasure-Chart-03-3.png 1,227 × 690; 737 KB
 Treasure-Chart-04-1.png 1,280 × 720; 796 KB
 Treasure-Chart-04-2.png 1,280 × 720; 780 KB
 Treasure-Chart-09-1.png 1,280 × 720; 814 KB
 Treasure-Chart-09-2.png 1,280 × 720; 504 KB
 Treasure-Chart-10-1.png 1,280 × 720; 813 KB
 Treasure-Chart-11-1.png 1,227 × 690; 403 KB
 Treasure-Chart-11-2.png 1,227 × 690; 470 KB
 Treasure-Chart-11-3.png 1,280 × 720; 685 KB
 Treasure-Chart-14-1.png 1,280 × 720; 665 KB
 Treasure-Chart-14-2.png 1,280 × 720; 698 KB
 Treasure-Chart-15-1.png 1,280 × 720; 378 KB
 Treasure-Chart-15-2.png 1,280 × 720; 562 KB
 Treasure-Chart-15-3.png 1,280 × 720; 561 KB
 Treasure-Chart-15-4.png 1,280 × 720; 484 KB
 Treasure-Chart-15-5.png 1,280 × 720; 462 KB
 Treasure-Chart-15-6.png 1,280 × 720; 681 KB
 Treasure-Chart-22-1.png 1,280 × 720; 838 KB
 Treasure-Chart-22-2.png 1,280 × 720; 678 KB
 Treasure-Chart-25-1.png 1,280 × 720; 972 KB
 Treasure-Chart-25-2.png 1,280 × 720; 765 KB
 Treasure-Chart-25-3.png 1,280 × 720; 686 KB
 Treasure-Chart-25-4.png 1,280 × 720; 551 KB
 Treasure-Chart-25-5.png 1,280 × 720; 546 KB
 Treasure-Chart-25-6.png 1,280 × 720; 743 KB
 Treasure-Chart-25-7.png 1,280 × 720; 1.07 MB
 Treasure-Chart-27-1.png 1,227 × 690; 639 KB
 Treasure-Chart-27-2.png 1,227 × 690; 542 KB
 Treasure-Chart-27-3.png 1,227 × 690; 616 KB
 Treasure-Chart-27-4.png 1,227 × 690; 428 KB
 Treasure-Chart-28-1.png 1,280 × 720; 713 KB
 Treasure-Chart-28-2.png 1,280 × 720; 861 KB
 Treasure-Chart-28-3.png 1,280 × 720; 646 KB
 Treasure-Chart-28-4.png 1,280 × 720; 857 KB
 Treasure-Chart-30-1.png 1,280 × 720; 875 KB
 Treasure-Chart-30-2.png 1,280 × 720; 666 KB
 Treasure-Chart-33-1.png 1,280 × 720; 238 KB
 Treasure-Chart-33-2.png 1,280 × 720; 792 KB
 Treasure-Chart-34-1.png 1,280 × 720; 891 KB
 Treasure-Chart-34-2.png 1,280 × 720; 771 KB
 Treasure-Chart-37-1.png 1,280 × 720; 817 KB
 Treasure-Chart-37-2.png 1,227 × 690; 524 KB
 Treasure-Chart-37-3.png 1,227 × 690; 368 KB
 Treasure-Chart-37-4.png 1,227 × 690; 292 KB
 Treasure-Chart-39-1.png 1,227 × 690; 560 KB
 Treasure-Chart-39-2.png 1,227 × 690; 553 KB
 Treasure-Chart-39-Chest.png 1,280 × 720; 836 KB
 Treasure-Chart-40-1.png 1,280 × 720; 813 KB
 Treasure-Chart-40-2.png 1,280 × 720; 589 KB
 Treasure-Chart-43-1.png 1,280 × 720; 736 KB
 Treasure-Chart-43-1b.png 1,227 × 690; 712 KB
 Treasure-Chart-43-2.png 1,280 × 720; 514 KB
 Treasure-Chart-44-1.png 1,280 × 720; 441 KB
 Treasure-Chart-44-2.png 1,280 × 720; 668 KB
 Treasure-Chart-45-1.png 1,280 × 720; 538 KB
 Treasure-Chart-45-2.png 1,280 × 720; 476 KB


