Misko's Treasure of Awakening I: Difference between revisions
Jump to navigation
Jump to search

Want an adless experience? Log in or Create an account.
No edit summary |
No edit summary |
||
| Line 1: | Line 1: | ||
{{Infobox|quest | {{Infobox|quest | ||
| image = | | image = [[File:Miskos-Treasure-of-Awakening-I-2.jpg|400px]] | ||
| caption = | | caption = | ||
| game = ''[[The Legend of Zelda: Tears of the Kingdom|Tears of the Kingdom]]'' | | game = ''[[The Legend of Zelda: Tears of the Kingdom|Tears of the Kingdom]]'' | ||
| Line 22: | Line 22: | ||
This [[Side Quest]] starts in [[Goronbi River Cave]]. Go to the [[Ancient Columns]] in the [[Rayne Highlands]], open the [[Ancient Columns Cave]], and open the [[Treasure Chest]] to receive the [[Tunic of Awakening]]. Reading the nearby pedestal starts [[Misko's Treasure of Awakening II]]. | This [[Side Quest]] starts in [[Goronbi River Cave]]. Go to the [[Ancient Columns]] in the [[Rayne Highlands]], open the [[Ancient Columns Cave]], and open the [[Treasure Chest]] to receive the [[Tunic of Awakening]]. Reading the nearby pedestal starts [[Misko's Treasure of Awakening II]]. | ||
==Gallery== | |||
<gallery widths="400px" heights="220px"> | |||
File:Miskos-Treasure-of-Awakening-I-2.jpg|Read the tablet within the [[Goronbi River Cave]] to begin the quest | |||
</gallery> | |||
{{Cat|Tears of the Kingdom Side Quests}} | {{Cat|Tears of the Kingdom Side Quests}} | ||
Revision as of 21:03, March 5, 2024
Misko's Treasure of Awakening I

Games | ||
Locations | ||
Start | Read the tablet in Goronbi River Cave | |
Rewards | ||
| Attributes | ||
|---|---|---|
Type | ||
Tears of the Kingdom
"On the Tabantha Frontier, where Rayne, Piper, and Tanagar meet, ruined pillars stand together. One of those mighty pillars opens the way to my treasure."
— Tears of the Kingdom In-Game Description
This Side Quest starts in Goronbi River Cave. Go to the Ancient Columns in the Rayne Highlands, open the Ancient Columns Cave, and open the Treasure Chest to receive the Tunic of Awakening. Reading the nearby pedestal starts Misko's Treasure of Awakening II.
Gallery
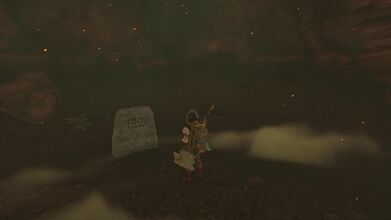
Read the tablet within the Goronbi River Cave to begin the quest