Jiosin Shrine: Difference between revisions
Jump to navigation
Jump to search
Video Walkthrough of Jiosin Shrine
Want an adless experience? Log in or Create an account.
No edit summary |
No edit summary |
||
| (12 intermediate revisions by 6 users not shown) | |||
| Line 1: | Line 1: | ||
{{Infobox| | {{Infobox|shrine | ||
| image = | | image = [[File:Jiosin-Shrine-1.jpg|400px]] | ||
| caption = | | caption = | ||
| game = ''[[The Legend of Zelda: Tears of the Kingdom|Tears of the Kingdom]]'' | | game = ''[[The Legend of Zelda: Tears of the Kingdom|Tears of the Kingdom]]'' | ||
| inhab = | | inhab = | ||
| location = [[Hyrule Field]] | | location = [[Hyrule Field (Breath of the Wild)|Hyrule Field]] | ||
| pointsint = | | pointsint = | ||
| | | counterpart_header = Depths Counterpart | ||
| counterpart = [[Nisoij Lightroot]] | |||
| reward = [[Light of Blessing]] | |||
| item = [[Hasty Elixir]] | |||
| related = | | related = | ||
| type = [[Shrine of Light]] | |||
}} | }} | ||
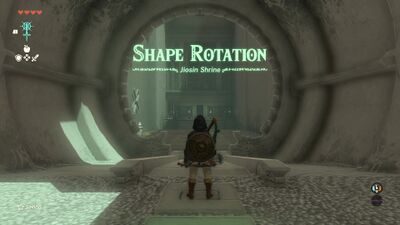
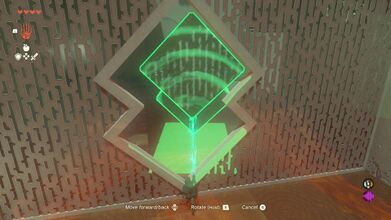
'''Jiosin Shrine''', also known as ''Shape Rotation'', is a [[Shrine of Light]] from ''[[The Legend of Zelda: Tears of the Kingdom|Tears of the Kingdom]]''. | '''Jiosin Shrine''', also known as ''Shape Rotation'', is a [[Shrine of Light]] from ''[[The Legend of Zelda: Tears of the Kingdom|Tears of the Kingdom]]''. | ||
This shrine is found just south of | This shrine is found just south of [[Lookout Landing]] in [[Hyrule Field (Breath of the Wild)#Tears of the Kingdom|Hyrule Field]], right next to the [[Hyrule Field Chasm]]. | ||
==Shape Rotation== | ==Shape Rotation== | ||
*Walk into the room on the left and use Ultrahand to grab the shape. Move it through the large 'X' opening in the wall to get it back to the main room. Then use the shape as a ramp to get across the gap and continue onward to the next room. | *Walk into the room on the left and use [[Ultrahand]] to grab the shape. Move it through the large 'X' opening in the wall to get it back to the main room. Then use the shape as a ramp to get across the gap and continue onward to the next room. | ||
*Walk into the room on the right and grab the large boulder. Rotate it to fit into the | *Walk into the room on the right and grab the large boulder. Rotate it to fit into the hole to get back to the main room. | ||
*Within this room there is a treasure chest further up. Use the object and rotate it so that it looks there are two | *Within this room there is a treasure chest further up. Use the object and rotate it so that it looks there are two cubes. Arrange it so the bottom cube falls into the hole, with the top cube against the wall. This creates a staircase of sorts that Link can climb up. Open the chest to get a [[Hasty Elixir]]. | ||
*The next opening is a bit trickier. Rotate the shape so that the part facing you is flat and in a diamond shape. Then move the shape through one of the diamond shaped holes. You can arrange it so the entire shape fits in at once. Or, if only half of the object gets through, you can still | *The next opening is a bit trickier. Rotate the shape so that the part facing you is flat and in a diamond shape. Then move the shape through one of the diamond shaped holes. You can arrange it so the entire shape fits in at once. Or, if only half of the object gets through, you can still maneuver around without rotating it any further. Link will be able to push it through the hole. | ||
*Now you will need to position the shape to make a staircase to climb up to the top of the shrine. Rotate the shape so that it looks like two cubes and one of them is flat on the ground. You want to position it so the upper cube is | *Now you will need to position the shape to make a staircase to climb up to the top of the shrine. Rotate the shape so that it looks like two cubes and one of them is flat on the ground. You want to position it so the upper cube is partially sitting on top of the lower platform. | ||
*When positioned right, jump on the small platform, then the lower cube. Then jump up to the higher cube and up to the top of the ledge. | *When positioned right, jump on the small platform, then the lower cube. Then jump up to the higher cube and up to the top of the ledge. | ||
*Run over to the altar and collect the Light of Blessing. | *Run over to the altar and collect the [[Light of Blessing]]. | ||
==Video Walkthrough== | |||
{{Youtube|nPmIQxmPU0M|360|Video Walkthrough of Jiosin Shrine}} | |||
{{Clear}} | |||
==Gallery== | ==Gallery== | ||
<gallery widths="400px" heights="220px"> | <gallery widths="400px" heights="220px"> | ||
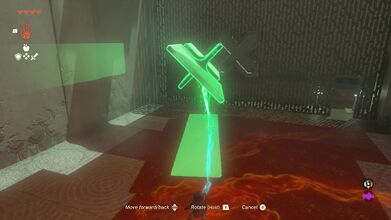
File:Jiosin-Shrine-2.jpg|Grab the object with [[Ultrahand]] and position to fit through the hole | |||
File:Jiosin-Shrine-3.jpg|Then use the object as a ramp to get across | |||
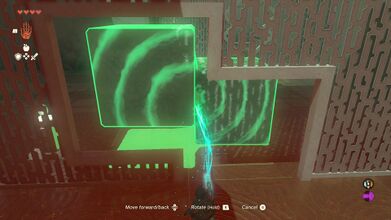
File:Jiosin-Shrine-4.jpg|Grab the double box shape and push it through the hole | |||
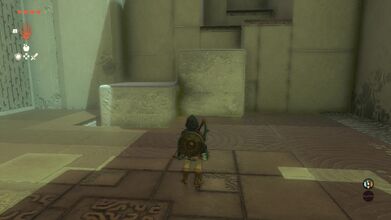
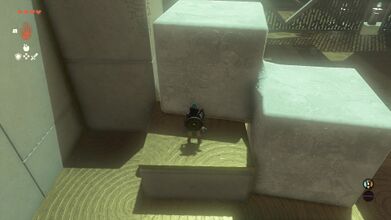
File:Jiosin-Shrine-5.jpg|Arrange the double block accordingly and then climb up to the chest to get a [[Hasty Elixir]] | |||
File:Jiosin-Shrine-6.jpg|Rotate the block to fit through the awkward hole. There is some wiggle room here and it doesn't need to be perfect | |||
File:Jiosin-Shrine-7.jpg|Position the blocks so you can climb up like stairs | |||
</gallery> | </gallery> | ||
{{Listbox|Tears of the Kingdom Shrines}} | |||
{{Cat|Tears of the Kingdom Shrines}} | {{Cat|Tears of the Kingdom Shrines}} | ||
{{Cat|Tears of the Kingdom Central Hyrule Shrines}} | |||
Latest revision as of 08:08, November 23, 2023
Jiosin Shrine

Games | ||
Location | ||
Depths Counterpart | ||
Items | ||
Rewards | ||
| Attributes | ||
|---|---|---|
Type | ||
Jiosin Shrine, also known as Shape Rotation, is a Shrine of Light from Tears of the Kingdom.
This shrine is found just south of Lookout Landing in Hyrule Field, right next to the Hyrule Field Chasm.
Shape Rotation
- Walk into the room on the left and use Ultrahand to grab the shape. Move it through the large 'X' opening in the wall to get it back to the main room. Then use the shape as a ramp to get across the gap and continue onward to the next room.
- Walk into the room on the right and grab the large boulder. Rotate it to fit into the hole to get back to the main room.
- Within this room there is a treasure chest further up. Use the object and rotate it so that it looks there are two cubes. Arrange it so the bottom cube falls into the hole, with the top cube against the wall. This creates a staircase of sorts that Link can climb up. Open the chest to get a Hasty Elixir.
- The next opening is a bit trickier. Rotate the shape so that the part facing you is flat and in a diamond shape. Then move the shape through one of the diamond shaped holes. You can arrange it so the entire shape fits in at once. Or, if only half of the object gets through, you can still maneuver around without rotating it any further. Link will be able to push it through the hole.
- Now you will need to position the shape to make a staircase to climb up to the top of the shrine. Rotate the shape so that it looks like two cubes and one of them is flat on the ground. You want to position it so the upper cube is partially sitting on top of the lower platform.
- When positioned right, jump on the small platform, then the lower cube. Then jump up to the higher cube and up to the top of the ledge.
- Run over to the altar and collect the Light of Blessing.
Video Walkthrough
Video Walkthrough of Jiosin Shrine
Gallery
Grab the object with Ultrahand and position to fit through the hole

Then use the object as a ramp to get across
Grab the double box shape and push it through the hole
Arrange the double block accordingly and then climb up to the chest to get a Hasty Elixir
Rotate the block to fit through the awkward hole. There is some wiggle room here and it doesn't need to be perfect
Position the blocks so you can climb up like stairs


