Koukot Plateau: Difference between revisions
Tags: Mobile edit Mobile web edit |
mNo edit summary |
||
| Line 2: | Line 2: | ||
| image = [[File:Koukot-Plateau.jpg|400px]] | | image = [[File:Koukot-Plateau.jpg|400px]] | ||
| caption = | | caption = | ||
| game = ''[[The Legend of Zelda: Breath of the Wild|Breath of the Wild]]'' | | game = ''[[The Legend of Zelda: Breath of the Wild|Breath of the Wild]]''<br/>''[[The Legend of Zelda: Tears of the Kingdom|Tears of the Kingdom]]'' | ||
| enemies = | | enemies = | ||
| inhab = | | inhab = | ||
| Line 12: | Line 12: | ||
}} | }} | ||
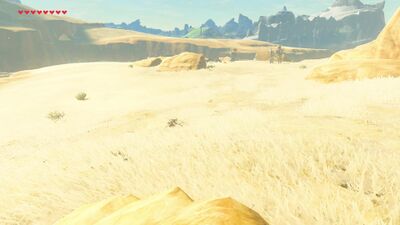
The '''Koukot Plateau''' is a location in ''[[The Legend of Zelda: Breath of the Wild|Breath of the Wild]]''. | The '''Koukot Plateau''' is a location in ''[[The Legend of Zelda: Breath of the Wild|Breath of the Wild]]'' and ''[[The Legend of Zelda: Tears of the Kingdom|Tears of the Kingdom]]''. | ||
==''Breath of the Wild''== | ==''Breath of the Wild''== | ||
| Line 20: | Line 20: | ||
===Animals=== | ===Animals=== | ||
<gallery mode=nolines> | |||
File:Wasteland-coyote.jpg|[[Wasteland Coyote]] | |||
</gallery> | |||
===Enemies=== | ===Enemies=== | ||
<gallery mode=nolines> | |||
File:Red-Bokoblin.png|[[Bokoblin|Red Bokoblin]] | |||
File:Blue-Lizalfos.png|[[Blue Lizalfos]] | |||
File:Black-Lizalfos.png|[[Black Lizalfos]] | |||
File:Electric-keese.jpg|[[Electric Keese]] | |||
File:Stalmoblin.jpg|[[Stalmoblin]] | |||
</gallery> | |||
===Materials=== | ===Materials=== | ||
<gallery mode=nolines> | |||
File:Cold-darner.png|[[Cold Darner]] | |||
File:Fairy-botw.png|[[Fairy]] | |||
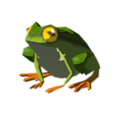
File:Hot-footed-frog.png|[[Hot-Footed Frog]] | |||
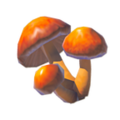
File:Sunshroom.png|[[Sunshroom]] | |||
File:Winterwing-butterfly.png|[[Winterwing Butterfly]] | |||
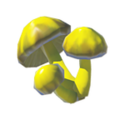
File:Zapshroom.png|[[Zapshroom]] | |||
</gallery> | |||
===Nearby Korok Seeds=== | ===Nearby Korok Seeds=== | ||
| Line 50: | Line 50: | ||
<section begin=Seed588summary />[[File:Korok588.png|200px|thumb|left|Solve the Magnesis Block puzzle near the top of the cliff.]]<section end=Seed588summary />Near the top of the cliff, solve the Magnesis block puzzle.{{Korok Seed|Seed588}}{{Clear|left}} | <section begin=Seed588summary />[[File:Korok588.png|200px|thumb|left|Solve the Magnesis Block puzzle near the top of the cliff.]]<section end=Seed588summary />Near the top of the cliff, solve the Magnesis block puzzle.{{Korok Seed|Seed588}}{{Clear|left}} | ||
{{Cat|Breath of the Wild Locations}} | {{Cat|Breath of the Wild Gerudo Locations}} | ||
{{cat|Tears of the Kingdom Gerudo Locations}} | |||
Revision as of 16:45, June 22, 2023
Games | ||
Location | ||
Related | ||
The Koukot Plateau is a location in Breath of the Wild and Tears of the Kingdom.
Breath of the Wild
The Koukot Plateau is surrounded on three sides by the Gerudo Canyon down below and it is just north of the Wasteland Tower. On the plateau, there is an enemy camp with a Red Bokoblin, a Blue Lizalfos, and some Black Lizalfos. After defeating all the enemies, a treasure chest will appear with a Knight's Bow. A second treasure chest can be found at the southeast portion of the area, buried in the ground, and it contains a Purple Rupee.
The higher plateau to the south is where the South Koukot Plateau is located, with there being a Stone Talus right in the center of the area.
Animals
Enemies
Materials
Nearby Korok Seeds
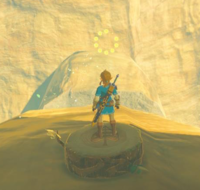
Stand on the nearby seed platform and then sprint to the seed.
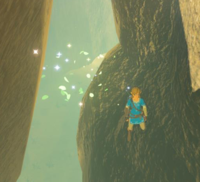
Examine the fairy lights in the rock bridge's gap.
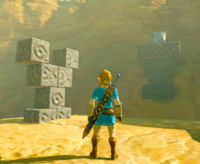
Near the top of the cliff, solve the Magnesis block puzzle.


