Gallery:A Link Between Worlds: Difference between revisions
Jump to navigation
Jump to search
Want an adless experience? Log in or Create an account.
| Line 6: | Line 6: | ||
<gallery> | <gallery> | ||
File:Hyrule and Lorule Reflections - ALBW.jpg|Artwork of [[Hyrule]] and [[Lorule]] | File:Hyrule and Lorule Reflections - ALBW.jpg|Artwork of [[Hyrule]] and [[Lorule]] | ||
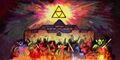
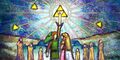
File:Link-Lorule-Hyrule.png|[[Link (A Link Between Worlds)|Link]] looks toward [[Hyrule Castle]] and [[Lorule Castle]], ghostly images of [[Seres]], [[Zelda]], [[Ravio]] & [[Impa]] visible above; and [[Hilda]] & [[Yuga]] below. | File:Link-Lorule-Hyrule.png|[[Link (A Link Between Worlds)|Link]] looks toward [[Hyrule Castle]] and [[Lorule Castle]], ghostly images of [[Seres]], [[Zelda (A Link Between Worlds)|Zelda]], [[Ravio]] & [[Impa]] visible above; and [[Hilda]] & [[Yuga]] below. | ||
File:The-Master-Sword-Link-Between-Worlds.jpg|The [[Master Sword]] | File:The-Master-Sword-Link-Between-Worlds.jpg|The [[Master Sword]] | ||
File:Link-Dungeon-Crawling.jpg|Link dungeon crawling | File:Link-Dungeon-Crawling.jpg|Link dungeon crawling | ||
Latest revision as of 14:48, November 30, 2022
| This article is a stub. You can help the Zelda Dungeon Wiki by expanding it. |
Below is a collection of official artwork and other media from A Link Between Worlds.
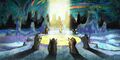
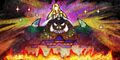
Scene Artwork
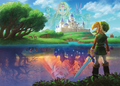
Link looks toward Hyrule Castle and Lorule Castle, ghostly images of Seres, Zelda, Ravio & Impa visible above; and Hilda & Yuga below.
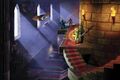
The Master Sword
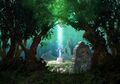
Link dungeon crawling
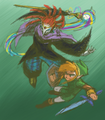
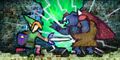
Preliminary Sketch of Link fighting Yuga
A Link Between Worlds Story Art 1
A Link Between Worlds Story Art 2
A Link Between Worlds Story Art 3
A Link Between Worlds Story Art 4
A Link Between Worlds Story Art 5


