Hebra North Crest: Difference between revisions
No edit summary |
mNo edit summary |
||
| Line 1: | Line 1: | ||
{{Infobox|location | {{Infobox|location | ||
| image = [[File:Hebra-North-Crest.jpg|300px]] | | image = [[File:Hebra-North-Crest.jpg|300px]] | ||
| caption = | |||
| game = ''[[The Legend of Zelda: Breath of the Wild|Breath of the Wild]]'' | | game = ''[[The Legend of Zelda: Breath of the Wild|Breath of the Wild]]'' | ||
| inhab | | enemies = | ||
| inhab = | |||
| pointsint = | | pointsint = | ||
| item | | location = | ||
| item = | |||
| natseason = | | natseason = | ||
| related = [[Hebra North Summit]]<br/>[[Goflam's Secret Hot Spring]] | | related = [[Hebra North Summit]]<br/>[[Goflam's Secret Hot Spring]] | ||
| Line 11: | Line 14: | ||
'''Hebra North Crest''' is an area in ''[[The Legend of Zelda: Breath of the Wild|Breath of the Wild]]''. | '''Hebra North Crest''' is an area in ''[[The Legend of Zelda: Breath of the Wild|Breath of the Wild]]''. | ||
== | ==''Breath of the Wild''== | ||
The Hebra North Crest is found at the north end of the [[Hebra Mountains]]. It includes the area surround the [[Goflam's Secret Hot Spring]] and is located just east of the [[Hebra North Summit]]. Like the rest of the Hebra Mountains, the temperature is bitterly cold, requiring Link to wear armor with [[Cold Resistance]] in order to survive. | The Hebra North Crest is found at the north end of the [[Hebra Mountains]]. It includes the area surround the [[Goflam's Secret Hot Spring]] and is located just east of the [[Hebra North Summit]]. Like the rest of the Hebra Mountains, the temperature is bitterly cold, requiring Link to wear armor with [[Cold Resistance]] in order to survive. | ||
| Line 18: | Line 21: | ||
At the far west end of the crest, just southwest of the enemy camp, there is a treasure chest buried in the snow that contains a [[Diamond]]. | At the far west end of the crest, just southwest of the enemy camp, there is a treasure chest buried in the snow that contains a [[Diamond]]. | ||
==Animals== | ===Animals=== | ||
{{Gallery}} | {{Gallery}} | ||
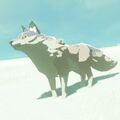
{{Gallery/Box|file=Cold-footed-wolf.jpg|link=Cold-Footed_Wolf|caption=[[Cold-Footed Wolf]]}} | {{Gallery/Box|file=Cold-footed-wolf.jpg|link=Cold-Footed_Wolf|caption=[[Cold-Footed Wolf]]}} | ||
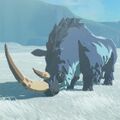
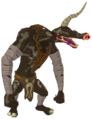
{{Gallery/Box|file=Great-horned-rhinoceros.jpg|link=Great-Horned_Rhinoceros|caption=[[Great-Horned Rhinoceros]]}} | {{Gallery/Box|file=Great-horned-rhinoceros.jpg|link=Great-Horned_Rhinoceros|caption=[[Great-Horned Rhinoceros]]}} | ||
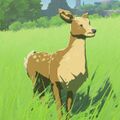
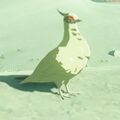
{{Gallery/Box|file=Mountain-doe.jpg|link=Mountain_Doe | {{Gallery/Box|file=Mountain-doe.jpg|link=Mountain_Doe|caption=[[Mountain Doe]]}} | ||
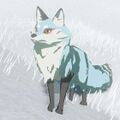
{{Gallery/Box|file=Snowcoat-fox.jpg|link=Snowcoat_Fox|caption=[[Snowcoat Fox]]}} | {{Gallery/Box|file=Snowcoat-fox.jpg|link=Snowcoat_Fox|caption=[[Snowcoat Fox]]}} | ||
{{Gallery/Box|file=Tabantha-moose.jpg|link=Tabantha_Moose|caption=[[Tabantha Moose]]}} | {{Gallery/Box|file=Tabantha-moose.jpg|link=Tabantha_Moose|caption=[[Tabantha Moose]]}} | ||
| Line 28: | Line 31: | ||
{{Gallery/Bottom}} | {{Gallery/Bottom}} | ||
==Enemies== | ===Enemies=== | ||
{{Gallery}} | {{Gallery}} | ||
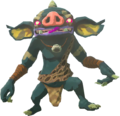
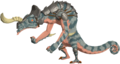
{{Gallery/Box|file=Black-Moblin.png|link=Black_Moblin|caption=[[Black Moblin]]}} | {{Gallery/Box|file=Black-Moblin.png|link=Black_Moblin|caption=[[Black Moblin]]}} | ||
| Line 36: | Line 39: | ||
{{Gallery/Bottom}} | {{Gallery/Bottom}} | ||
==Materials== | ===Materials=== | ||
{{Gallery}} | {{Gallery}} | ||
{{Gallery/Box|file=Chillshroom.png|link=Chillshroom|caption=[[Chillshroom]]}} | {{Gallery/Box|file=Chillshroom.png|link=Chillshroom|caption=[[Chillshroom]]}} | ||
| Line 45: | Line 48: | ||
{{Gallery/Bottom}} | {{Gallery/Bottom}} | ||
==Nearby Korok Seeds== | ===Nearby Korok Seeds=== | ||
<section begin=Seed417summary />[[File:Korok417.png|200px|thumb|left|Pick up the rock from the center of the circle and put it in the missing spot on the outer circle.]]<section end=Seed417summary />Use the rock in the middle to complete the rock circle.{{Korok Seed|Seed417}}{{Clear|left}} | <section begin=Seed417summary />[[File:Korok417.png|200px|thumb|left|Pick up the rock from the center of the circle and put it in the missing spot on the outer circle.]]<section end=Seed417summary />Use the rock in the middle to complete the rock circle.{{Korok Seed|Seed417}}{{Clear|left}} | ||
{{Cat|Breath of the Wild Locations}} | {{Cat|Breath of the Wild Locations}} | ||
Revision as of 00:57, October 21, 2021

Hebra North Crest is an area in Breath of the Wild.
Breath of the Wild
The Hebra North Crest is found at the north end of the Hebra Mountains. It includes the area surround the Goflam's Secret Hot Spring and is located just east of the Hebra North Summit. Like the rest of the Hebra Mountains, the temperature is bitterly cold, requiring Link to wear armor with Cold Resistance in order to survive.
At the northwest end of the region, there is an enemy bases at the lower elevation. Here there are some enemy Black Moblin who wield Ice Arrows, as well as some Ice Keese and some Blue Bokoblin archers. At the top of the base there is a wooden chest that contains five Fire Arrows.
At the far west end of the crest, just southwest of the enemy camp, there is a treasure chest buried in the snow that contains a Diamond.
Animals

Enemies
Materials


Nearby Korok Seeds

Use the rock in the middle to complete the rock circle.