- Chapter 1 – Mercay Island
- Chapter 2 – Temple of Fire
- Chapter 3 – Ocean King Part II
- Chapter 4 – Temple of Wind
- Chapter 5 – Ocean King Part III
- Chapter 6 – Temple of Courage
- Chapter 7 – Ghost Ship
- Chapter 8 – Ocean King Part IV
- Chapter 9 – Goron Temple
- Chapter 10 – Temple of Ice
- Chapter 11 – Ocean King Part V
- Chapter 12 – Mutoh’s Temple
- Chapter 13 – Ocean King Part VI
13.1 Phantom Sword
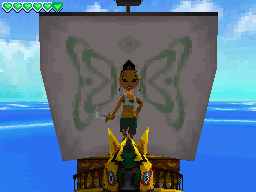
Return to Lineback and set sail. With all three Pure Metals in hand we want to make our way back over to Zauz. Warp over to the northwestern quadrant and land at Zauz’s Island. Speak with Zauz to give him the Pure Metals but he states that it will take some time before they are ready. Return to Lineback, but you’ll find that you will have received a letter from Jolene. She has challenged you to one last duel. Go and set sail to seek out Jolene.


This is one of the few times where you actually have to face off with Jolene, as it is the event that triggers Zauz to finish forging the blade. Allow Jolene’s ship to ambush you and batter her one last time. The battle is just like the previous encounters except that she is a bit more ferocious. She’s a bit faster and after striking her a few times, she won’t give up as easily. Keep at it until Jolene has been defeated.


Return to Zauz’s Island and you’ll find that he has finished forging the sword. However, it is missing a handle! Zauz tells you that you need to visit Oshus over at Mercay Island as he has the ability to combine it with the Sand of Hours.


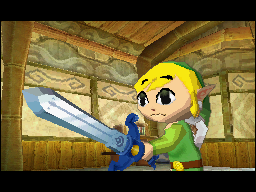
Return to Mercay Island and make your way over to Oshus at the west side of the island. Speak with him and he will infuse the blade with the Sand of Hours, forming the Phantom Sword. With this power, Link is able to defeat Bellum.


Leave the hut and make your way towards the Temple of the Ocean King. Once you reach the northeast part of of the island it will trigger a cut-scene with Linebeck. After some quick chit-chat, make your way over to the Temple of the Ocean King.


After completing Mutoh’s Temple, King Mutoh will soon send you a letter in the mail. This will only occur after you saved your game and rebooted your console. He extends his gratitude and will reward Link with a Power Gem.Optional: Power Gem #20


At this point you have collected all 20 Power Gems, all 20 Courage Gems, and all 20 Wisdom Gems. Make your way over to Spirit Island to get the final upgrades. The Power upgrade allows you to do more damage, the Wisdom upgrade will cause you to take less damage, and the Courage upgrade will allow you to perform a large beam blade attack.Optional: Spirit Gem Upgrades

13.2 Temple of the Ocean King VI
This final trip through the Temple of the Ocean King is not too different than the last one. There are a couple of uses of our newly acquired Hammer in some of the later floors of the Temple. However, the major difference is that now that we have the Phantom Sword, we finally have the ability to defeat all of the Phantoms that we run into. Furthermore, if you defeat all of the Phantoms on a single floor, an additional treasure chest will appear.
The treasure that is left by Phantoms on all of the floors before the midway point is just a random treasure. It is not until after the midway point where you finally start to get some Ship Parts, as well as some Rupees. Thus, depending on what you’d like to do, you can just skip to the halfway point of the Temple. This guide will briefly run through all of the floors in the Temple. Also, you can also take a look at our Ocean King guide to see if you can complete the challenge of finishing the entire Temple with a full 25-minutes left in your Hourglass.
There is nothing new in this room, so continue onward to Floor B1.
There are two Red Phantoms in this room that we can now defeat. Wait until they are walking away from you and then strike them in the back. Open the treasure chest at the bottom-left corner of the room to get a random treasure. Collect the small key and head down the steps.


There are two Phantoms in this room and the one at the north end of the room could give you trouble as its back is against the wall. The key here is to allow the Phantom to see you and then quickly run to the safe zone at the northeast corner. Once it turns around to run back, quickly defeat it.


Hit the two switches to get the small key to drop and run over and grab it. Defeat the Red Phantom, using the east safe zone if needed. Use the small key and head down to the next floor.
Circle around the room to defeat the two Phantoms and a treasure chest appears near the south end of the room. You’ll have to make your way up to the top of the platform at the southeast part of the room and then use the Grappling Hook to get over to the treasure. Open it up to get a random treasure. Be sure to snag the small key in this room as it could save you some time later. At the northwest corner of the room, use the Grappling Hook on the two torches and launch yourself up, bypassing the puzzle in this room. Continue through the next door and down to the floor below.


Defeat the first Phantom right when you enter this floor and then run around and defeat the second Phantom. The treasure chest will appear at the west side of the room and it contains a random treasure. You can grab the small key in this room if you’d like, but then be sure to use use a bombchu at the northwest corner of the room to hit the switch. Open the locked door at this corner of the room and use this staircase to get down to the floor below.


There is nothing new in this room. Get to the stairs at the north end of the room and head down to the next floor.
Defeat the two Phantoms and a treasure chest appears at the south end of the room. Open it up to get a random treasure. Draw the Triforce symbol onto the red door and then continue down to the floor below.


There are three Phantoms on this floor and if you defeat all three of them, a treasure chest appears at the northwest corner of the map. The Phantom at the southeast corner is best defeated by luring it to the nearby safe zone or using the nearby red pot. However, once you make it to the right side of the room, the only way to get back to the left side of the room is to head down to Floor B8, run across the hidden pathway at the south end of the room, and then back up the stairs to return to B7. The treasure chest contains a random Ship Part! Be sure to get the Round Crystal, located in the treasure chest at the north end of the room. Grab it and then head down to the floor below.


Defeat the three Phantoms in this room and a treasure chest appears on the east side. Open it up to get a Ship Part. Use a bombchu to hit the switch and open the door near the northeast side of the room. Carry the Round Crystal down to the next floor.


This room is identical to the last time we visited. We were able to defeat this Phantom before by sending it down a trapdoor, but now it is easier with the Phantom Sword. One recommendation is to lure it to the southwest corner before getting rid of it. Open the treasure chest here to get a Ship Part. Use the Square Crystal to get the Triangle Crystal at the northwest corner of the room. Then place the crystals in the proper order: Square, Round, and Triangle. Go through the door and then make your way to the floor below.


This is another room where we were previously able to defeat both Phantoms. From the entrance we first recommend using a bombchu to send through the small hole and hit the crystal switch below. This will lower the spikes on the left. Wait and defeat the Phantom on the right side of the room and then use your sword or the boulder to defeat the second phantom. A treasure chest will appear and it contains a Big Green Rupee.
At the Southwest corner of the room there is a ground switch off in the distance. Use your Hammer to smack it and a large treasure chest will appear. Open it up to get a Treasure Map.Optional: Treasure Map #30


In this room we recommend luring the Phantoms to a safe zone and defeating them when they turn away. After defeating both of them, open the treasure chest at the southwest side of the room to get a Big Red Rupee. Don’t bother with the puzzle located in this room, and instead, just head down the stairs at the east side of the room.


Hit the crystal switch found here and a treasure chest will appear at the east end of the room. This treasure chest is on a timer, so you’ll have to be quick. Use the Hammer to catapult yourself over the ledge and quickly run to the treasure chest to get the Treasure Map. It might be a good idea to get rid of the Phantom and Phantom Eyes before trying to get this treasure.Optional: Treasure Map #31


You have to collect the three Force Gems in this room, just like before. This time however, we can obviously defeat all three of the Phantoms. Once they are all defeated, open the treasure chest to get a Big Gold Rupee! Place all the Force Gems in their proper spots and head down to the next Floor.


This floor is much different than the last time we were here. As soon as you step out of the safe zone, a trio of Blue Phantoms will appear. If they spot you, red flames will cover the exits on the side and the only way to escape is by defeating them, or using your shovel on the soil spot. The trick here is to first grab the red pot at the northeast corner of the room. Then jump down the ledge on the left side and quickly toss the pot on the ground. Run to this safe zone so that the Phantoms cannot harm you.


While standing in the safe zone, you can use your hammer to draw the Phantoms near. Carefully defeat the three Blue Phantoms and then three Red Phantoms will appear. Defeat these guys and then defeat the three Warp Phantoms that appear next. With all nine phantoms defeated, you through the door that opens up.


We’ve finally made it! Run across the bridge and it will crumble behind you. A blue warp portal will appear and you can step in it to get back to the entrance of the Temple of the Ocean King. You can then step back into that same portal to immediately return to this chamber. So while Bellum is right up the stairs, this is a good time to do any extra preparation. You can purchase some potions, or if you haven’t collected any of the extra goodies such as the Gem Upgrades, Quiver Upgrade, or Heart Containers, now is a good time to do that. Additionally, it’s a good idea to upgrade Linebeck’s Ship with the best parts you have to give it a boost in health if you haven’t done so before.


We picked up two Treasure Maps in this final adventure through the Temple of the Ocean King. While it may seem completely out of your way, you can warp out of the Ocean King to uncover these two Sunken Treasure. Sunken Treasure #30 – Northeast Quadrant – South of the Isle of Ruins, the chest contains a Ship Part. Sunken Treasure #31 – Northeast Quadrant – South of the Isle of the Dead, the treasure contains a Big Gold Rupee.Optional: Sunken Treasure
If you make your way through the Temple of the Ocean King again, after defeating the nine phantoms on Floor B13 and making it to the final chamber room, two treasure chests will appear. These often have rare Ship Parts and treasure, including an opportunity to get a piece of the Gold Ship Set.Optional: Bonus Treasure Chests

13.3 Bellum
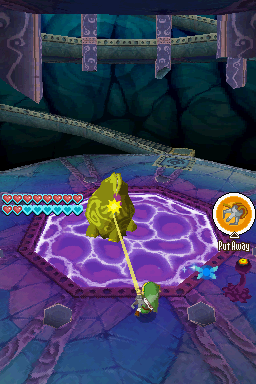
Bellum will appear and drop down into a pool of purple ooze to begin the first phase of the battle. Bellum moves around very slowly and will occasionally toss some of that ooze towards Link. The ooze can turn into small minions which will try to attack you. You can get rid of them with a simple sword slash and they’ll occasionally drop some goodies for you.
What you want to do is use your Grappling Hook to pull some of the ooze off of Bellum. After enough has been pulled, you’ll be able to pull a final piece of ooze which is located right by its mouth. This will pull Bellum over to you and leave it stunned temporarily. Deliver a series of sword slashes and Bellum will bounce around in the pond. Chase after it and keep slashing away. After enough hits Bellum will leave its pond, floating up to the second floor.


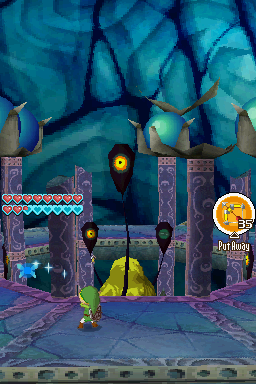
Climb the steps up to the second floor and you’ll see Bellum’s tentacles attach to the various pillars. Bellum will occasionally try to swipe at you with one of its tentacles, but as long as you keep moving you’ll be fine. Whip out your bow and arrow and shoot the eyes of the tentacles that are on the pillars. Make your way around the room, shooting the tentacles one by one. Once they have all been hit, Bellum will drop down to the first floor. This will repeat the first phase of the battle, although this time Bellum will shoot out more ooze. Just repeat the same strategies with the Grappling Hook to take care of Bellum.


Bellum will return to the second floor and the second phase of the battle repeats. This time however, the eyes on the tentacles will only stay open for a short while. Keep on the move and once one of the eyes opens up, shoot it with an arrow. If you do run out of arrows, you’ll have to destroy some of the ooze minions Bellum shoots out, as they will occasionally give out arrows as a reward.


After several hits, Bellum will float all the way to the top floor. Bellum will more aggressively swing its tentacles around. When Bellum attacks with all its tentacles, you can carefully hide behind one of the pillars. Once again move around the room and shoot all of the eyes with arrows. Once all of them have been hit, a large orb will be released from Bellum. Ciela will fly over, combining with the orb. This will return some of her lost memories and she re-awakens as the Spirit of Time and Courage.


Return to the bottom floor and the staircases will crumble away. Ciela will occasionally release Phantom Spheres and once you collect them, an hourglass symbol appears on the ground. While Bellum is floating around in a circle, tap the hourglass symbol and quickly draw the shape of an hourglass. Doing so will freeze time momentarily. If Bellum is moving around in a circle at this time, you can run up and slash away at its eye.
While Bellum is moving around, as long as you stay close to the pool of ooze, it will never be able to harm you. It’s just a matter of getting the right rhythm, drawing the hourglass symbol. After enough hits, Bellum will be defeated.


The room will begin to crumble and using some of his restored powers, Oshus will warp Link and Ciela back to Linebeck’s Ship. After a cut-scene showing the re-awakening of Tetra, she is quickly snatched up by Bellum, leading to the next boss battle.


Bellum takes Tetra to the Ghost Ship and infects it with all of the ooze. During this battle Linebeck will control the ship, just moving from side to side. The Ghost Ship will shoot out ooze towards Link’s ship and you’ll need to destroy this ooze with shots from your cannon. As you make your way around the ship, just keep shooting all of the eyes that appear. They will re-appear occasionally, but just keep at it. Some of the larger eyes will appear on the ship’s deck. Keep sailing and shooting the eyes until all of them have been defeated, destroying the Ghost Ship in the process.


Link and the crew will climb on board the wreckage of the Ghost Ship. Bellum will once again appear, snatching up both Link and Tetra. This time it is Linebeck that comes to the rescue, but it is short lived. Bellum captures Linebeck and possess his body, leading to the final boss battle with Phantom Linebeck.


The massive phantom has extensive armor and is invulnerable from its front side. Ciela suggests hitting the monster in its backside, but as you try to get around it, the phantom will turn. Ciela will then unleash a Phantom Sphere. Just like before, draw the Hourglass symbol to freeze time. However, when you circle around Bellum, its eye is closed and you still cannot harm it.


Ciela will then fly behind Bellum, using the top screen as a secondary view. Now you can see when that eye opens up. Ciela is snatched up by Bellum and is unable to unleash a Phantom Sphere. You’ll now have to free her by striking Bellum. Attack Bellum and you’ll eventually lock swords with it. Rub the stylus to break free and then slash it one more time to temporarily free Ciela. She will be able to release a Phantom Sphere. Walk around and wait for Bellum’s eye to open up. Then use the Hourglass to freeze time. Quickly run to Bellum’s backside and slash away with your sword.


If you keep your distance from Bellum, it’ll occasionally perform a massive spin attack that is really hard to avoid. Try to roll away but it is rather difficult to avoid damage. The closer you stay to Bellum, the less likely it is to perform this attack.
When striking Bellum with your sword, you will usually attack it three times before it does a side step. Quickly attack it again before it gets a sword slash off. You’ll lock swords again and rub away with the stylus. Grab the Phantom Sphere that is released and repeat the process. That’s all there is to it, so just keep at it until Bellum is defeated.


That’s all folks. Give yourself a pat on the back for completing what I think is one of the best video games released for the Nintendo DS. Sit back and enjoy the ending scene and credits. Stick around for the post-credits scene as well!


- Chapter 1 – Mercay Island
- Chapter 2 – Temple of Fire
- Chapter 3 – Ocean King Part II
- Chapter 4 – Temple of Wind
- Chapter 5 – Ocean King Part III
- Chapter 6 – Temple of Courage
- Chapter 7 – Ghost Ship
- Chapter 8 – Ocean King Part IV
- Chapter 9 – Goron Temple
- Chapter 10 – Temple of Ice
- Chapter 11 – Ocean King Part V
- Chapter 12 – Mutoh’s Temple
- Chapter 13 – Ocean King Part VI
