- Chapter 1 – Inside The Great Deku Tree
- Chapter 2 – Princess of Destiny
- Chapter 3 – The Mighty Collection
- Chapter 4 – Dodongo’s Cavern
- Chapter 5 – Inside Jabu-Jabu’s Belly
- Chapter 6 – Timely Appearance
- Chapter 7 – Forest Temple
- Chapter 8 – Fire Temple
- Chapter 9 – Ice Cavern
- Chapter 10 – Water Temple
- Chapter 11 – Bottom of the Well
- Chapter 12 – Shadow Temple
- Chapter 13 – Spirit Temple
- Chapter 14 – Ganon’s Castle
10.1 Enter the Water Temple
Now that we have both the Iron Boots and Zora Tunic, we can enter the Water Temple. Play the Serenade of Water to quickly warp over to Lake Hylia. Before entering the temple, there is one optional Gold Skulltula that we can collect, over at the Lakeside Laboratory.
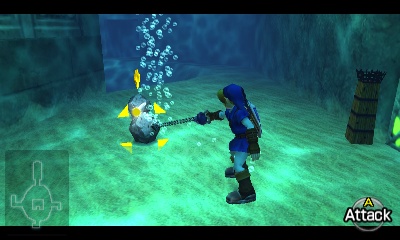
Enter the Lakeside Laboratory and use the Iron Boots to sink down to the bottom of the small pool. Roll into the wooden crate here and and a Skulltula will pop out. Use the Hookshot to defeat it and grab the token.Optional: Gold Skulltula #71
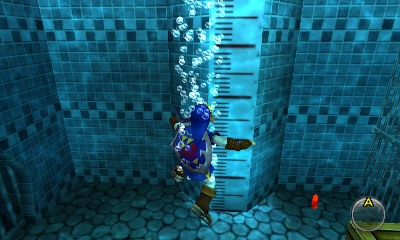
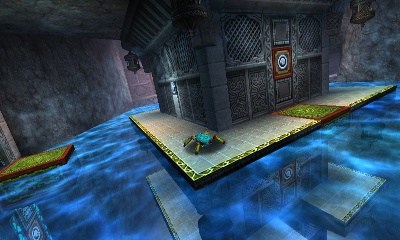
Now, as you’ve already noticed, the water has drained out of the lake and some of the ruins are now more readily viewable. Simply follow the ruins to the lowest point of the lake and sink down to find a grated entrance to the temple. To open it, wear the Iron Boots and Zora Tunic and stand right before it, then use the Hookshot to hit the crystal thing right above the doorway. This will cause the gate to lift up. When you’re ready, enter the temple.
10.2 Water Temple
Lowest Level – East (Ruto Room) – Once you enter the dungeon, walk forward and you’ll find yourself in the large central chamber. We will be returning to this room very often and I will refer to it as the main room.
Jump into the water and sink to the very bottom using your Iron Boots. We want to head through the opening on the bottom floor to the right, just between the two torches. Along the way, you’ll likely have an encounter with the enemy Spikes. Use your Hookshot to kill them and then enter the east passage entrance between the torches. In the 3DS version of the game, this will be highlighted by some green lines. As soon as you round the “S” shaped corridor you’ll witness a cut scene with, *gasp*, the adult Princess Ruto! She’s all grown up!


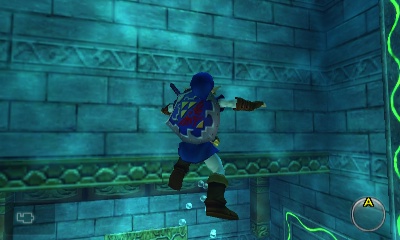
After an awkward and surprising one-way conversation in which she reminds you that she is your fiance, she will begin floating up. Take off your boots and follow her all the way to the top to find that she’s disappeared. =(. Go ahead and head through the door.
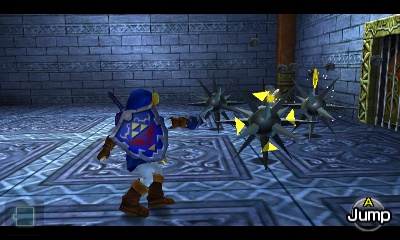
Dungeon Map Room – In this small room, you’ll be thrown into the midst of four Spikes all at once. Try to kill them from afar to avoid taking damage. Should you decide to get close, Deku Nuts are easily the most effective weapon to stun them all at once. After they’ve all been killed, a large chest appears containing the Dungeon Map. Nice.
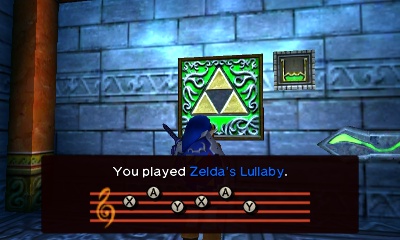
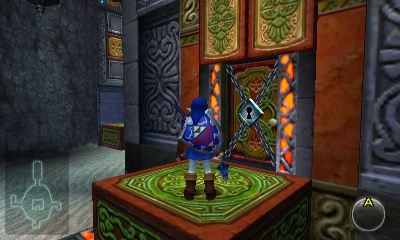
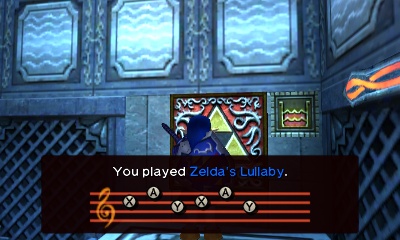
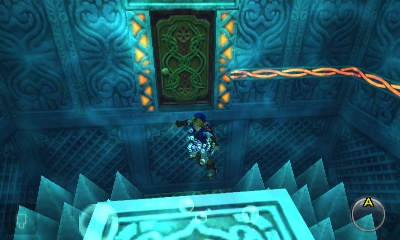
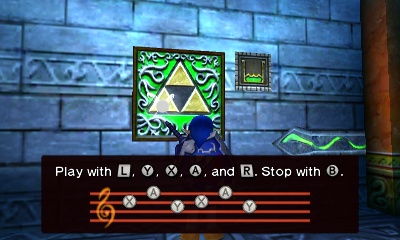
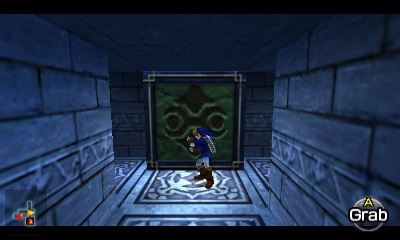
First Triforce Symbol – Go back to the previous room and stand in front of the Triforce symbol on the wall. In case you haven’t caught on yet, every time you see one of these symbols throughout the game, you’re supposed to play Zelda’s Lullaby. Doing so will cause the water level to go down to its lowest level. This is the first of three places you can change the water level that Ruto was talking about.
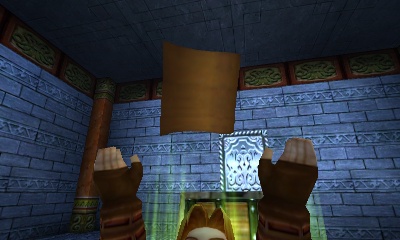
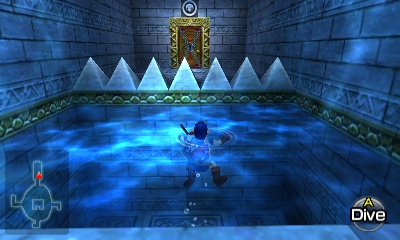
Jump down all the way to the lowest floor and you’ll see two torches against the door. Now that there’s no water, the single torch in the center of this small room is lit. Hmm… Either shoot arrows through the one torch to light the other two or simply just use Din’s Fire. Once both torches are lit, enter the small room.
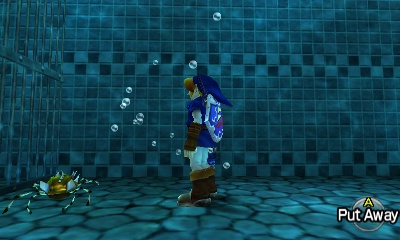
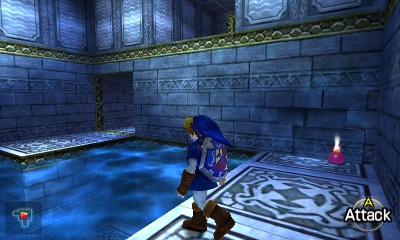
Shell Blade Room (1st Key) – Inside, you’ll find a new enemy known as the Shell Blade. You can target them from afar and use the Hookshot or Bow to defeat them when their mouths are open. Alternatively, just get close to all of them and kill them in one go with Din’s Fire. Snag the Small Key in the chest that appears, then return to the main room.


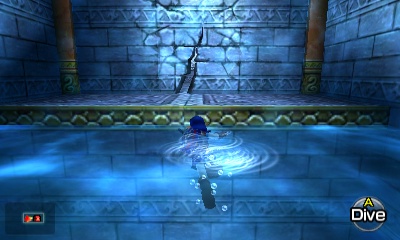
Lowest Level – South – Now take the south entrance, which is directly to your left and you return to the main room. This leads to a dead end, but you’ll notice the floor has a crack in it, so whip out a Bomb and blow open hole in the floor. Sink down and you’ll immediately come across a Shell Blade. At this point, you can either kill it with your Hookshot, or take off your boots and swim over it. In either case, go up on the other side and pop out above the water.


Get on the small platform and step on the switch to raise the water level in this room just a little bit. Climb up one level and now the statue that was submerged has raised, revealing a Hookshot target. Zip across and kill the two Tektites. I find it easier to maneuver past them before facing off because I don’t have to worry about falling in the water.
NOTE: This puzzle has slight differences in the N64 and 3DS versions of the game. In the N64 version, the crystal switch is beyond the gate, where as in the 3DS version has the crystal switch in front of the gate.
In the 3DS version, simply slash at the crystal switch to open the gate. In the N64 version of the game, walk up to the gate and use a Spin Attack to activate it, thus opening the door. Snag the Skulltula token and goodies, then return to the main room.
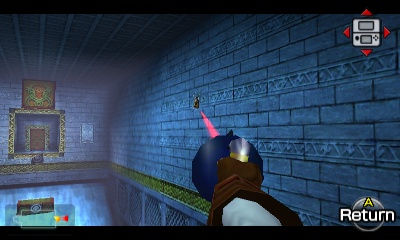
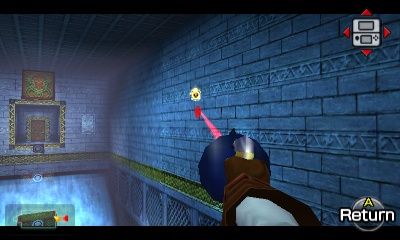
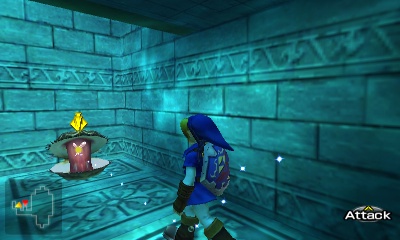
On the lowest level of the main chamber, walk through the south path and bomb the floor. Travel to the next room, step on the switch, and hookshot over to the target. Hit the crystal switch and snag the Gold Skulltula.Optional: Gold Skulltula #72


Lowest Level – West – Back in the main room, we want to make our way through the west entrance, where there is a block that is preventing you from passing. Stand on the platform here and push the block all the way back until it falls into a hole and clicks in place underwater. Sink down and back up on the other side.


First Water Pillar Room – In this small room, you need to get to the other side. Should you fall down into the pit, you can Hookshot your way back up. Smack the nearby crystal switch with your sword and jump onto the water pillar that raises up. Jump across to the other side and run right past the Tektite to the door.


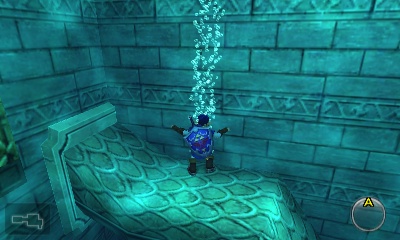
Spinning Water Room – This small room has a giant pool of water that spins around rapidly. Jump in and you’ll quickly see that the water will take you with it if you’re not heavy enough. There’s an iron dragon statue-like thing underwater that weaves in and out of the walls, try to land on its body in the opposite corner of the room from the door using your Iron Boots.
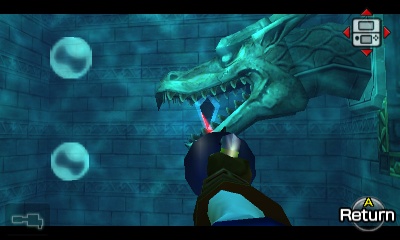
Once you’ve safely landed there and aren’t moving, hit the crystal switch in the dragon’s mouth with your Hookshot to open the nearby door. It’s only open for a few seconds, so Hookshot to the target on the wall in the alcove and run towards the door.


There are two Shell Blades in here that make this process terribly annoying. Your best bet is to simply avoid them. To do so, just take off your boots as you’re approaching the entrance and float up into the small area.
Once you make it, climb up and open the chest for a Small Key. Nice. Now hit the crystal switch in here and swim back to the entrance of the room. I like to use a Bomb to ensure I have enough time, but using your sword works just fine as well. Once you get back, go through the door.
First Water Pillar Room – Back in the room from a moment ago, kill the Tektite and Hookshot to the target across the way or simply shoot the crystal switch with an arrow. Work your way back to the main room. At the end, you’ll have to use your Iron Boots and Hookshot to get onto the platform.


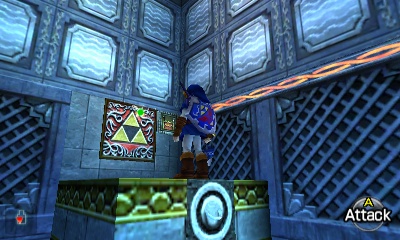
Center Pillar – You should have two keys at this point. At long last, enter the locked door in the center pillar of the main room. In the 3DS version, this door is surrounded by some red lines, indicating it will lead to another location where you can change the water level. Inside, run forward, turn around, and Hookshot up to the target on the side of the platform above you. Once you climb up, play Zelda’s Lullaby for the second Triforce to bring the water to the mid level.

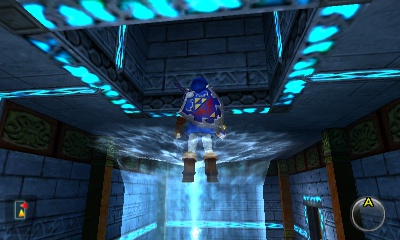
Now, this is the part that stumps most people: In that little cut scene where the water’s rising, it showed that platform below rises with the water, and it reveals a hidden hole that you can sink down into. This is made much more apparent in the Nintendo 3DS version of the game. Get on top of either of the platforms here, equip the Iron Boots and step between the platforms to land safely on the platform below. Sink down into the hole below.

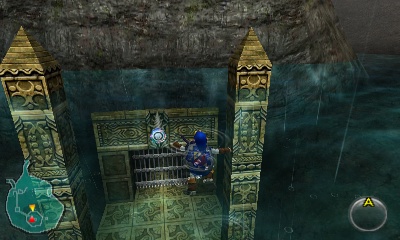
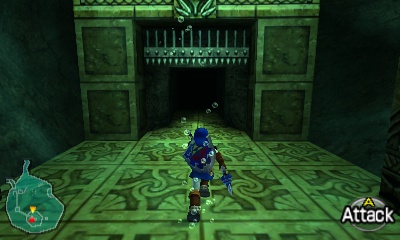
Temple’s Flooded Basement – Round the corner and you’ll find a lone crystal switch. Hit it from afar with your Hookshot, which will open up a gate above it, dropping down baddies to confront you. Defeat them one at a time while slowly inching your way forward until they’re all gone, which opens the gate above on the other side.


Float up and snag the Small Key from inside the chest. Nifty. Work your way back to the room where you just changed the water level and go through the door.


Mid Level – East (Compass Room) – Now that the water’s at the mid level, there are a few more rooms we can access. To help in finding all the keys, let’s snag the Compass, which is totally optional of course. Enter the east wing, with the two lone jars, and it’ll lead to some spikes.


Hookshot onto the platform across from the spikes on the floor, then turn around and Hookshot to the farthest target from you on the ceiling. This will take you all the way up. Now, we need to open the chest, but the crystal switch’s timer doesn’t last very long. Either lay a Bomb or shoot it from across the way with an arrow to open the chest in time. Return to the main room; just be careful when you jump down not to land on the spikes. 😉
Lowest Level – East (Ruto Room) – Next on the agenda: Blowing up a mysterious wall we saw earlier… Sink down to the lowest level and go back through the east entrance with the two torches, where we met Ruto. Take off your Boots and float up, where you’ll find a cracked wall all by its suspicious self. Blow it up and snag the Small Key inside the little treasure chest. Go back to the main room.

Mid Level – West – You should have three keys at this point. Go through the locked door on the west side. In the 3DS version, it has some blue lines around it, indicating it leads to another location where you can change the water level.
Here you’ll find another water pillar that’s obviously activated by the crystal switch across the room. Before jumping for it, walk near the water pillar to lure a Tektite from above. After killing it, stand on the water pillar and use either a Bomb or Arrows to activate the switch and go up.


Once you come out the door, you’ll find yourself in a small alcove in the main room next to the final Triforce symbol. Play Zelda’s Lullaby once more to lift the water back to the original height.


Highest Level – West – Now, you should have two keys at this point. If you don’t, you’ll have to change the water levels a couple times and refer to previous points in the walkthrough to figure out which ones you missed. Anyway, if you do indeed have two, enter the locked door on the west again at long last.
Waterfall Room – Inside, you’ll find an enormous room with a huge waterfall. First of all, kill the two Keese before they brew any trouble. Then jump down to the lowest platform directly below you. You’ll probably notice there’s a Skulltula on the wall that’s too far to get to. We’ll deal with that later.

Wait until you have a good chance, than Hookshot across to the platforms falling down. Obviously, you have to work your way up to the opposing door, which can be slightly frustrating as you’re losing “ground” so to speak. When you finally get high enough, Hookshot onto the platform and enter the locked door.
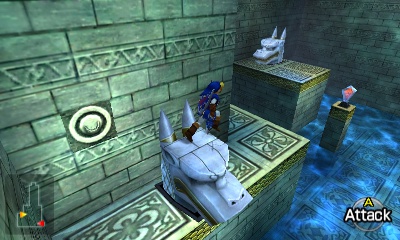
Statue And Tektite Room – In this room, you’ll have to hit the crystal switch in the center of the room with your Hookshot to raise and lower the water level repeatedly. By raising it, you’ll make the statues float up, revealing targets. Should you fall in while the water is low, you’ll have to equip the Iron Boots and hit the crystal switch with your Hookshot to get back to the platforms. First of all, I suggest raising the water, then luring the Tektites over to the starting platform where you can kill them off. Now, to the actual puzzle:


- Raise the water. Hookshot to the next platform (clockwise).
- Lower the water. Hookshot to the target on the left side of the next platform. Climb across the statue head.
- Raise the water. Hookshot to the last platform.
- Lower the water. Climb on top of the head of the statue. Raise the water again to go up.
Kill the two Blue Tektites up here, then kill the Like Like across the spikes. You can do so with a Spin Attack or Bombs. Hookshot the target on the ceiling to appear on the other side. Be sure to grab the goodies in the jars, a mini-boss is up ahead.
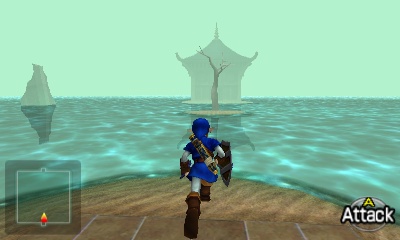
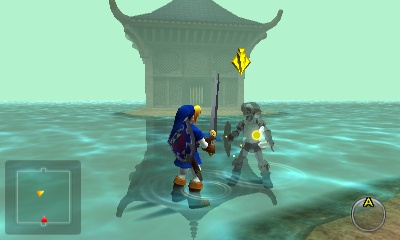
Room Of Illusions – This is one of the coolest rooms in the whole game. It looks like an endless sea of water, with bits of ruins and a single tree in the middle. If you walk along the edges of the “room” though, you’ll find there are invisible walls that clang like metal when you slash them with your sword, so you are still confined. At first, it may seem like nothing, so walk over to the opposite door and turn around. You’ll see something next to the tree in the middle…
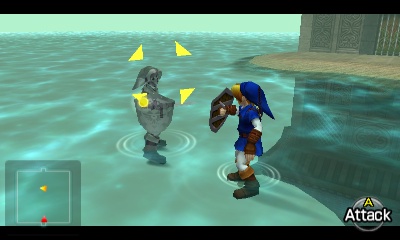
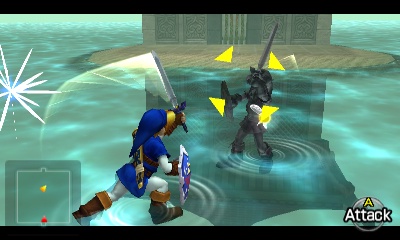
Dark Link – This battle can be intimidating at first, but after you begin seeing the patterns in his attacks and simply avoid the moves that cause him to react, he can be quite easily defeated. Basically, he mirrors your every movement at first, but then gets more aggressive as the battle progresses.
There are a number of ways you can go about defeating Dark Link. Let’s start with the easiest and safest ways of defeat him.
Din’s Fire – If you have Din’s Fire, you can use it repeatedly. While it uses up some magic and you cannot endlessly use it, it will hit Dark Link every single time that you do use it.
Biggoron’s Sword – If you have the Biggoron’s Sword, it demolishes Dark Link. Just walk up to him and slash away.

Since both of these items are optional up until this point in the game, you might have to try some other strategies. You can simply use the Master Sword to defeat Dark Link, but the battle becomes a bit more complicated. If you simply target Dark Link and just press your sword button, Link will attack, but Dark Link will block. If you rapidly press the sword attack, Dark Link will usually block 3 or 4 times, but you’ll usually be able to get a hit in.
A more riskier strategy is to attack Dark Link with the Master Sword without actually targeting him. If you simply swing your sword with targeting him, you will almost always connect. However, this method leaves you more vulnerable to his attacks. As the battle progresses, Dark Link will get significantly more aggressive with his attacks, so be careful. Lastly, jump attacks while using the Megaton Hammer can also be effective, but leave you vulnerable.

After you’ve defeated him, the room’s illusion will cease and it’ll revert to normal as well as open the next door. Spooky.
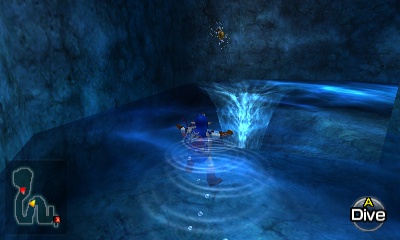
Longshot Room – Open the large chest to find the Longshot! With that in hand, stand next to the Time Block on the other side of the chest and play the Song of Time to remove it. Fall down into the cavern below.


Raging Water Cavern – This long, twisting corridor is filled with rushing water and “vortexes” that will suck you in and make you start the room over again if you’re not careful. There are two ways to go about this: use the Iron Boots, or risk swimming. It may seem logical that using the boots is by far the better option, but because of the way the ground can make you slip (some of the angles make you slide down repeatedly) it can actually be detrimental to your progress. I suggest swimming for the most part, taking it slow, the pressing B to swim fast when you need to.
To start off, jump in the water and head to the end of the first section, hug the left wall and make it past the first vortex.
At the next corner, put on the boots and use your Longshot on the Gold Skulltula on the wall. Take off the boots and round the corner, hugging the right wall.
After acquiring the Longshot and traveling through the area with the vortexes in the water, you’ll find a Skulltula on one of the walls. Use the Iron Boots and Longshot to defeat the Skulltula while in the water.Optional: Gold Skulltula #73

Ahead, there are two vortexes. I don’t recommend using your Iron Boots here, as you’ll likely get pulled down into the vortex. Just swim along the right wall towards the little ledge with the two jars. I like to climb up and get my bearings.
Now, our next objective is to swim across to that little platform opposite, between you and the closed corridor. I suggest jumping into the water close to the platform in the corner with the two jars, waiting until you’re floating safely on the surface, then swim between the raging waters and climb up. It’s really pretty easy. If you’re worried about it, use the Iron Boots to carefully inch forward, then take them off to climb up.


Whip out your Fairy Bow and shoot the golden eye switch on the wall across from you. This opens up the doorway for a few seconds. Jump across and open the chest for a Small Key.


Jump down into the spinning room with the dragon we tackled earlier, work your way back to the main room, just like we did before.
When you return to the main room, the water should be at its highest point. To the north is the boss room, but we can’t get there since we don’t have the Boss Key yet. Before we change the water level, enter the west door, which leads back to the room with the descending platforms on the waterfall you had to Hookshot up through.
Now that we have the Longshot, you should easily be able to snag the Skulltula on the right wall. Return to the main room.
Once you have the Longshot, return to the room west of the main chamber on the highest floor. Use the Longshot to defeat the Skulltula on the wall to the right and snag the Gold SkulltulaOptional: Gold Skulltula #74
With Longshot in hand, we can finally access two more rooms that you might have already investigated with little results. The first one we need to inspect is on the second level, but we’ll need to change the water level twice. Sink down to the bottom of the main room and go through the east corridor, where we met Ruto, float up and change the water level to the lowest level.
Next enter the center pillar, Longshot up and play Zelda’s Lullaby yet again. Before we exit through the door, use your Longshot to snag the Skulltula token hiding above you.
Inside the large central pillar of the main room, once you have the Longshot, you will be able to defeat a Skulltula all the way at the top of the room and snag the token.Optional: Gold Skulltula #75


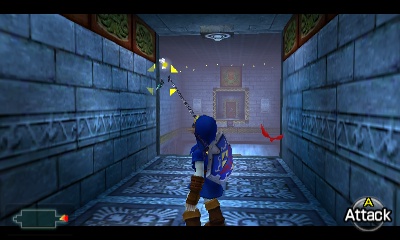
Back in the main room, go and face the south corridor with the golden eye switch and the iron grating. You may want to lure the Blue Tektites down and kill them before you tackle this. In any case, shoot the golden eye switch with an Arrow to lift the grating temporarily. There’s only enough time to Longshot in, so you couldn’t reach before.


Go down the corridor and you’ll find a red block. You could have reached this block earlier from a different direction. Nevertheless, pull it back until it locks in place. Turn around and head down the corridor. Use the Longshot to grapple up to the target and get back to the main room. Jump back down and once again make your way to the eye switch and grating at the south corridor. Once again use the bow and Longshot to get by.
This time, you can now push the red block, revealing the opening to the right. Run ahead and open the chest containing the last Small Key. Once again Longshot up to the target and return to the main room.

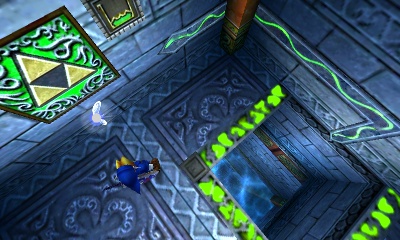
Main Room (North) – You should have two Small Keys at this point. The second room that’s now opened to us is on the bottom level (but you don’t need to change the water level). Sink down and enter the north corridor (the sandy area with the ditch and two Spike enemies). Sink down and float back up to find yourself in a room with a spike wall blocking the way to the door on the other side. Turn around and climb onto the ledge, then Longshot the target on the other side of the room and enter the locked door.

Rolling Boulder Room – This room is filled with some crazy strong flowing water that zig zags through the room with a couple vortexes, six Blue Tektites and two rolling boulders. There are two ways to go about this, you can try to get across and sneak past the Tektites and Boulders, or you can lure the enemies to your side by either swimming out and back or shooting them. Luring them is safer, but the more I play through the game, I just get impatient. Swimming across is quite easy, just stay on the right side near the end and swim under the Tektites. If you start heading for the vortex, just slip on the Iron Boots. Whichever method you choose, once you make it across and enter the next door.


Stinger Room – To start off, kill the Stingers in this room as they can be incredibly annoying. You will see a floor switch underwater and our goal is to push it down. In order to do so, we’ll need to use a large block that is hidden behind the fake wall. If you look at the south end of the room, there is a cracked wall. If you actually look carefully, both walls on the south end are a bit odd. Place bombs against both walls along the south part of the room to reveal two separate passages.


This creates a “U” shaped room with a large block in the middle. You’ll have to push and pull the block to get it out of that backroom. This will require a lot of back and forth across the water, but eventually you can push it down into the water, so it lands on the floor switch. With the water raised, climb up and head through the door.
Second Water Pillar Room – We treat this room the same as the last one, except there are more water pillars and Tektites to deal with. You may want to lure them off first by either jumping down and getting close to the other side, or shooting them with arrows. One of the differences in this room from the last is that the timer that activates the pillars also opens the door on the other side.


Rolling Boulder Room – Now that we’re up in one of the alcoves where the boulders come from, we can get a Skulltula. Sneak out to the edge and snag the token on your right. Wait for the boulder to pass, equip your Iron Boots and jump into the water, go towards the waterfall and sink into the deeper water.
Inch forward to the edge of the floor and look to the right to find a Skulltula. Use the Longshot to defeat it and snag the token.Optional: Gold Skulltula #76


Round the corner slowly, as there is a Shell Blade right around the bend. Kill it with your Longshot. After you kill it (or fail to do so and get frustrated) take off the boots and float up. Enter the locked door, using your last Small Key.
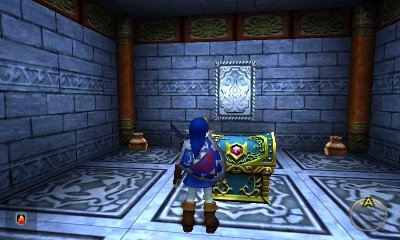
Open the pretty chest to find the Boss Key. Nice! We now want to backtrack all the way to the main room.

Main Room – At long last, we’re ready for the Boss Room. We first need to raise the water to its highest level. On the second floor of the main chamber, head through the door to the west, which eventually leads to the Triforce symbol where you can raise the floor.


Back in the main chamber, with the water raised up, you can Longshot onto the target of the dragon statue in the northern part of the room. Fill up your bottles with Fairies in the jars nearby if you like, then enter the door.


Spike Trap Corridor – In this small room, you’ll have to run by the Spike Traps. Just stay on either the left or right side and run straight. If you slow down at all or roll, you’ll slide all the way down, most likely getting hit in the process. This room can be a bit obnoxious, but you’ll eventually make it up there. Once you get to the top, head on through the menacing door.
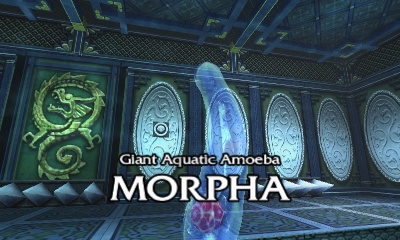
Boss Room – As soon as you enter, Navi will exclaim that the water isn’t natural. Well, that’s certainly comforting. Jump onto one of the platforms in the middle to begin the boss battle.
Like the last boss, this one deals out quite a bit of damage should you accidentally get caught. This boss is rather simple: it really only consists of a single orb that controls the water in this room, in the form of tentacles that try to grab you. You can easily tell where the tentacles are coming from by the noises they make.
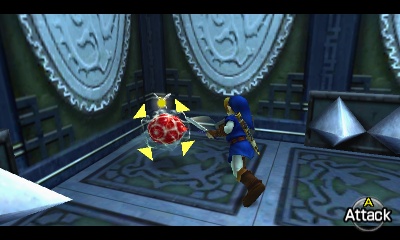
To avoid taking loads of hurting, simply stay a good distance away from each tentacle as soon as you see them beginning to appear. It’s pretty easy to stay out of their range. Wait until the nucleus attacks through a tentacle, then target it and use the Longshot to grab it. Make sure there’s plenty of room on the ground in front of you for it to bounce around, lest it fall back into the water as soon as you get it! As soon as you do grab it, smack it with your sword.


After several hits, it’ll summon two tentacles at once, and eventually three. Repeat the processes just like you did before. If you do happen to get caught by one of the tentacles, it will squeeze the life out of you, before launching you across the room.
There is alternative strategy to make this a significantly faster battle. If you stand in one of the corners of the room and use the Longshot to grab Morpha, before striking the boss, quickly run around it so that Morpha is between you and the corner. Smack it and Morpha will bounce into the corner. You can then repeatedly hit Morpha and it won’t be able to return to the water.
Once Morpha is defeated it will explode into a pile of water, leaving the rest of the possessed water in the room to suck up to the ceiling and trickle away. Pretty sweet little cinematic really.
Jump down and be sure to grab the Heart Container before entering the glowing circle.


Temple of Light – You’ll then appear in the Temple of Light, along with Ruto, where you will get the Water Medallion. Anyway, she’ll ramble about your “engagement” and how you’re looking for Zelda before giving you the Water Medallion at long last.
10.3 Goodies at the Lake
Lake Hylia – You’ll appear back in Lake Hylia along with Sheik, who has more poetry to recite. After a quick glimpse around the lake as its filling back up with water, she’ll disappear.
You may have noticed a small pedestal on this small island that reads, “shoot for the morning light.” It automatically is morning, once this scene loads up, so stand just in front of the pedestal, take aim and shoot the sun with an arrow. A short clip will ensue, revealing the Fire Arrows out on the small island. Swim out and grab them.


Now that we have the Longshot, we can do something we couldn’t before. Return to the island just above the entrance to the Water Temple. Play the Sun’s Song to make it nighttime and use the Longshot to grapple up on top of the tree. You’ll have to aim at an angle so that you can land on the branch. Walk along the branch and if you look on top of the tree, you’ll find a Gold Skulltula.
After acquiring the Longshot, grapple up to the top of the tree, located on the island just above the entrance to the Water Temple. At nighttime, you’ll find a Gold Skulltula up here.Optional: Gold Skulltula #77


- Chapter 1 – Inside The Great Deku Tree
- Chapter 2 – Princess of Destiny
- Chapter 3 – The Mighty Collection
- Chapter 4 – Dodongo’s Cavern
- Chapter 5 – Inside Jabu-Jabu’s Belly
- Chapter 6 – Timely Appearance
- Chapter 7 – Forest Temple
- Chapter 8 – Fire Temple
- Chapter 9 – Ice Cavern
- Chapter 10 – Water Temple
- Chapter 11 – Bottom of the Well
- Chapter 12 – Shadow Temple
- Chapter 13 – Spirit Temple
- Chapter 14 – Ganon’s Castle
