- Chapter 1 – Inside The Great Deku Tree
- Chapter 2 – Princess of Destiny
- Chapter 3 – The Mighty Collection
- Chapter 4 – Dodongo’s Cavern
- Chapter 5 – Inside Jabu-Jabu’s Belly
- Chapter 6 – Timely Appearance
- Chapter 7 – Forest Temple
- Chapter 8 – Fire Temple
- Chapter 9 – Ice Cavern
- Chapter 10 – Water Temple
- Chapter 11 – Bottom of the Well
- Chapter 12 – Shadow Temple
- Chapter 13 – Spirit Temple
- Chapter 14 – Ganon’s Castle
7.1 Getting Epona
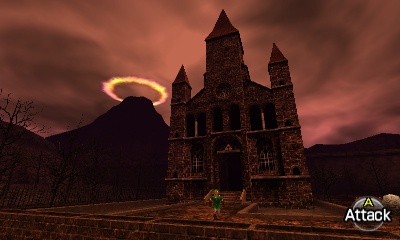
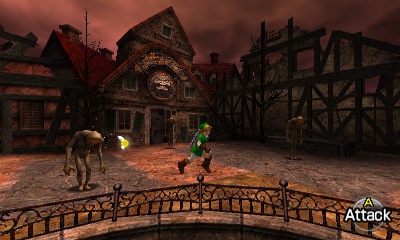
After exiting the Temple of Time, you’ll see how Death Mountain has gotten even worse than before and the trees surrounding the Temple are dead. Back in the Market, you’ll see that everything is run down and there are zombies, known as ReDeads, everywhere! You saw a few of them as a child, but you’ll be seeing a lot more of them now…
There’s nothing we can do here yet, so make your way for the drawbridge. In the area right before Hyrule Field, the guardhouse on the left now houses the Ghost Shop, with a sadistic owner inside. Chat with him and store him away in your memory for a later quest.
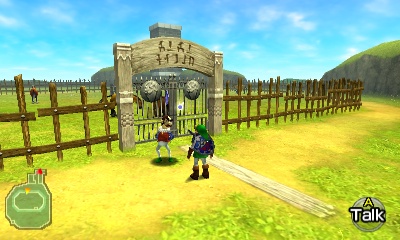
Out in Hyrule Field, it’s actually more calm, since there are no longer any Stalchildren or PeaHats. Head for Lon Lon Ranch in the center of the field. NOTE: This portion is actually optional as you don’t need Epona to complete your quest. To continue onward with the main quest, just to section 7.2.
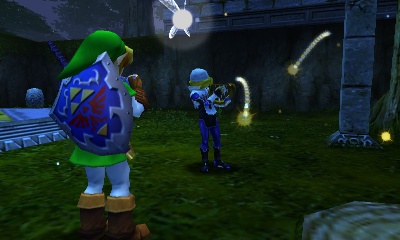
Well, Talon (the fat sleeping guy) got kicked out and Ingo (the dirty worker in the stables) is now the owner of the ranch! You can find Malon in the stables, clutching a broom and afraid to leave the ranch out of fear that Ingo will mistreat the horses.
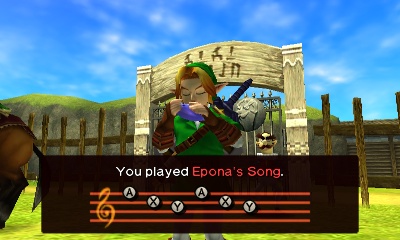
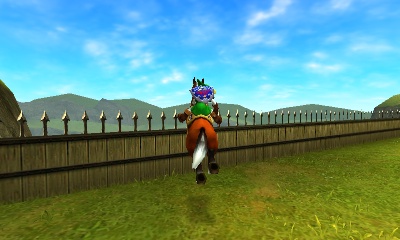
Run up to the corral in the center of the area and speak with Ingo to hear him gripe about how awesome he is. Anyway, he has a little pony ride you can partake in for 10 Rupees. Fork over the goods and you’ll appear inside the corral. Don’t take the horse he offers you, but instead play Epona’s Song to make the best horse come to you. If you didn’t learn Epona’s song earlier, you learn it from Malon as a child. If you don’t have it, just skip this part of the guide and return later. After completing the Forest Temple, you will have the opportunity to become a child again and can complete any incomplete tasks.


Use her to jump both of the fences by pressing A shortly before you reach them. They’ll give you 20 Rupees in total, earning you back what you paid to ride in the first place. Go back to Ingo and target him while riding Epona and accept his challenge to a race when you think you’re ready.
Horse Race – After riding horses at least once, pay Ingo again to enter the corral, then speak to him while riding Epona to race against him. You can use the regular horse he gives you, but you’ll never win because it’s so slow…


The first race is fairly easy. Ingo cheats and starts a second early, but he tends to take the corners pretty wide, giving a chance to slip ahead. Use A to speed up, but don’t use all of your carrots until the end. Either get ahead of him first and try to stay ahead of him by using your carrots slowly and blocking him, or wait until you’re near the end and speed past him by continually using carrots.
He’ll challenge you to a second race, this time offering you the horse. He’s a little more vicious now and will try to cut you off as soon as you get close. Just wait until you see a good chance and run for it. I still recommend just zooming ahead of him right at the start and trying to stay ahead.
After beating Ingo at both races, he’ll lock you in the ranch so you can’t leave. You can get out very easily though, simply get a running start and jump either the fence, or any of the shorter walls on any side. You’ll then witness a short triumphant clip of Epona jumping out of Lon Lon Ranch. Da-da!
If you enter Lon Lon Ranch afterwards, Ingo will once again be a timid ranch worker and Malon will recognize you. She will now run a mini-game where you can race around the track with Epona, hopping over some fences. You have to complete two laps around in less than 50 seconds. It’s actually a little challenging and might take a few tries. If you successfully complete it in time, you will win a Cow! Yes, an actual Cow. It will now appear at your old house in Kokiri Forest. How exactly it was carried up there is another question…


7.2 Getting the Hookshot
From now on, you can use your trusty steed to get across Hyrule Field quickly; simply call her using Epona’s Song. Unfortunately, she can’t go very many places and is limited to Hyrule Field for the most part…
Make your way to Kakariko Village on the east side of the Field. There isn’t much to do here at the moment, so just head right on through to the Graveyard like Sheik told you to.
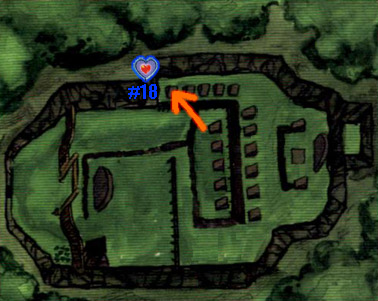
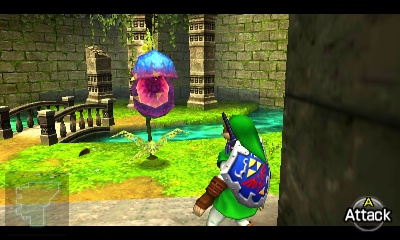
On the left side, there’s a soft soil spot that should have a plant in it if you planted a Magic Bean in the past like I told you. Don’t worry, you can go back later if you didn’t. If the plant is there though, ride it up to the ledge above and smash the crate to find another Piece of a Heart.
Right next to the Magic Bean Plant (left side of the Graveyard) is a grave with flowers in front of it. Pull back the grave to reveal a hole. Fall in. Inside, you’ll see a familiar character…
In the Graveyard, if you planted a Magic Bean as a child, there will be a Magic Bean flower that has grown. Ride it up to the higher ledge and roll into the wooden box to find the heart piece.Heart Piece #18


Dampe’s Amazing Cave Race – This game is very simple. Follow the ghost of the dead grave keeper and don’t get left behind!
It’s pretty straight forward, for the first chunk, just follow the left wall. After you go through the first door, hug the right wall until you get to the big room, go through the right exit, then take a left and a right (purple flames).
After that door, go along the right side, then when you get to the ledges, climb either the one on the left or straight ahead. After that, just follow the path until the end.


After, you know… not losing… he’ll congratulate you and tell you to come again sometime. After he leaves, open the chest to find the Hookshot! With this, we can finally tackle the first temple. Go ahead and go for the open doorway.
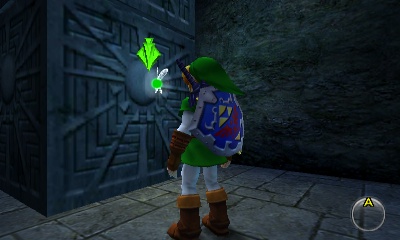
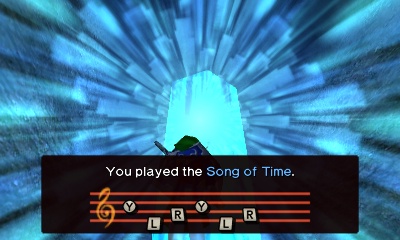
The door closes behind you and you’re stuck with a giant blue block…? The game isn’t very clear at this point, but if you target it and talk to Navi, she will tell you it looks like the symbols in the Temple of Time. Play the Song of Time to get rid of the block. It actually only “moves” it to a nearby location, which isn’t really important except in the Master Quest for later puzzles.
In any case, climb the ledge and run up the stairs to find yourself in the top of the Windmill. Before you hop on down, you may notice a Piece of a Heart on a nearby ledge. Wait for the gears to turn your way and jump onto the spinning platform. Use it to reach the Heart Piece. You could have actually gotten this in the past with your Boomerang, but it’s awkward and we were coming here anyway.
Found inside the Windmill. It is easiest to acquire this Heart Piece after completing Dampe’s race and acquiring the Hookshot.Heart Piece #19


You can talk to Guru Guru down below and learn the Song of Storms right now, but we don’t need it until much later, so I’ll mention it again when the time comes. On to the Forest Temple!

7.3 Hookshot Goodies
NOTE: Now that you have the Hookshot, there are a TON of things you can do in the Overworld, spanning all across the world. There are Heart Pieces, Skulltulas, and other goodies that we can find in Lake Hylia, Zora’s Domain, Gerudo Valley, and Goron City. We will be checking out all those regions later and will include them in subsequent chapters. You can even acquire the Biggoron Sword, but that becomes a bit cheaper at a later point.
That said, there are a couple of extras we want to get right now.
After acquiring the Hookshot from Dampe, return to his grave and speak with him again. You can race him once again. If you complete the race in one minute or less, Dampe will reward you with a piece of heart.Heart Piece #20


In Kakariko Village, right when you come out of the Windmill, jump onto the fence that is straight ahead. From here, you can use your Hookshot to get on top of the building just to the right. There is a man sitting on this building and if you speak with him, you can get a Heart Piece. You could have gotten this with a strategic jump as a child, but now is a more appropriate time.Heart Piece #21

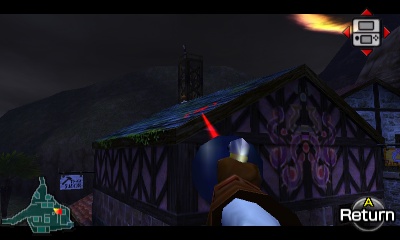

Make your way to the south end of Kakariko Village, next to Impa’s House. From here, Hookshot onto the roof of the SKulltula House and then Hookshot onto the roof of Impa’s House. At nighttime you will find a Gold Skulltula located here.Optional: Gold Skulltula #45


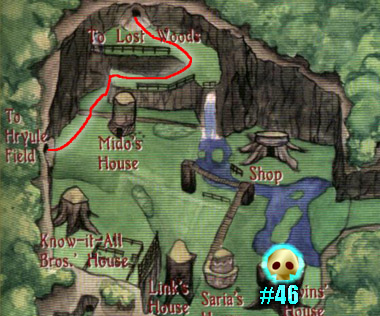
Return to the Market and make your way to where Hyrule Castle use to be. You’ll find that it is now Ganon’s Castle. Follow the path to the right passed the archway and then turn around. The Skulltula can be found on the backside. Use the Hookshot to defeat it and grab the token.Optional: Gold Skulltula #46


7.4 Return to the Forest
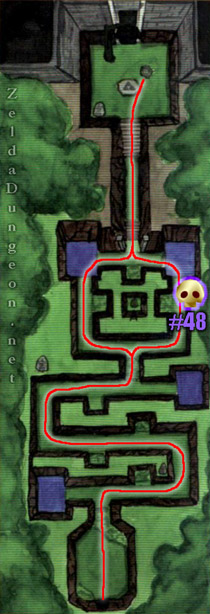
NOTE: While we will be making our way to the next dungeon, the Forest Temple, it is very possible to complete the Fire Temple first. Many players choose to do so as it is near Kakariko Village, where we acquired the Hookshot. If you’d like to do the Fire Temple first, jump over to the next Chapter.
Now that we have all the goodies out of the way, go ahead and get back to Hyrule Field and make your way to Kokiri Forest. Once you get there, you may notice a couple things different, like maybe even the fact that there are monsters everywhere… Maybe…
So everyone’s in their houses and have pointless things to say, but they also don’t recognize you because you grew up (unlike them).
There’s a new enemy here, the Big Deku Babas. They fight the exact same way as their smaller counterparts, but because they’re so tall, it mainly makes them awkward to fight than anything else.
There’s a Skulltula you can hear at night, so use the Sun’s Song, then go to the house closest to the Deku Tree (other than the shop) and follow your ears.
At nighttime in Kokiri Forest, make your way over to the Twins’ House, located at the southeast part of the forest. Use your Hookshot to defeat a Skulltula that is located above the building.Optional: Gold Skulltula #47


There’s nothing else we can do here, so ignore the plant infested village for now and climb up the vines to reach the Lost Woods.
Lost Woods – Well you probably remember the route, it’s right, left, right… hey, it’s our old friend, “The Path Blocker!” If you talk to Mido, he’ll demand you have proof that you know Saria. Play Saria’s Song to make him get out of your way.


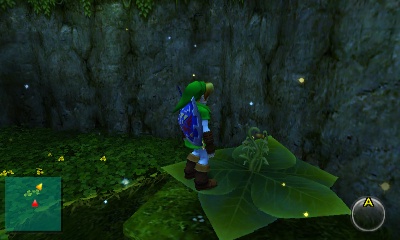
In the very next area, you can take a left to get a Skulltula, but it has to be night and you’ll have to have planted a Magic Bean there in the past. If you didn’t do that, you’ll have to do that later and return here.
At nighttime in the Meadow of the Lost Woods. Take the Magic Bean Plant ride up to the top and slash away at the Gold Skulltula. Alternatively, you can try using a bombchu and it will climb the wall, blowing up the Golden Skulltula sitting on top. Use the Hookshot to collect the token.Optional: Gold Skulltula #48
To continue the way through the Lost Woods, the whole path is: right, left, right, left, straight, left, right.
Sacred Forest Meadow
This area is pretty straight forward, and these new enemies aren’t anything you can’t handle. The Moblins won’t change from their original path, so as long as you stay “out of their way” they can’t harm you. It’s only if you inch out too far and they see you that they’ll charge at you. Simply sneak around corners and run for the next alcove until you’re close enough to kill each one.
The Hookshot gets my vote for the best way to kill them all, but the sword can feel very vindicating, and bouncing Bombs off walls makes me feel so tricky =D Probably the only times they’ll really give you trouble is when you’re in one of the pools at the end. The last Moblin goes along an L path, which can mean a long wait before you can get out of the water and sneak past.

Once you finally get to the steps, you’ll find yourself faced with a giant one, known as a Club Moblin, for obvious reasons… He looks really intimidating, but he’s really easy once you get the hang of it. Just zig-zag to get close then slash away at his feet repeatedly until he falls over and drops tons of Rupees. Yippee!
Up the steps, you’ll witness a short clip in which Link looks at the stump his old buddy Saria used to sit on, then Sheik will appear out of nowhere (like usual) and start quoting more poetry. Afterwards, she’ll teach you a snazy little song that’ll allow you to teleport here anytime you want. Awesome!

Once she’s finally gone, you can enter the first temple. Before that however, there’s one more Skulltula we can get. It’s along one of the walls up high, only at night. If you wish to snag it, play the Sun’s Song to make it night, then the Minuet of Forest to be on the far end of the Meadow. Kill the Club Moblin again, then climb up the ladder at the end. Work your way left and use the Hookshot to claim the token.
When you’re ready, save and head to the end of the Meadow. Hookshot to the branch above the steps leading into the Forest Temple.
At nighttime in the Sacred Forest Meadow, climb up the ladder to the higher ledge and look up at the east wall. There is a gold skulltula that you can defeat with the Hookshot.Optional: Gold Skulltula #49

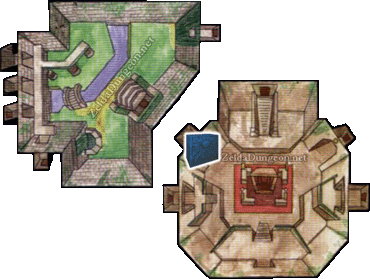
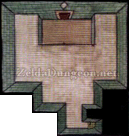
7.5 Forest Temple

This temple can get pretty confusing. Doors with the forest symbol above them are “forward” while ones without will be “backwards.”
Entrance Room – As you enter, you’ll be immediately faced with two Wolfos at once. You can Z target one of them to make the other leave you alone. Remember that the trick is to wait until their back is to you to strike, as you’ll do double damage. A Jump Attack to the tail will kill them one hit!
Before heading through the door, climb the vine on the right, then plop down atop the tree on your left. From here, you can kill the skulltula on the vines and claim the token. Next, walk along the branches and jump to the other tree, where you’ll find a chest containing a Small Key.
With that, head into the next room.


In the first room of the dungeon, climb the vines on the right side. Use the Hookshot to defeat the Gold Skulltula.Optional: Gold Skulltula #50


Entry Hallway – Here, all we have to do is kill the Large Skulltula that’s blocking the path. Use your handy Hookshot on them. It’ll kill them with one hit from either side, making these enemies incredibly easy from now on. Enter the next door.
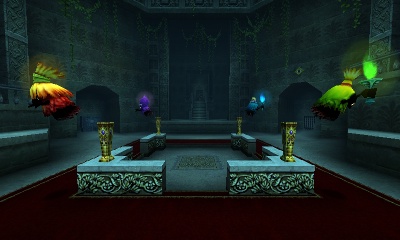
Grand Hall – Welcome to the Grand Hall, the main room of this temple. As you enter, you’ll witness a short clip with the four colorful Poe Sisters removing their flames and disappearing into the four corners of the temple. We’ll get to them in a minute. First off, head straight to the opposite side of the room, climb up the ledge and up the stairs. Right before you enter the door, snag the Skulltula directly to your right.

In the large central room, run straight ahead to the north door. Look at the wall to the right and you’ll find the Gold Skulltula.Optional: Gold Skulltula #51


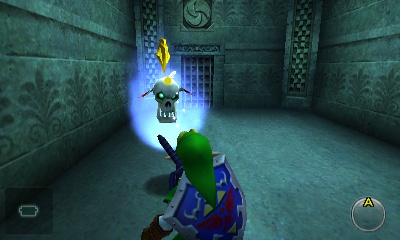
Blue Bubble Hallway (North) – This small room has a single, new enemy called a Blue Bubble. These flaming skulls are invulnerable to your sword until you stun them or knock them with your shield. Either dispose of it or avoid it, then go through the next door (with the forest symbol above it).
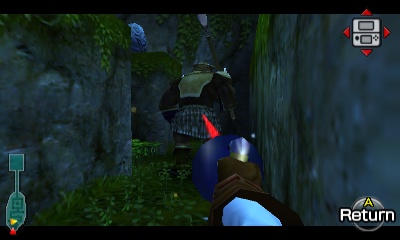
Stalfos Room (North) – You’ll be locked in this room and immediately face off with two Stalfos. These new enemies can be quite difficult and do enough damage to kill you quickly this early on in the game. Use Z targeting to tackle one at a time, then just keep your guard up as you get close. Jump out of the way as soon as you see them jumping, and try to stab whenever you see an open spot.
When both of them are dead, open the chest that appears to find the second Small Key. There’s a Fairy in the jars nearby if you need it, but if you don’t yet, put it in a bottle for later. Return to the main room.


~ The Map And Third Small Key ~
Grand Hall – From a map perspective, you’ll be heading to the northwest door, which has a Time Block in front of it (big blue cube). You saw one of these in Kakariko earlier. Play the Song of Time while standing next to it to make it disappear and enter the door.
Ruins (Northwest) -As soon as you enter this room, you’ll see a Big Deku Baba right in your face. Kill it if you like or sneak past, then go right.

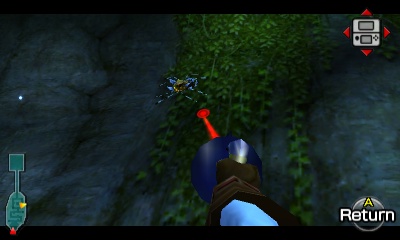
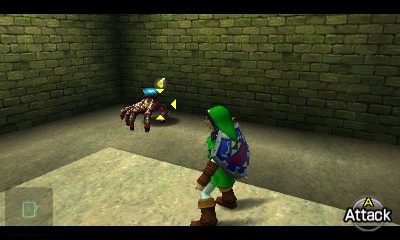
You’ll see some vines with Skullwalltulas on it. Kill the two lower ones with your Hookshot, then try to climb past the third. It may take a few tries, but it helps to be as far right as possible. Enter the door once you get to the top.

Map Room – Here, kill the lone Blue Bubble to make a big chest appear, containing the Dungeon Map. Enter the next door (with the symbol above it).
Ruins (Northeast) – Here, you’ll be confronted by a regular sized Deku Baba. Aww, they’re so small and cute now! Kill it. After that, Hookshot to the symbol above the nearby platform to land safely on it. Step on the switch.
This will cause the water in the well nearby to drain as well as the one in the previous open air room (it’s one and the same). Jump down into the water and climb up on land. There’s a Skulltula you can get now by using your Hookshot on the long side of the small chest on the ledge in the water… In either case though, climb down the well.


In the wide open room northwest of the center room, you’ll find a treasure chest on a higher ledge. Use the Hookshot to latch on to the front of the chest, pulling you up to the higher ledge. From here, find the Skulltula right around the corner.Optional: Gold Skulltula #52


Within The Well – Simply run to the other end and open the chest for a Small Key. Climb up on either side and go back to the main room.


Grand Hall – Now that we have an abundant supply of Small Keys we don’t have to come back for, head through the locked door on the west side of the room.


Skulltula Hallway (West) – Kill the Skulltula using your Hookshot, then head through the next door (with candles).

Block Room (West) – Kill the Blue Bubble as you enter, then climb the first two ladders straight ahead and round the corner to find our first complex puzzle. It’s actually pretty simple, and they even have arrows on the floor! For some reason, this one tends to confuse people.
The first step is to pull the BLUE block:
* Pull it out until it lines up with the corner of the wall.
* Go on the left side and push it all the way back.
* Go around (using the now uncovered doorway) and push it back again until it clicks into a hole.


Before venturing onward, go back and climb the now uncovered ladder, then round the corner to find a RED block. Push it until it hits the wall.
Go back down the ladder and find your BLUE block. Climb atop it, then jump up to the next ledge on the right (yes, it’s kind of hiding there isn’t it?).


Round the corner and you’ll be reunited with the RED BLOCK. Push it all the way until it clicks into place as well.
Here, you’ll find two Blue Bubbles to kill, a silver eye switch to ignore for now and a locked door to go through. Go on, do it!


Twisting Corridor – West – Whoa. Just… whoa… Go through
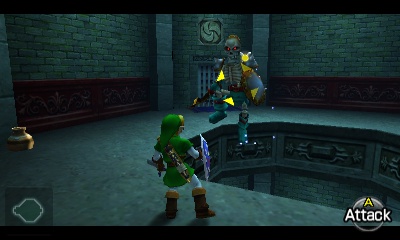
Boss Key Room – This strange little room is twisted around at a funky angle, and as you can probably guess, we’ll be returning at another angle later on. Navi will warn you that there’s a new enemy here: a Wallmaster. Don’t let it grab you, or it’ll deal a whole heart of damage and take you back to the beginning of the temple!
Anyway, just keep moving to avoid this one for now. Jump to the next platform, turn right and jump again.

Joelle’s Room – We can’t do anything in this room at the moment. Ignore the Poe laughter, go down the stairs and through the door.
Bow Room – This room has another Stalfos and a large pit in the center. Be sure not to fall down, as it will take you back to the room where you fought the two Stalfos earlier… In any case, after you defeat this one, a platform floating above will come down and fill in the pit. Two more Stalfos will appear, but this time, if you don’t kill the second fast enough, the other will come right back!


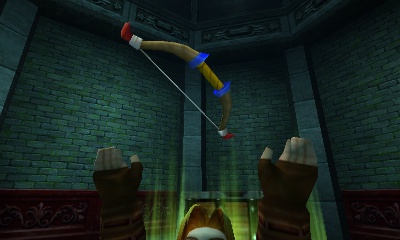
When all three have been defeated, a large chest will appear. Open it to get the Fairy Bow. Yippee!
Next, we could go forward… but we’ll need keys here soon, so actually, if you think back, there were a couple silver eye switches in the room where we moved those colorful blocks…

Block Room – At the very top of the room where you moved the Red and Green blocks, there are those two Blue Bubbles and a door with a silver eye switch above it. Now that we have the Bow, we can shoot the switch.


Twisted Hallway – West – After doing so, go through the door to find that the twisted hallway has straightened, opening up a new path for us! Enter the small room from earlier, this time at a new angle and jump down to the large chest which contains the Boss Key!
It is possible to climb back up the ladder, but there’s something we need in the hole below. Jump down it.
Blue Bubble Room – After falling down the hole, you’ll have to defeat the two Blue Bubbles, which will open the nearby door.


Ruins (Northwest) – You’ll find yourself back in the northwest room with the ruins. There’s another Skulltula you can get here by jumping out onto the pillars with recovery hearts on them. From there, you can kill the Skulltula on the wall and retrieve the token with your Hookshot.
When you reenter the Northwest Room with the ruins, jump over to the narrow platform. From there look up against the wall and you’ll find the Gold Skulltula.Optional: Gold Skulltula #53


Continuing on, there’s a Big Deku Baba blocking the way ahead. If you’re feeling lazy, you could just shoot it with arrows, or use Deku Nuts to stun it, seeing as they tend to drop them. After he’s defeated, check the last alcove on the right to find a door hiding in the shadows.
Floormaster Room – Inside, you’ll find a single, new enemy called a Floormaster. Another rendition of the Wallmaster, these nasty things need to be defeated quickly. I find a good way to kill them is to Z target and use your shield to get close, then right after it attacks, run up and slash away. Quickly charge up a spin attack while it’s “dying” so you can unleash a single attack that’ll kill all three mini Floormasters at once!
After it’s been defeated, a small chest will plop down containing an ever elusive Small Key! Exit the door.

Ruins (Northwest) – From here, you can either jump down, but there is a shortcut if you take the door to the right. This will bring you back to the tall room with the Blue and Red block.
Block Room – Scale the room just as before. There is an optional treasure chest we can now collect in this room. After climbing up the Blue Block, look around on this level. In the wide open area, you will find an eye switch. You can shoot it with an arrow and treasure chest will appear. Jump over and open it to get some more arrows.


Now scale to the very top of the room and shoot the silver eye switch. What? But the eye is already closed! Just remember, a lot of the stuff in this game can be “done again” to do bring it back to its original state. Anyway, this will “re-twist” the hallway.
Twisted Corridor – West – Go back through the twisted corridor and the small, funky angled room, then jump across the two platforms to the door on your right.
Joelle’s Room – Welcome back to the room with the giggling picture frames. At long last, you’ve probably already guessed what you have to do. When you get close to a portrait that has the ghost in it, the Poe will move into one of the other two frames. Use your Fairy Bow to shoot it from afar. Using the process of elimination, you’ll be able to shoot the Poe in all three picture frames. I find it easiest to do so from the middle level.


Once you’ve done all three, the first Poe Sister will appear and go to the lowest portion of the room. Meet up with her and smack her whenever you get a chance. She fights just like the regular Poes in the Graveyard. Use your shield all the time, then use either your sword or Bow every time her guard is down. When she goes invisible, you can toss a Deku Nut at her to cause her to appear right away. After five good hits, she’ll burst into flames and all the red torches will be lit once again.

Snag the arrows she drops, then open the chest that appears to find a Small Key. Go through the door.
Bow Room – Nothing left to do here, enter the next door.
Beth’s Room – And here, we have the room of the second Poe Sister, Beth. Shoot these pictures and defeat her in the bottom half of the room alike her sister, which will light all of the blue torches in the dungeon.


At long last, enter the locked door at the top of this room.

Twisted Corridor – East – Hmm, another funky angled room which comes with another Wallmaster that Navi will warn you about. There’s nothing to be done in this small room at the moment, so either jump across, or jump down and climb up the ladder to get to the area on your right.
In this hallway, you’ll find a new enemy: Green Bubbles. They’re basically just like the blue ones you encountered earlier, except they only go in circles and they occasionally stop having flames. Really, a pretty worthless obstacle.
Kill them if you like, I prefer to just walk around them. Use your last Small Key on the locked door at the far end.


Lava Room – In this room, our goal is to melt the silver eye switch on the other platform. First jump onto one of the moving platforms in the middle. From here, you can either shoot the switch through the torch in the middle when you’re on the opposite side, or just jump on the same platform it’s on and use Din’s Fire.


This will twist the hallway you just came from.
Twisted Corridor – East – Now that it’s all twisted, jump down into the hole that appears.

Checkerboard Room – This long room with a checkerboard floor is pretty easy, but the screen angle changes, which can make things a little awkward. In this new view, you can’t use Z targeting at all, and any of your ranged weapons merely aim around while you can still move.


Wait for the ceiling to fall to see the next path you can take. Squares that have shadows on them will have a Skulltula who will drop down on you. Use the funky camera angle to your advantage by holding down the Hookshot C button, and releasing it when standing next to a Skulltula so you can stand in that square.
In any case, make your way to the switch, which unlocks the next door on the other side of the room.
Amy’s Room – This room starts out with a simple puzzle. Get away from the shadows on the floor, then shoot the giant picture of Amy to make the five blocks fall from the ceiling. You have a minute and ten seconds to piece them together. If, for whatever reason, you mess up or run out of time, just exit the room and come back in to reset the puzzle (the first set is the easiest).
The first step is to get rid of the blue block in the middle, then quickly push and pull the rest towards the center. I suggest pulling them all towards a specific block (so you don’t move one of them at all). It’ll save you time.


After all four blocks are aligned correctly, Amy will appear. Defeat her the same way you did her sisters, which will light the flame and open the nearby door.
Another Skulltula Hallway – Kill the Skulltula in this hallway and enter the next door, which leads back to the main room.
Grand Hall – Meg – There’s nothing exciting up on this ledge, so go ahead and jump down. You’ll find the last Poe Sister, Meg, chuckling (or crying?) in the middle. Go up to her to initiate her little battle.
Meg doesn’t fight like her sisters; she has the ability to make four illusions of herself. If you don’t find the real one quick enough, she’ll smack you, dealing half a heart in damage. Now, you can kill them all at once with things like a Spin Attack, Din’s Fire and Deku Nuts, but they aren’t that effective because she’s invulnerable to those attacks.


To defeat her, simply stand there and wait for her to appear. After she does, the real one will spin around one more time than the others. Z target that one and shoot her with your bow. After doing this five times, Meg will return to being a flame once more, causing the elevator from the beginning of the temple to be available once more.
Slash the pots and the like nearby if you need arrows or health, then go down the elevator.
This room is very simple. Our goal here is to get rid of the bars blocking the hallway that leads to the Boss Room. To do that, you’ll have to turn the room by pushing on one of the two big… handles… on either side of the room. This will spin the wall, opening up small alcoves on the sides.
Turn the room counter-clockwise once each time for the following steps:
- Turn Counter-Clockwise – Press Switch with the white colored ground.
- Turn Counter-Clockwise – Press Switch with the red colored ground.
- Turn Counter-Clockwise – Open Chest and Defeat Gold Skulltula.
- Turn Counter-Clockwise – Press Switch with the Blue colored ground.
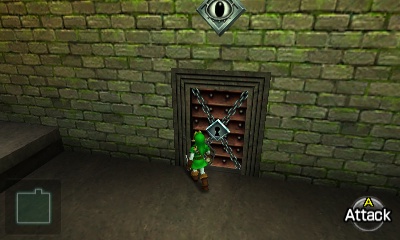
This will open up the final hallway leading to the boss room. Make sure you’re all stocked up on arrows, fairies and health.


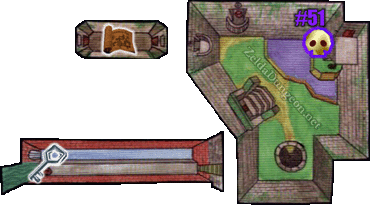
In the Basement of the Forest Temple, just before the boss, there is a Gold Skulltula located in the room with the Treasure Chest. Optional: Gold Skulltula #54


Walk up the ramp and into the arena. Curiously, you’ll find nothing. Turn around to leave and you’ll be blocked off. Ganondorf! Or… Almost…
Your first temple boss can be difficult if only because he does a lot of damage and his attacks are hard to avoid if you mess up. The first half of the battle is similar to your recent battle with Meg, the fourth Poe Sister. The boss will come out of one of the six pictures along the wall along with an illusion. At the last second, the illusion will turn around and run back up the path, while the real one will come out and zap the middle of the arena. If you’re not fast enough, this will do a whole two hearts of damage.

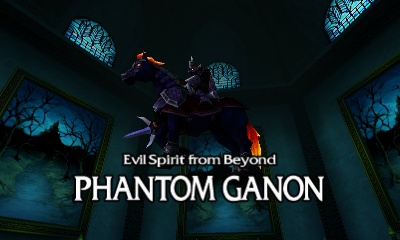


A good method is to stay on one side of the room rather than standing in the middle. Also, his lightning attack NEVER hits any of the corners… After three successful shots with your bow, his horse will abandon him and he’ll fight you alone.
For the second half, he’ll float around by himself and shoot less powerful orbs at you. While they’re easily avoided or dispersed with any other attack or merely holding up your shield, in order to stun him, you’ll have to play ping pong with him until one of you isn’t fast enough. Use your sword to smack his attack back at him multiple times until you hit him. Try to time your swings so that the tip of your sword will hit the orb. It is possible to just get very close to him and hope the first bounce you get hits him, but it’s hard to time it right and the stun doesn’t last as long.
Very rarely, he’ll make some pretty fireworks, then charge at you very quickly. Simply hold up your shield or move out of the way to avoid it. If he does hit you though, he’ll do three full hearts of damage! Yikes!
Once he’s been stunned, run up and slash away. Rather simple really, but can get quite frustrating. After a good thirteen hits, he’ll finally die.


After he’s been defeated, he’ll burst into blue flames and you’ll “read” the ominous voice of the real Ganondorf raving about how worthless a creation it was as he sends it to another dimension. Well, that’s encouraging. Be sure to snag the Heart Container, then step into the blue light.


7.6 Post-Temple Goodies
You’ll appear inside the Chamber of Sages in the Temple of Light once again, along with the Sage of Forest, Saria. This part is sad, I just get this feeling like she’s trapped here all alone for the greater good of everyone else… Aww… Anyway, she’ll make insinuations like you both had feelings for each other and cough up the Forest Medallion. Woot.


You’ll appear back in Kokiri next to the dead Deku Tree. Link will look down suspiciously at a strange little stub of a branch wiggling away on the ground before it abruptly springs into a small chubby tree.


After introducing himself as the Deku Tree Sprout, he’ll tell you a little story about Link’s past. There was a woman long ago who was hurt in a terrible war and sought protection from the Great Deku Tree for her child. The woman died shortly afterwards, and the Deku Tree could tell the child was destined for great things, so he and the children of the forest helped to raise the boy as one of them.
As a result, you’ve grown old because you’re actually a Hylian! All your Kokiri friends are still children. Well that’s nifty. When the clips are finally over with, go ahead and leave.
Navi initial states that we should return to the Temple of Time. If you make your way back there, you will find Sheik. Sheik will teach you the Prelude of Light, which serves a warp point, quickly bringing you back to the Temple of Time. Sheik also tells you that you can place the sword back in the pedestal to return to being a child. NOTE: There are some goodies for us to collect back as a child, but we will take care of that at a later time.
Also, in the Nintendo 3DS version, talking to Sheik will open up the Boss Gauntlet mode, where if you return to your house and sleep in your bed, you can face off with some of the former bosses that you’ve already beaten.


Now that we have the Bow, there is a nifty upgrade we can get over at Kakariko Village. Make your way over to the brand new building that has been constructed, located just beyond the Skulltula House. This is the new Shooting Gallery and it is virtually identical to the Shooting Gallery we played at as a child. This time you now use your Bow and Arrow. Simple hit all the targets and you’ll be rewarded with an upgraded Quiver!


If you’ve been following the guide, we have collected more than 50 Gold Skulltulas at this point. You can enter the Skulltula House to claim your newest prize, a piece of heart. NOTE: The final reward for getting all 100 Skulltulas is simply an infinite supply of rupees. It is hardly worth it and I’d only recommend it if you are trying to 100% complete the game.Heart Piece #22


7.7 The Final Bottle
Right after beating the Forest Temple, you can go get the last bottle. It takes some time and might not totally be worth it. I’d only recommend getting it if you are trying to 100% the game. Nevertheless, the things you need are the Fairy Bow and Epona. We got both of these earlier in this chapter.
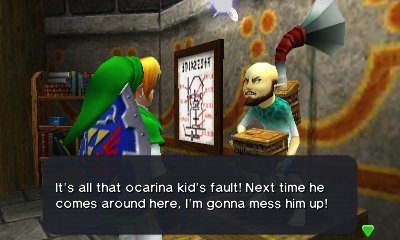
On your way leaving the ruins of Hyrule Town is the old guardhouse, which has been since changed into the Poe Shop. This gangly, one eyed, hooded figure with a stick loves the spirits formed from the hatred in the world known as Poes. He’ll buy smaller ones that you bring him in bottles for a few Rupees. There are ten large ones scattered throughout Hyrule Field though, and if you catch all of them for you, he’ll give you a little prize.


First let me explain that they only appear when you walk over certain spots. It’s generally just a ring on the ground that once you enter, the Big Poes will appear. By running through these invisible rings on Epona, you can whip out your Fairy Bow and shoot them as they run away from you. Two hits and they’ll fall down. Speak with them to put them in a bottle. You’ll have to bring them back to the Poe Shop repeatedly, as obnoxious as that is.

#1 – Right at the entrance to the ruined bridge leading to what remains of Hyrule Town is a sign. Passing by it will cause the Poe to appear.


#2 – At the entrance to Lon Lon Ranch is a tree. Pass by it (in particular between it and the wall) to make the Poe appear.


#3 – In the northwest (top left) corner of Hyrule Field are tons of little black bushes next to a stream. One of the triggering locations for the Poe is atop one of them. Find it, then run through it when you’re ready.


#4 – Between Lon Lon Ranch and the entrance to the Gerudo Valley area is a tree all by itself. I find it easiest to face towards Hyrule Castle and run along the right side of the tree.


#5 – Near the entrance to Gerudo Valley, where the road forks right before the ground color changes, stand on the ground between the road and the wall (right side). The easiest way to catch this one is to face right and try to get him to pass through the hole there. By far, the most frustrating one.


#6 – In the south part of Hyrule Field, between Lake Hylia and Kokiri Forest are tons of trees. Find the patch of bushes and run through them to make this Poe appear.


#7 – In the same spot, there’s a regular brown boulder waiting all by its lonesome. The triggering spot to make the Poe appear is the tree directly south of it. I suggest facing towards Lon Lon Ranch and running north, along the tree’s right side.


#8 – Along the road between Kokiri Forest and Lon Lon Ranch is a silver boulder. Stand at the top, inside of the “Y” shape of the road next to the boulder to make it appear.


#9 – Wait in the corner of the “V” shaped wall to the west of Lon Lon Ranch. You can either stand on top of it and wait or run along side it below.


#10 – Near the entrance to Kakariko Village, there’s an overhang above the stream. It’s just this general area that makes it appear, so you can either wait on top or run through the pillar supporting it alongside the stream. I find it easier up top.


For each Big Poe you turn in, you’ll get a snazzy 50 Rupees, which is pretty much worthless in this game. There’s nothing big to save up your money for in the long run other than refilling your quiver or buying back tunics if you don’t kill a Like Like fast enough. Anyway, after you’ve turned in all ten, the Ghost Shop Owner will ecstatically ramble before giving you the long awaited bottle. Doesn’t it feel good to have them all?


- Chapter 1 – Inside The Great Deku Tree
- Chapter 2 – Princess of Destiny
- Chapter 3 – The Mighty Collection
- Chapter 4 – Dodongo’s Cavern
- Chapter 5 – Inside Jabu-Jabu’s Belly
- Chapter 6 – Timely Appearance
- Chapter 7 – Forest Temple
- Chapter 8 – Fire Temple
- Chapter 9 – Ice Cavern
- Chapter 10 – Water Temple
- Chapter 11 – Bottom of the Well
- Chapter 12 – Shadow Temple
- Chapter 13 – Spirit Temple
- Chapter 14 – Ganon’s Castle
