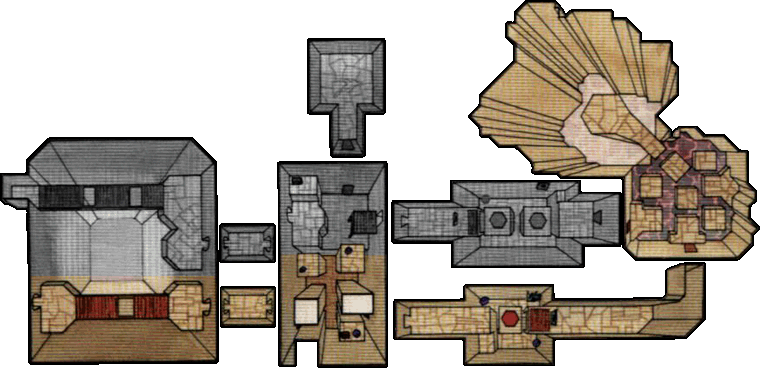
- Chapter 1 – Inside The Great Deku Tree
- Chapter 2 – Princess of Destiny
- Chapter 3 – The Mighty Collection
- Chapter 4 – Dodongo’s Cavern
- Chapter 5 – Inside Jabu-Jabu’s Belly
- Chapter 6 – Timely Appearance
- Chapter 7 – Forest Temple
- Chapter 8 – Fire Temple
- Chapter 9 – Ice Cavern
- Chapter 10 – Water Temple
- Chapter 11 – Bottom of the Well
- Chapter 12 – Shadow Temple
- Chapter 13 – Spirit Temple
- Chapter 14 – Ganon’s Castle
4.1 Goron City

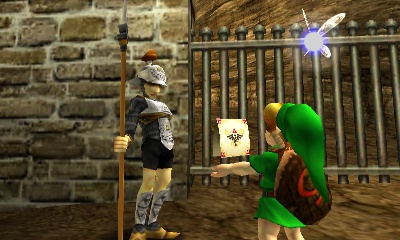
Make your way over to Kakariko Village and climb up to the top of the area. Show Zelda’s Letter to the Death Mountain guard in Kakariko Village. This will initiate a lengthy conversation in which he laughs at you, opens the gate, tells you to get the shield and comments that his kid desperately wants a mask from the Happy Mask Shop in Hyrule Town. The mask is part of a side quest that will be covered in a later chapter. When he’s finally done, head on through the gate.
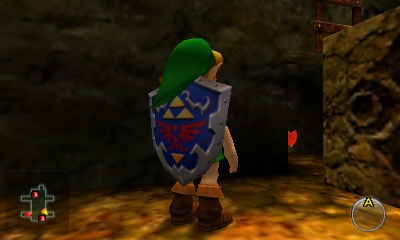
Note: If you haven’t acquired the Hylian Shield, you can now pick one up from the Bazaar in the Market. It was originally 80 rupees, but now that we talked to the guard, it is for sale for 60 rupees. Alternatively, you can get one for free in the Kakariko Graveyard, which we covered in the previous chapter.
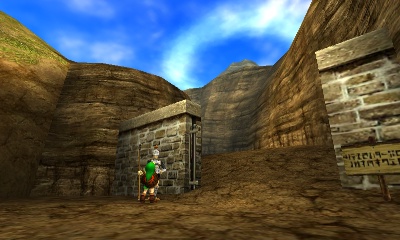
~ Death Mountain Trail ~

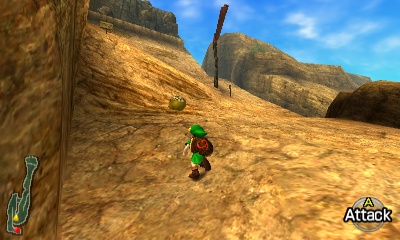
This area has several Red Tektites, a jumping foe that come after you if you get too close. Simply target them and wait for them to come towards you. Once they jump at you, hit the B button without moving the analog stick to perform a vertical slash that will hit them in the air as well. As long as you time it well, you can defeat them incredibly easily. If you have trouble, just avoid them or use Deku Nuts.
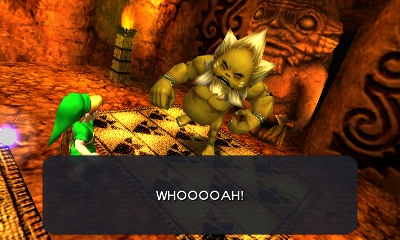
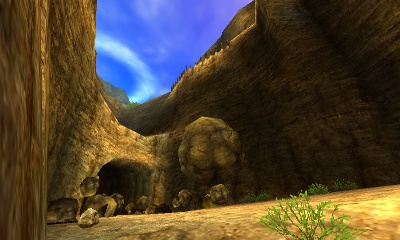
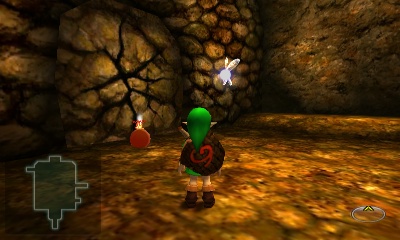
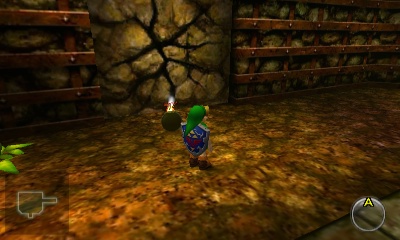
Make your way up the area until you get to a large, cracked boulder where you can talk to the rock-like creature next to it. He’ll inform you that he is of the Goron race, one of many on Death Mountain. The boulder behind him blocks the entrance to Dodongo’s Cavern, the Goron’s main source of tasty rocks to eat. It was sealed by none other than Ganondorf, the fiend!
Once you’re done talking to him, round the corner and continue upward. Once you get up into the large area, head to the right side of the flag. Avoid this rolling Goron by staying on the left side. If he hits you, he’ll knock you off the mountain. Continue on through and enter the giant, bannered entrance to Goron City.

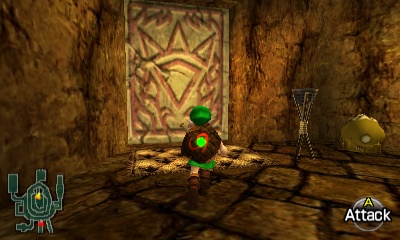
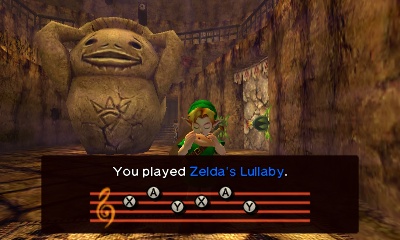

This city within the mountain is composed of many tiers which each have many doors and twisting corridors. For now, our objective is the bottom level, so you can just jump all the way down to get there quickly. Once there, head over to the big door, which is closed. How to get it open…? The nearby Goron gives you a clue if you speak to him: stand on the carpet and play Zelda’s Lullaby, which will cause the Goron leader to open the door.
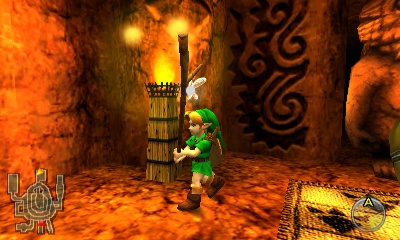
Saria’s Song – For this next part, we will need Saria’s Song. If you didn’t get it yet, simply light a Deku Stick on the torch in here and run outside, lighting the torches as you go. Light all the torches on the bottom floor and you’ll get the giant pot to spin. Just keep following the right wall, up the steps and around the corner into a corridor with boulders and Bomb Flowers. This part is not so obvious. With your lit Deku Stick, go touch one of the Bomb Flowers on either side to make it light. Stand back and enjoy the fireworks.


If you don’t have Saria’s Song, take the shortcut to the Lost Woods. From this entrance, turn left, left again, forward, left, and right to reach the Sacred Forest Meadow. Once you arrive, simply target the enemy Wolfos that appears and keep your shield up to get close. Wait either right after it attacks or when it’s back is turned to stab it. He should be pretty easy for you.
After defeating the Wolfos, the bars blocking the way to the rest of the area will disappear. Round the next corner and we’ll encounter an enemy Mad Scrub. This variety shoots three seeds at a time, so it’s best to target them and walk towards them with your shield raised. Get close to them and use Deku Nuts or your sword.


Make your way to the other side of the area using your mini-map. There are several dead ends along the way, but you should have no problem figuring it out. On the far side, you’ll eventually come to a ladder and a set of stairs. Take the steps, which leads to an enormous archway with two more Mad Scrubs guarding it. Defeat them quickly before they both cause trouble, then go the final distance to the most sacred part of the Sacred Forest Meadow…
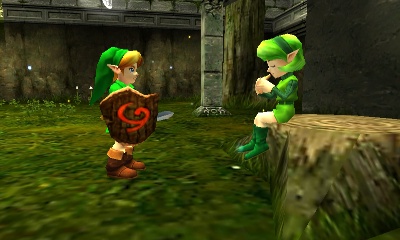
You’ll witness a clip in which Link and Saria are reunited. It turns out she’s been the one playing that song we hear in the woods the whole time. She briefly comments that she feels this place will be important to the two of you later. She then teaches you her song, the same one as the woods.

On your way back, you can take a shortcut to avoid all of the Mad Scrubs. Simply climb the ladder at the bottom of the temple-like ramp to get on top of all of these grassy walls. From here, you can simply jump along the tops of these walls until you get back to the beginning and right on out. From here, turn left, right, forward, right, and then right to get back to Goron City.
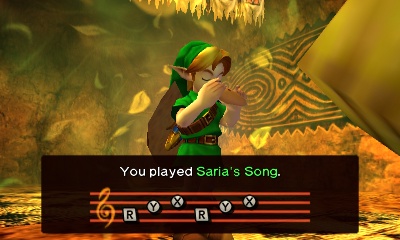
Make your way back over to Darunia’s chamber and play Saria’s Song while standing in front of him. I mean, that’s just common sense, right?
After witnessing the boss man dance a jig for you, he’ll turn all serious again, but be in a more talkative mood. Turns out, he’s willing to give you the Spiritual Stone of Fire…! If you can kill the beasts in Dodongo’s Cavern… Great. As a free gift (for no reason he claims), he’ll give you some helpful jewelry we need to even enter the cavern.
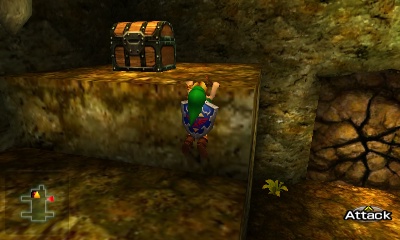
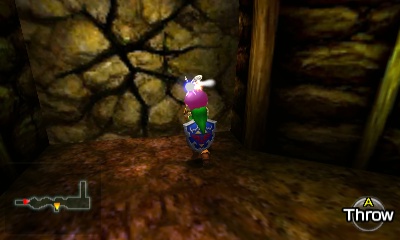
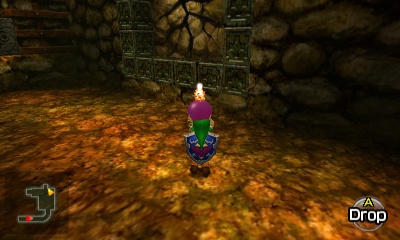
Fun With Ceramics – With downright fantastic equipment in hand, there’s just one more thing to do here. Take a Deku Stick and light it on the torch nearby, then light all the torches on the lowest tier outside his room. This will cause the giant Goron urn in the center of the city to spin. Climb up the steps to the second to bottom tier. Turn left and you’ll find a bomb flower just up the next set of steps. Grab the Bomb Flower, run and toss it into the moving urn. It might take a few tries to get it in there, but keep at it.
The goal is for the bomb flower to explode in the urn when the smiling face is facing you forward, which causes a Piece of a Heart to appear. It may take several tries, so be patient.
Heart Piece #10


With the shortcut, Saria’s Song, Goron’s Bracelet and Heart Piece in hand, make your way out of Goron City through the top exit.


From the entrance to Goron City, head to the right, rather than back down the mountain. Here, you’ll find a little overhang with a lone Goron and Bomb Flower. Speak with him if you wish, though he holds no monetary value, so to speak. His companion, however, is now useful to us.
Pick up the Bomb Flower and toss it over the ledge. If you aim straight ahead, it will land beside the giant boulder below and blow open the entrance to Dodongo’s Cavern. What? That was it? Why couldn’t these lazy bums who are ten times stronger than you do that?
Actually, as long as you’re up here, you can cheat and do a back flip at an angle over this shorter Bomb Flower fence to land on top of the roof of the Dodongo’s Cavern entrance and grab a Piece of a Heart (#26) early. I’m not going to do it for the sake of the walkthrough as this is not the intended way to get this piece of heart, but if you like, the option is open =)
Whenever you’re ready, go ahead and enter the Cavern. Note, there is a soft soil location just outside. So you can drop some bugs to get a Skulltula to appear. There are no bugs nearby, so you can head back to the Graveyard to snag some from underneath the rock near the entrance.
Optional: Gold Skulltula #21


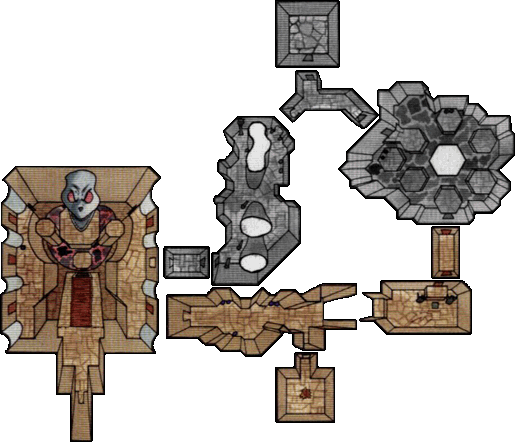
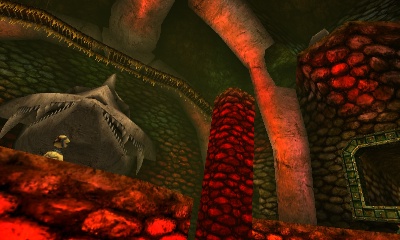
4.2 Dodongo's Cavern
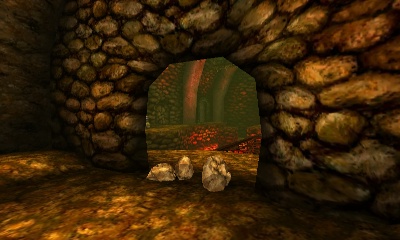
As soon as you enter, you’ll find an odd looking wall straight ahead. Use one of the Bomb Flowers nearby to blow it up, revealing the whole of Dodongo’s Cavern. This place is full of lava and fire enemies, so best to equip the Hylian Shield so you don’t burn your little Deku edition. As soon as you head forward, Navi will hint at this very thing.
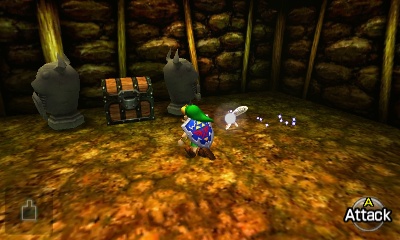
Main Room – Straight ahead, you’ll see a new statue enemy with a giant eyeball atop it; otherwise known as a Beamos. We can kill them with Bomb Flowers, but they’re best avoided for the most part right now. First off, we want to get to the left side of the room. You can do so by either jumping to the middle platform with the Beamos, and then left, or you can run along the dry ground at the very edge of the left platform right next to the lava, circle around the back and there’s a ladder leading up. Once you get there, pick up the lonely Bomb Flower and toss it at the funny looking wall nearby, which reveals a large chest containing, duh-duh-duh-duuuuuuh: the Dungeon Map. The next funny looking wall contains a Business Scrub selling Deku Shields, in case you burn yours.


Next, work your way to the opposite side of the room, once again either going through the Beamos platform in the middle, or circling around near the lava and climbing up the ladder. This first bombable wall contains a Gossip Stone, which we can’t use yet anyway. Pick up the Bomb Flower here and kill the Beamos on this platform. Next, use the Bomb Flower (which regrows after a moment) to blow up the farther funny looking wall (behind where the Beamos was). Go through the passage that’s revealed.

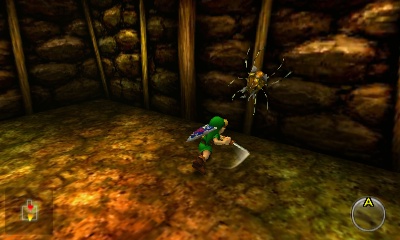
Baby Dodongo Corridor – In this small passage, you’ll find another new enemy: Baby Dodongo. Watch them carefully and slash them with your sword once they get close. Just make sure you’re out of the way when they explode and work your way to the other side of the room. Halfway across, you’ll see a bombable looking wall to the right which leads to Gold Skulltula. If you’re careful, you can lure one of the Baby Dodongo’s to it then kill it to make it blow open the passage so you can get the Gold Skulltula early.
I’m going to assume most people aren’t going to take the time (and frustration) to do that and will simply wait a little while. So, go up the ledge and you’ll come to a barred door with a switch below it. You have to remain standing on the switch to keep the door open, so how do we get through the door? Push and pull either of the Armos Statues on either side onto the switch to keep it down and go through the door.


Keese Corridor – In this hallway, kill the two Keese if you like and enter the next room.
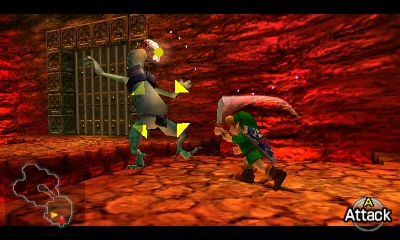
Lizalfos Room (Lower) – As soon as you enter this room, the door shuts behind you. We then have a face off with a new enemy called a Lizalfos. They take turns attacking you, so don’t worry about them both coming against you at once. Z target the one that comes for you, use your shield to defend and then smack it between it’s attacks. Whenever it jumps over you, just use your shield to not get hit. They’re a piece of cake and they can’t hurt you if you just keep your shield up. As a side note, doesn’t it look like they’re wearing metal bras? Also, it’s kind of a good idea to avoid the lava. Once you get the hang of it, you’ll defeat them with ease. Both doors will then open. Snag some goodies in the jars nearby if you need, then head through the next door.
Dodongo Room – In this next hallway, you’ll see a bombable wall in the corner. You can use the nearby Bomb Flowers to get in there, but it just leads to a Business Scrub selling Deku Sticks. Continue on through this room, and you’ll encounter yet another new enemy: Dodongos. This large version of the lizard things will breathe fire at you and are invulnerable except in their tail.


The trick is to stand in front of them to make them attack, then while they’re doing that, circle around behind and quickly smack them in the tail. Get out of the way because they spin around really quick. If you have extra Deku Sticks you can do a Deku Stick Jump Attack on their tail and kill them one hit. Now, the other easy way is to simply… Shoot them with your slingshot between their attacks… But how boring is that? =D
There are three of them in the room, so defeat them real quick. You’ll then find that the next door is barred, so we have to solve a puzzle. There are three unlit torches and one lit one in this room. I think you know what to do. Head back to the beginning of this room and whip out a Deku Stick, then run back to the door and light all the torches along the way. Go through the door.
Main Room – We’re back in the center room, this time on an upper ledge. Run forward and step on the switch to open a barred door across the way. That’s it here, so hop down and make your way across to go through the door.


The Big Steps – This giant rooms looks awful suspicious, does it not? We’ll get to this in a moment. If you’d like the compass (say yes, say yes!) then pick up one of the Bomb Flowers and blow up the odd looking wall on the left, which reveals a door. Go on through.
Compass Room – In this treacherous room, you’ll encounter your first Armos. Unlike the statues from earlier, this one is alive. Run forward and touch it to wake it up, then run back. I suggest just using a Deku Nut and then a Jump Attack. After that, you can either run away from it to avoid it’s trampling powers and explosion, or just hold R with your Hylian Shield.
Once it’s defeated, open the large chest to get the Compass. Nice. Head back to the previous room.
The Big Steps – Alright, so we have a large number of Bomb Flowers on either side of this big pillar thing, with a suspicious gap of a Bomb Flower in the middle. Hmm. Pick up the lone Bomb Flower near the Compass Room door and place it between the other Bomb Flowers, causing them to blow up at the same time. The mass amount of firepower will cause the pillar thing to sink down into the ground, which is then revealed to be gigantic steps that lead into the upper area! How… convenient…


Climb up (takes forever doesn’t it?) and circle around either left or right. Once you come to the vines, stop to kill the Skullwalltulas as well as, duuun-dun-dun-daaaah, another Gold Skulltula! Oh happy day! With that in hand, whip around and go through our next door.
Optional: Gold Skulltula #22


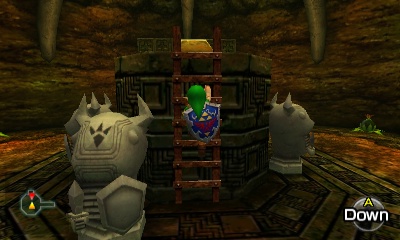
Armos Room – In this hexagon shaped room, you’ll encounter a variation of an enemy we’ve already encountered: Fire Keese. Be sure you have your Hylian Shield equipped so they don’t burn your other one. I suggest just shooting them with the Slingshot. Once they’re out of the way, head to the middle of the room and find the side of the platform that has the ladder. Pull the Armos Statue (the only one that’s not alive) out from in front of the ladder, then climb up and step on the switch. This opens both the doors and points you towards the next one. Jump down and go through the door.
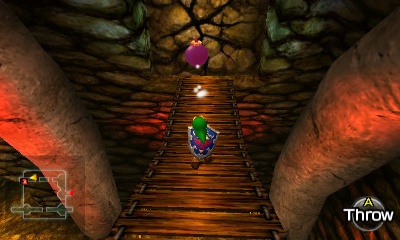
Main Room (2nd Floor) – We’re back in the main room, above the entrance. There are two more Fire Keese here, so be careful they don’t knock you over. Just keep head straight across the bridge and you’ll get to the next room. There’s a deliberate chunk taken out in the center of it for no reason, JERKS!

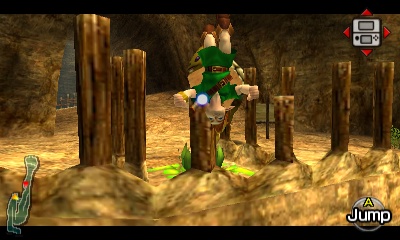
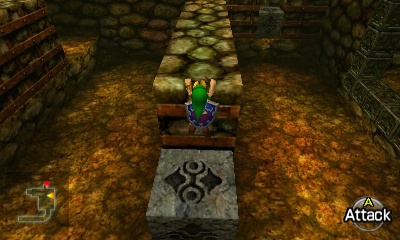
Trap Room (Lower) – As soon as you enter, stand next to the edge and look down. There’s a common Zelda franchise obstacle here we’ve yet to encounter: Blade Traps. For this first one, I suggest jumping straight ahead, between the two pillars. Run forward a bit and Navi will exclaim that you should use Z targeting to look around corners. Just keep going straight, being obviously wary for more Blade Traps, until you get to the Stone Block. You can pull this back to reveal a Recovery Heart behind it in the hole.
Pull the block to the nearby platform and use it to climb up. Once there, you’ll find a lonely little chest containing a Red Rupee worth 20. Pick up the Bomb Flower here and toss it at the funny looking wall above the ladder. Don’t worry if you miss, the Bomb Flower will keep growing back. You want to try and make it land on that little ledge, but if you find this too difficult, you can holding until it starts flashing faster, then toss it so it blows in mid air. Once you manage to blow it up, jump over and continue onward.

Flame Puzzle 1 – In this next little room, the platform between you and the next hallway is filled with a raging flame. The suspicious looking Eye Switch above it, however, is watching you. Shoot it with your Slingshot to get rid of the flames momentarily. Jump across and head through the hallway, which turns out to be infested with Baby Dodongos! Oh nooos! Your Hylian Shield comes in handy here to avoid confrontation as they jump right over you. Continue on and enter the door at the end of the hall.
Lizalfos Room (2nd Floor) – As soon as you enter this lava filled room, two Lizalfos appear. Ahh! We’re much more confined, now that we have to fight them on these little platforms, but it shouldn’t make any difference. It just makes it harder to Jump Attack. Once you defeat them both, the next door will open. If you got hurt during the battle at all, there are some Recovery Hearts out on the platform off to the side (check it out, we’re in the top part of the room we fought them in earlier!) Aren’t the natural formations of square platforms in this room logical? Gotta love it. When you’re ready, head through the door.
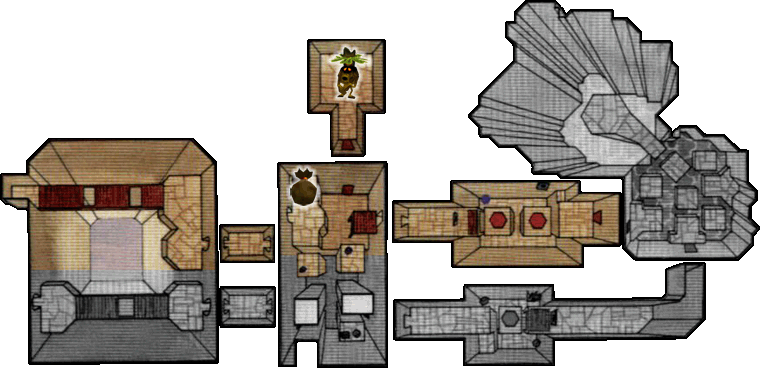
Flame Puzzle 2 – Ah, another flaming puzzle. Shoot the Eye Switch just like last time and you’ll encounter another problem. The next platform is still burning! Jump to the first platform and look to the left. You’ll see there’s another Eye Switch in the cubby. Shoot this one to douse the second flame. Onward, to victory!


Trap Room (2nd Floor) – We’re back in the room with the spiky traps down below. From this upper area, jump to the next platform and climb up the ledge on your right. Open the large chest to get the dungeon item: Bombs! Now we can blow everything up! It’s like Zelda meets Bomberman… maybe not…

Now, you’ll notice there’s a bombable wall down a level. DON’T DO IT! It’s just a couple Business Scrubs selling Deku Nuts and Deku Seeds (worthless). Continue on through the next opening.
Main Room (2nd Floor) – We’re back in the main room in the final area of it. Run forward and step on the switch to make a shortcut, extending the lift of one of the elevator things to the upper floor. Awesome. Continue forward and you’ll see a stone block which has a clue as to what we need to do next… After examining the poetry, head right and onto the bridge. There’s a bombable wall ahead, but it just contains a small chest with a Red Rupee (20). If you lost your Kokiri Shield, you will find a replacement in this treasure chest.
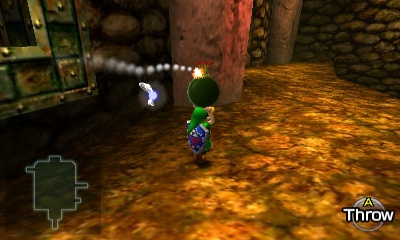
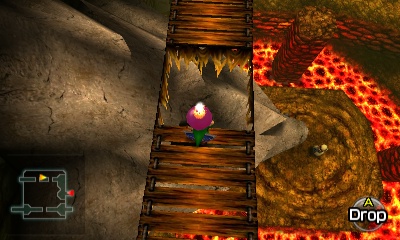
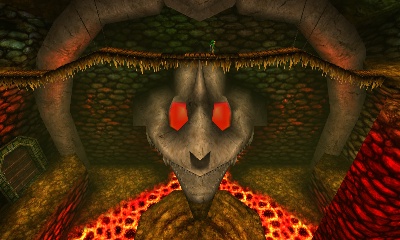
So, as the poem said, we need to make the giant Dodongo’s eyes red. How would one suppose we do that after we get an explosive item, hmm? You’ll notice, the bridge suspiciously has holes right above the eyes. Stand next to the edge of each of these holes and drop a Bomb down (by pressing the C button twice). Wait for that one to blow, then do the other eye. Once both the eyes are “lit,” it’s mouth will go down, revealing another door! At this point, we just need to get down, so you can go the long way, jump to your doom, or do what I do: Jump down onto the skull, then down onto the platform.
Before we head into the skull, there’s a Skulltula you probably didn’t snag earlier. While facing the Dodongo skull, go to the right side of the room and through the farthest doorway, which leads us back into the little hallway with the Baby Dodongos.
Baby Dodongo Corridor – Follow the right wall, avoiding the Baby Dodongos, and you’ll come to the bombable wall you probably passed by earlier. It’s possible to lure the Baby Dodongos close and use them to blow it up, but now that we have Bombs, we can get in here. Blow open the wall and enter the small room.
Gold Skulltula Room 1 – This small room contains three Keese and a Gold Skulltula. For fun, you can try tossing one of our Bombs at them and watching them explode >=D Next, you’ll have to use a Jump Attack or backflip to collect the token. With that in hand, return to the main room and enter the throat of the beast; so scary!
Optional: Gold Skulltula #23
Final Room – We’re right next to the boss; unfortunately, we can’t get through the door just yet. Hop down into the square room and defeat the Fire Keese if you like. Head to the right (the only other area you can climb up) and follow the long hallway.
“S” Shaped Room – The two Fire Keese in here are awfully obnoxious, so I suggest defeating them first. Jump down and make your way to the opposite side of the room, climbing over the blocks when you get to them. On the other side of the room, you’ll see a bombable wall on a ledge. Toss a Bomb onto the ledge or just hold it until it’s about to explode and then toss it, if you have trouble hooking it onto the ledge. Go through the door.


Gold Skulltula Room 2 – In this room, we have a lone Armos statue guarding our next Gold Skulltula. After defeating it, go ahead and snag the token. Return to the previous room.
Optional: Gold Skulltula #24

“S” Shaped Room – Those stupid Fire Keese have come back, so you may have to defeat them again. Head over to the ledge we climbed over and use it to get on top of the high wall. Now use it to run along the top of the wall and drop down into the next area. There’s a Fairy in one of the jars to the left that you can snag in a bottle if you like. Continue on through the next hallway.

Final Room – We’re back in the square room, but there’s a stone block here! Push it off the ledge, then hop down and kill the Fire Keese which are both back from the dead. Next, push/pull the block onto the switch in the hole in the center of the room. This will keep the boss door open. If you’re ready, go on in.


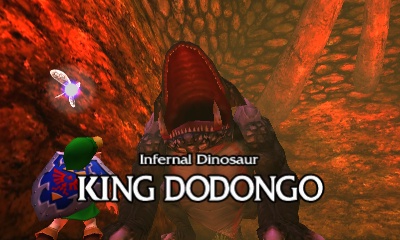
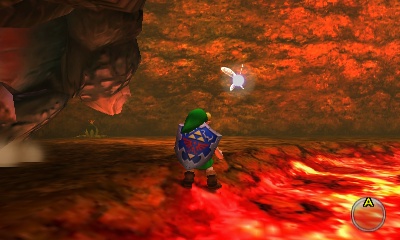
Boss Room – Once in there, use a Bomb on the funny looking patch on the floor, then open the chest for some Bombs (so you’re full). Fall down the hole to begin the boss battle.


King Dodongo is another easy boss that just looks big. Its large size makes for awkward attacks that are easily avoided. It only has two forms of offense, the first of which is to breathe fire at you, which takes him a long time to charge up. His second attack is to roll around half the arena, which he does repeatedly throughout the battle, usually either immediately after the first attack, or when there’s an awkward situation where he can’t hit you that well.

Both of his attacks are easily avoided by standing close to the lava, or in one of the insides of the corners. For the rolling attack, you can also just hold in your shield to avoid taking damage.
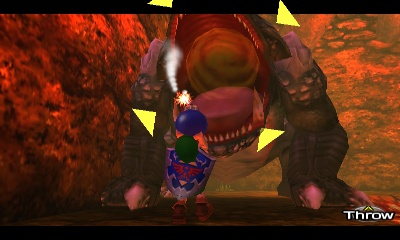

With that being said, you should follow Navi’s advice and try “giving him a shock.” Do so by throwing a Bomb or Bomb Flower into his mouth while he’s inhaling to breathe fire. It will explode in his stomach, stunning him for a moment. Use the opportunity to slash him with your sword. Just be prepared to jump to the side with the lava to avoid his roll immediately after, then circle around to the other side or wait in one of the corners to face him once again.
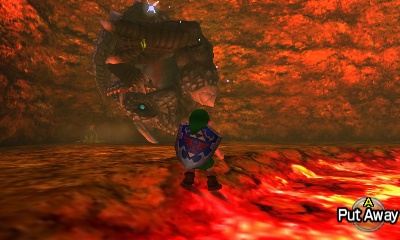


Four or five hits will kill this beast. And if you plan ahead, you can throw the Bomb, whip out your sword while he flings himself in the air, then use A to do a Jump Attack on him as soon as he hits the ground, dealing extra damage.
After the old king has been defeated, be sure to grab the Heart Container that’s left behind, then enter the blue portal to leave this dungeon.


4.3 Atop Death Mountain
After exiting the dungeon, you’ll quickly be reunited with Darunia, who is quite pleased to see you. After giving you a friendly pat on the back that plants you on your face, he’ll lament about how Ganondorf came and put the boulder in front of the Cavern, and how special you are. Somehow, you two become Sworn Brothers, whatever that means. Ooo, Darunia knows how to glow. I wish I could do that…


He then gives you Goron’s Ruby, the second Spiritual Stone we were after. He’ll then urge you to go see the Great Fairy on top of the mountain. We’ll follow his advice momentarily. After the conversation, two Gorons fall down and wish to have a little huddle of love. Run away from the Goron hugs, Link!

Now that we’ve narrowly escaped death in the arms of the rock people, we have some goodies to grab all over Death Mountain. Head back towards Kakariko Village and along the way, you’ll see a funny looking chunk of the wall (and the sounds of a Gold Skulltula emanating behind!) It’s just begging to be blown up with one of your newfound Bombs. Do so and kill the spider, then climb up the oddly climbable stone surface.
Alright, before we head up to the top of Death Mountain, let’s pay a quick visit to Goron City. On the way you’ll find a second bombable wall and this one has a treasure chest that contains a Purple Rupee.
Optional: Gold Skulltula #25


There is a large rolling Goron in the city now, known as “Hot Rodder Goron“. Be careful not to get too close to him, as he will run you over. You can stop his crazy awesome rolling by using well timed Bombs to blow him up, but he just gets annoyed at you. Stop him under the closed in, cave-like area on the north side of the city and he’ll give you a nifty upgrade.


With a lot of Bombs in hand, head to the top of the city. There are three rocks blocking the path on the west side of the city. You can either blow them up, or use the ropes leading to the pedestal and tightrope your way there. The latter option may be fun, but it’s not really worth the time.
Once you make it to the other side, follow this short path to be taken to a rock maze… You can’t do anything with the silver boulders at the moment, so just blow your way through the regular boulders until you find all the treasures. Just try to stay on the right side for the first half, then the middle after that.
At the end, open the small chests to get a Purple Rupee worth 50 each! Roll into the crate to find a Gold Skulltula. With that, leave Goron City.
Optional: Gold Skulltula #26


Death Mountain Trail – And now, it’s time to ascend Death Mountain to speak with the Great Fairy like Darunia told us to. When you’re ready, head back to the part of the trail where the path splits and this time go to the highest point thus far. There are three boulders, two of which are blocking the way. With our new Bombs, we can blow our way through.
Blow up the first one, then hold a Bomb and wait till it’s about to explode, then toss it at the second. Jump over and collect the Red Rupee (20) that was underneath. Climb up and there’s another boulder up here, which will reveal a hole with a cow in it, should you desire milk (by using Epona’s Song).
Continue along the path and you’ll abruptly find you’re caught in an eruption of the volcano! Make sure your Hylian Shield is equipped and simply hold R to wait it out. The eruption comes in bursts, so make a break for the other side between the gaps in the flying magma and rocks. Once you get close to the other side, it’ll stop, so don’t worry. =)
Whip out your Slingshot and kill the Skullwalltulas before climbing up. After that, it’s smooth sailing up to the top. Once you get up there, you’ll find a couple things of interest, one of them being the Owl. Ignore him for now and enter that hole in the mountain on the right.
Death Mountain Crater – Whew, is it hot in here! We’re not really supposed to be here yet, but there are two things we can grab real quick. Make sure you’re not in here when the timer ends though, otherwise you’ll get killed! First off, roll into that crate at the entrance to find a Skulltula spider!
Optional: Gold Skulltula #27


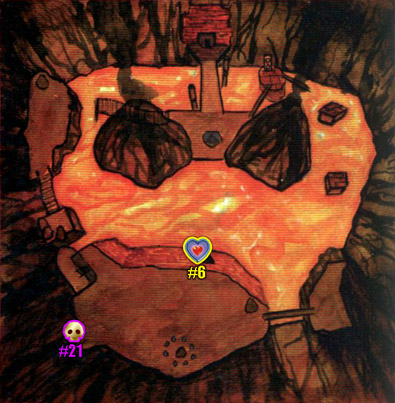
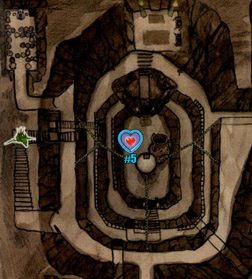
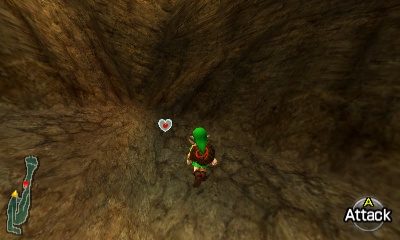
At this point, you may want to reenter to ensure you have a full timer. Run forward and when you come to the ledge, line yourself up so you’re facing towards the Triforce platform down below. Now run at the cliff. Don’t worry, you’ll flip around and grab hold of the wall, which is climbable! Now start climbing down and you’ll find a small cubby in the middle of this cliff that has a Heart Piece! Now, we can’t get back in time, so instead, jump into the lava (this is actually better than waiting for the timer). You’ll appear back at the entrance with one less heart. Exit.
Heart Piece #11


Atop Death Mountain – With those items in hand, swerve around the bird for now and lay a Bomb against the funny looking wall, which blows to reveal a hidden cave. Enter it to find our first Great Fairy Fountain. Run forward, stand on the Triforce symbol and play Zelda’s Lullaby.
A large, scandalous woman will then appear. After giggling and making idle chat, she’ll give you our first magic ability: the Spin Attack. Before you leave, she reminds you to visit her friend near Hyrule Castle, who will give you another power. Good to know.


Head back outside and speak with the owl. After another conversation that will undoubtedly make you yawn, stand underneath him when he’s done talking to get a ride back to Kakariko. By taking this shortcut down to the village, we can get a hidden prize.
Kakariko Village –  Okay, before you go ahead and jump off the building, there’s a Piece of a Heart we can get. There are two ways to collect this puppy: Use the Hookshot (which we don’t have yet) or use the Owl’s free ride from Death Mountain (you can do it as many times as you like) to get on top of this roof. Since we’re up here, let’s snag it now, shall we?
Sneak off to the right side of the roof and peek over the edge, above the Cucco Lady’s chicken pen. You’ll see there’s a thatch roof overhang. Jump down to it and turn around to find a hole in the wall of the house (they should really get that fixed). Inside, there’s a cow behind bars. Not a very good prison for the criminal I’d say (why is there a cow in a house…?) Collect the Piece of a Heart next to it.
Heart Piece #12


Now, if you forgot and jumped off the building, don’t feel too bad, because until you leave the area, all you have to do is play the Sun’s Song, which restarts the area and makes you appear wherever you entered the village from. In this case, that’s on top of the roof. Pretty cool trick, isn’t it? =D
4.4 Fun With Bombs
Now that we have the bombs, there are a few goodies for us to collect. The first is back at the Castle Market Town, so head on over. We want to enter the now open Bombchu Bowling Alley. It’s on the same side as the Shooting Gallery, in between the exit to Hyrule Field and Hyrule Castle.
Bombchu Bowling Alley – This game has no time limit, so be sure to take your time. The goal is to drop the Bombchus down at angles so that they miss the obstacles along the way and hit the targets on the wall. Remember that they can climb walls as well, so you can use either of the sides to your advantage.


The first area is rather simple. Just aim directly ahead, wait until the path is clear and drop a bomb. You have to be perfectly in line, otherwise the Bombchu will scatter off in a direction. The second area is a bit more challenging. I find it easier to angle Link so he is facing 45-degrees and then drop a Bombchu. It takes some time to get the right angle. The last area one has a giant chicken that really, just won’t budge. It stays in a little ditch right in the way.
I find it’s easiest to simply lay them down a Bombchu when the chicken is in the middle and the little one is off somewhere else, that way, the larger one will most likely move by the time the Bombchu gets there. The other method is to stand off to either the left or right side, aim for the target and wait for the big chicken to be on the opposite side.
Just be patient and time it well. The prizes for this game change every time you play, but they go through a cycle, so if there’s one you particularly want, you can get it.
There are multiple prizes for this mini-game, which will be cycled through, so if you miss it, you can get back to it if you keep playing. The prizes, in order are: Bombchus, Heart Piece, Bombs, Bomb Bag and Purple Rupee (50). The initial prize is a random one from the list, but from then on, it will always cycle to the next one in line.
It’s a pretty easy game really, it just costs a lot of Rupees… Use the guardhouse nearby to get more if you need it. Since the prizes cycle through, you can always come back for these goodies later if you don’t make it the first time.
Heart Piece #13


Next, head on through to the Hyrule Castle area. Climb up the vines and go straight ahead. Jump down and blow up the boulder behind the “Dead End” sign using your bombs. Crawl through the hole you find.
Inside, play Zelda’s Lullaby to make the Great Fairy of Magic appear. She’ll give you another spell that will be quite useful to you. NOTE: In order to acquire Din’s Fire, you will need to have visited the Great Fairy located at the very top of Death Mountain.


We have one more Heart Piece for us to collect and this one is back in Hyrule Field. Make your way to the southwest portion of the field, right by the entrance to Lake Hylia. Right in the middle of the four square fences, you will hear the chime from your Shard of Agony, or feel the rumble from the Stone of Agony. This indicates a secret. Drop a bomb right in the center of this area to uncover a hidden grotto. Inside, you will find a Business Scrub who will sell you a Piece of Heart for 10 rupees. Sweet deal!
Heart Piece #14


There is one last goody for us to collect over at Lost Woods. Make your way through the Lost Woods to the final area just before the entrance to the Sacred Forest Meadow. Here you will find a boulder that can be blasted away with a bomb. Inside there are a pair of Business Scrubs and the first one will sell you a Deku Nut Upgrade at the cost of 40 rupees.


- Chapter 1 – Inside The Great Deku Tree
- Chapter 2 – Princess of Destiny
- Chapter 3 – The Mighty Collection
- Chapter 4 – Dodongo’s Cavern
- Chapter 5 – Inside Jabu-Jabu’s Belly
- Chapter 6 – Timely Appearance
- Chapter 7 – Forest Temple
- Chapter 8 – Fire Temple
- Chapter 9 – Ice Cavern
- Chapter 10 – Water Temple
- Chapter 11 – Bottom of the Well
- Chapter 12 – Shadow Temple
- Chapter 13 – Spirit Temple
- Chapter 14 – Ganon’s Castle
