This guide covers the completely optional quest of playing through the Gerudo Training Ground and acquiring the Ice Arrows. This quest becomes available once you have saved all the Carpenters at the Gerudo Fortress and acquired the Gerudo Membership Card.
Near the front of the Gerudo Fortress, there is a Gerudo women dressed in white, standing in front of a barred entrance. For the cost of 10 rupees, You can enter this mini-dungeon. Before entering, I would recommend that you have complete the five primary dungeons as an adult, as we will need the following items to acquire all the keys.
- Fairy Bow – Forest Temple
- Megaton Hammer – Fire Temple
- Longshot – Water Temple
- Lens of Truth – Within The Well
- Hover Boots – Shadow Temple
- Silver Gauntlets – Spirit Temple
That said, there are a total of 9 small keys that you can acquire in the dungeon, although you technically only need 7 of them to actually complete the dungeon. This means that if you know where you particularly need to go, you can complete this mini-dungeon prior to completing the Spirit Temple, or Shadow Temple. Whichever primary dungeon you choose to complete last. Since the reward is not exactly needed in either of the last dungeons, I would recommend only completing the Gerudo Training Ground after acquiring all the items.
Entrance
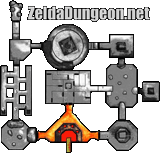

As soon as you enter, you can turn around and shoot the golden eye switch directly above the entrance. This makes two small chests appear. One has a Blue Rupee and the other has a bundle of arrows.
There are three doors in this room. The one right across from the entry will take us to the locked doors, and the main prize, so we’ll do that one last. This entire dungeon just loops around, so you can start by going either left or right. Personally, I think left is easier.


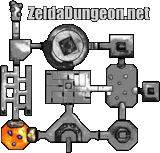

In this room, you have one minute to kill both the Stalfos. They’re easily defeated, especially if you have the Biggoron Sword. As long as you keep moving, the sand shouldn’t cause you any problems.
Once they’re both dead, snag the Small Key [1] from the chest and go through the door.


This room contains a Wallmaster in the middle, rolling boulders on both sides side, and several invisible flaming walls. You only have a minute and a half to get all five Silver Rupees. I suggest ignoring the Wallmaster.
First of all, run forward and take a left. Peak around the corner and wait for the boulder to pass by, while watching out for the Wallmaster. Once it passes, quickly turn left to get the first Rupee (1). Head right and duck into the side crevices to avoid the boulder, and at the top, snag the Rupee (2).
Go to the middle corridor, which doesn’t have flames and is higher up, and turn right. Jump off the ledge to get the next Rupee (3).
Now, head through this middle corridor on the right side and wait for the boulder again. Head clockwise around the corner to grab another Rupee (4).
At long last, use your Longshot on the target straight ahead on the ceiling to fall into the final Rupee (5).


The timer stops and the next door opens. Go all the way up and towards the door, but watch out for the flames that block the way. Longshot to the target on the ceiling, then go through the door.


This area is a little tricky. First of all, run forward and kill the two Wolfos and two White Wolfos. Next, use the Lens of Truth to see a hidden area above the Fake Door. Longshot to the target up there and step on the switch. This opens up both of the sealed doors below.
Jump back down and use the Gauntlets to push the giant Silver Block all the way into the hole. Enter the now unsealed door.


In this small room, kill the three Like Likes to make two additional chests appear. The original on the platform is a trap that will freeze you. The two up front contain a Blue and Gold Rupee, but there’s an invisible one as well. Use the Lens of Truth in the last sandy hole to find a chest that contains a a Small Key [2].


Return to the previous room, Longshot back up to the hidden area and enter the door.


There’s a barred door on this top level we can’t use yet, but wait! Before you jump down, stand next to the barred door and you’ll see that Navi turns green. Play the Scarecrow’s Song while facing her to make Pierre appear. Now we have easy access back up. Jump down.
On the outer platform, which begins spinning. Face the statue in the middle and aim carefully. Shoot each eye once with an arrow to make a small chest appear next to them. Longshot to the small chest to get a Small Key [3]. Longshot to the target near the entrance of this area to get out.


Now, the barred door up top is now open. To get back up there, you can either fall in the lava, or face the barred door, making Navi fly up there and turn green, and play the Scarecrow’s Song to make Pierre appear.
Longshot to him and go through the door. Inside, you find a small chest containing another hidden Small Key [4]. Go back, jump down, and enter the other door.


Kill the two Fire Keese and Fire Slugs to make the door open and a small chest appear, containing some rather worthless stuff. Next, use the Megaton Hammer to smash the statues to reveal various goodies. In the northeast (top right) corner of the room, there’s a statue thing that’s hiding a switch in a hole.
Step on the switch and quickly grab the Small Key [5] from the chest in the middle before the fire comes back. Enter the next door. Note, if you’re trying to go back the other way, you have to find the gold eye switch, which will open up the door to the statue room.


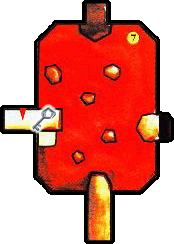
There are five Silver Rupees in this room, which open the east door. First, go forward a little bit, turn around and Longshot the target directly above you to get the first Rupee (1).
Jump down to the platform in front of you (2).
At this point, I suggest equipping the Hover Boots. Use them to go to the next (middle) platform. Navi turns green straight ahead. Play the Song of Time to make two Time Blocks appear. Float over to them and climb all the way up to find a Small Key [6]. Don’t go through this entrance, though.


Jump/Fall off to the side of the platform where a single switch is dying to be stepped on. This causes the fire on the platform across the room to go out.
Using the Hover Boots, float along the obvious platform path, gathering another Silver Rupee (3). I recommend leaving one of these here uncollected. Run to the other side of the room and snag the Rupee (4). If you get this one last, it shows the animation of the door opening, and the lava might re-appear while that happens, knocking Link into the lava and making you start the room over.
Quickly run back to the middle of the room, grab the final Silver Rupee (5), and enter the east door.


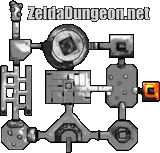

Play the Song of Time to remove the Time Blocks, then equip the Iron Boots and Zora Tunic. Sink down and avoid the Blade Trap in the middle of the floor. Wander around, killing the four Shell Blades with your Longshot.
The first Silver Rupee is simply in the middle, around the Blade Trap (1). The next two are along the west wall. Stand in line of sight with the target, the Silver Rupee between you. You should go right through it (2) and land onto the next one (3).
Do the same thing to get the one on the east wall (4), then take off the Iron Boots and float to the roof of this room, where the last one (5) awaits you.


Lava Room – Float across to the door on the left and head south.
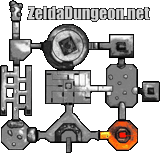

In this room, we have a Beamos and two Dinalfos. I suggest immediately throwing a Bomb at the Beamos so it’s out of the way.
These Dinalfos are exactly like the Lizalfos… The only difference I can tell is that they don’t wait for you (take turns) if you Z target one of them like most other enemies. Running and quickly slashing them up is the easiest way to defeat them.
As soon as they’re dead, the barred door opens and a chest appears containing a Small Key [8].


We are back at the entrance and right in the center of this room, Navi will fly over and turn green. You can Play the Song of Storms to make a fairy appear. At long last, enter the center room with all the locked doors.


You should have eight total keys at this point. If you entered from the lava room, you’ll need a total of 9 keys, but if you enter from the entrance room, you only need 7. But, where is the 9th key? Once arrive at this area from the entrance room, enter the door on the left.
Before venturing onward, use the Lens of Truth and look at the ceiling directly to your left. There’s a hole that you can climb up the grating to get to a secret room with the final key [9].


Climb back down and go through all of the remaining doors on the left side to eventually wind up in the center and claim the prize: the Ice Arrows. There are several other small chests along the way, but none are very interesting. When you’re done playing around, exit the mini-dungeon.


