Zelda Dungeon’s Fantasy Smash Bros. Roster — One Year Later, We Pick Some DLC Characters!
Posted on December 30 2019 by Andy Spiteri
It’s hard to believe that it’s been a year since the release of Super Smash Bros. Ultimate, arguably the greatest Smash Bros. game yet and inarguably one of the biggest pieces of fan service Nintendo has ever released to its fans. One of the things that makes the road to a new Smash Bros. game seem more exciting than your run-of-the-mill Nintendo game is the constant buzz around which characters we might see join the brawl. The last two installments into Nintendo’s mascot brawler have really seen the doors blown wide open in terms of non-Nintendo characters joining the fight, with Smash Bros. morphing from a celebration of Nintendo’s rich history to a celebration of video games in general.
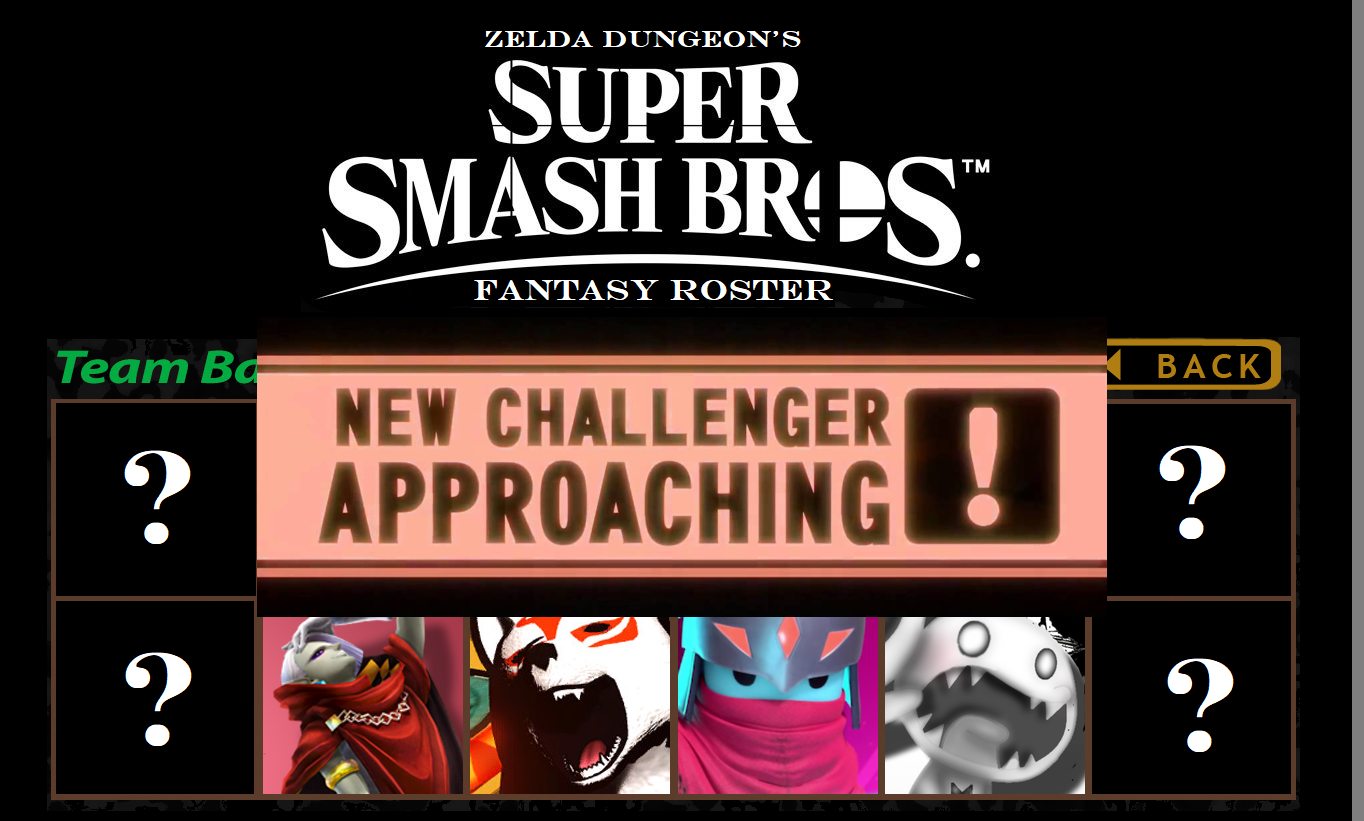
Of course, not all of our favorite characters have made their way to Final Destination yet, which is why Zelda Dungeon published our Fantasy Smash Bros. Roster last December. We built a pretty cool roster if I do say so myself; but what about DLC fighters? If Smash Bros. Ultimate can release five fighter packs, and then tell us that they’re working on even more downloadable content, we figured we would use that as an excuse to add even more fighters to our aptly named fantasy game, Super Smash Bros. ZD.
So come and check it out — Zelda Dungeon’s editors each picked out a character, complete with a moveset and Final Smash, they’d love to see appear in Smash! Lets dive right in, and hey — you never know — maybe we’ll see some of these characters in a real Smash game one day!
Kicking things off, I, Andy Spiteri, choose the neon clad, synthwave phenom from Hotline Miami known as…

Moves
Up^B – Chainsaw Time!
- Jacket pulls out a heavy chainsaw which reacts violently enough to pull him straight upwards, doing heavy damage to anyone around.
Down^B – Mask Change
- Jacket changes his masks, going between his default Rooster mask, which grants him balanced properties, to an Owl mask, making him faster and lighter; a Horse mask, making him stronger and slower; and a Swan mask, making his Smash attacks do double the damage, but also causes him to take double damage. This would be similar to Shulk’s Arts neutral special.
Side>B – Dog Rush
- Jacket unleashes one of those brutal dogs that mows down foes in a single hit. Long range attack.
Neutral B – Double Guns
- Jacket pulls out twin machine guns and shoots a short burst in each direction, both left and right, damaging anyone on his sides.
Final Smash – Fastlane Miami
- Jacket quickly calls on his trusty getaway car to mow down anyone in a straight line. Similar to Marth’s critical hit.
Next, Alison Brunyee funks up the field with…

Moves
Up^B – High Five
- Toejam or Earl will drop in to give their friend a high five and recover some damage.
Down^B – Crank It Up!
- Toejam and Earl get out their boom box that can crank out some seriously funky tunes. All fighters on the field are forced to dance for a time, which gives you the opportunity to create some damage.
Side>B – Presents
- Toejam or Earl can open a present on the battlefield to aid them, be careful however as you could be unlucky and get a ‘Total Bummer’ which is an instant KO!
Neutral B – Jar Trap
- Toejam or Earl throw jam jars at the other fighters to cause damage. If you manage to throw enough jam jars at an opponent, they will become trapped. If you can collect the jam jar before they escape, it will be an instant KO for that fighter.
Final Smash – Rapmaster
- Toejam and Earl’s beloved rocket ship makes an appearance. Blasting out some beats on its megawatt speakers and causing a ton of damage in the process – jammin!
Next up, Rod Lloyd adds the coolest Kong around…

Moves
Up^B – Point Break
- Funky is dedicated to a tubular lifestyle, so he never lets go of his trusty surfboard. In addition to wacking any punk that tries to harsh his mellow, this righteous dude can also perform a radical upward strike and hover down on his board. Nice aerial, dude!
Down^B – Badical Banana
- Any x-treme athlete worth his salt knows you need the right fuel to keep the party going. That’s why Funky will take a quick sec’ to chow down on a banana before getting back into the action. The extra grub will not only reduce his damage percentage, but Funky will leave a banana peel on the ground for some barney to trip on. Just don’t litter on the beach, brotha!
Side>B – Righteous Roll
- Funky has mastered the art of chill in all situations, which is why he’s renowned for his infinite roll in Donkey Kong Country: Tropical Freeze. If you execute this gnarly move, the funkster will roll forward with the wicked force. And if you charge it up before releasing, he may even mow down multiple fighters at once. Yew!
Neutral B – Bodacious Boot
- If you’ve played Donkey Kong 64, you know that Funky, in addition to being a vehicle expert and master of the surf, is a top-notch weapons guru. His rocket launcher actually delivered a boot-sized whippin’ to King K. Rool at the end of the game. Likewise, in Smash Bros., Funky can launch boots at his opponents and teach them the meaning of “wipeout”. Shacka, bruh!
Final Smash – Barrel Flight
- Funky has been renting out flights on his barrel plane for years, so it would only make sense for our bodacious compadre to use his ride to cause some serious damage. If an opponent wanders too far into Funky’s chill space, he’ll call down the Jumbo Barrel and have it crash directly into them. They’ll be soarin’ off the stage for sure after that. Cowabunga!
Charles Xavier chooses a resident troublemaker to join the fray. Get ready for…
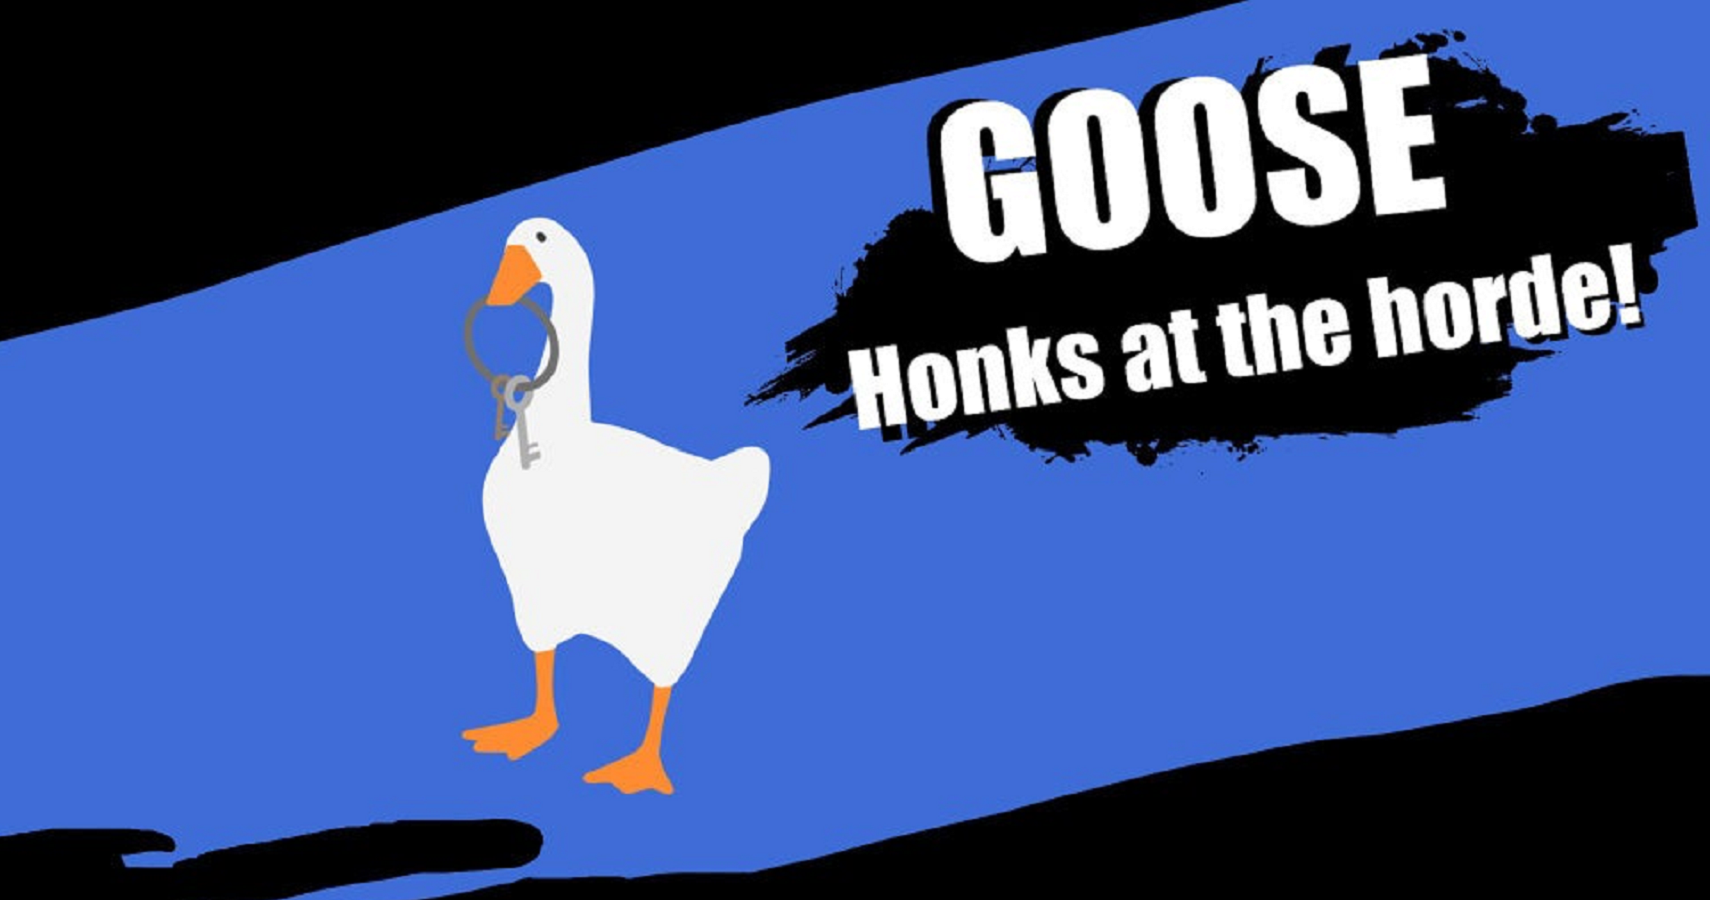
Moves
Up^B – Beak Peck
- Goose will stab aerial opponents with his beak.
Down^B – Defiant Flap
- Goose will flap his wings downward, sending out a shockwave of air, damaging nearby enemies. While airborne, Goose will flap his webbed feet while in his descent.
Side>B – Whipping Neck
- Nearby enemies will be lashed with the reach of Goose’s strong neck, this attack is Goose fighting like nature intended.
Neutral B – Honk!
- His claim to fame, Goose’s standard attack is a flurry of loud honks that pierce the sound barrier, dealing minimal damage.
Final Smash – Show Stealer/Stolen Fury
- Goose has a randomized chance to steal an easy win each time he performs his Final Smash. If the fight continues, Goose will become furious, and toss waves of stolen items onto the battlefield.
Because what’s a Smash Bros. game without a couple Fire Emblem characters? The first of two picks from Three Houses, Brandon Schmidtz picks…

Moves
Up^B – Lance Launch
- Bernadetta charges her lance upward — the longer the charge, the higher into the air her enemy is launched upon impact.
Down^B – Cute Yet Carnivorous
- Demonstrating her affinity for plants — carnivorous ones, especially — Bernadetta drops a pot containing a large, venus fly trap-esque plant. Nearby enemies better steer clear!
Side^B – Charge!!
- Bernadetta summons her horse and charges forward. Enemies caught in her path are launched into the air.
Neutral^B – Bow Strike
- Bernadetta harnesses her Crest of Indech to release a powerful bow strike. The longer the charge, the more powerful the attack.
Final Smash – Teddy Wave
- Known for creating dolls in her spare time, Bernadetta has far more than just the one teddy bear in her room at Garreg Mach Monastery. The House Varley heir summons a tidal wave of teddy bears that consumes her enemies.
Straight from the Blue Lion house, Alasyn Eletha picks…

Moves
Up^B – Triple Upward Strike
- Similar to Link’s Up^B, Felix will use three upward strikes with wide-sweeping swipes.
Down^B – Low Blow
- Felix spins, the followthrough of his blade cutting in a low arc.
Side>B – Deadly Swing
- Felix moves with a quick upward swing before bringing his sword back down for a devastating blow.
Neutral B – Quick Swings
- Felix swings left then right in quick succession.
Final Smash – Barrage Attack
- Similar to Link’s Final Smash in Smash Bros. Wii U, Felix will unleash an unforgiving barrage of sword strikes on a paralyzed opponent, finishing them off with a merciless upward swing.
From the magical world of A Hat In Time, Almog Rimmer’s pick…
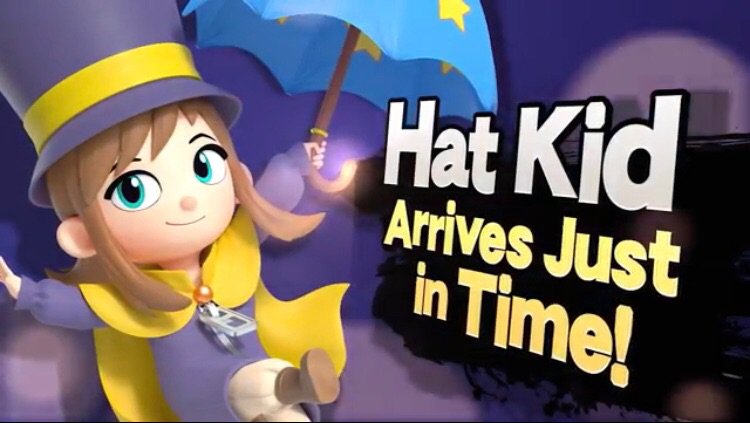
Moves
Up^B – ‘Brella Pierce
- Hat Kid points her umbrella up, intent to stab.
Down^B – Frigid Slam
- Hat Kid turns into an ice statue and slams the ground, damaging anyone nearby. Has a cooldown (uses the ice-hat).
Side^B – Sprint
- Hat Kid sprints for a short amount of time, dealing damage to anyone in her way. Has a cooldown (uses the sprint-hat).
Neutral^B – Concoction
- Hat Kid throws a concoction that explodes when it hits the ground / other players, dealing damage in a radius. Player holds the button to charge and releases it to throw the vial. Has a cooldown. (uses the brewing hat).
Final Smash – Nyakuza Smackdown
- Hat Kid swings her umbrella. The player/s hit will be sent to Nyakuza Metro district, where they will take a serious beating from The Empress and her mob of cat goons.
This is no simulation! From the mind of David Wayne Nystrom, meet…
Moves
Demon Gage
- Fills slowly over the course of each stock as Pilgor takes damage.
Up^B – Fireworks
- Pilgor’s body explodes in a fiery and colorful burst, propelling her up twice (three times if Demon Gage is filled).
Down^B – Glitch Flop
- Pilgor slams her whole body around on the ground, sending flaming spikes upward around her. This works similar to DK’s Down Special, except that Pilgor will take a small amount of fire damage from the move. (If the Demon Gage is filled, Pilgor will take no damage from the move).
Side^B – Ram
- On the ground, Pilgor can charge up and slam head first into opponents (like Banjo). It does significant damage (breaks shields instantly if Demon Gage is filled), but can be reflected with things like shine, Nayru’s Love, or Mario’s cape. Also Pilgor will take damage if the move hits, equal to 15% of damage given. In the air, Pilgor will summersault in the direction she’s facing but not for a great distance. (If Demon Gage is filled, Pilgor will take no damage from the move).
Neutral^B – Tongue Whip
- Works like Yoshi’s tongue but instead of turning opponents into an egg, stains them for damage over time (like Joker’s Side Special) (x2 damage of Demon Gage is filled).
Final Smash – Abomination
- Pilgor becomes a giant demon and will slam her hooves on the ground. Anybody she stomps on is dealt significant damage and launched from the stage, parallel to the platform they’re on. If it is the last :30 of a timed match or that players last stock, Pilgor is given an extra point or stock but put at 350% damage when the animation finishes.
Other:
Alt Skins — one skin option has fully rounded horns to resemble the Twilight Princess goats.
Movement and weight — Pilgor jumps like Yoshi but without the flutter aspect. She’s on the heavy side of medium weight, meaning easy kills come at about 100% damage.
Tilt attacks and non specials — Forward attacks use her head, back attacks use her rear legs. A back air has kill confirms, while forward air does not. Can spike with a downward thrust of her hind legs.
Giving Sonic the Hedgehog a second rep, albeit one on the more chaotic side, Heather Beard picks…

Moves
Up^B – Chaos Control
- Shadow warps away. The energy surrounding him can damage nearby enemies.
Down^B – Chaos Blast
- Shadow unleashes a large spherical blast from around him. The longer this move charges the stronger and larger the blast radius will be.
Side^B – Chaos Spear
- Shadow launches a flurry of spears of chaos energy. This move can be charged further to release a large, singular Chaos Spear. This attack can be used as a multi-directional attack.
Neutral^B – Roundhouse Kick
- Shadow moves swiftly with a powerful kick that also blasts enemies with the air from his air shoes.
Final Smash – Super Shadow
- Shadow uses the 7 Chaos Emeralds to turn into Super Shadow. He also sheds the rings around his wrists and ankles for an extra boost of power at the cost of being damaged more easily for the rest of the match.
Alexis Anderson goes old school and picks…

Moves
Up^B – Aeroplace
- Turn into aeroplane Cuphead, obtain the ability to fly for a short time and deal parry-damage if touched
Down^B – Spread EX
- Blast red pyramid shaped projectiles in the radius around you
Side>B – Invisible Dash
- A useful defensive tactic, teleport a few feet to the side
Neutral B – Peashooter
- Cuphead’s default gun, shoots a single light blue beam or continuous shots if held down
Final Smash – Super Art I
- Shoot a powerful, milky beam akin to R.O.B.’s final smash
Other
His EX cards should charge up during the fight (maybe giving him Super Art II’s brief invincibility when fully charged).
He should definitely appear one-dimensional like Mr. Game & Watch
From blind forests to wills of the wisps, Adam Barham picks…

Moves
Up^B – Kuro’s Feather
- Ori launches upwards and glides down while holding a feather. If the launch hits an opponent, it deals damage with strong knockback. This is similar to Peach’s or Game&Watch’s Up B.
Down^B – Stomp
- Kuro slams straight down into the ground, causing damage in a shock-wave, dealing more damage closer to the point of impact.
Side>B – Dash
- A simple, quick dash, similar to Fox’s or Falco’s, that can be used on the ground or in the air.
Neutral B – Bash
- This is similar to a dodge; when timed properly, this allows Ori to fling their opponent away, dealing damage, and also launching themselves in the opposite direction. This can also be used to redirect projectiles or recover from a falling opponent.
Final Smash – Kuro
- Ori hides as Kuro the owl swoops across the stage, dealing massive damage and knockback
From the ridiculously difficult Ghouls n’ Ghosts, Doug Kwiecinski picks a hero of legend…

Moves
Up^B – Axe
- Arthur winds up with an axe, then jumps and tosses it in a curved trajectory. Useful as a recovery move.
Down^B – Torch
- Toss a torch directly in front and directly behind Arthur, raising a pillar of fire on either side (a shorter range version of the Belmont Holy Water)
Side>B – Javelin
- Arthur throws a javelin in the direction he is facing. Slower than knife, but more powerful.
Neutral B – Knife
- Arthur throws a knife in the direction he is facing. Not very powerful, but a fast projectile. Can be thrown in rapid succession.
Final Smash – Excalibur’s Bolt
- Upon activation, a cutscene plays where a chest appears, inside is a suit of gold armor. Arthur puts on his armor and begins charging an attack. He calls a bolt of lightning from the sky that hits anyone above him. Arthur acts as a conduit to the bolt and shoots the lightning out of both sides, shocking any opponent in its path.
Easter Egg
- When Arthur reaches 100% damage, he is knocked back and his steel suit of armor is knocked off in pieces, revealing Arthur in his boxers. He remains this way for the remainder of that life/stock.
Bryan King is bringing a old fan favorite into the fray, kupo! No points for guessing who…

Moves
Up^B – Dance
- Moogle performs a randomized dance from Final Fantasy VI depending on the terrain. Similar in nature to the Hero’s Down B ability. Draws from an MP pool. Full list of potential dances here. I won’t take up a lot of space listing them all out.
Down^B – Save Book Slam
- Moogle slams his opponent over the head with the saving tome from Final Fantasy IX, embedding them into the ground in the process.
Side>B – Spear Thrust
- Moogle wields a spear to deal damage to opponents. Faster than Simon/Richter’s whip, but 3/4 of the range.
Neutral B – Pom-Pom Bash
- Moogle effectively “headbutts” his opponent with the pom-pom on his head. Can be charged to deal more damage and launch the opponent further.
Final Smash – Choco/Mog
- Mog’s summon from Final Fantasy VII. Jumping on a Chocobo steed, he rides into the battle with a herd of chocobo behind him in tow, trampling everything in front of the Moogle upon activation. The Chocobo theme plays for its duration.
Joining his Persona companion Joker, John Piland summons up from Persona 3…
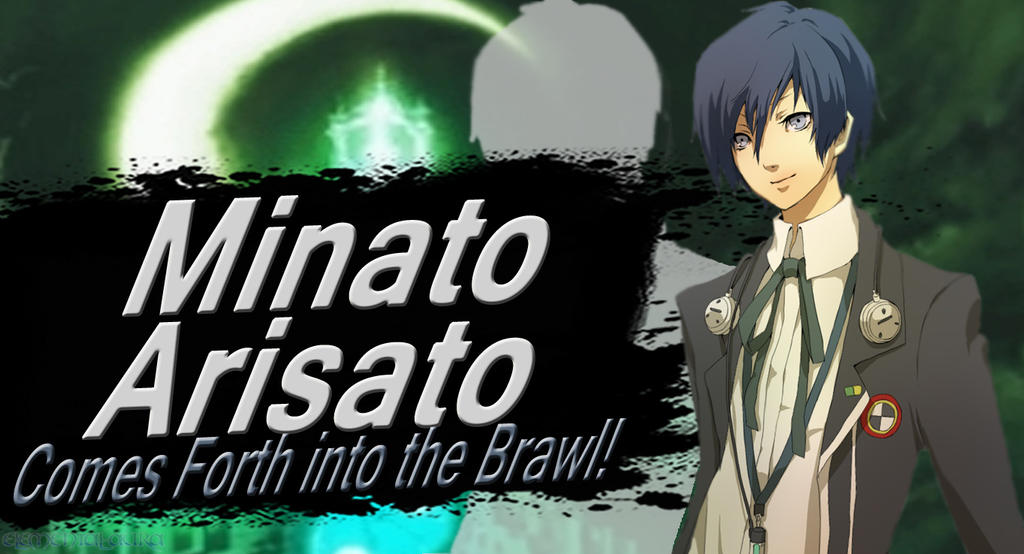
Moves
Orpheus
- After taking 50% damage, Minato will summon Orpheus.
Up^B – Akihiko
- Punches in an upward jump similar to Mii Brawler. Represents Akihiko. While Orpheus is active, one recovery from off stage will activate Cadenza and restore 15% HP every 20 seconds. Minato’s recovery also launches him higher the entirety of Orpheus’s duration.
Down^B – Ken
- Downward thrust with a lance, knocks back any nearby opponents. Represents Ken. While Orpheus is active, this will activate Tetrakarn, which functions as it does with Joker.
Side>B – Yukari
- Bow & Arrow that functions like Link, but can be used in jump combos in a fashion similar to Joker’s gun. Represents Yukari. While Orpheus is active, this move becomes Agidyne, which functions the same as Eiagon.
Neutral B – Shinji
- Downward hammer swings in the direction Minato is facing that can be charged, their range increasing the longer the charge. Represents Shinji. Hammer attacks power up while Oprheus is active.
Final Smash – All-Out-Attack
- Will operate as an All-Out-Attack with P3’s animation, but unlike Joker, Minato/Minako will not have to make contact in a straight line, but will encompass a large area, trapping anybody within the radius.
From Judy Calder, an old icon of gaming joins the fray…

Moves
Up^B – Claw Swipe
- Spyro charges up a big swing with his claws.
Down^B – Spin Attack
- Spyro spins 360, doing damage with his tail.
Side>B – Dash Horns
- Spyro dashes at his enemy, spearing them with his horns.
Neutral B – Dodge
- Spyro dodges by leaping into the air, flapping his wings for momentary flight. This move also causes the opponent to be pushed backwards due to the force of Spyros wings if timed correctly.
Final Smash – The Burn
- Spyro leaps high into the air, flapping his wings to remain airborne. He breathes fire, which spins mercilessly down and all over his opponent. When the opponent falls, Spyro lands on top of him, and looks directly at the player.
Straight from the depths of Hollow Knight, Sean Gadus picks…

Moves
Up^B – Aerial Lunge
- Hornet jumps in the air with the point of her spear pointed upward. She can be direct left or right in order to better target enemies or get to a nearby platform when she is in danger of falling off the stage completely.
Down^B – Parry/Counter
- Hornet holds her needle in a defensive stance, blocking any incoming attack. If struck while she is defending, she will giggle before unleashing a wide-range counter slash.
Side^B – Needle Throw
- Throws her needle forward, then pulls it back. The needle can damage the opponents on the way back (like Link’s boomerang from Smash 64).
Neutral^B – Gossamer Storm
- Hornet unleashes an area-of-effect attack centered around Hornet. This attack using her thread to slice into things around her. This attack can be done in the air as she is falling.
Final Smash – Hornet’s Sting
- Hornet’s final Smash is similar to “critical hit” Final Smash by the Fire Emblem characters like Marth and Lucina. Line Hornet up with an opponent or opponents and she will lunge forward with her needle and 1 hit K.O any character caught in her devastating attack.
Kristen Rosario bundles three picks into one, repackaging an old Smash character in Pokemon Trainer…

Moves
Blastoise
Up^B – Whirlpool
- Blastoise retreats into their shell, surrounding themselves with a wall of water when spinning. When in mid-air, wall of water vertically expands, causing consecutive damage. Draws similar recovery traits to Bowser’s Up-B.
Side^B – Skull Bash
- Exits into his shell, charging up and then launches themselves into the enemy. Draws heavy similarities to Luigi’s Side B special. The big difference is that Blastoise’s max charged Side B doesn’t gain as much distance as Luigi’s. Comes with a limited time of armor when charging.
Neutral^B – Hydro Pump
- Fires two strong streams of water from his cannons, causing repetitive damage. Like with Bowser’s Flame Breath and Charizard’s Flamethrower, the attack weakens after a lengthy continuous use. What makes it different from those two abilities is that it can cause knockback, like Mario’s FLUDD ability. Plus, the more damage your enemy has, the farther they’ll get knocked back by the pressure.
Pidgeot
Up^B – Aerial Ace
- Straight shot that shoots Pidgeot into the sky, causing damage to enemy with contact. Can shift the angle to fly diagonally.
Side^B – Air Slash
- Projectile-style attack where Pidgeot throws sharp pieces of the wind at the enemy.
Neutral^B – Gust
- A gust of wind that causes repetitive damage. Deals some knockback. If you charge it, a bigger gust of wind that causes even more repetitive damage. Deals more powerful knockback.
Growlithe
Up^B – Agility
- Mid-air recovery move where Growlithe diagonally launches themselves upward.
Side^B – Flame Wheel
- Growlithe cloaks itself in fire and charges at the target. Has a chance of causing burning damage to the enemy.
Neutral^B – Ember
- Throws a tuft of flame at the enemy causing consecutive damage. When charged, ember goes farther, and the flame’s radius expands. Like Ness’ Side-B.
For All Three:
Down^B – Pokémon Change
- Works just like Pokémon Trainer’s Down B. Switches between Pokémon during battle.
Final Smash – Best Finish
- Pidgeot traps the enemy(s) in mid-air with Hurricane (enemy(s) taking damage in the vortex), while on the ground, Blastoise uses Hydro Cannon and Growlithe uses Flare Blitz on the Hurricane, creating a massive, multicolored, elemental vortex.
And now, for some Zelda Dungeon picks…

Moves
Up^B – Windblight
- Calamity Ganon takes the form of Windblight Ganon and unleashes powerful bursts of wind, also propelling himself upwards.
Down^B – Fireblight
- Calamity Ganon takes the form of Fireblight Ganon and unleashes a circular blast of flames
Side^B – Thunderblight
- Calamity Ganon takes the form of Thunderblight Ganon and propels a thunder infused javelin at his opponents.
Neutral^B – Waterblight
- Calamity Ganon takes the form of Waterblight Ganon and blasts opponents with a block of ice.
Final Smash -Dark Beast Ganon
- Calamity Ganon takes the form of Dark Beast Ganon and unleashes a powerful blast of dark energy on all surrounding foes.
And finally, one last pick from me. Right from a rosy Rupeeland, here comes…

Moves
Up^B – Rupee Tower
- Uncle Rupee summons the Rupee fountain to damage enemies and lift him up straight vertically.
Down^B – Rupee Glow
- Uncle Rupee summons a giant rupee shield around him that protects and reflects projectiles.
Side^B – Rupee Arrow
- Uncle Rupee shoots out a sharp rupee at his opponents. The amount of damage done depends on the color of the rupee.
Neutral^B – Rupee Smash
- Uncle Rupee charges up, turning green, and unleashes a devastating rupee punch.
Final Smash – Andross Rupee Blast
- Uncle Rupee assumes his Andross big-head form and blasts his enemies with rupees
And there it is! Our updated roster for Super Smash Bros. ZD! Do you like our picks? Let us know who YOU would pick for your fantasy Smash Bros. roster in the comments below!
Andy Spiteri is the Editor-in-Chief of Zelda Dungeon. Now that Ridley has made his way into Smash, he’s holding out hope for Tingle. Follow him on Twitter here.

Andy Spiteri is a Manager of Zelda Dungeon, Host of The Zelda Cast podcast, and Owner of Omega Metroid. Probably drinking a Tim Horton’s Double Double as you read this.
Business: andy.spiteri@zeldadungeon.net
