Wind Temple (The Wind Waker): Difference between revisions
m (Text replace - "{{Dungeon" to "{{Infobox|dungeon") |
mNo edit summary |
||
| (11 intermediate revisions by 6 users not shown) | |||
| Line 1: | Line 1: | ||
{{Infobox|dungeon | {{Infobox|dungeon | ||
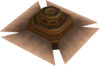
| image = [[File:005 Thumb.jpg|200px]] | |||
|image = [[File:005 Thumb.jpg|200px | | caption = ''One room of the Wind Temple'' | ||
|game = ''[[The Legend of Zelda: The Wind Waker|The Wind Waker]]'' | | game = ''[[The Legend of Zelda: The Wind Waker|The Wind Waker]]'' | ||
|boss = [[Molgera]] | | enemies = [[Armos]]<br/>[[Armos Knight]]<br/>[[Blade Trap]]<br/>[[Blue Bubble]]<br/>[[Floormaster]]<br/>[[Darknut|Golden Darknut]]<br/>[[Bokoblin|Green Bokoblin]]<br/>[[Peahat]]<br/>[[Stalfos]]<br/>[[Darknut|White Darknut]]<br/>[[Wizzrobe]] | ||
|miniboss = [[Wizzrobe]] | | boss = [[Molgera]] | ||
|reward = [[Master Sword]] final powerup | | miniboss = [[Red Wizzrobe]] | ||
| | | reward = [[Master Sword]] final powerup | ||
| item = [[Hookshot]] | |||
| walkthrough = [https://www.zeldadungeon.net/the-wind-waker-walkthrough/wind-temple/ Text Walkthrough] | |||
}} | }} | ||
{{ZD|[https://www.zeldadungeon.net/the-wind-waker-walkthrough/wind-temple/ ''The Wind Waker'' Walkthrough<br/>Chapter 12: Wind Temple]}} | |||
The '''Wind Temple''' is the sixth [[Dungeon]] in ''[[The Legend of Zelda: The Wind Waker|The Wind Waker]]''. | |||
[[Link (The Wind Waker)|Link]], along with the new [[Wind Sage]], [[Makar]], enters the temple from [[Gale Isle]], a mountaintop of Old [[Hyrule]]. | |||
Link | Link and Makar are separated almost immediately in the second room. | ||
Link | Link travels into the main shaft of the temple to find Makar inside a large cage. Link falls to the bottom of the temple to obtain the [[Hookshot]]. Link activates a large fan that blows wind gusts to the roof of the temple. With the Hookshot, Link can release Makar along with the [[Iron Boots]]. The two then return to the bottom of the shaft. | ||
Link and Makar eventually arrive at the door of the boss: the large sand snake, [[Molgera]]. After Molgera is defeated, Makar and Link finally return the [[Master Sword]] to its full power. | |||
==Enemies== | |||
{{Gallery|size=100|pad=5|title=Enemies in the Wind Temple}} | |||
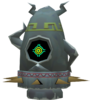
{{Gallery/Box|file=Armos_Figurine_(TWW).png|link=Armos|caption=[[Armos]]}} | |||
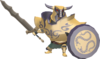
{{Gallery/Box|file=Armos_Knight_Figurine_(TWW).png|link=Armos Knight|caption=[[Armos Knight]]}} | |||
{{Gallery/Box|file=Blade-Trap-TWW.png|link=Blade Trap|caption=[[Blade Trap]]}} | |||
{{Gallery/Box|file=Bubble_Figurine_(TWW).png|link=Blue Bubble|caption=[[Blue Bubble]]}} | |||
{{Gallery/Box|file=Floormaster_Figurine_(TWW).png|link=Floormaster|caption=[[Floormaster]]}} | |||
{{Gallery/Box|file=Shielded_Darknut_Figurine_(TWW).png|link=Shielded Darknut|caption=[[Golden Darknut]]}} | |||
{{Gallery/Box|file=Green-Bokoblin.png|link=Bokoblin|caption=[[Bokoblin|Green Bokoblin]]}} | |||
{{Gallery/Box|file=Peahat_Figurine_(TWW).png|link=Peahat|caption=[[Peahat]]}} | |||
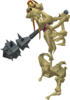
{{Gallery/Box|file=Stalfos_Figurine_(TWW).png|link=Stalfos|caption=[[Stalfos]]}} | |||
{{Gallery/Box|file=Darknut_Figurine_(TWW).png|link=Darknut|caption=[[Darknut|White Darknut]]}} | |||
{{Gallery/Box|file=Wizzrobe_Figurine_(TWW).png|link=Wizzrobe|caption=[[Wizzrobe]]}} | |||
{{Gallery/Bottom}} | |||
{{Listbox|The Wind Waker Locations}} | |||
{{Cat|The Wind Waker Dungeons}} | {{Cat|The Wind Waker Dungeons}} | ||
{{Cat|The Wind Waker Locations}} | |||
Revision as of 16:34, November 29, 2022

One room of the Wind Temple
Games | ||
Boss | ||
Mini-bosses | ||
Enemies | ||
Items | ||
Rewards | Master Sword final powerup | |
| Guides | ||
|---|---|---|
Walkthrough | ||
In-depth guide:
The Wind Waker Walkthrough Chapter 12: Wind Temple |
The Wind Temple is the sixth Dungeon in The Wind Waker.
Link, along with the new Wind Sage, Makar, enters the temple from Gale Isle, a mountaintop of Old Hyrule.
Link and Makar are separated almost immediately in the second room.
Link travels into the main shaft of the temple to find Makar inside a large cage. Link falls to the bottom of the temple to obtain the Hookshot. Link activates a large fan that blows wind gusts to the roof of the temple. With the Hookshot, Link can release Makar along with the Iron Boots. The two then return to the bottom of the shaft.
Link and Makar eventually arrive at the door of the boss: the large sand snake, Molgera. After Molgera is defeated, Makar and Link finally return the Master Sword to its full power.
Enemies
- Enemies in the Wind Temple