Toto Sah Shrine: Difference between revisions
mNo edit summary |
Molly O'Kami (talk | contribs) |
||
| Line 24: | Line 24: | ||
All the puzzles in this shrine are based on the motion control of your controller. Joy. | All the puzzles in this shrine are based on the motion control of your controller. Joy. | ||
The first puzzle may seem the easiest, but the trick is that there's a treasure chest on the bottom of the platform. You will probably need to turn your controller upside down to see it. Open the chest and continue. | The first puzzle may seem the easiest, but the trick is that there's a treasure chest on the bottom of the platform. You will probably need to turn your controller upside down to see it. Open the chest ([[Shield of the Mind's Eye]]) and continue. | ||
For the second puzzle, gently slide the stairs into position and then rotate them until they align so you can climb them. | For the second puzzle, gently slide the stairs into position and then rotate them until they align so you can climb them. | ||
The third puzzle is trickier and is in two parts. First, flip it upside down and line it up so you can reach and open the chest. This chest is in fact required as it contains a small key, possibly the first you've seen in the entire game so far. | The third puzzle is trickier and is in two parts. First, flip it upside down and line it up so you can reach and open the chest ([[Small Key]]). This chest is in fact required as it contains a small key, possibly the first you've seen in the entire game so far. | ||
Then return to the controls and line up the platform in such a way that you can reach the exit. You'll also have to slide the stairs into place as well but that tends to happen on its own as you're lining up the whole platform. Once the platform is in position, scale it to reach the altar and get the [[Spirit Orb]]. | Then return to the controls and line up the platform in such a way that you can reach the exit. You'll also have to slide the stairs into place as well but that tends to happen on its own as you're lining up the whole platform. Once the platform is in position, scale it to reach the altar and get the [[Spirit Orb]]. | ||
{{Cat|Breath of the Wild Shrines}} | {{Cat|Breath of the Wild Shrines}} | ||
Revision as of 23:14, March 28, 2019
| This article is a stub. You can help the Zelda Dungeon Wiki by expanding it. |
Games | ||
Inhabitants | ||
| Guides | ||
|---|---|---|
Walkthrough | ||
The Toto Sah Shrine is one of the many Shrine of Trials from Breath of the Wild.
Requirements
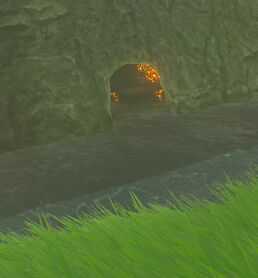
On the cliff wall on the west side of the river is a bombable wall surface. Blow it up to access the shrine. (Bomb arrows work, or throw a bomb and let the current bring it to the wall to detonate.)
Toto Sah Apparatus
All the puzzles in this shrine are based on the motion control of your controller. Joy.
The first puzzle may seem the easiest, but the trick is that there's a treasure chest on the bottom of the platform. You will probably need to turn your controller upside down to see it. Open the chest (Shield of the Mind's Eye) and continue.
For the second puzzle, gently slide the stairs into position and then rotate them until they align so you can climb them.
The third puzzle is trickier and is in two parts. First, flip it upside down and line it up so you can reach and open the chest (Small Key). This chest is in fact required as it contains a small key, possibly the first you've seen in the entire game so far.
Then return to the controls and line up the platform in such a way that you can reach the exit. You'll also have to slide the stairs into place as well but that tends to happen on its own as you're lining up the whole platform. Once the platform is in position, scale it to reach the altar and get the Spirit Orb.


