Ta'loh Naeg Shrine: Difference between revisions
Jump to navigation
Jump to search
Want an adless experience? Log in or Create an account.
mNo edit summary |
mNo edit summary |
||
| Line 1: | Line 1: | ||
{{Infobox|location | {{Infobox|location | ||
| image = [[File:Ta'lohNaegShrine.jpg|258px]] | | image = [[File:Ta'lohNaegShrine.jpg|258px]] | ||
| caption = | |||
| game = ''[[The Legend of Zelda: Breath of the Wild|Breath of the Wild]]'' | | game = ''[[The Legend of Zelda: Breath of the Wild|Breath of the Wild]]'' | ||
| inhab = [[Ta'loh Naeg]] | | inhab = [[Ta'loh Naeg]] | ||
| Line 25: | Line 26: | ||
After completion, returning to this Shrine will not repeat the tutorial. However the information can be accessed again in the Ability Controls section of the pause menu. | After completion, returning to this Shrine will not repeat the tutorial. However the information can be accessed again in the Ability Controls section of the pause menu. | ||
{{Listbox|Breath of the Wild Shrines|hide=hide}} | |||
{{Cat|Breath of the Wild Shrines}} | {{Cat|Breath of the Wild Shrines}} | ||
Revision as of 19:02, November 3, 2020
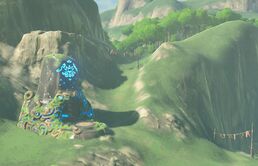
Ta'loh Naeg Shrine

Games | ||
Inhabitants | ||
Items | ||
| Guides | ||
|---|---|---|
Walkthrough | ||
The Ta'loh Naeg Shrine, also known as Ta'loh Naeg's Teaching, is one of the many Shrine of Trials from Breath of the Wild.
Requirements
Ta'loh Naeg's Teaching
This shrine serves as a combat tutorial, and will teach advanced techniques such as Perfect Dodge and Perfect Guard.
Two chests are near the entrance containing a Shield of the Mind's Eye and an Eightfold Blade. After defeating the guardian, Link will find an Opal gem in the final treasure chest before examining the altar to get a Spirit Orb.
After completion, returning to this Shrine will not repeat the tutorial. However the information can be accessed again in the Ability Controls section of the pause menu.