Strategy Guides: Difference between revisions
Jump to navigation
Jump to search
Want an adless experience? Log in or Create an account.
No edit summary |
m (Adding The Official Nintendo Player's Guide at User:Pinchme123's request) |
||
| (21 intermediate revisions by 4 users not shown) | |||
| Line 6: | Line 6: | ||
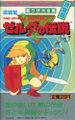
{{Gallery/Box|file=Legend-of-Zelda-Million-Medium.jpg|link=Million_Publications_The_Legend_of_Zelda_Strategy_Guide|caption=[[Million_Publications_The_Legend_of_Zelda_Strategy_Guide|Million Publications]]}} | {{Gallery/Box|file=Legend-of-Zelda-Million-Medium.jpg|link=Million_Publications_The_Legend_of_Zelda_Strategy_Guide|caption=[[Million_Publications_The_Legend_of_Zelda_Strategy_Guide|Million Publications]]}} | ||
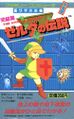
{{Gallery/Box|file=Legend-of-Zelda-Dawn-Publications.jpg|link=Dawn_Publications_The_Legend_of_Zelda_Strategy_Guide|caption=[[Dawn_Publications_The_Legend_of_Zelda_Strategy_Guide|Dawn Publications]]}} | {{Gallery/Box|file=Legend-of-Zelda-Dawn-Publications.jpg|link=Dawn_Publications_The_Legend_of_Zelda_Strategy_Guide|caption=[[Dawn_Publications_The_Legend_of_Zelda_Strategy_Guide|Dawn Publications]]}} | ||
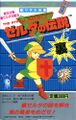
{{Gallery/Box|file=Akita-Shoten-The-Legend-of-Zelda-Strategy-Guide.png|link=Akita_Shoten_The_Legend_of_Zelda_Strategy_Guide|caption=[[Akita_Shoten_The_Legend_of_Zelda_Strategy_Guide|Akita Shoten]]}} | |||
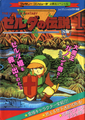
{{Gallery/Box|file=Legend-of-Zelda-Futabasha.jpg|link=Futabasha_The_Legend_of_Zelda_Strategy_Guide_(1986)|caption=[[Futabasha_The_Legend_of_Zelda_Strategy_Guide_(1986)|Futabasha (1986)]]}} | {{Gallery/Box|file=Legend-of-Zelda-Futabasha.jpg|link=Futabasha_The_Legend_of_Zelda_Strategy_Guide_(1986)|caption=[[Futabasha_The_Legend_of_Zelda_Strategy_Guide_(1986)|Futabasha (1986)]]}} | ||
{{Gallery/Box|file=Legend-of-Zelda-Futabasha-1.jpg|link=Futabasha_The_Legend_of_Zelda_Strategy_Guide_(1990)|caption=[[Futabasha_The_Legend_of_Zelda_Strategy_Guide_(1990)|Futabasha (1990)]]}} | {{Gallery/Box|file=Legend-of-Zelda-Futabasha-1.jpg|link=Futabasha_The_Legend_of_Zelda_Strategy_Guide_(1990)|caption=[[Futabasha_The_Legend_of_Zelda_Strategy_Guide_(1990)|Futabasha (1990)]]}} | ||
| Line 11: | Line 12: | ||
{{Gallery/Box|file=Futami-May-25-1986.jpg|link=Futami_The_Legend_of_Zelda_Strategy_Guide_(May_25th_1986)|caption=[[Futami_The_Legend_of_Zelda_Strategy_Guide_(May_25th_1986)|Futami (May 25th, 1986)]]}} | {{Gallery/Box|file=Futami-May-25-1986.jpg|link=Futami_The_Legend_of_Zelda_Strategy_Guide_(May_25th_1986)|caption=[[Futami_The_Legend_of_Zelda_Strategy_Guide_(May_25th_1986)|Futami (May 25th, 1986)]]}} | ||
{{Gallery/Box|file=Legend-of-Zelda-Futami-2.jpg|link=Futami_The_Legend_of_Zelda_Strategy_Guide_(1987)|caption=[[Futami_The_Legend_of_Zelda_Strategy_Guide_(1987)|Futami (1987)]]}} | {{Gallery/Box|file=Legend-of-Zelda-Futami-2.jpg|link=Futami_The_Legend_of_Zelda_Strategy_Guide_(1987)|caption=[[Futami_The_Legend_of_Zelda_Strategy_Guide_(1987)|Futami (1987)]]}} | ||
{{Gallery/Box|file=Official-Nintendo-Player's-Guide.jpg|link=The Official Nintendo Player's Guide|caption=[[The Official Nintendo Player's Guide|Nintendo Player's Guide]]}} | |||
{{Gallery/Box|file=Keibunsha-The-Legend-of-Zelda-Strategy-Guide.png|link=Keibunsha_The_Legend_of_Zelda_Strategy_Guide_(1994)|caption=[[Keibunsha_The_Legend_of_Zelda_Strategy_Guide_(1994)|Keibunsha (1994)]]}} | |||
{{Gallery/Box|file=Legend-of-Zelda-Tips-And-Tactics.jpg|link=The_Legend_of_Zelda_Tips_&_Tactics_Strategy_Guide|caption=[[The_Legend_of_Zelda_Tips_%26_Tactics_Strategy_Guide|Tips & Tactics]]}} | |||
{{Gallery/Box|file=Conquering-Zelda-Guide.jpg|link=Compute_Books_Conquering_Zelda_Strategy_Guide|caption=[[Compute_Books_Conquering_Zelda_Strategy_Guide|Compute Books]]}} | {{Gallery/Box|file=Conquering-Zelda-Guide.jpg|link=Compute_Books_Conquering_Zelda_Strategy_Guide|caption=[[Compute_Books_Conquering_Zelda_Strategy_Guide|Compute Books]]}} | ||
{{Gallery/Box|file=NES-Game-Atlas-Nintendo-Players-Guide.jpg|link=NES_Game_Atlas_Nintendo_Player's_Guide|caption=[[NES_Game_Atlas_Nintendo_Player%27s_Guide|Nintendo Player's Guide]]}} | {{Gallery/Box|file=NES-Game-Atlas-Nintendo-Players-Guide.jpg|link=NES_Game_Atlas_Nintendo_Player's_Guide|caption=[[NES_Game_Atlas_Nintendo_Player%27s_Guide|Nintendo Player's Guide]]}} | ||
| Line 21: | Line 25: | ||
{{Gallery/Box|file=A-Link-To-The-Past-Futabasha.jpg|link=Futabasha_A_Link_to_the_Past_Strategy_Guide|caption=[[Futabasha_A_Link_to_the_Past_Strategy_Guide|Futabasha]]}} | {{Gallery/Box|file=A-Link-To-The-Past-Futabasha.jpg|link=Futabasha_A_Link_to_the_Past_Strategy_Guide|caption=[[Futabasha_A_Link_to_the_Past_Strategy_Guide|Futabasha]]}} | ||
{{Gallery/Box|file=A-Link-To-The-Past-Prima.jpg|link=Prima_Games_A_Link_to_the_Past_Game_Secrets_Strategy_Guide|caption=[[Prima_Games_A_Link_to_the_Past_Game_Secrets_Strategy_Guide|Prima Games]]}} | {{Gallery/Box|file=A-Link-To-The-Past-Prima.jpg|link=Prima_Games_A_Link_to_the_Past_Game_Secrets_Strategy_Guide|caption=[[Prima_Games_A_Link_to_the_Past_Game_Secrets_Strategy_Guide|Prima Games]]}} | ||
{{Gallery/Box|file=Keibunsha-The-Legend-of-Zelda-Handbook.jpg|link=Keibunsha_The_Legend_of_Zelda_Handbook|caption=[[Keibunsha_The_Legend_of_Zelda_Handbook|Keibunsha]]}} | |||
{{Gallery/Box|file=A-Link-To-The-Past-Nintendo-Players-Guide.jpg|link=A_Link_to_the_Past_Nintendo_Player's_Guide|caption=[[A_Link_to_the_Past_Nintendo_Player%27s_Guide|Nintendo Player's Guide]]}} | {{Gallery/Box|file=A-Link-To-The-Past-Nintendo-Players-Guide.jpg|link=A_Link_to_the_Past_Nintendo_Player's_Guide|caption=[[A_Link_to_the_Past_Nintendo_Player%27s_Guide|Nintendo Player's Guide]]}} | ||
{{Gallery/Box|file=A-Link-To-The-Past-Nintendo-Players-Guide-German.jpg|link=A_Link_to_the_Past_Nintendo_of_Europe_Spieleberater|caption=[[A_Link_to_the_Past_Nintendo_of_Europe_Spieleberater|Nintendo of Europe]]}} | {{Gallery/Box|file=A-Link-To-The-Past-Nintendo-Players-Guide-German.jpg|link=A_Link_to_the_Past_Nintendo_of_Europe_Spieleberater|caption=[[A_Link_to_the_Past_Nintendo_of_Europe_Spieleberater|Nintendo of Europe]]}} | ||
| Line 33: | Line 38: | ||
{{Gallery/Box|file=Links-Awakening-DX-Prima-Games.jpg|link=Prima_Games_Link's_Awakening_DX_Strategy_Guide|caption=[[Prima_Games_Link's_Awakening_DX_Strategy_Guide|Prima Games]]}} | {{Gallery/Box|file=Links-Awakening-DX-Prima-Games.jpg|link=Prima_Games_Link's_Awakening_DX_Strategy_Guide|caption=[[Prima_Games_Link's_Awakening_DX_Strategy_Guide|Prima Games]]}} | ||
{{Gallery/Box|file=Links-Awakening-Super-Game-Boy.jpg|link=Nintendo_Super_Game_Boy_Strategy_Guide|caption=[[Nintendo_Super_Game_Boy_Strategy_Guide|Nintendo of America]]}} | {{Gallery/Box|file=Links-Awakening-Super-Game-Boy.jpg|link=Nintendo_Super_Game_Boy_Strategy_Guide|caption=[[Nintendo_Super_Game_Boy_Strategy_Guide|Nintendo of America]]}} | ||
{{Gallery/Box|file=Ocarina-Of-Time-ASCII-Large.jpg|link=ASCII_Ocarina_of_Time_Strategy_Guide|caption=[[ASCII_Ocarina_of_Time_Strategy_Guide|ASCII]]}} | |||
{{Gallery/Box|file=Ocarina-Of-Time-Axela-Large.jpg|link=Axela_Ocarina_of_Time_Strategy_Guide|caption=[[Axela_Ocarina_of_Time_Strategy_Guide|Axela]]}} | |||
{{Gallery/Box|file=Ocarina-Of-Time-Gakken-Large.jpg|link=Gakken_Ocarina_of_Time_Strategy_Guide|caption=[[Gakken_Ocarina_of_Time_Strategy_Guide|Gakken]]}} | |||
{{Gallery/Box|file=Ocarina-Of-Time-Kodansha-Large.jpg|link=Kodansha_Ocarina_of_Time_Strategy_Guide|caption=[[Kodansha_Ocarina_of_Time_Strategy_Guide|Kodansha]]}} | |||
{{Gallery/Box|file=Ocarina-Of-Time-Media-Factory-Large.jpg|link=Media_Factory_Ocarina_of_Time_Strategy_Guide|caption=[[Media_Factory_Ocarina_of_Time_Strategy_Guide|Media Factory]]}} | |||
{{Gallery/Box|file=Ocarina-Of-Time-NTT-Publishing.jpg|link=NTT_Publishing_Ocarina_of_Time_Strategy_Guide|caption=[[NTT_Publishing_Ocarina_of_Time_Strategy_Guide|NTT Publishing]]}} | |||
{{Gallery/Box|file=Ocarina-Of-Time-T2-Publishing.jpg|link=T2_Publishing_Ocarina_of_Time_Strategy_Guide|caption=[[T2_Publishing_Ocarina_of_Time_Strategy_Guide|T2 Publishing]]}} | |||
{{Gallery/Box|file=Ocarina-Of-Time-Takahashi-Shoten-Large.jpg|link=Takahashi_Shoten_Ocarina_of_Time_Strategy_Guide|caption=[[Takahashi_Shoten_Ocarina_of_Time_Strategy_Guide|Takahashi Shoten]]}} | |||
{{Gallery/Box|file=Ocarina-Of-Time-Nintendo-Power.jpg|link=Nintendo_Power_Ocarina_of_Time_Strategy_Guide|caption=[[Nintendo_Power_Ocarina_of_Time_Strategy_Guide|Nintendo Power]]}} | {{Gallery/Box|file=Ocarina-Of-Time-Nintendo-Power.jpg|link=Nintendo_Power_Ocarina_of_Time_Strategy_Guide|caption=[[Nintendo_Power_Ocarina_of_Time_Strategy_Guide|Nintendo Power]]}} | ||
{{Gallery/Box|file=Ocarina-Of-Time-Prima-Games.jpg|link=Prima_Games_Ocarina_of_Time_Strategy_Guide|caption=[[Prima_Games_Ocarina_of_Time_Strategy_Guide|Prima Games]]}} | {{Gallery/Box|file=Ocarina-Of-Time-Prima-Games.jpg|link=Prima_Games_Ocarina_of_Time_Strategy_Guide|caption=[[Prima_Games_Ocarina_of_Time_Strategy_Guide|Prima Games]]}} | ||
{{Gallery/Box|file=Ocarina-Of-Time-Prima-Games-EB.jpg|link=Prima_Games_Ocarina_of_Time_Strategy_Guide|caption=[[Prima_Games_Ocarina_of_Time_Strategy_Guide|Prima Games]]}} | {{Gallery/Box|file=Ocarina-Of-Time-Prima-Games-EB.jpg|link=Prima_Games_Ocarina_of_Time_Strategy_Guide|caption=[[Prima_Games_Ocarina_of_Time_Strategy_Guide|Prima Games (Exclusive Collector's Cover)]]}} | ||
{{Gallery/Box|file=Ocarina-Of-Time-Prima-Games-Gamestop.jpg|link=Prima_Games_Ocarina_of_Time_Strategy_Guide|caption=[[Prima_Games_Ocarina_of_Time_Strategy_Guide|Prima Games]]}} | {{Gallery/Box|file=Ocarina-Of-Time-Prima-Games-Gamestop.jpg|link=Prima_Games_Ocarina_of_Time_Strategy_Guide|caption=[[Prima_Games_Ocarina_of_Time_Strategy_Guide|Prima Games (GameStop Exclusive's Cover)]]}} | ||
{{Gallery/Box|file=Ocarina-of-Time-Brady-Games.jpg|link=Brady_Games_Ocarina_of_Time_Strategy_Guide|caption=[[Brady_Games_Ocarina_of_Time_Strategy_Guide|Brady Games]]}} | {{Gallery/Box|file=Ocarina-of-Time-Brady-Games.jpg|link=Brady_Games_Ocarina_of_Time_Strategy_Guide|caption=[[Brady_Games_Ocarina_of_Time_Strategy_Guide|Brady Games]]}} | ||
{{Gallery/Box|file=Ocarina-of-Time-Versus-Books.jpg|link=Versus_Books_Ocarina_of_Time_Strategy_Guide|caption=[[Versus_Books_Ocarina_of_Time_Strategy_Guide|Versus Books]]}} | {{Gallery/Box|file=Ocarina-of-Time-Versus-Books.jpg|link=Versus_Books_Ocarina_of_Time_Strategy_Guide|caption=[[Versus_Books_Ocarina_of_Time_Strategy_Guide|Versus Books]]}} | ||
{{Gallery/Box|file=Majoras-Mask-EnterBrain-Large.jpg|link=Enterbrain_Majora's_Mask_Strategy_Guide|caption=[[Enterbrain_Majora's_Mask_Strategy_Guide|Enterbrain]]}} | |||
{{Gallery/Box|file=Majoras-Mask-Shogakukan-Large.jpg|link=Shogakukan_Majora's_Mask_Strategy_Guide|caption=[[Shogakukan_Majora's_Mask_Strategy_Guide|Shogakukan]]}} | |||
{{Gallery/Box|file=Majoras-Mask-Nintendo-Power.jpg|link=Nintendo_Power_Majora's_Mask_Strategy_Guide|caption=[[Nintendo_Power_Majora's_Mask_Strategy_Guide|Nintendo Power]]}} | {{Gallery/Box|file=Majoras-Mask-Nintendo-Power.jpg|link=Nintendo_Power_Majora's_Mask_Strategy_Guide|caption=[[Nintendo_Power_Majora's_Mask_Strategy_Guide|Nintendo Power]]}} | ||
{{Gallery/Box|file=Majoras-Mask-Prima-Games.jpg|link=Prima_Games_Majora's_Mask_Strategy_Guide|caption=[[Prima_Games_Majora's_Mask_Strategy_Guide|Prima Games]]}} | {{Gallery/Box|file=Majoras-Mask-Prima-Games.jpg|link=Prima_Games_Majora's_Mask_Strategy_Guide|caption=[[Prima_Games_Majora's_Mask_Strategy_Guide|Prima Games]]}} | ||
| Line 44: | Line 59: | ||
{{Gallery/Box|file=Majoras-Mask-Brady-Games.jpg|link=Brady_Games_Majora's_Mask_Strategy_Guide|caption=[[Brady_Games_Majora's_Mask_Strategy_Guide|Brady Games]]}} | {{Gallery/Box|file=Majoras-Mask-Brady-Games.jpg|link=Brady_Games_Majora's_Mask_Strategy_Guide|caption=[[Brady_Games_Majora's_Mask_Strategy_Guide|Brady Games]]}} | ||
{{Gallery/Box|file=Majoras-Mask-Versus-Books.jpg|link=Versus_Books_Majora's_Mask_Strategy_Guide|caption=[[Versus_Books_Majora's_Mask_Strategy_Guide|Versus Books]]}} | {{Gallery/Box|file=Majoras-Mask-Versus-Books.jpg|link=Versus_Books_Majora's_Mask_Strategy_Guide|caption=[[Versus_Books_Majora's_Mask_Strategy_Guide|Versus Books]]}} | ||
{{Gallery/Box|file=Oracle-Of-Seasons-And-Ages-Nintendo-Dream.jpg|link=Nintendo_Dream_Oracle_of_Seasons_and_Oracle_of_Ages_Strategy_Guide|caption=[[Nintendo_Dream_Oracle_of_Seasons_and_Oracle_of_Ages_Strategy_Guide|Nintendo Dream]]}} | |||
{{Gallery/Box|file=Oracle-Of-Seasons-EnterBrain.jpg|link=Enterbrain_Oracle_of_Seasons_Strategy_Guide|caption=[[Enterbrain_Oracle_of_Seasons_Strategy_Guide|Enterbrain]]}} | |||
{{Gallery/Box|file=Oracle-Of-Ages-EnterBrain.jpg|link=Enterbrain_Oracle_of_Ages_Strategy_Guide|caption=[[Enterbrain_Oracle_of_Ages_Strategy_Guide|Enterbrain]]}} | |||
{{Gallery/Box|file=Oracle-Of-Seasons-Shogakukan.jpg|link=Shogakukan_Oracle_of_Seasons_Strategy_Guide|caption=[[Shogakukan_Oracle_of_Seasons_Strategy_Guide|Shogakukan]]}} | |||
{{Gallery/Box|file=Oracle-Of-Ages-Shogakukan.jpg|link=Shogakukan_Oracle_of_Ages_Strategy_Guide|caption=[[Shogakukan_Oracle_of_Ages_Strategy_Guide|Shogakukan]]}} | |||
{{Gallery/Box|file=Oracle-Of-Seasons-And-Ages-Nintendo-Power.jpg|link=Nintendo_Power_Oracle_of_Seasons_and_Oracle_of_Ages_Strategy_Guide|caption=[[Nintendo_Power_Oracle_of_Seasons_and_Oracle_of_Ages_Strategy_Guide|Nintendo Power]]}} | {{Gallery/Box|file=Oracle-Of-Seasons-And-Ages-Nintendo-Power.jpg|link=Nintendo_Power_Oracle_of_Seasons_and_Oracle_of_Ages_Strategy_Guide|caption=[[Nintendo_Power_Oracle_of_Seasons_and_Oracle_of_Ages_Strategy_Guide|Nintendo Power]]}} | ||
{{Gallery/Box|file=Oracle-Of-Seasons-And-Ages-Prima-Games.jpg|link=Prima_Games_Oracle_of_Seasons_and_Oracle_of_Ages_Strategy_Guide|caption=[[Prima_Games_Oracle_of_Seasons_and_Oracle_of_Ages_Strategy_Guide|Prima Games]]}} | {{Gallery/Box|file=Oracle-Of-Seasons-And-Ages-Prima-Games.jpg|link=Prima_Games_Oracle_of_Seasons_and_Oracle_of_Ages_Strategy_Guide|caption=[[Prima_Games_Oracle_of_Seasons_and_Oracle_of_Ages_Strategy_Guide|Prima Games]]}} | ||
| Line 60: | Line 80: | ||
{{Gallery/Box|file=The-Minish-Cap-Nintendo-Power.jpg|link=Nintendo_Power_The_Minish_Cap_Strategy_Guide|caption=[[Nintendo_Power_The_Minish_Cap_Strategy_Guide|Nintendo Power]]}} | {{Gallery/Box|file=The-Minish-Cap-Nintendo-Power.jpg|link=Nintendo_Power_The_Minish_Cap_Strategy_Guide|caption=[[Nintendo_Power_The_Minish_Cap_Strategy_Guide|Nintendo Power]]}} | ||
{{Gallery/Box|file=Twilight-Princess-Nintendo-Power.jpg|link=Nintendo_Power_Twilight_Princess_Strategy_Guide|caption=[[Nintendo_Power_Twilight_Princess_Strategy_Guide|Nintendo Power]]}} | {{Gallery/Box|file=Twilight-Princess-Nintendo-Power.jpg|link=Nintendo_Power_Twilight_Princess_Strategy_Guide|caption=[[Nintendo_Power_Twilight_Princess_Strategy_Guide|Nintendo Power]]}} | ||
{{Gallery/Box|file=Twilight-Princess-Prima-Games-Collectors-Edition.jpg|link=Prima_Games_Twilight_Princess_Collector's_Edition_Strategy_Guide|caption=[[Prima_Games_Twilight_Princess_Collector's_Edition_Strategy_Guide|Prima Games<br>Collector's Edition]]}} | {{Gallery/Box|file=Twilight-Princess-Prima-Games-Collectors-Edition.jpg|link=Prima_Games_Twilight_Princess_Collector's_Edition_Strategy_Guide|caption=[[Prima_Games_Twilight_Princess_Collector's_Edition_Strategy_Guide|Prima Games<br/>Collector's Edition]]}} | ||
{{Gallery/Box|file=Twilight-Princess-Prima-Games-Premiere-Edition-GameCube.jpg|link=Prima_Games_Twilight_Princess_Premiere_Edition_Strategy_Guide_GameCube_Version|caption=[[Prima_Games_Twilight_Princess_Premiere_Edition_Strategy_Guide_GameCube_Version|Prima Games<br>Premiere Edition]]}} | {{Gallery/Box|file=Twilight-Princess-Prima-Games-Premiere-Edition-GameCube.jpg|link=Prima_Games_Twilight_Princess_Premiere_Edition_Strategy_Guide_GameCube_Version|caption=[[Prima_Games_Twilight_Princess_Premiere_Edition_Strategy_Guide_GameCube_Version|Prima Games<br/>Premiere Edition]]}} | ||
{{Gallery/Box|file=Twilight-Princess-Prima-Games-Premiere-Edition-Wii.jpg|link=Prima_Games_Twilight_Princess_Premiere_Edition_Strategy_Guide_Wii_Version|caption=[[Prima_Games_Twilight_Princess_Premiere_Edition_Strategy_Guide_Wii_Version|Prima Games<br>Premiere Edition]]}} | {{Gallery/Box|file=Twilight-Princess-Prima-Games-Premiere-Edition-Wii.jpg|link=Prima_Games_Twilight_Princess_Premiere_Edition_Strategy_Guide_Wii_Version|caption=[[Prima_Games_Twilight_Princess_Premiere_Edition_Strategy_Guide_Wii_Version|Prima Games<br/>Premiere Edition]]}} | ||
{{Gallery/Box|file=Phantom-Hourglass-Prima-Games-Collectors-Edition.jpg|link=Prima_Games_Phantom_Hourglass_Collector's_Edition_Strategy_Guide|caption=[[Prima_Games_Phantom_Hourglass_Collector's_Edition_Strategy_Guide|Prima Games<br>Collector's Edition]]}} | {{Gallery/Box|file=Phantom-Hourglass-Prima-Games-Collectors-Edition.jpg|link=Prima_Games_Phantom_Hourglass_Collector's_Edition_Strategy_Guide|caption=[[Prima_Games_Phantom_Hourglass_Collector's_Edition_Strategy_Guide|Prima Games<br/>Collector's Edition]]}} | ||
{{Gallery/Box|file=Phantom-Hourglass-Prima-Games-Premiere-Edition.jpg|link=Prima_Games_Phantom_Hourglass_Premiere_Edition_Strategy_Guide|caption=[[Prima_Games_Phantom_Hourglass_Premiere_Edition_Strategy_Guide|Prima Games<br>Premiere Edition]]}} | {{Gallery/Box|file=Phantom-Hourglass-Prima-Games-Premiere-Edition.jpg|link=Prima_Games_Phantom_Hourglass_Premiere_Edition_Strategy_Guide|caption=[[Prima_Games_Phantom_Hourglass_Premiere_Edition_Strategy_Guide|Prima Games<br/>Premiere Edition]]}} | ||
{{Gallery/Box|file=Spirit-Tracks-Prima-Games-Collectors-Edition.jpg|link=Prima_Games_Spirit_Tracks_Collector's_Edition_Strategy_Guide|caption=[[Prima_Games_Spirit_Tracks_Collector's_Edition_Strategy_Guide|Prima Games<br>Collector's Edition]]}} | {{Gallery/Box|file=Spirit-Tracks-Prima-Games-Collectors-Edition.jpg|link=Prima_Games_Spirit_Tracks_Collector's_Edition_Strategy_Guide|caption=[[Prima_Games_Spirit_Tracks_Collector's_Edition_Strategy_Guide|Prima Games<br/>Collector's Edition]]}} | ||
{{Gallery/Box|file=Spirit-Tracks-Prima-Games-Premiere-Edition.jpg|link=Prima_Games_Spirit_Tracks_Premiere_Edition_Strategy_Guide|caption=[[Prima_Games_Spirit_Tracks_Premiere_Edition_Strategy_Guide|Prima Games<br>Premiere Edition]]}} | {{Gallery/Box|file=Spirit-Tracks-Prima-Games-Premiere-Edition.jpg|link=Prima_Games_Spirit_Tracks_Premiere_Edition_Strategy_Guide|caption=[[Prima_Games_Spirit_Tracks_Premiere_Edition_Strategy_Guide|Prima Games<br/>Premiere Edition]]}} | ||
{{Gallery/Box|file=Ocarina-of-Time-3D-Prima-Games.jpg|link=Prima_Games_Ocarina_of_Time_3D_Strategy_Guide|caption=[[Prima_Games_Ocarina_of_Time_3D_Strategy_Guide|Prima Games]]}} | {{Gallery/Box|file=Ocarina-of-Time-3D-Prima-Games.jpg|link=Prima_Games_Ocarina_of_Time_3D_Strategy_Guide|caption=[[Prima_Games_Ocarina_of_Time_3D_Strategy_Guide|Prima Games]]}} | ||
{{Gallery/Box|file=Skyward-Sword-Prima-Games-Collectors-Edition.jpg|link=Prima_Games_Skyward_Sword_Collector's_Edition_Strategy_Guide|caption=[[Prima_Games_Skyward_Sword_Collector's_Edition_Strategy_Guide|Prima Games<br>Collector's Edition]]}} | {{Gallery/Box|file=Skyward-Sword-Prima-Games-Collectors-Edition.jpg|link=Prima_Games_Skyward_Sword_Collector's_Edition_Strategy_Guide|caption=[[Prima_Games_Skyward_Sword_Collector's_Edition_Strategy_Guide|Prima Games<br/>Collector's Edition]]}} | ||
{{Gallery/Box|file=Skyward-Sword-Prima-Games-Premiere-Edition.jpg|link=Prima_Games_Skyward_Sword_Premiere_Edition_Strategy_Guide|caption=[[Prima_Games_Skyward_Sword_Premiere_Edition_Strategy_Guide|Prima Games<br>Premiere Edition]]}} | {{Gallery/Box|file=Skyward-Sword-Prima-Games-Premiere-Edition.jpg|link=Prima_Games_Skyward_Sword_Premiere_Edition_Strategy_Guide|caption=[[Prima_Games_Skyward_Sword_Premiere_Edition_Strategy_Guide|Prima Games<br/>Premiere Edition]]}} | ||
{{Gallery/Box|file=A-Link-Between-Worlds-Prima-Games-Collectors-Edition.png|link=Prima_Games_A_Link_Between_Worlds_Collector's_Edition_Strategy_Guide|caption=[[Prima_Games_A_Link_Between_Worlds_Collector's_Edition_Strategy_Guide|Prima Games<br/>Collector's Edition]]}} | |||
{{Gallery/Bottom}}</center> | {{Gallery/Bottom}}</center> | ||
{{Cat|Resources}} | {{Cat|Resources}} | ||
Revision as of 19:36, March 18, 2019
Below is a listing of all known Strategy Guides for The Legend of Zelda series. This includes more general strategy guides that have significant sections within them relating to a particular Legend of Zelda Game. Guides are listed below in game release order. Some guides cover multiple Zelda games. Data including the games covered, release date, ISBN number, page length, and features can be found at the individual guide pages. Click the image or publisher name below to take you to the specific page.