Shai Utoh Shrine: Difference between revisions
BlueChuchu (talk | contribs) |
mNo edit summary |
||
| (18 intermediate revisions by 10 users not shown) | |||
| Line 1: | Line 1: | ||
{{stub}} | {{stub}} | ||
{{Infobox|location | {{Infobox|location | ||
| image | | image = [[File:ShaiUtohShrine.jpg|258px]] | ||
| caption = | |||
| game = ''[[The Legend of Zelda: Breath of the Wild|Breath of the Wild]]'' | | game = ''[[The Legend of Zelda: Breath of the Wild|Breath of the Wild]]'' | ||
| inhab = [[Shai Utoh]] | | inhab = [[Shai Utoh]] | ||
| location = South side of the [[Lakeside Stable]] in the jungles of [[Faron (Breath of the Wild)|Faron]] | |||
| pointsint = | | pointsint = | ||
| item = [[Spirit Orb]] | | item = [[Spirit Orb]]<br/>[[Traveler's Sword]]<br/>[[Ancient Core]] | ||
| natseason = | | natseason = | ||
| related = | | related = | ||
}} | | walkthrough = [https://www.youtube.com/watch?v=4sSM8GPEWsg Video Walkthrough] | ||
}}<section begin=summary /><includeonly> | |||
''Halt the Tilt''<br><br> | |||
'''Requirements:''' None | |||
</includeonly><section end=summary /> | |||
'''Shai Utoh Shrine''' is one of the many [[Shrine of Trials]] from ''[[The Legend of Zelda: Breath of the Wild|Breath of the Wild]]''. | '''Shai Utoh Shrine''' is one of the many [[Shrine of Trials]] from ''[[The Legend of Zelda: Breath of the Wild|Breath of the Wild]]''. | ||
==Requirements== | ==Requirements== | ||
{{Shrine | {{Shrine}}{{Clear|left}} | ||
{{Clear|left}} | |||
Behind Lakeside Stable is a bombable wall. Blow it up to access the shrine. | |||
==Halt the Tilt== | |||
Stasis is gonna be your go-to here. Use Stasis on the first seesaw to climb up, then the second seesaw to climb up to the right, and open the chest. | |||
Now flip the seesaw so you can climb to the other side, freeze it with Stasis, and continue. | |||
Grab the first chest with Magnesis and bring it with you. The goal here is to drop the chest and launch yourself upward. Stand on the far end of the next seesaw, and position the chest above the upper end of the seesaw, then raise it as high as you can, and then let go of it. When in the air, quickly paraglide backward to the ledge with the chest ([[Traveler's Sword]] or better). | |||
Once the second chest ([[Ancient Core]]) is open, you're free to make your way to the altar. You can either glide to it from there, launch yourself again with the seesaw/chest then gliding over the upper seesaw or just putting the chest on upper seesaw on the side closest to the monk, then using Stasis on the lower seesaw so you can just walk up easily. Whichever method you choose, reach the altar to get your [[Spirit Orb]]. | |||
{{Listbox|Breath of the Wild Shrines|hide=hide}} | |||
{{Cat|Breath of the Wild Shrines}} | {{Cat|Breath of the Wild Shrines}} | ||
Revision as of 21:33, September 23, 2021
| This article is a stub. You can help the Zelda Dungeon Wiki by expanding it. |
Games | ||
Location | South side of the Lakeside Stable in the jungles of Faron | |
Inhabitants | ||
Items | ||
| Guides | ||
|---|---|---|
Walkthrough | ||
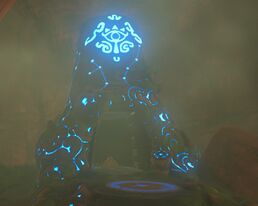
Shai Utoh Shrine is one of the many Shrine of Trials from Breath of the Wild.
Requirements
Behind Lakeside Stable is a bombable wall. Blow it up to access the shrine.
Halt the Tilt
Stasis is gonna be your go-to here. Use Stasis on the first seesaw to climb up, then the second seesaw to climb up to the right, and open the chest.
Now flip the seesaw so you can climb to the other side, freeze it with Stasis, and continue.
Grab the first chest with Magnesis and bring it with you. The goal here is to drop the chest and launch yourself upward. Stand on the far end of the next seesaw, and position the chest above the upper end of the seesaw, then raise it as high as you can, and then let go of it. When in the air, quickly paraglide backward to the ledge with the chest (Traveler's Sword or better).
Once the second chest (Ancient Core) is open, you're free to make your way to the altar. You can either glide to it from there, launch yourself again with the seesaw/chest then gliding over the upper seesaw or just putting the chest on upper seesaw on the side closest to the monk, then using Stasis on the lower seesaw so you can just walk up easily. Whichever method you choose, reach the altar to get your Spirit Orb.


