Sah Dahaj Shrine: Difference between revisions
RoseBadWolf (talk | contribs) (Corrected edit format) Tags: Mobile edit Mobile web edit |
Tags: Mobile edit Mobile web edit |
||
| (3 intermediate revisions by 3 users not shown) | |||
| Line 1: | Line 1: | ||
{{Infobox|location | {{Infobox|location | ||
| image = [[File:SahDahajShrine.jpg|258px]] | | image = [[File:SahDahajShrine.jpg|258px]] | ||
| caption = | |||
| game = ''[[The Legend of Zelda: Breath of the Wild|Breath of the Wild]]'' | | game = ''[[The Legend of Zelda: Breath of the Wild|Breath of the Wild]]'' | ||
| inhab = [[Sah Dahaj]] | | inhab = [[Sah Dahaj]] | ||
| Line 11: | Line 12: | ||
''Power of Fire''<br><br> | ''Power of Fire''<br><br> | ||
'''Requirements:''' None<br> | '''Requirements:''' None<br> | ||
'''Enemies:''' [[Guardian Scout | '''Enemies:''' [[Guardian Scout III]] | ||
</includeonly><section end=summary /> | </includeonly><section end=summary /> | ||
| Line 20: | Line 21: | ||
==Power of Fire== | ==Power of Fire== | ||
In the first room, hit the torch on the left side to knock it down, causing the flames to burn all the leaves, revealing a passage to the next room. Alternatively, Link can toss a bomb to light the leaves on fire. In the next area, defeat the [[Guardian Scout | In the first room, hit the torch on the left side to knock it down, causing the flames to burn all the leaves, revealing a passage to the next room. Alternatively, Link can toss a bomb to light the leaves on fire. In the next area, defeat the [[Guardian Scout III]] and climb the ladder. | ||
Use your bow to shoot the lantern up above, lighting everything on fire and revealing a passage to the next room. | Use your bow to shoot the lantern up above, lighting everything on fire and revealing a passage to the next room. | ||
| Line 40: | Line 41: | ||
File:Sah-Dahaj-Shrine-9.jpg|<center>The flames will burn the crates, causing the slab to hit the switch.</center> | File:Sah-Dahaj-Shrine-9.jpg|<center>The flames will burn the crates, causing the slab to hit the switch.</center> | ||
</gallery> | </gallery> | ||
{{Listbox|Breath of the Wild Shrines|hide=hide}} | |||
{{Cat|Breath of the Wild Shrines}} | {{Cat|Breath of the Wild Shrines}} | ||
Revision as of 19:20, December 20, 2020

Games | ||
Inhabitants | ||
Items | ||
| Guides | ||
|---|---|---|
Walkthrough | ||
Sah Dahaj Shrine, also known as Power of Fire, is one of the many Shrine of Trials from Breath of the Wild.
Requirements
Power of Fire
In the first room, hit the torch on the left side to knock it down, causing the flames to burn all the leaves, revealing a passage to the next room. Alternatively, Link can toss a bomb to light the leaves on fire. In the next area, defeat the Guardian Scout III and climb the ladder.
Use your bow to shoot the lantern up above, lighting everything on fire and revealing a passage to the next room.
In this final room, there is a treasure chest up above on the right side. Shoot down the lantern to set the leaves on fire, causing the treasure chest to drop down. Open it to get either a Knight's Bow or Royal Bow.
At the back end of the room, there are two boxes behind a gate, with a switch in between them. Knock the torches down with arrows to burn all the leaves and the boxes. The large slab will fall onto the switch, opening the nearby door. Run over to the altar and speak with Sah Dahaj to get the Spirit Orb.
Gallery
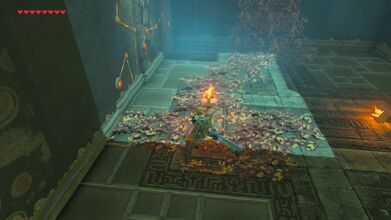
Knock the torch down to burn the leaves. 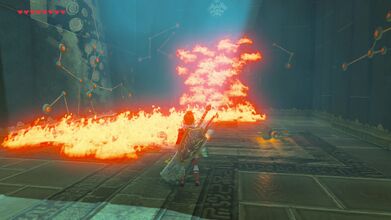
The fire reveals a path to the next room. 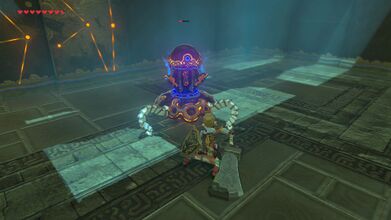
Defeat the Guardian Scout II. 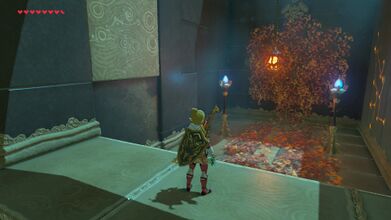
Shoot the torch down with an Arrow. 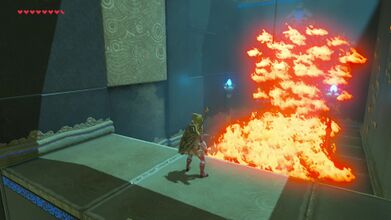
This will burn the leaves, revealing a path. 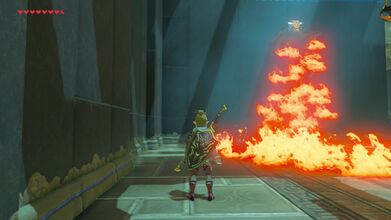
Burn the leaves to get the treasure chest to fall. 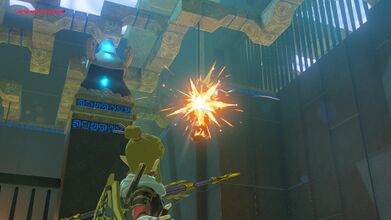
Hit the torch down with an arrow. 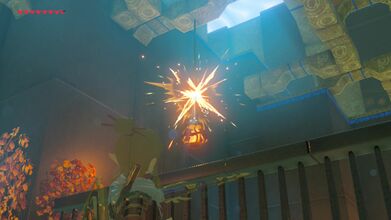
Hit the second torch with an arrow. 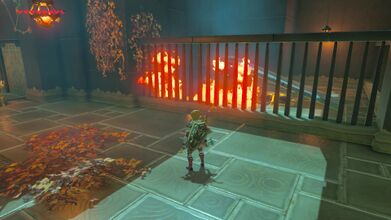
The flames will burn the crates, causing the slab to hit the switch.


