Rucco Maag Shrine: Difference between revisions
m (added optional chest drop info) |
m (→Five Flames: added alternative method to completing the shrine by giving switch directions) |
||
| Line 31: | Line 31: | ||
* Hit the horizontal shock crystal (the one on the right). | * Hit the horizontal shock crystal (the one on the right). | ||
* Light the torch on the left. | * Light the torch on the left. | ||
Or if you're having trouble lighting the switches with an arrow simply hit the switches in the following order, while facing the water: | |||
*bottom | |||
*front | |||
*left | |||
*left (again) | |||
*front | |||
*right | |||
And you're done. If you need to return it to the start position first, simply leave and return. | And you're done. If you need to return it to the start position first, simply leave and return. | ||
Revision as of 01:24, June 1, 2022
| This article is a stub. You can help the Zelda Dungeon Wiki by expanding it. |
Games | ||
Location | ||
Inhabitants | ||
Items | ||
| Guides | ||
|---|---|---|
Walkthrough | ||
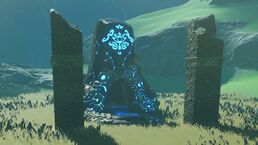
Rucco Maag Shrine is one of the many Shrine of Trials from Breath of the Wild.
Requirements
Five Flames
This puzzle involves lighting torches at a distance, which the easiest way is with fire arrows. You can also create a fire (drop flint and wood, hit with a metal weapon), and then stand near the fire with regular arrows. Be careful if your bow is wooden as it can catch on fire too. The goal here is of course, as the name says, to have all five flames lit at once.
The diamond shock switches will turn the cube, and if a torch gets dunked, it is of course put out. So the trick's to not dunk any torches.
From the starting position, this is actually pretty easy. When standing next to the shock switches:
- Light the two torches that are on the right, touching each other.
- Hit the horizontal shock crystal (the one on the right).
- Light the torch on the left.
Or if you're having trouble lighting the switches with an arrow simply hit the switches in the following order, while facing the water:
- bottom
- front
- left
- left (again)
- front
- right
And you're done. If you need to return it to the start position first, simply leave and return.
Before you scurry over to the altar though, don't forget the two treasure chests on the far wall. Pull them down with Magnesis, or use Cryonis to give you a boost up, or set their ledges on fire to drop them down and collect the contents (Opal and Silver Bow). Now head to the altar for your Spirit Orb.


