Phantom Hourglass Wisdom Gems: Difference between revisions
(Created page with "Below is a listing of all 20 Wisdom Gems that Link finds on his quest. When Link has collected 10 Wisdom Gems he can restore a portion of Neri's power. In order to do...") |
No edit summary |
||
| (3 intermediate revisions by the same user not shown) | |||
| Line 2: | Line 2: | ||
{{Gallery|size=256|pad=5|align=left|margin=30}} | {{Gallery|size=256|pad=5|align=left|margin=30}} | ||
{{Gallery/Box|file=Wisdom-Gem-01.png|caption=''' | {{Gallery/Box|file=Wisdom-Gem-01.png|caption='''Wisdom Gem #1''' | ||
'''Location''': [[Beedle's Shop Ship]] | '''Location''': [[Beedle's Shop Ship]] | ||
| Line 10: | Line 10: | ||
Right from the start of the game, [[Beedle]] has a Wisdom Gem for sale at the cost of 500 rupees.}} | Right from the start of the game, [[Beedle]] has a Wisdom Gem for sale at the cost of 500 rupees.}} | ||
{{Gallery/Box|file=Wisdom-Gem-02.png|caption=''' | {{Gallery/Box|file=Wisdom-Gem-02.png|caption='''Wisdom Gem #2''' | ||
'''Location''': [[Zauz's Island]] | '''Location''': [[Zauz's Island]] | ||
| Line 18: | Line 18: | ||
Sail over to Zauz's Island, an uncharted island located west of [[Bannan Island]] and north of the [[Isle of Gust]]. Grab a [[Cucco]] and leap over from the higher ledge over to the ledge that has a treasure chest. Open it up to get a Wisdom Gem.}} | Sail over to Zauz's Island, an uncharted island located west of [[Bannan Island]] and north of the [[Isle of Gust]]. Grab a [[Cucco]] and leap over from the higher ledge over to the ledge that has a treasure chest. Open it up to get a Wisdom Gem.}} | ||
{{Gallery/Box|file=Wisdom-Gem-03.png|caption=''' | {{Gallery/Box|file=Wisdom-Gem-03.png|caption='''Wisdom Gem #3''' | ||
'''Location''': [[Isle of Gust]] | '''Location''': [[Isle of Gust]] | ||
| Line 24: | Line 24: | ||
'''Conditions''': Reach [[Isle of Gust]] | '''Conditions''': Reach [[Isle of Gust]] | ||
As you make your way through the [[Isle of Gust]], you will be required to head through a cave that is filled with [[Miniblin]]s. | As you make your way through the [[Isle of Gust]], you will be required to head through a cave that is filled with [[Miniblin]]s. Open the treasure chest that is near the miniblins to get the Wisdom Gem.}} | ||
{{Gallery/Box|file=Wisdom-Gem-04.png|caption='''Wisdom Gem #4''' | |||
'''Location''': [[Isle of Ember]] | |||
'''Conditions''': Complete [[Temple of Wind]] | |||
After completing the [[Temple of Wind]], return to Astrid and speak with her. She will give you some advice, but will then give you a [[Wisdom Gem]].}} | |||
{{Gallery/Box|file=Wisdom-Gem-05.png|caption='''Wisdom Gem #5''' | |||
'''Location''': [[Molida Island]] | |||
'''Conditions''': Acquire [[Sun Key]] | |||
After unlocking the Sun Door with the Sun Key, head up and out of the cave to reach the north part of Molida Island. Immediately pull out your shovel and dig the nearby soft spot to find a cave. Open the treasure chest below to get the Wisdom Gem.}} | |||
{{Gallery/Box|file=Wisdom-Gem-06.png|caption='''Wisdom Gem #6''' | |||
'''Location''': [[Temple of Courage]] | |||
'''Conditions''': Acquire [[Bow]] and Arrow | |||
Once you reach the northeast portion of Floor B1 at the Temple of Courage, there is an arrow orb. Hit it with the boomerang so that it is facing northward and then shoot it with with an arrow. Open the treasure chest that appears to get the Wisdom Gem.}} | |||
{{Gallery/Box|file=Wisdom-Gem-07.png|caption='''Wisdom Gem #7''' | |||
'''Location''': [[Mercay Island]] | |||
'''Conditions''': Acquire [[Bomb]]s | |||
At the northeast part of Mercay Island, before heading west towards the Temple of the Ocean King, walk northward. Against the flat wall ahead, place a bomb to find a hidden cave. This leads to the island at the northeast corner of the map where [[Freedle]] is located. Open the treasure chest here to get the Wisdom Gem.}} | |||
{{Gallery/Box|file=Wisdom-Gem-08.png|caption='''Wisdom Gem #8''' | |||
'''Location''': [[Bannan Island]] | |||
'''Conditions''': Speak with [[Joanne]] and Acquire [[Jolene's Letter]] | |||
After fighting [[Jolene]], and after encountering [[Joanne]] at Bannan Island, Jolene will send a letter in the mail. It is actually for her sister, Joanne. Take the letter to Joanne and she will thank you by giving you a Wisdom Gem.}} | |||
{{Gallery/Box|file=Wisdom-Gem-09.png|caption='''Wisdom Gem #9''' | |||
'''Location''': [[Temple of the Ocean King]] | |||
'''Conditions''': Complete [[Ghost Ship]] | |||
On Floor B9 of the Temple of the Ocean King, there are four [[Wizzrobe]]s that appear in the four corners of the room. Defeat all four of them and a large treasure chest containing a Wisdom Gem will appear.}} | |||
{{Gallery/Box|file=Wisdom-Gem-10.png|caption='''Wisdom Gem #10''' | |||
'''Location''': Various | |||
'''Conditions''': Acquire [[Bomb]]s and Play [[Salvatore]]'s [[Cannon Game]] on [[Bannan Island]] | |||
After acquiring Bombs, you can play Salvatore's Cannon Game at Bannan Island. After playing his game, Salvatore will send you a letter containing a Wisdom Gem. This event sequence will happen only after you save and reopen your game file.}} | |||
{{Gallery/Box|file=Wisdom-Gem-11.png|caption='''Wisdom Gem #11''' | |||
'''Location''': [[Goron Island]] | |||
'''Conditions''': Complete the [[Goron Quiz]] | |||
After completing the [[Goron Quiz]] at [[Goron Island]], [[Biggoron]] will award you with a Wisdom Gem.}} | |||
{{Gallery/Box|file=Wisdom-Gem-12.png|caption='''Wisdom Gem #12''' | |||
'''Location''': [[Temple of Ice]] | |||
'''Conditions''': Reach Temple of Ice | |||
On Floor 3F of the Temple of Ice, there is a crystal switch at the west end of the room. Toss a bomb at it to hit it, lowering the blue blocks. Leap off the ledge and climb up the nearby stairs that were blocked off by the blue blocks. Open the chest to get a Wisdom Gem.}} | |||
{{Gallery/Box|file=Wisdom-Gem-13.png|caption='''Wisdom Gem #13''' | |||
'''Location''': [[Temple of Ice]] | |||
'''Conditions''': Acquire [[Grappling Hook]] | |||
On Floor B1 of the Temple of Ice, you will be required to make your way to the northeast corner of the map where you can unlock a door with a [[Small Key]]. Open the chest that is behind this locked door to get the Wisdom Gem.}} | |||
{{Gallery/Box|file=Wisdom-Gem-14.png|caption='''Wisdom Gem #14''' | |||
'''Location''': [[Isle of Frost]] | |||
'''Conditions''': Acquire [[Grappling Hook]] | |||
At the west end of the Isle of Frost, just west of the [[Island Chief]]'s hut, there is a treasure chest on a higher ledge. Grapple over to it with the Grappling Hook and open it to get the Wisdom Gem.}} | |||
{{Gallery/Box|file=Wisdom-Gem-15.png|caption='''Wisdom Gem #15''' | |||
'''Location''': Various | |||
'''Conditions''': Complete [[Temple of Ice]] | |||
After completing the Temple of Ice, you will soon get a letter from [[Aroo]]. He will thank you for helping him out and will reward you with a Wisdom Gem as a sign of thanks. You will have to save your game and reload it to trigger this event to happen.}} | |||
{{Gallery/Box|file=Wisdom-Gem-16.png|caption='''Wisdom Gem #16''' | |||
'''Location''': [[Temple of the Ocean King]] | |||
'''Conditions''': Acquire [[Bombchu]]s | |||
On Floor B2, there is a hidden area at the northwest corner of the room, just west of the locked door. Toss a bomb against the northern wall to allow passage into the safe zone. From here, there is a small hole where you can send a bombchu through. Hit the switch with a bombchu and a treasure chest appears at the east end of the room. Quickly run over and open it up to get a Wisdom Gem.}} | |||
{{Gallery/Box|file=Wisdom-Gem-17.png|caption='''Wisdom Gem #17''' | |||
'''Location''': [[Maze Island]] | |||
'''Conditions''': Reach [[Northeast Quadrant]] | |||
Regardless of the difficulty level of the Maze, you can venture to the east end of the island, where there is a treasure chest that is easily visible, but it looks like it is impossible to reach. Directly south of the treasure chest, there is a bombable wall, just to the left of the eye switch. Toss a bomb to blast it open and run over to open the treasure chest to get the Wisdom Gem.}} | |||
{{Gallery/Box|file=Wisdom-Gem-18.png|caption='''Wisdom Gem #18''' | |||
'''Location''': [[Maze Island]] | |||
'''Conditions''': Reach [[Northeast Quadrant]] | |||
The Wisdom Gem is the prize for completing the Easy pathway at Maze Island.}} | |||
{{Gallery/Box|file=Wisdom-Gem-19.png|caption='''Wisdom Gem #19''' | |||
'''Location''': [[Isle of Ruins]] | |||
'''Conditions''': After acquiring the [[Regal Necklace]] | |||
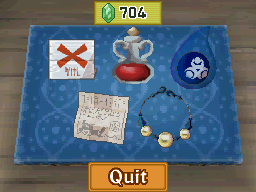
After placing the [[King's Key]] into Bremeur's Temple, the the water level on the island will be lowered. There is a new cave for us to reach near the northwest part of the island. Do not leap down to the lower level. Instead, backtrack towards that initial bridge that Bremeur had extended. From here make your way down to the cave that is indicated on your map. Inside, open the chest to get the Wisdom Gem.}} | |||
{{Gallery/Box|file=Wisdom-Gem-20.png|caption='''Wisdom Gem #20''' | |||
'''Location''': [[Isle of Ruins]] | |||
'''Conditions''': After acquiring the [[Regal Necklace]] | |||
At the southeast part of the island, there is a boulder on a higher ledge that is surrounded by three sets of stairs. Push the boulder up once and then push it to the right. It will travel across the bridge and break the boulder in the distance. Lift the rock that is in the way and head up a screen. Open the treasure chest to get the final Wisdom Gem.}} | |||
Revision as of 18:21, March 3, 2018
Below is a listing of all 20 Wisdom Gems that Link finds on his quest. When Link has collected 10 Wisdom Gems he can restore a portion of Neri's power. In order to do so, he must take the gems to Spirit Island, which is a hidden Island located just south of Molida Island. If Link has collected all 20 of these gems, he can take them to the spring at Spirit Island to fully restore the power of Neri. The 20 Wisdom Gems are listed in roughly the order they become available to collect.
Wisdom Gem #1
Location: Beedle's Shop Ship
Conditions: 500 Rupees
Right from the start of the game, Beedle has a Wisdom Gem for sale at the cost of 500 rupees.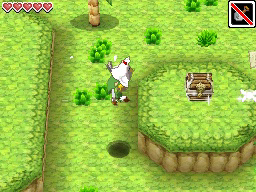
Wisdom Gem #2
Location: Zauz's Island
Conditions: Reach Northwest Quadrant
Sail over to Zauz's Island, an uncharted island located west of Bannan Island and north of the Isle of Gust. Grab a Cucco and leap over from the higher ledge over to the ledge that has a treasure chest. Open it up to get a Wisdom Gem.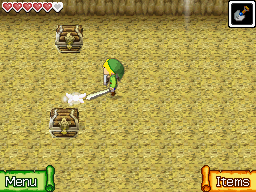
Wisdom Gem #3
Location: Isle of Gust
Conditions: Reach Isle of Gust
As you make your way through the Isle of Gust, you will be required to head through a cave that is filled with Miniblins. Open the treasure chest that is near the miniblins to get the Wisdom Gem.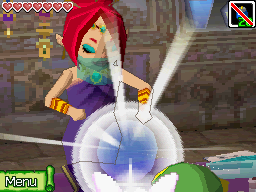
Wisdom Gem #4
Location: Isle of Ember
Conditions: Complete Temple of Wind
After completing the Temple of Wind, return to Astrid and speak with her. She will give you some advice, but will then give you a Wisdom Gem.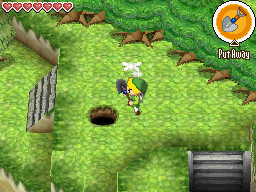
Wisdom Gem #5
Location: Molida Island
Conditions: Acquire Sun Key
After unlocking the Sun Door with the Sun Key, head up and out of the cave to reach the north part of Molida Island. Immediately pull out your shovel and dig the nearby soft spot to find a cave. Open the treasure chest below to get the Wisdom Gem.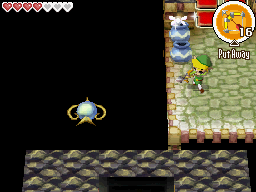
Wisdom Gem #6
Location: Temple of Courage
Conditions: Acquire Bow and Arrow
Once you reach the northeast portion of Floor B1 at the Temple of Courage, there is an arrow orb. Hit it with the boomerang so that it is facing northward and then shoot it with with an arrow. Open the treasure chest that appears to get the Wisdom Gem.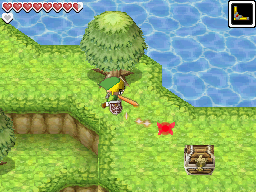
Wisdom Gem #7
Location: Mercay Island
Conditions: Acquire Bombs
At the northeast part of Mercay Island, before heading west towards the Temple of the Ocean King, walk northward. Against the flat wall ahead, place a bomb to find a hidden cave. This leads to the island at the northeast corner of the map where Freedle is located. Open the treasure chest here to get the Wisdom Gem.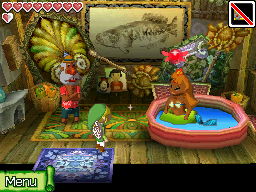
Wisdom Gem #8
Location: Bannan Island
Conditions: Speak with Joanne and Acquire Jolene's Letter
After fighting Jolene, and after encountering Joanne at Bannan Island, Jolene will send a letter in the mail. It is actually for her sister, Joanne. Take the letter to Joanne and she will thank you by giving you a Wisdom Gem.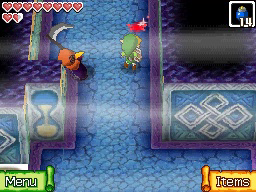
Wisdom Gem #9
Location: Temple of the Ocean King
Conditions: Complete Ghost Ship
On Floor B9 of the Temple of the Ocean King, there are four Wizzrobes that appear in the four corners of the room. Defeat all four of them and a large treasure chest containing a Wisdom Gem will appear.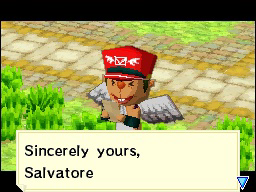
Wisdom Gem #10
Location: Various
Conditions: Acquire Bombs and Play Salvatore's Cannon Game on Bannan Island
After acquiring Bombs, you can play Salvatore's Cannon Game at Bannan Island. After playing his game, Salvatore will send you a letter containing a Wisdom Gem. This event sequence will happen only after you save and reopen your game file.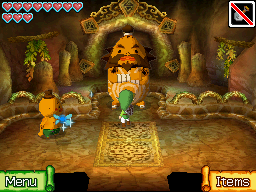
Wisdom Gem #11
Location: Goron Island
Conditions: Complete the Goron Quiz
After completing the Goron Quiz at Goron Island, Biggoron will award you with a Wisdom Gem.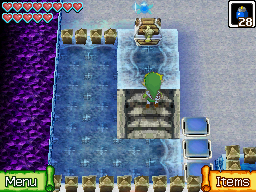
Wisdom Gem #12
Location: Temple of Ice
Conditions: Reach Temple of Ice
On Floor 3F of the Temple of Ice, there is a crystal switch at the west end of the room. Toss a bomb at it to hit it, lowering the blue blocks. Leap off the ledge and climb up the nearby stairs that were blocked off by the blue blocks. Open the chest to get a Wisdom Gem.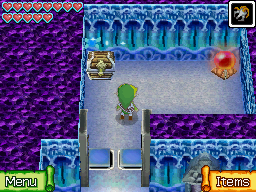
Wisdom Gem #13
Location: Temple of Ice
Conditions: Acquire Grappling Hook
On Floor B1 of the Temple of Ice, you will be required to make your way to the northeast corner of the map where you can unlock a door with a Small Key. Open the chest that is behind this locked door to get the Wisdom Gem.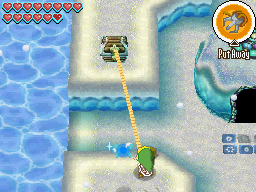
Wisdom Gem #14
Location: Isle of Frost
Conditions: Acquire Grappling Hook
At the west end of the Isle of Frost, just west of the Island Chief's hut, there is a treasure chest on a higher ledge. Grapple over to it with the Grappling Hook and open it to get the Wisdom Gem.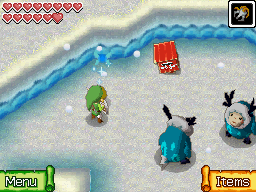
Wisdom Gem #15
Location: Various
Conditions: Complete Temple of Ice
After completing the Temple of Ice, you will soon get a letter from Aroo. He will thank you for helping him out and will reward you with a Wisdom Gem as a sign of thanks. You will have to save your game and reload it to trigger this event to happen.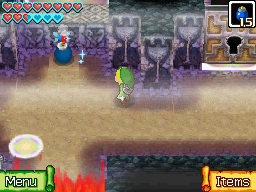
Wisdom Gem #16
Location: Temple of the Ocean King
Conditions: Acquire Bombchus
On Floor B2, there is a hidden area at the northwest corner of the room, just west of the locked door. Toss a bomb against the northern wall to allow passage into the safe zone. From here, there is a small hole where you can send a bombchu through. Hit the switch with a bombchu and a treasure chest appears at the east end of the room. Quickly run over and open it up to get a Wisdom Gem.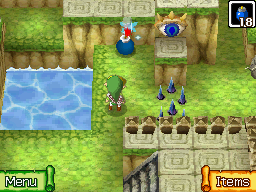
Wisdom Gem #17
Location: Maze Island
Conditions: Reach Northeast Quadrant
Regardless of the difficulty level of the Maze, you can venture to the east end of the island, where there is a treasure chest that is easily visible, but it looks like it is impossible to reach. Directly south of the treasure chest, there is a bombable wall, just to the left of the eye switch. Toss a bomb to blast it open and run over to open the treasure chest to get the Wisdom Gem.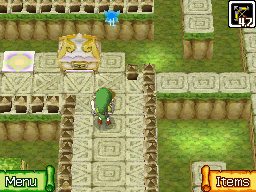
Wisdom Gem #18
Location: Maze Island
Conditions: Reach Northeast Quadrant
The Wisdom Gem is the prize for completing the Easy pathway at Maze Island.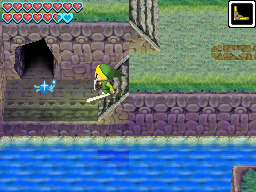
Wisdom Gem #19
Location: Isle of Ruins
Conditions: After acquiring the Regal Necklace
After placing the King's Key into Bremeur's Temple, the the water level on the island will be lowered. There is a new cave for us to reach near the northwest part of the island. Do not leap down to the lower level. Instead, backtrack towards that initial bridge that Bremeur had extended. From here make your way down to the cave that is indicated on your map. Inside, open the chest to get the Wisdom Gem.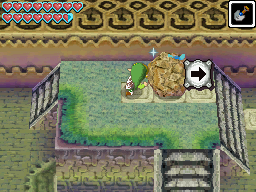
Wisdom Gem #20
Location: Isle of Ruins
Conditions: After acquiring the Regal Necklace
At the southeast part of the island, there is a boulder on a higher ledge that is surrounded by three sets of stairs. Push the boulder up once and then push it to the right. It will travel across the bridge and break the boulder in the distance. Lift the rock that is in the way and head up a screen. Open the treasure chest to get the final Wisdom Gem.


