Ne'ez Yohma Shrine: Difference between revisions
No edit summary |
Thortok2000 (talk | contribs) No edit summary |
||
| Line 22: | Line 22: | ||
Before walking up the water ramp with the rolling boulders, look to your right. The ball socket is at the far right corner of the bottom of the ramp, and this is the ultimate goal to get the ball into. You'll be using the Cryonis rune to make this happen. | Before walking up the water ramp with the rolling boulders, look to your right. The ball socket is at the far right corner of the bottom of the ramp, and this is the ultimate goal to get the ball into. You'll be using the Cryonis rune to make this happen. | ||
The very first pillar you make needs precise placement. It needs to block the laser so you can pass, it needs to be close enough to the triangle ledge for you to jump for it and get the chest | The very first pillar you make needs precise placement. It needs to block the laser so you can pass, it needs to be close enough to the triangle ledge for you to jump for it and get the chest, and it needs to be close enough to the gap between the two walls that boulders that hit it go to the right. | ||
Now climb all the way to the top to find the orb that you'll be navigating down to the ball socket. Pop it out from the wall with a Cryonis pillar behind it, and pop it over the first curved platform. It should roll down, bounce off the first pillar you made earlier, and wait just below the next curved platform. If this doesn't happen, move any boulders that are in the way, and keep trying until it does. Once the orb rolls off the edge another will appear at the start again. If you take long enough, eventually the boulders stop coming and it leaves you with just the orb and any boulders that haven't rolled off yet. | Now climb all the way to the top to find the orb that you'll be navigating down to the ball socket. Pop it out from the wall with a Cryonis pillar behind it, and pop it over the first curved platform. It should roll down, bounce off the first pillar you made earlier, and wait just below the next curved platform. If this doesn't happen, move any boulders that are in the way, and keep trying until it does. Once the orb rolls off the edge another will appear at the start again. If you take long enough, eventually the boulders stop coming and it leaves you with just the orb and any boulders that haven't rolled off yet. | ||
Revision as of 16:13, April 22, 2018
| This article is a stub. You can help the Zelda Dungeon Wiki by expanding it. |
Games | ||
Inhabitants | ||
Items | ||
| Guides | ||
|---|---|---|
Walkthrough | ||
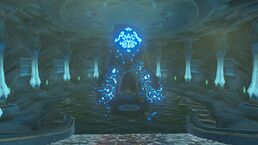
Ne'ez Yohma Shrine is one of the many Shrine of Trials from Breath of the Wild.
Requirements
Pushing Power
Before walking up the water ramp with the rolling boulders, look to your right. The ball socket is at the far right corner of the bottom of the ramp, and this is the ultimate goal to get the ball into. You'll be using the Cryonis rune to make this happen.
The very first pillar you make needs precise placement. It needs to block the laser so you can pass, it needs to be close enough to the triangle ledge for you to jump for it and get the chest, and it needs to be close enough to the gap between the two walls that boulders that hit it go to the right.
Now climb all the way to the top to find the orb that you'll be navigating down to the ball socket. Pop it out from the wall with a Cryonis pillar behind it, and pop it over the first curved platform. It should roll down, bounce off the first pillar you made earlier, and wait just below the next curved platform. If this doesn't happen, move any boulders that are in the way, and keep trying until it does. Once the orb rolls off the edge another will appear at the start again. If you take long enough, eventually the boulders stop coming and it leaves you with just the orb and any boulders that haven't rolled off yet.
That was step 1. Once you get the orb stationary above the second curved platform, step 2 is a little easier and if done correctly should only take one attempt. You want to put a pillar against the triangular platform that's just above the ball socket, to block the orb from rolling down the side of the triangle (when it gets there). Then when you're ready, you use one pillar to push it over the curved platform, and it should stop against the pillar you made. Then you use a final pillar to push it over the triangle, into the ball socket.
At that point the gate unlocks. Head to the altar to get your Spirit Orb.


