Moldorm: Difference between revisions
No edit summary |
mNo edit summary |
||
| Line 1: | Line 1: | ||
{{Enemy | {{Enemy | ||
|name = Moldorm | |name = Moldorm | ||
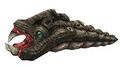
|image = [[File:Moldorm-LoZ-Art.png|200px]]<br>''Artwork from | |image = [[File:Moldorm-LoZ-Art.png|200px]]<br>''Artwork from The Legend of Zelda Game Manual'' | ||
|game = ''[[The Legend of Zelda]]''<br>''[[The Legend of Zelda: A Link to the Past|A Link to the Past]]''<br>''[[The Legend of Zelda: Link's Awakening|Link's Awakening]]''<br>''[[The Legend of Zelda: The Minish Cap|The Minish Cap]]''<br>''[[The Legend of Zelda: Twilight Princess|Twilight Princess]]''<br>''[[The Legend of Zelda: Phantom Hourglass|Phantom Hourglass]]''<br>''[[The Legend of Zelda: Skyward Sword|Skyward Sword]]'' | |game = ''[[The Legend of Zelda]]''<br>''[[The Legend of Zelda: A Link to the Past|A Link to the Past]]''<br>''[[The Legend of Zelda: Link's Awakening|Link's Awakening]]''<br>''[[The Legend of Zelda: The Minish Cap|The Minish Cap]]''<br>''[[The Legend of Zelda: Twilight Princess|Twilight Princess]]''<br>''[[The Legend of Zelda: Phantom Hourglass|Phantom Hourglass]]''<br>''[[The Legend of Zelda: Skyward Sword|Skyward Sword]]'' | ||
|habitat = '''''The Legend of Zelda'''''<br>[[Level 2: The Moon]]<br>[[Level 7: The Demon]] | |habitat = '''''The Legend of Zelda'''''<br>[[Level 2: The Moon]]<br>[[Level 7: The Demon]] | ||
---- | ----'''''A Link to the Past'''''<br>[[Tower of Hera]]<br>[[Ganon's Castle]] | ||
'''''A Link to the Past'''''<br>[[Tower of Hera]]<br>[[Ganon's Castle]] | ----'''''Link's Awakening'''''<br>[[Tail Cave]] | ||
---- | ----'''''The Minish Cap'''''<br>[[Fortress of Winds]] | ||
'''''Link's Awakening'''''<br>[[Tail Cave]] | ----'''''Twilight Princess'''''<br>[[Gerudo Desert]]<br>[[Arbiter's Grounds]] | ||
---- | ----'''''Phantom Hourglass'''''<br>[[Temple of Courage]] | ||
'''''The Minish Cap'''''<br>[[Fortress of Winds]] | ----'''''Skyward Sword'''''<br>[[Fire Sanctuary (Skyward Sword)|Fire Sanctuary]] | ||
---- | |||
'''''Twilight Princess'''''<br>[[Gerudo Desert]]<br>[[Arbiter's Grounds]] | |||
---- | |||
'''''Phantom Hourglass'''''<br>[[Temple of Courage]] | |||
---- | |||
'''''Skyward Sword'''''<br>[[Fire Sanctuary (Skyward Sword)|Fire Sanctuary]] | |||
|weapon = [[Sword]]<br>[[Mogma Mitts]] | |weapon = [[Sword]]<br>[[Mogma Mitts]] | ||
|similar = [[Swamola]]<br>[[Mini-Moldorm]] | |similar = [[Swamola]]<br>[[Mini-Moldorm]] | ||
| Line 48: | Line 42: | ||
==Gallery== | ==Gallery== | ||
<gallery> | <gallery> | ||
File:Moldorm-LoZ-Art-2.png|Moldorm Artwork from ''[[The Legend of Zelda]]'' | File:Moldorm-LoZ-Art-2.png|Moldorm Artwork from [[Million Publications The Legend of Zelda Strategy Guide|Million Publications Strategy Guide]] for ''[[The Legend of Zelda]]''. | ||
File:Moldorm-LoZ-Sprite.png|Moldorm Sprite from ''[[The Legend of Zelda]]'' | File:Moldorm-Artwork-LoZ-Kodokawa-Shoten-Guide.png|Moldorm Artwork from '''Kadokawa Shoten Strategy Guide''' for ''[[The Legend of Zelda]]''. | ||
File:Moldorm-ALTTP-Sprite.png|Moldorm Sprite from ''[[The Legend of Zelda: A Link to the Past|A Link to the Past]]'' | File:Moldorm-LoZ-Sprite.png|Moldorm Sprite from ''[[The Legend of Zelda]]''. | ||
File:Moldorm.jpg|A Moldorm from ''[[The Legend of Zelda: Twilight Princess|Twilight Princess]]'' | File:Moldorm-ALTTP-Sprite.png|Moldorm Sprite from ''[[The Legend of Zelda: A Link to the Past|A Link to the Past]]''. | ||
File:Ph-moldorm.png|Moldorm from ''[[The Legend of Zelda: Phantom Hourglass|Phantom Hourglass]]'' | File:Moldorm.jpg|A Moldorm from ''[[The Legend of Zelda: Twilight Princess|Twilight Princess]]''. | ||
File:Moldworm-SS.jpg|Link fighting a Moldorm in ''[[The Legend of Zelda: Skyward Sword|Skyward Sword]]'' | File:Ph-moldorm.png|Moldorm from ''[[The Legend of Zelda: Phantom Hourglass|Phantom Hourglass]]''. | ||
File:Moldworm-SS.jpg|Link fighting a Moldorm in ''[[The Legend of Zelda: Skyward Sword|Skyward Sword]]''. | |||
</gallery> | </gallery> | ||
Revision as of 09:43, January 11, 2013
A Moldorm is an enemy that has appeared in multiple Legend of Zelda games to date. It is usually a small land-dwelling creatures that is like a long worm. In more recent games, it has taken the appearance of a more centiped-like enemy instead of worm-like. In A Link to the Past and in Link's Awakening Moldorms appear as bosses.
Appearances
The Legend of Zelda
In The Legend of Zelda, Moldorms appear in Level 2 and in Level 7. They can be defeated by slashing one part of their body at a time, until they have finally been reduced to one piece, at which time a final slash will do them in. In the last dungeon of the game, Moldorms are replaced by a tougher enemy known as a Swamola. these enemies can only be attacked at their head, where Moldorms can br attacked anywhere.
A Link to the Past
- Main article: Moldorm (A Link to the Past)
Moldorm is the boss of the Tower of Hera. Moldorm later appears as a mini-boss in Ganon's Tower.
Link's Awakening
- Main article: Moldorm (Link's Awakening)
Moldorm is the Nightmare found within Tail Cave.
Twilight Princess
This is a worm-like enemy that buries beneath the desert sand. Its only attack is to leap up and hit you. Use the Clawshot to pull it to the surface and kill it with one strike of your sword, or wait for it to jump and use the Mortal Draw Hidden Skill.
Phantom Hourglass
[Insert Information]
Skyward Sword
Moldorms in Skyward Sword can be found in the Fire Sanctuary, Sky Keep, and an island in the Thunderhead. After digging underground with his Mogma Mitts, Link can find them crawling around in a continuous circle. If they spot Link, they'll charge at him immediately, causing a small amount of damage. Their backside is their sole weak point.
Gallery

Moldorm Artwork from Million Publications Strategy Guide for The Legend of Zelda.

Moldorm Artwork from Kadokawa Shoten Strategy Guide for The Legend of Zelda.

Moldorm Sprite from The Legend of Zelda.

Moldorm Sprite from A Link to the Past.
A Moldorm from Twilight Princess.
- Ph-moldorm.png
Moldorm from Phantom Hourglass.
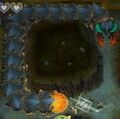
Link fighting a Moldorm in Skyward Sword.


