Jee Noh Shrine: Difference between revisions
Thortok2000 (talk | contribs) m (Reverted edits by Ember314 (talk) to last revision by Drummerj12001) |
m (added alt strat) |
||
| Line 29: | Line 29: | ||
In the third room, use Magnesis to get the chest and open it for an [[Opal]]. If it falls, it will come along the conveyor belt again, don't worry. | In the third room, use Magnesis to get the chest and open it for an [[Opal]]. If it falls, it will come along the conveyor belt again, don't worry. | ||
The objective is now to carry the nearby orb to the ball slot at the end. Time your movements to cross the laser beam when it is blocked by the blocks on the other belt. | The objective is now to carry the nearby orb to the ball slot at the end. Alternatively, you can use Stasis and hit the orb across the room. | ||
Time your movements to cross the laser beam when it is blocked by the blocks on the other belt. | |||
Stop on the platform to the side a moment to put down the orb and use Stasis on the next laser, since it's on your side and won't be blocked by the blocks. Run past it with the orb before Stasis wears off, and then again use timing for the third beam. | Stop on the platform to the side a moment to put down the orb and use Stasis on the next laser, since it's on your side and won't be blocked by the blocks. Run past it with the orb before Stasis wears off, and then again use timing for the third beam. | ||
Revision as of 14:46, July 18, 2019
| This article is a stub. You can help the Zelda Dungeon Wiki by expanding it. |
Games | ||
Inhabitants | ||
Items | ||
| Guides | ||
|---|---|---|
Walkthrough | ||
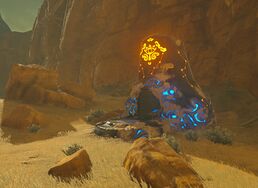
Jee Noh Shrine is one of the many Shrine of Trials from Breath of the Wild.
This shrine is located inside the Gerudo Canyon Pass at the southern most curve, east of the Wasteland Tower.
Requirements
On the Move
The goal in the first two rooms is to shoot an arrow at the orb to knock it into the ball slot on the other side. Using the Stasis rune on either the orb or the conveyor can help.
The second room also has two Guardian Scout I on the conveyor, so be sure to defeat them.
In the third room, use Magnesis to get the chest and open it for an Opal. If it falls, it will come along the conveyor belt again, don't worry.
The objective is now to carry the nearby orb to the ball slot at the end. Alternatively, you can use Stasis and hit the orb across the room.
Time your movements to cross the laser beam when it is blocked by the blocks on the other belt.
Stop on the platform to the side a moment to put down the orb and use Stasis on the next laser, since it's on your side and won't be blocked by the blocks. Run past it with the orb before Stasis wears off, and then again use timing for the third beam.
Drop the ball into its socket and then head to the altar for your Spirit Orb.


