
|
This article describes a subject that is or may be outside the core Zelda canon.
|
Isle of Rebirth is a Zelda Classic custom quest developed by Evan20000. A difficult-ish quest that takes Link across the island of Remdra in his quest to rescue Princess Zelda.
Trading Sequence
| Item
|
Location
|
Screenshot
|
| Guitar
|
Two screens west of Basic Bomb Shop
|

|
| Pineapple
|
When you bring to the "Ralph" look-a-like in the first town
|

|
| Egg
|
One screen west of Mushrooms of Level 2 area entrance
|

|
| Seeds
|
Southwest of the 1st arena is a beach. continue along it until you find a cave. bomb to wall to the right and talk to the snake.
|

|
| Goron Vase
|
One or two screens above the spin attack house give to the guy who is watering seeds
|

|
| Shovel
|
Talk to goron west of forge.
|

|
| Coconut
|
Give to boy on beach.
|

|
| Jewelry
|
Man in 1st town.
|

|
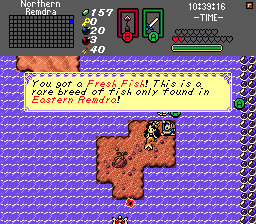
| Fish
|
Mermaid north of Level 6
|
|
| Goron Circlet
|
Fisherman east of level 8.
|
File:Inventory goroncirclet.png
|
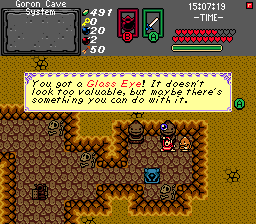
| Glass eye
|
Goron in goron cave system, behind a skull rock (powder keg) and Statue (Level 2 gauntlet).
|
|
| Level EX
|
Missing fish eye on jungle island northwest of Level 6.
|
|
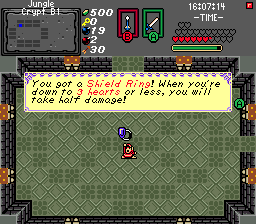
| Shield ring & Cursed skull
|
Defeat Servant of the Darkness: Krampus, the boss of Level EX: Jungle Crypt.
|
|
Walkthrough (Incomplete)
Before Level 1
| Item
|
Location
|
Screenshot
|
| Piece of Heart #1
|
One screen north of the start, talk to the old man down the stairs. After that, open the chest for a Piece of Heart.
|
|
| Wooden Sword
|
In the Hori Woods, there is a cabin. Inside, you will find Venser, Archmage of the Wizzrobe Clan. Talk to him to get the Wooden Sword.
|
|
| Piece of Heart #2
|
Follow through Hori Woods past a couple mushrooms. There’s a room with a ton of blue Moblins. Kill them all and grab the heart.
|
|
| Ocarina
|
In Hori Village’s shop for 100 rupees.
|
|
| 50 rupees
|
West of Hori.
|
|
| Bombs
|
In another shop west of Hori in a town named Brihton.
|
|
| 50 rupees
|
Also in Brihton.
|
|
| Magic Shield
|
Also in Brihton, in the same shop as the bombs.
|
|
| Guitar
|
North of the shop is a house. Go in, play the Ocarina on the block, and open the chest.
|
|
| 50 rupees
|
Placed prominently on the west of Brihton.
|
|
| Piece of Heart #3
|
In Blue Woods is a Forest Mansion. One screen west of the entrance is an ice puzzle. Beat it to get a piece of heart.
|
|
| Mushroom
|
In the Blue Woods is a strange man. He’ll give you a mushroom.
|
|
| Potions
|
Give the mushroom to the witch on the beach.
|
|
Bomb Bag #2
(12 bombs)
|
Behind a bombable wall just past the northeast exit of Brihton village and a bit north of the Blue Woods. Costs 100 Rupees.
|
|
| Fresh Pineapple
|
Give the Guitar to the boy in Hori.
|
|
| 50 rupees
|
Behind the bombable wall north of the 2nd pieceof heart, you need 2 bombs.
|
|
| Piece of Heart #4
|
Just west of the river with the bridge out is a soft dig spot. Bomb it, beat all the enemies inside, and pick up the heart.
|
|
| 50 rupees
|
In the bottom-west corner of the Blue Forest.
|
|
| Piece of Heart #5
|
In the Forest Mansion, kill all the Armos in the room to the right of the entrance. Or just kill enough to reach the spark switch. Hint: the northeast corner of the room is where you can kill enough to reach it.
|
|
| Piece of Heart #6
|
In the Forest Mansion is a spike trap room. Go to the upper right corner by hiding where the bushes are when the spikes are up, and moving when they’re down.
|
|
| Piece of Heart #7
|
In the northwest room of the Forest Mansion, follow the darker tiles to the chest without stepping on the lighter ones.
|
|
| Piece of Heart #8
|
In the Blue Woods, second entrance east of Brihton, there is a bombable rock. Follow it north to the bombable wall. Kill all the Moblins, then go up and get the heart piece. Oh, and please spare his life.
|
|
| Boomerang
|
Go north past Brihton from the northwest exit. East of the first non-town screen will be a shop with a chain chomp. Buy the boomerang for 150 Rupees.
|
|
| Piece of Heart #9
|
Near the start of the game where you stepped on a button to make a bridge. There is a row of trees with a piece of heart behind it.
|
|
Level 1: Seaside Ruins
There are 4 blocks to the south of Hori Village. Go down until you reach a beach. Follow it all the way east until you enter the first dungeon, Seaside Ruins.
| Item
|
Location
|
Screenshot
|
| Compass
|
In the first room of enemies after you defeat them all.
|
|
| Map
|
Go right two screens from the first room of enemies. Past the traps is the map.
|
|
| Small Key
|
In the sand flow room with three columns flowing to the middle, kill all Stalfos/Crabs to get a key.
|
|
| Small Key
|
North past the block puzzle, then west. In the v-shaped room with Blades is a key when you beat all the enemies.
|
|
| Candle
|
Go through the lock block northwest of the entrance. Kill the Dodongo and the Stalfos to get a Candle.
|
|
| Cursed Skull #1
|
Go north and around the plateau from the beginning. Back directly north of the start, light the torch and grab the Skull.
|
|
| Small Key
|
In the sand swirl room, there’s a cracked wall up north. Bomb it. Go through the hole, and use your candle to light the room. Step on the switch before going to the key.
|
|
| Boss Key
|
Go to the first room of enemies. Follow the path all the way west, staying along that wall. Go through the locked door and kill the dodongo for the boss key.
|
|
| Blue Crustacean: Crabalt
|
He’ll charge at you. Quickly dodge and swipe him with your sword. Wait in one spot, and when you just see him appear, move out of the way and hit him. When he does the maneuver where he jumps, face away from where he was before the jump and quickly swipe your sword. (ex: if he pops out to your east, then jumps, face west and tap the sword button rapidly.) You won’t take damage when you’re swiping him if you deal damage to him. HP: 10
|
|
Before Level 2
| Item
|
Location
|
Screenshot
|
| Piece of Heart #10
|
Burn down the tree in Hori.
|
|
| Prison Key
|
There’s a river with the bridge out you’ve seen a lot. Go northeast from there but not up the stairs, and burn the tree, and go down to get the key.
|
|
| Piece of Heart #11
|
Go out the northwest exit from Brihton. Go east until you see a house with trees blocking it. Burn them and go in.
|
|
| Level 1 Arrows
|
In Hori Woods is a cave blocked by trees. Go inside and you can get the level one arrows. You need to get the Bow before these are of any use to you.
|
|
| Spin Attack
|
There is a shack in southwest Brihton. Burn the tree, and go in to get a scroll.
|
|
| 50 rupees
|
Burn the tree in the woods of Hori.
|
|
| Damp Egg
|
Go to the very northwest area of Hori where you burned the trees. Follow the path east and talk to a raven in the trees.
|
|
| Entrance to Marsh
|
West of Hori Woods, you saw a red tree. Burn it down, and the mushrooms will become cuttable (red).
|
|
Remdra Prison
Northwest of Brihton is that building with a keyhole. Go inside.
| Item
|
Location
|
Screenshot
|
| Compass
|
Take the east path. Go up one more and kill all the guards for the compass.
|
|
| Small Key
|
Go past the compass, past the block puzzle, and to a room with four cells and a spark. Kill all the Moblin and grab the key.
|
|
| Cursed Skull #2
|
One more past the small key, kill all the Guards to get the skull.
|
|
| Map
|
Go up past the entrance and beat all the Guards for the Map.
|
|
| Small Key
|
One north and one east from the entrance, beat all the enemies and light the torch.
|
|
| Boss Key
|
East, and up past the locked door. Stun the Warden and you’ll get his key.
|
|
| Bow
|
Go up from the start and past the big lock. Instead of a boss battle, the nice Moblin man will give you the Bow.
|
|
Before Level 2 continued
| Item
|
Location
|
Screenshot
|
| Piece of Heart #12
|
From the start, go up and use your bow on the blue emblem. Go up the vines, and follow the path east of here. Go until you get a cave. Kill all the Gels in here to get a Heart.
|
|
| Quiver #2
|
North of the start, shoot the blason with an arrow to grow the vines, then there is a bombable wall. Inside, pay money for the bigger Quiver.
|
|
| Piece of Heart #13
|
In the northeast corner of the Marsh, there is a piece of heart at the bottom left corner behind a tree.
|
|
Level 2: Murky Palace
In the Marsh, from the west entrance that the monkey was blocking, there is a blue emblem. Shoot it with an arrow. Find your way around (go through Hori Woods), and go in.
| Item
|
Location
|
Screenshot
|
| Small Key
|
In the first room, shoot the eye switch that doesn’t follow you. Go west, and push all the blocks onto the switches. From this room, go west again. Use your candle on the torch and a chest with a key will appear.
|
| Map
|
From the start, go north one, and east. Follow all the way east and take the north path. Go past the stairs, and follow all the way up. Once you go down a long bridge, the map is south and west in a tiny room.
|
| Step Ladder
|
Past some marshes, you’ll find a dodongo snake with a flower that shoots fireballs. Beat the snake (bombs are not required) and head south and beat the Ropes to get the ladder.
|
| Cursed Skull #3
|
Northwest of the entrance, eventually you’ll come across a room with moveable torches. Move them onto the switches, and a hole will open. Fall down it, and one screen right is the chest.
|
| Small Key
|
In the basement is a room with an unlit torch and water that you can walk across in certain spots. Use your ladder to go around, and use the candle on the torch. Go east and open the chest.
|
| Small Key
|
Take the path west of the hole we created. Follow it to get a small Key after beating all the enemies in the last room.
|
| Boss Key
|
Fall down the hole you created. If you have a small key, use it on the lock. Follow the path down to get the key.
|
| Compass
|
You’ll find a room with a bunch of blocks. They look kinda like three triangles. If you push them into triangles (one on top, three middle, five bottom) from the bottom up, like the triforce, a chest will appear with the Compass.
|
| Small Key
|
In the room with floor holes and armos, fall down through the three squares at the bottom. Follow the path west until you get to a key.
|
| Boss Room
|
Go back down your hole. Take the path with the last locked door, and follow it all the way until you reach the boss.
|
| Cybernetic Experiment: Moldorm Prime
|
If you want an easy way to take him down, use bombs. Time them well enough, and he’ll take damage multiple times from one explosion. Bring all 12 bombs to make it a bit easier.
If you want a(n honestly barely fair) challenge, battle him like a Moldorm. Walk around the pond in the middle, following the same direction as him, swinging your sword at the end of his tail. When he starts to fly, if you see shadows, just walk around and avoid the boulders. Sometimes he’ll charge from the top/bottom at you. If so, stand in one spot, and as you just see him, move towards where his tail will be, and swipe when you have the chance. Eventually, he’ll do both attacks at once. Just keep dodging and you’ll take him out. Spin attacks do extra damage, but you move slower. HP:(check needed)
|
Before Level 3
| Item
|
Location
|
Screenshot
|
| Piece of Heart #14
|
There is a beach south of Brihton. Follow it west, and use you ladder to navigate a corner. Keep going, and burn down a small tree. Follow the cave all the way, and in the last room, a chest will appear with a Heart.
|
|
| Magic Container #2
|
Southwest of Brihton, past the beach, is a green house with boxing gloves on it. Go inside, and follow north. Talk to the kangaroo from Holodrum to increase your magic meter.
|
| Blessed Star
|
Beat the Arena (where you got the magic) to get a blessed star.
|
|
| Strange Seeds
|
Past the Arena is a bombable wall. In the cave, bomb the wall to the right. Talk to the snake to trade your Egg for Seeds.
|
|
| Goron Vase
|
Give the strange seeds to the man in Brihton who wants to grow new flowers.
|
|
| Piece of Heart #15
|
In the same cave as the seeds is a heart for beating all the gels around the Armos.
|
|
| 50 rupees
|
Northwest of Brighton, kill all the mobs in the screen.
|
|
Goron's Grotto
Northwest of Brihton are two holds you can use your ladder to pass. Inside, use bombs on the cracked left wall.
| Item
|
Location
|
Screenshot
|
| Compass
|
In the room with four blocks, kill all the gels to get a compass.
|
| Map
|
Past the eye switch in the room with the green pegs, kill all the gels in here and the map will appear next to the lava.
|
| Small Key
|
When you shoot a blue crest with an arrow, a bridge will appear. Go south, and in that little hut is a goron with a key.
|
|
| Cursed Skull #4
|
Two screens north of the hutt, kill all the mobs.
|
|
| Boss Key
|
Northwest of the bridge you just created, staying on the left wall, is the boss key just sitting there for you. It’s past where you light a torch.
|
|
| Boss Door
|
In the same room as the hut.
|
| Manhandla
|
Either kill it by slashing each head, or time a bomb to blow up many or all at once.
|
| Power Bracelet
|
Reward for beating Manhandla.
|
|
Before Level 3 continued
| Item
|
Location
|
Screenshot
|
| Piece of Heart #16
|
North of Brihton is a pond with a staircase behind it. You can walk over the pond in two spots with the ladder. Use your Gauntlets to get the chest inside.
|
|
| Piece of Heart #17
|
After you get the Gauntlets, blow up the wall at the entrance to Blue Woods closest to Brihton. In there, past the rock, is the heart.
|
|
| 50 rupees
|
Just above Level 3. Easy to spot.
|
|
Level 3: Corona Mines
West of Brihton was a desert. Follow the desert around, and in there is a big building, Corona Mines. You can cut the sprouts with your sword, so don’t think they’re blocking you off. There’s a south entrance south of it, too.
| Item
|
Location
|
Screenshot
|
| Compass
|
North. West of the first bridge you create, in the room with the boss doors. Beat all the enemies and the compass will appear.
|
| Small Key
|
North. In a room with a red crest on the wall. Shoot it, and grab the chest.
|
| Small Key
|
North. Take the path west in the room with the cement blocks. Follow the path all the way, and light the torch for a key.
|
| Cursed Skull #5
|
South. East from the first fork of the south entrance. Blow up the rock statue, and head south. In here is a chest with a cursed skull (assuming you stepped on the switch already).
|
| Map
|
South. From the start of the south entrance, go straight up.
|
| Generator
|
South. After going through the South area, you’ll arrive back north. In this room is a locked block. Follow it north, and bomb the rock to get electricity flowing.
|
| Hammer
|
North. From the room with the blocks that create flooring, go west. On the tracks is a spark switch. Step on it, and open the now obtainable chest for the Hammer.
|
| Small Key
|
North. In the room where pegs are blocking a chest and two sets of two eye switches.
|
| Small Key
|
South. From the entrance, go all the way right and down. Light the torch with your hammer to get the key.
|
| Boss Key
|
South. Take the path east from the room with the blocks that create flooring in the north half. Take the path, and enter the southern ruins. Hammer the pegs, then complete the puzzle for a chest with a boss key.
|
| Generator
|
South. There is a room that doesn’t seem like it gives you any options. Use your arrows on the right torch, and it’ll light the left one.
|
| Boss Door
|
North. Northwest of the start, you saw this earlier. If you got all the generators, the path is open.
|
| Crazed Overseer: Corgoro
|
Just keep hitting him. Bombs are good at first, then use your hammer. When he rains rocks down at you, stay in one place (unless there’s a shadow over you) for a bit, then move, since the last one is homing. When he makes fire bars, circle with them and hit him when you can. Run in circles, avoiding shadows, when he makes fire bars in the air. HP:(check needed)
|
Before Level 4
| Item
|
Location
|
Screenshot
|
| Big Bomb
|
Northwest of Brihton at the Goron Shop for 100 Rupees. Use it to blow up the big wall.
|
| Piece of Heart #18
|
On the southwest corner of Glim City (just after blowing up the big wall).
|
|
| 50 rupees
|
Two screens north of the big wall.
|
|
| 50 rupees
|
A few screens east from the previous 50 rupees.
|
|
| Piece of Heart #19
|
Northeast of the 50 rupees, beat all the mobs to make it appear.
|
|
| Piece of Heart #20
|
At the east end of the Northern Remdra plains near the beginning of the northern section. In a screen with diamonds on either side of two tiles worth of holes, beat the enemies for a heart piece.
|
|
| Pot Roast
|
In the Glim City shop for 150 rupees.
|
| 50 rupees
|
North of Glim City.
|
|
| Piece of Heart #21
|
In a cave north of Glim City. You can grind through the spikes to open the chest for a heart. You’ll probably die on your way back at this point. If you don’t want to spend a life, save your game before you die, which will warp you to the beginning of Northern Remdra without raising your death counter.
|
|
| Magic Container #3
|
Near the big lake in a cave. This room also has spikes, and another screen east. Go open the chest for magic.
|
|
| Blue Tunic
|
Take the path north starting at the beginning of Northern Remdra. At the fork, take it west, down, and around. The knight will give you a tunic.
|
|
| Yoshi Doll
|
Talk to the man near the shop in Remdra Crossroads.
|
| Piece of Heart #22
|
Give the Yoshi Doll to the lady right south of the wall.
|
|
| Piece of Heart #23
|
Southeast of Remdra Crossroads is a small, one-screen cemetery. Push the bottom-left block to the left and defeat all the enemies inside.
|
|
| Piece of Heart #24
|
In the volcanic area, right south of the eye glass design, directly south from the start on a platform.
|
|
Bomb Bag #3
(16 bombs)
|
In the same screen as the piece of heart. Directly south of the entrance to the volcano from the eyeglass.
|
| Shovel
|
Give the Vase to the goron in Rurol.
|
|
| Coconut
|
Give the shovel to the boy on the beach south of Brihton.
|
|
| Expensive Jewelry
|
Give the coconut to the man in Hori whose house is up some stairs.
|
|
Abandoned Forge
In Rurol Town near the volcano.
| Item
|
Location
|
Screenshot
|
| Compass
|
North of a water room, where the boss door is. Beat all the Moblins for the Compass.
|
|
| Small Key
|
One room west of the Compass.
|
|
| Cursed Skull #6
|
In the shaky room with the moblins, beat them all to get the skull.
|
|
| Map
|
North of the block puzzle, push all the blocks into the rocky spots to get a chest with the map.
|
|
| Small Key
|
From the east path, take the bridge north until a screen with blade traps and moblins. Beat them all and a key will appear.
|
|
| Boss Key
|
North of the room with the spike traps and spark switches, in a chest.
|
|
| Patra
|
|
|
| Noble Sword
|
Defeat the Patra then head right a room to get a sword upgrade.
|
|
Before Level 4 continued
| Item
|
Location
|
Screenshot
|
| Piece of Heart #25
|
On the snowy mountain. Follow the path up some stairs and across a step ladder bridge.
|
|
| Skull Key
|
South of the Remdra Crossroads is the group of stumps shaped like a cross. (or diamond; there are four of them.) Bomb the soft spot, and go through the cave to get the Skull Key.
|
|
| Entrance to Level 4
|
In Glim City past the locked gate.
|
|
Level 4: Unhallowed Chapel
| Item
|
Location
|
Screenshot
|
| Small Key
|
From the start, all the way to the right in the spike room. It will appear on a ledge you can’t reach from this room.
|
|
| Small Key
|
After the Scourge, follow east, and use your arrow on the torch. Go up a room to get a small key.
|
| Lens of Truth
|
After the second Scourge encounter. Go up the stairs in a room with 6 eyes to get the Lens from the chest.
|
| Map
|
Past the room you walked through the wall is the chest near the lens tiles.
|
| Compass
|
In the first room of the dungeon, after you get the Lens. Light the torch to make the chest appear.
|
| Small Key
|
North of the raised platform where you got a key is a hole with some lens tiles on it. Go north, and in the next room, light the torch to be able to open the chest.
|
| Hint
|
In the room with pegs and the blade traps, use the Lens.
|
| Cursed Skull
|
After using the Lens in the peg/trap room, use your Lens in this other one to the north to find an eye statue to shoot.
|
| Small Key
|
Go north from where you flooded the basement. Follow through the spike path with your Lens and the key is in a small room.
|
| Small Key
|
After creating a bridge that leads to a healing torch, find a four-way path. Go south to get a key you made the chest appear for.
|
| Boss Key
|
After creating a square bridge over a gap, take a left. Go left through the room with the spark switches, being very careful, and in this room is the boss key.
|
| Boss Door
|
In the room with the two sets of three spike traps past the healing torch.
|
| Enemy of the Living: Scourge
|
Just hit it in the back until it dies. The only challenge is its high health. Bombs do not work, despite the fact that the damage sound will play. The Candle’s flame can go through him and do damage, but you can only use it once. The Spin Attack is also very forgiving. When he creates black shadows that become hands, just keep walking so they can’t get you, and they won’t become hands. HP:40
|
Before Level 5
Go into the mini dungeon first
Stormwoods Island
North of the eye tile north of the volcanic area.
| Item
|
Location
|
Screenshot
|
| Cursed Skull
|
One screen right of the start near the three Armos.
|
| Small Key
|
In the room with a bunch of Armos in formation, use your Lens.
|
| Map
|
Take the right path from the entrance. Past a room with two spike traps after a bombable wall.
|
| Compass
|
After beating all the enemies in the room after going up vines.
|
| Small Key
|
In a chest left of a room you created two bridges in.
|
| Boss Key
|
After the block puzzle.
|
| Hinox
|
The sand flows counter-clockwise, so use that to stay away. Place bombs if he’s chasing, and if not, use your spin attack.
|
| Thieves' Wallet
|
After beating the boss. Holds 500 Rupees, and is full!
|
Before Level 5 continued
| Item
|
Location
|
Screenshot
|
| Piece of Heart
|
Southwest corner of Glim City using your Lens.
|
| Ice-Melting Candle
|
In the Remdra Crossroads shop for 300 Rupees.
|
| Raft
|
In the Raft Shop north of the start screen for 400 Rupees.
|
| Piece of Heart
|
Take the raft from the start screen.
|
| Shortcut
|
Go through the cave on the icy mountain that’s blocked by blocks of ice. Give the pot roast to the goron blocking the way. After emerging outside, go down a ladder. Use your candle on the little block of ice to your right.
|
| Entrance to Level 5
|
North of the lake you froze over near the mountain is the next dungeon.
|
Level 5: Frozen Enclave
| Item
|
Location
|
Screenshot
|
| Small Key
|
Past an unlit torch, and a room with an eye laser in the middle. In a chest near some pots.
|
| Map
|
In a room with 12 statues and some ice on the ground.
|
| Small Key
|
Past a room with 12 statues. You have to step on a spark switch on one side to make a chest appear on the other. To get past the statue room, follow the path of the ice on the other room.
|
| Small Key
|
In the ice maze after a block puzzle. You’ll have to leave and reenter after you hear the chime for the chest to appear.
|
| Hookshot
|
Up a large set of stairs, up through a double locked door. Beat all the four Darknuts to get the Hookshot. If it gets stuck, and you have enough health, you can always run through the spikes to pick it up. Save and return to the start if you don’t want to get a death if you’re on your way back to save ground.
|
| Compass
|
Go south from the ice maze. West of there in a room with a U shape is the compass in a chest you get by pushing the torch on the left.
|
| Cursed Skull
|
There’s a room with a couple darknuts past one you defeated all the enemies to enter. In here is also three blade traps blocking a spark switch. Step on it, and go downstairs. From down here, go all the way north and open the chest.
|
| Small Key
|
South past the cursed skull. Beat all the enemies in a room with an eye statue in the middle. In the small room, light the four torches in order to get a Key.
|
| Small Key
|
There’s a room you have to light four torches in. On the other side appears a chest. Find your way around and open it for a key.
|
| Shortcut
|
In an ice maze is a locked block. Follow the path through spikes, and if you take the right path, the door will open. Go through the door when it does, and follow it to a spark switch that makes a shortcut. In the ice room you were just in is some cracked ice for you to blow up.
|
| Small Key
|
Go through the southeastern ice maze on the bottom floor. You’ll find a room with some water and hookshot diamonds. There is a spark switch after going through this room. Go into the room you see through the room with four turrets, two spike traps, and stairs. Follow this path until you get to a chest with a key.
|
| Boss Key
|
After you made a shortcut just before, there was some ice you bombed. Fall down the hole, and beat all the enemies for the boss key.
|
| Small Key
|
West of the very start is a line of Armos. Defeat all the bats to turn them into targets. Find your way through this path to a torch room. Use your arrows to light them all, and grab the key from the chest.
|
| Boss Door
|
Downstairs was a room with a few different paths, and spike traps going up and down. Go east from here. Get to the room with a closed door that doesn’t open on the right. Bomb the wall under it. Follow this path to get to the door where the boss is.
|
| Sub-Zero Commandant: Frostknuckle
|
Use your Hookshot to get around the room. If he hits the ground while you aren’t pulling, you’ll freeze and he’ll body slam you. Also, the Hookshot usage should protect you from damage, even if you aren’t pulling on anything. A good way to do damage is to bomb him. But make sure you’re still using your Hookshot on the wall targets. Bombs are great for the first phase, but your sword will suffice when he loses his shield.
|
Before Level 6
| Item
|
Location
|
Screenshot
|
| Quiver
|
Northwest of the out bride in SR is a hookshot area. Go through the cave and get a quiver for 150 Rupees.
|
| Piece of Heart
|
After taking the hookshot over a river is a screen with 6 circles on the ground. Use your lens there, and bomb the wall to get a piece of heart.
|
| Piece of Heart
|
West of the first dungeon along the beach is a raft. Take it, and down the stairs. Use your Hookshot to open the chest for a heart.
|
| Piece of Heart
|
Northwest of Brihton is a cave between stairs and vines. In this cave is a piece of heart.
|
| Hurricane Spin
|
East of the start of Northern Remdra, past a hookshot target. There was a house over here you couldn’t reach. Inside is a scroll with a new spin attack.
|
Flooded Tunnel
From the beginning of the game, go north up the vines. There is one raft up here that you need to take. Sail your way over to a cave, and go inside.
| Item
|
Location
|
Screenshot
|
| Cursed Skull
|
Upper left corner of a water room that has blocks and an eye symbol on the ground.
|
| Compass
|
In a small room with four hookshot targets, plus one on the wall.
|
| Map
|
In a tiny room reached after beating a few enemies for a red rupee. Use bombs on the wall.
|
| Small Key
|
Directly right of the start, through this path, and after completing the block puzzle.
|
| Boss Key
|
In a 7-shaped room with blocks in the way, use your Lens to get across. After this path is the boss key.
|
| Boss
|
Either use bombs or the sword to kill all the ones surrounding the little one. Bombs are quite hard to place in this fight, though, so you might need to use the sword.
|
| Stopwatch
|
West of the boss.
|
Level 6: Undersea City
After you beat the Flooded Tunnel, you will go up some stairs. There is a lone raft here that will take you straight to the dungeon.
| Item
|
Location
|
Screenshot
|
| Small Key
|
Take the left path from the start.
|
| Shortcut
|
From a torch, go down, and left. Follow this path without hitting any pegs to make a shortcut to where the first small key was.
|
| Map
|
From the start, taking the left path, after taking the path back the way you came from in the ditch, under an Armos.
|
| Cursed Skull
|
With the water up, all the way to the east after defeating all the enemies in the last room.
|
| Small Key
|
There is a room with an ocarina symbol between 6 torches. Go back up, and follow the path west a room all the way to a small key.
|
| Small Key
|
From the start, go one screen up. On your left, if the water is up, you can go left a screen. Follow this path to a small key. You can use Armos as walkways.
|
| Small Key
|
From the start, one up and one right, with the water up. Cross over the Armos.
|
| Compass
|
On the east side of the dungeon is an emblem on the wall. Even though it’s above you, you can hit it with an arrow. Put the water back up, and follow those new rafts west a screen to get the Compass.
|
| Flippers
|
Back where you just shot the emblem, take the path north. There are two locked doors in your way. In this last room are the Flippers.
|
| Small Key
|
Where you got the compass, follow the water northwest. There is a key sitting at the end if you follow the path.
|
| Small Key
|
In the room with the Flippers when the water is down. Near there, if you walk by four Lens tiles, use the Lens in that room.
|
| Boss Key
|
In the same room as the boss door, there is an underwater Armos. Dive under it to get the Boss Key.
|
| Airborne Menace: Mothula
|
This battle is pretty straight-forward. He’ll fly around the room, and occasionally throw lasers at you. After a couple hits, he’ll spawn a few smaller Moths to swarm you. Kill them, then go back after Mothula. After a bit, he’ll start to blow up and leave you a heart container.
|
Before Level 7
| Item
|
Location
|
Screenshot
|
| Golden Moblin
|
In a cave one screen south and one east of the start.
|
| Piece of Heart
|
At the very southwest corner of Southern Remdra.
|
Guardhouse Armory
| Item
|
Location
|
Screenshot
|
| Entrance
|
In the ocean at the south of Southern Remdra is a building. Use your Lens to enter.
|
| Map
|
On the western side, below the pond, after beating all of the guards.
|
| Cursed Skull
|
North and west of the Map.
|
| Small Key
|
At the east end after a block puzzle.
|
| Small Key
|
From the block puzzle, go down, over until you reach a fork, and up all the way, with the red blocks down.
|
| Small Key
|
In a room with a few unlit torches blocked off by red blocks. Come here and light them all when the reds are down.
|
| Compass
|
North of where you switch the blocks. You need to light a candle with reds down, and grab it with blues down.
|
| Small Key
|
Directly north from the beginning if you take the western entrance from the first room.
|
| Boss Key
|
On the eastern side with the red blocks down. It’s on the other side of the water and requires multiple keys to reach.
|
| Boss Door
|
North from the start with the blues down.
|
| Boss
|
Just a bunch of Guards. No biggie. Beat them, and go north for the…Master Sword?
|
Before Level 7 Continued
| Item
|
Location
|
Screenshot
|
| Piece of Heart
|
Directly north of Stormwoods Island after beating all the land enemies.
|
| Magic Container
|
Southeast corner of the big island north of Remdra, in the cave.
|
| Bomb Bag Upgrade
|
Go to the eastern side of the big island. Use your hookshot to get to the west, and in a cave is a bigger bomb bag.
|
| Piece of Heart
|
Where you exited the tunnel before the previous dungeon.
|
| Fresh Fish
|
Give the Jewelry to the mermaid at the eastern side of the bay.
|
| Arena
|
Northeast of the start of Northern Remdra in the middle of a lake.
|
| Restless Spirit: Pumpking
|
Avoid his fire and hit his head. When he blows up, he’ll actually detatch his head. Go after that, as his body chases you. Beat his head three times. The last time, his body will come after you, and a few hits should do him in.
|
| Arsonist’s Candle
|
After beating the arena.
|
| Castle Remdra
|
Northeast of the start of Northern Remdra, past the lake and a sign that points you there.
|
| Piece of Heart
|
On the roof of Castle Remdra on the left side.
|
Level 7: Magus Tower
Found at the top of castle Remdra
| Item
|
Location
|
Screenshot
|
| Small Key
|
On F1 after falling down a hole (there are 4 possible ones but they all lead to the same place) push the block and the chest will appear.
|
| Map
|
Southeast from the start. You have to fall down some holes above after bombing through the floor.
|
| Compass
|
West of the start is a cracked wall. Follow this path to a screen with a torch-lighting puzzle. After beating it, go down the right staircase and get the Compass.
|
| Small Key
|
East from the start is a small key on a ledge. The key can be obtained by falling from the very right of the floor above it. There are boomerang switches that look inaccessible, but are not.
|
| Wand
|
At one point, you’ll see a locked block in between some regular ones. Unlock it, and follow the path that opens up. After the block puzzle you will get the Wand.
|
| Small Key
|
Following the room you bombed a wall in, in a room with moving tiles and a spark switch, go up the stairs and get a key from the chest, if you did the wand-mirror puzzle in here already.
|
| Small Key
|
In the warp room before the previous small key, find another warp path that takes you to a room that goes west, north, and east. There is a mirror puzzle in here. Beat it, and follow the path until you get to a small key.
|
| Security System
|
Past two straight locked doors. Beat all the enemies, and shoot all th eyes.
|
| Cursed Skull
|
In the room that shakes once you disable the security system.
|
| Boss Key
|
There is one warp room where there is a west exit that you have never gone through. Follow that path and, at the end, is the boss key.
|
| Boss Door
|
Go right and north, and take this path up to the top floor. On F4 is the boss room.
|
| Clan Archmage: Venser
|
Just keep slashing at him. Beat some Wizzrobes if there are too many on the screen, and stay moving so you can dodge his attacks. After a while, he will yield.
|
Before Level 8
| Item
|
Location
|
Screenshot
|
| Red Tunic
|
In Castle Remdra, from the start and up to the first left.
|
| Piece of Heart
|
East of the start on top of an island plateau. Use your wand on the blocks.
|
| Piece of Heart
|
In the southern rainforest is a path that leads up to a wall. Follow it, and bomb the wall. Inside is a piece of heart.
|
| Piece of Heart
|
After the rainforest, you will go up some vines. Go left in here, and enter a cave for a piece of heart if you stepped on the switch from the other entrance.
|
| Quiver
|
Follow through the rainforest and go up to Northern Remdra through the water. In a cave for 200 rupees.
|
| Goron Circlet
|
Go through the rainforest and follow around into a city named Laston Town. Give the Fresh Fish to the fisherman.
|
| Entrance to Level 8
|
West of Laston in the water.
|
Level 8: Sunken Basin
Found in western Northern Remdra, west of Laston Town.
| Item
|
Location
|
Screenshot
|
| Eye Maze
|
If you push the eye around, you’ll see what appears to be an arrow out of different tiles on the ground. If the eye follows you, go in the direction the arrow points. If the arrow looks away, go the opposite way. If it’s looking at an angle, not sure how to describe what to do. Thankfully, the path is set, so if this is too much effort, take it left, down, down, left, down, up, right, right.
|
| Small Key
|
After the first underground, side-scrolling portion you will find some rocks at the bottom. Bomb them, and fall left. Follow this path, and hit an eye statue next to the S block. Follow this path to a small key.
|
| Small Key
|
After the maze, there is a room with 4 pink blocks in the middle. Beat all the enemies to get a key.
|
| Map
|
From the start, go east. Go down the stairs, through the locked door, bomb the wall, and open the chest for a Map.
|
| Small Key
|
When you reach a new outside area, follow it past a block puzzle to get a key.
|
| Compass
|
Past three locked things, you will create a waterfall. Follow it up and right to get the compass from a chest.
|
| Power Glove
|
West, north, and east of the compass, after beating a puzzle.
|
| Small Key
|
From a room where you use your hammer on some pegs opposite some blocks, go down and around, and up. You’ll pass two rooms with small passages over lava with blades. Down some stairs there, follow the path to a room with a bunch of mimics for you to defeat.
|
| Small Key
|
East of the start after the first time you create a waterfall.
|
| Small Key
|
Take the maze, and go south right after. Push some of the heavy blocks and go down the stairs at the southern end of the room. You should follow east a long way and be on the bottom row on the map. Take this all the way, and once you curve back around, there is a room with a small key and some chained skeletons.
|
| Cursed Skull
|
Past two rooms where you need to go west past some spike traps. Beat all the enemies in the last one, and take the opened path back around. Back outside, go around until you find a chest with a Skull.
|
| Boss Key
|
Fall down the right of the two waterfalls. Follow past a quick block puzzle, and fall down the holes. The first time there is a way to the right, take it. Beat all the mimics for the boss key.
|
| Boss Door
|
Fall down the rightmost of the two waterfalls. Take this path right, past a locked door, and you will find the boss door.
|
| Terror of Remdra: Gleeok
|
For the first phase, treat him as a normal gleeok: slash at his heads. Once you do enough damage to his head, it will split off and float around. Get all the heads that are attached to the body and he will be defeated. Not really; fall down the holes. This fight is the same. However, he is above you in a side-scrolling part. Slash the attached heads until he is defeated. Have the Hookshot equipped so you can dodge his laser attacks. After getting all attached heads this second time, he will be defeated.
|
Before Level 9
| Item
|
Location
|
Screenshot
|
| Piece of Heart
|
West of the out bridge in the beginning fields was a spot you bombed to get a heart piece. Push the block here and go south. Hit all the switches to get a heart piece.
|
| Piece of Heart
|
In the volcanic area of Northern Remdra, near the very south edge. You may have to grind through some lava to reach it, at least at this point, so be weary.
|
| Piece of Heart
|
At the very east of Northern Remdra in the water, north of the exit to Flooded Tunnel. There is a piece of heart you can’t reach. Use your Wand on the block to make vines appear, then go up to get the Heart.
|
| Glass Eye
|
In the Goron Cave System was a Goron you could not reach because a block was in the way. Push it, and give him the circlet to get the Glass Eye.
|
| Piece of Heart
|
South of the Glass Eye is a hookshot area with a piece of heart.
|
| Glim Sanctuary
|
In Glim City where the cutscene was.
|
| Silver Arrows
|
Listen to the lady in the Sanctuary.
|
| Piece of Heart
|
In the bay, at the west end. Go down some stairs on an island, and push the block for a heart piece.
|
| Piece of Heart
|
In the little house west of the Sunken City. Push the mirror all the way right, and use your wand to make the chest appear.
|
Jungle Crypt
| Item
|
Location
|
Screenshot
|
| Jungle Crypt
|
On the big island in the bay. Go past the push block, and put the Glass Eye in place to enter.
|
| Small Key
|
After the rooms where you use your Lens, and after the room where the spikes are on timers. Beat all the enemies in the room that is back on the first floor.
|
| Map
|
From the start, go west. Follow this path through a locked door. Keep going until you reach a room with the map.
|
| Compass
|
After creating a shortcut to near the start (passing north after going past the broken wall at the beginning) go through the door that opens. Fall down the first hole you see and follow it north for the compass.
|
| Small Key
|
In a room with a circle of pegs after going through a stealth maze.
|
| Boss Key
|
In a room with moving ground, there are two paths. Take the west path along until you reach a larger eye stealth maze. Get caught near the bottom right, and the boss key is under an Armos. You can see which with your Lens.
|
| Boss Door
|
In the room with moving ground, now go east. After going around a bit, you will reach the boss door.
|
| Servant of the Dark: Krampus
|
Just whack away at him. Silver Arrows are nice, your sword too. Kill the Vires to make this a bit easier. When he makes lasers, just follow them around. Keep hitting him until he is defeated.
|
| Cursed Skull
|
After the boss room.
|
Before Level 9 continued
| Item
|
Location
|
Screenshot
|
| Piece of Heart
|
In the house directly east of Laston Town.
|
| Golden Stalfos
|
In the house south of the fairy statue in Remdra Crossroads.
|
| Piece of Heart
|
One screen west of the eastern entrance to the volcano area, down some stairs. On the lowest line of screens in Northern Remdra.
|
| Entrance to Level 9
|
In the Castle Remdra restricted area at the top. Use your Silver Arrows on the Ganon statues.
|
Level 9: Prismatic Gate
Found in the northern part of Castle Remdra, use the silver arrows to get in.
| Item
|
Location
|
Screenshot
|
| Map
|
When the area is blue, from the start, go north at the east of two paths. Follow it up to a room with moving ground. Take the southwest path and the map will appear in this room with two beamers after you defeat everything.
|
| Small Key
|
When everything is gray, from the start, take the upper right path to a room with spikes on the ground. Go north towards the purple area until you reach a staircase. Follow around and take the hookshot room with spikes south. Shoot across the gap, and take the path with the lowered gray blocks. The key will be in a chest when you light the four torches.
|
| Small Key
|
Go east, and north from the start when everything is gray. Here is a staircase north of some red blocks. Follow around, and go up those stairs. Up here, go east, and north until the next staircase. Up here is a small key if you made the chest appear.
|
| Cursed Skull
|
From the last Small Key, keep going along. There is a long, purple path there with some things to open up. Follow the long path to reach the Cursed Skull.
|
| Small Key
|
When the dungeon is red, one screen east of the start. You will have to find your way around, however.
|
| Obsidian Ring
|
When the dungeon is red, at the northeast corner of the second floor is a room with a hole in the middle and floor moving around it. Fall down there, and go one screen left for the ring.
|
| Compass
|
When the area is red, from the start, go left. Take the first right, first up, and left, and follow down to the compass.
|
| Small Key
|
When the area is red, look on the map northeast of the start. There is a room shaped like an H with red blocks in the middle, with a bombable wall on the upper right side. Find your way there by dropping down from above, and follow the hookshot path in that small room to get a Key.
|
| Small Key
|
When the area is blue, find a warp panel. Take it to F2 where the Cursed Skull was. Follow that path until you can go right through another path. Follow this path, not going down the first path of stairs until you go right for a while. Go through these stairs, and up a room to get a Key. Requires doing puzzle work first.
|
| Boss Key
|
When the area is gray, there is a puzzle where you push blocks around to cover every space. Do that puzzle, and step on the switch. Now, make it blue. Go through the portal, and follow this path all the way around to a chest surrounded with blue blocks that are now down. Open it for the Boss Key.
|
| Boss Door
|
You’ll need to have used 2 keys at this point. When the area is gray, there is an area where there are spike traps (that are down) and three locked blocks. Find your way to that pathway (take the stairs down to the northwestern of the two) and step on a switch to make a shortcut when possible. Keep going and you will reach the door.
|
| Fallen Angel: Lumen
|
She likes to teleport around the room. If she is still, use your sword or wand on her. Dodge her attacks, the first of which don’t follow her. Sometimes she’ll fire energy balls at you. This is a good time to get some hits on her. Just be careful, and slash when you can, until she is defeated. Grab the Heart Container, and head back out to fill up on red potion and save.
|
| Triforce Usurper: Venser
|
You have two options here. First of all, you are not supposed to win this fight. So if you don't, that should happen. If you want to try and win, which is possible but hard, fight him the same way you did the last time. If you manage to win, you'll get his Cane.
|
Before Level 10
| Item
|
Location
|
Screenshot
|
| Piece of Heart
|
In Glim Sanctuary, in a house north of the golden statue.
|
| Piece of Heart
|
North and east of the statue is a house. Find your way around and go north. Up you’ll see a heart. Follow around and collect it.
|
| Arena
|
At the very northeast corner of the Sanctuary.
|
| Sentient Stratocumulus Smog
|
When you hit him, he’ll split a little. Once he is down to the smallest units, you just need to remove the rest and he will be defeated. (think marching milde from yoshi’s island or the manta storm from Mario sunshine)
|
| Giant’s Wallet
|
After beating the Arena.
|
| Entrance to Level 10
|
In the volcanic area in southeastern Remdra. There is a cave on the bottom row of of screens that leads there after a bit.
|
Level 10: Magitek Factory
Found inside the volcanic wastelands in the southeast part of Northern Remdra.
| Item
|
Location
|
Screenshot
|
| Small Key
|
On F1, after a room where you use your Hookshot to reach to safe places over oil. Take the path that opens up, and in the chest in the Lens room is a key.
|
| Map
|
On F2, from the torch, follow up where you see two squares with moving tiles like the previous dungeon. Go up, then let the others carry you. In a room with a big spike trap, beat everything and go through the door that opens, and in the room with all the pots, defeat the Goriyas for the Map.
|
| Compass
|
When you create stairs that act as a shortcut to the earlier part. Go directly east and follow the tiles. In the room with all the red Gels is the compass if you defeat them all.
|
| Small Key
|
From the Compass, take the stairs on the other side. In this chest up here is a key.
|
| Block Puzzle
|
In the large block puzzle, there is what seems to be an unmovable circle block in the upper right corner. Take the stairs, and you’ll see a hole. You need to fall down it to move that block.
|
| Small Key
|
For beating the block puzzle.
|
| Gale Boomerang
|
On F1 is an owl statue. To its left is an up arrow. Take the path, past a yellow block that should be facing up, and at the end is the boomerang.
|
| Small Key
|
On F2 is a room with some Goriyas in a space between blocks. Take this east to find a switch puzzle. Go around and follow this path to a room with movable torches. In the chest, if you made it appear by going east from the start, is a key.
|
| Boss Key
|
Take the path past the first block puzzle. The first time there is a place to use your Gale Boomerang, do so and take the path that opens up. Going east past a spike room is a place with three paths. Take the lower one, and use your boomerang to put the air on, and go right south for the boss key.
|
| Cursed Skull
|
Go east from the torch. Now that you can hit these switches, do so. Follow this path to the room with a cursed skull. It’s a two-sided room north of one where you need to use your hookshot.
|
| Small Key
|
Keep going past the Skull if all the arrows are pointing the right way.
|
| Boss Door
|
Past where the compass was if all the arrows are pointing the right way.
|
| Bio-Mechanical Weapon: Meta Arrghus
|
He has two rings of orbs orbiting around him. These are considered mechanical enemies, so try and use that to knock them out of orbit. Once you do that, use something to defeat them, like the Wand. You have to do an orbital at a time, so the outer layer must be defeated before the inner can be started. Take all orbs out, he’ll start jumping. Use other times good on mechs to hit him when he lands (aim for the shadow), and, after a few hits, he will be defeated.
|
Before Level 11
| Item
|
Location
|
Screenshot
|
| Piece of Heart
|
There is a windmill in Blue Woods. Use your Gale Boomerang on it, and go in the cave for a heart.
|
| Membership Card
|
In the Laston City shop for 540 Rupees.
|
| Golden Tektite
|
At the very northeastern corner of Northern Remdra in the bay is a windmill. Use your Boomerang to enter the house.
|
| Magic Container
|
In a cave in the volcano area is a fan that you can use your boomerang on. Do so, and go north for more magic.
|
| Iron Hammer
|
In the Glim Sanctuary shop for 487 rupees, if you have the membership card.
|
Desert Wasteland
| Item
|
Location
|
Screenshot
|
| Dusty Cavern
|
Official start is down the stairs at the start of the wasteland. Can also be reached by falling through any sand holes.
|
| Compass
|
From the start of the desert, go up past a large pig rock. Go down some stairs, and light some torches in here to get a compass.
|
| Small Key
|
Fall down from above the hole farthest east from the desert start. Go across the gap and down. In this room, use your Lens to get the key.
|
| Piece of Heart
|
After a block puzzle, you will find another entrance to the dungeon. Outside, and north, is a lake. Beat the enemies to get a heart.
|
| Small Key
|
Fall down north of where you came out of the cave last. Fall down again on the right side. Go east, and in this room with fireball shooters and hookshot targets is a small key.
|
| Shortcut
|
After coming back out, go east and hit all the pegs to make a shortcut to the start of the desert.
|
| Piece of Heart
|
Blow up the pig rock, then on the surface is a heart piece.
|
| Small Key
|
After going up stairs at the northern edge of the desert, and east, fall in the hole and open the chest.
|
| Cursed Skull
|
West of the desert start is a staircase. In the same screen is a sinkhole to fall down. Do so, and defeat the enemies for a Skull.
|
| Boss Key
|
There is a room with a heavy block preventing you from going up the stairs at the northeast. With the peg down, go east, and use your key to get the Boss Key.
|
| Boss Door
|
In the same room as the Compass. Well, one door is.
|
| Dust Flyer
|
Not sure of identity. Just hit it and it will be defeated.
|
| Shrine Key
|
After beating the first boss.
|
| Map
|
Up the stairs, the second sinkhole east. Right a room is a chest with the map.
|
| Boss Door
|
Follow the path of the map, and at the west end of B1 is the boss door.
|
| Subrosian Cultists
|
Beat them like regular Wizzrobes.
|
| Shrine Key
|
For beating the cultists.
|
Level 11: Echoing Shrine
This dungeon has tons of puzzles. This includes ones that require you to be itemless due to bubbles. So if you lose your item due to bubbles, that's okay.
| Item
|
Location
|
Screenshot
|
| 1st Trial
|
Go north from the start, and you will notice that a candle on the wall is out. Light it. Go east. Pass through the bubbles and go east again.
|
| Map
|
Two screens south of the first block puzzle.
|
| Small Key
|
One screen east of the block puzzle, if you step on the spark switches below.
|
| Small Key
|
After coming back up to the first floor after the mirror puzzle, as far east as possible, after defeating all the enemies.
|
| Cursed Skull
|
In the basement south of a short mirror puzzle.
|
| Small Key
|
South from the start of the basement is a bombable wall. In the next room, defeat all the enemies to open a path. Follow it around for a key.
|
| Mirror Shield
|
After two rooms with moving platforms over pits.
|
| Small Key
|
After going into the basement from a room where there is a switch on one side that makes a staircase on the other.
|
| Boss Key
|
After the room with a moving light beam and a row of red bubbles with a couple pegs at the southeast. There is a puzzle that says to “break the endless flow of light” that gives it to you.
|
| Compass
|
After going up stairs after a puzzle, take the left path. Follow it past red bubbles and a room where you use your shield to kill Stalfos. Go south. There is a peg blocking stairs to go down. Up a room after beating the enemies is the compass.
|
| Boss Door
|
From the fork where you got the compass, in the room where you use your shield to beat the enemies, go west this time. Follow the path, past a puzzle, and on the floor, east, to open up the door.
|
| Corporeal Nightmare Medusa
|
Use the light around to hit her. If you’re facing her, it helps to use wand/arrows while she’s lit. You can damage her otherwise though, possibly. Use the light on the minor enemies and on her when you get the chance. After a number of hits, she’ll be defeated.
|
Before Level 12
| Item
|
Location
|
Screenshot
|
| Golden Mushflier, idk
|
Near the first arena is a house with a mirror puzzle. Beat the enemy to upgrade the ring.
|
| Piece of Heart
|
Near the start of the game after burning down a tree was a place with mirrors. Take care of the puzzle and then collect the heart.
|
| Magic Container
|
In the Dusty Cavern is a room with a sun block. From there, go outside, and along the top layer of water, at the bottom, is a magic container.
|
| Remdra Skies
|
In the rainforest is a fairy. Talk to her now and she will let you go into the sky.
|
| Forged Letter
|
From the start of the sky, all the way east, in a house.
|
| Piece of Heart
|
In Celest City, southeastern area is a house with a hungry fairy. Give her pot roast, and go in the next room for a heart.
|
| Improved Charge Watch
|
In the Celest City shop for 600-ish rupees.
|
| Piece of Heart
|
From the Skies start, go northwest on the clouds. Go through a cave, and appear back outside. In this space with two Lynels, defeat them both to get a heart.
|
| Bomb Bag
|
From the northeast exit of the city, due east is a cave with someone who will sell you a bomb bag for 400 rupees.
|
| Quiver
|
From the southeast exit of the city, once you get to the bottom screen row, go west and you will find a cave with a quiver for 400 rupees.
|
| Piece of Heart
|
All the way east of the bomb bag is a piece of heart.
|
| Piece of Heart
|
Behind a house in Celest City. Top right side of the house.
|
| Golden Lynel
|
At the northwest part of Glim Sanctuary after giving the letter to the guard.
|
| Gold Tunic
|
One screen east of the block to Laston Town in the house. Show the man all the rings for beating the beasts and he will upgrade your tunic.
|
| Entrance to Level 12
|
From the start of the skies, go west. Stay on the land until you reach a part of the clouds that narrowly leads east. From here, go north until you reach the temple.
|
Level 12: Starlit Temple
Found in the sky, which can be accessed through the rainforest.
| Item
|
Location
|
Screenshot
|
| Compass
|
There is a maze with a statue that says “count up, count down.” Counting up, follow it to a room where there are warp tiles. Go east from a room, and north to a room with wizzrobes and mirrors. Beat all the Wizzrobes and the compass will be in a chest.
|
| Map
|
Southeast of the compass is a room with a bridge and some spikes rotating. Go south, and all the way west to some stairs. Go up, and take the south path up here to get the map.
|
| Small Key
|
Count down in the maze room this down, and take the first path south you can. Go through the door that opens. Go east after this room, and hit all the switches and kill the gel to get a small key in the spikes.
|
| Small Key
|
At night, from the start, go all the way east, up until you can go east more, and up some stairs. Once you get to a warp maze, when you can go either up or down, go down. From the first exit, follow around to a block puzzle. Complete it for a small key.
|
| Small Key
|
At night, count up at the maze. Follow until you go over some ice that was water before. Follow around until you fall. On these two platforms will be a key if you beat the enemies.
|
| Portal Sphere
|
At day, there is a mirror puzzle northeast of the start. Light all the symbols and a chest with the item will appear.
|
| Cursed Skull
|
At day, use your Portal Sphere to find your way to a room with two armos guarding switches. Go south from the east side of the room and open the chest for a Skull.
|
| Small Key
|
From the counting maze, take the right side (go up, down, down, up) and follow until you get to a room with an armos in the middle and a bunch of portals. Take the path north, and follow until you reach a block puzzle. Beat it to get a key.
|
| Boss Key
|
From where you change the day/night, follow left. Past the locked blocks, use your hookshot to get over the gap. Once you get to a maze, follow it until you can use portals in the maze. Follow that and you’ll get to a room with conveyers. Get to the chest and open it for the boss key.
|
| Small Key
|
At day, from the counting maze, take the west side. Go through the staircase in the room where you stepped on all the tiles to make a staircase appear. Follow around, using your Sphere, until you get to a room where the key is.
|
| Boss Door
|
There is a room with tiles zipping around. Take this room, go to the lock block, and you can go north to the room. Door itself only accessible at night.
|
| Vengeful Spirit: Lumen
|
Same as the last fight, but more of it. Just wail on her when you can, using your sword and power rod until she is defeated.
|
Endgame
| Item
|
Location
|
Screenshot
|
| Piece of Heart
|
From the sky start, go into the cave right to the northeast. At the fork, go west. Beat all the keese for a Heart.
|
| Piece of Heart
|
In the Forest Mansion is that heart in the top room. Use your Sphere to get it.
|
| Piece of Heart
|
South of Laston is a staircase. In the cave, use your Sphere to get the heart.
|
| Piece of Heart
|
In the Sanctuary, north of the entrance is a house. Use your Sphere to get the heart.
|
Final Showdown
| Item
|
Location
|
Screenshot
|
| True Master Sword
|
Interact with the big hero statue in the Sanctuary.
|
| Final Boss
|
In the same location as Venser in the Prismatic Gate. Use your new sword on the markings. Follow the path north. Take the Boss Key, and go through the double locked doors.
|
| Destroyer of the Gate: Venser
|
Just use whatever you have to take him out. Those floating tiles will appear to carry you, so don’t worry about falling down. The dark circle will freeze you and drain your magic.
|
| Dimensional Aberration: Venser Reborn
|
As expected, just wail on him. The hands are not a necessary target, so just keep your focus on the body, if you can. Distance is good, but getting close up damage is good if you want to do faster damage. After a while, he will explode.
|
Post-game
| Item
|
Location
|
Screenshot
|
| Hall of Memories
|
In the Sky, south of the temple, is a warp on the ground. Use it to go east. Talk to the fairy there and she will open the hall.
|
| Hall of Memories Arena
|
Boss Rush. If that’s not bad enough, the bosses are actually stronger and have more HP. Battle them like usual, plus you have new items and stuff that can help. There are refill rooms after Corgoro, Mothula, and Medusa. The Scourge is easy with your Portal Sphere, even if it doesn’t sound like you’re doing any damage. The rest are normal.
|
| Champion of Haribo: Moosh
|
He will jump around a lot. Sometimes, he’ll charge forward and leave a trail of fire behind him. Also, he will summon Lava Gels, which you should defeat as fast as possible to get drops and to make the battlefield less flaming. That’s all there really is to it, so just hit him and the gels until he is defeated.
|
| Light Arrows
|
For beating Moosh. You really should have been nicer to him, you jerk.
|
| Entrance to Level X
|
Go back to where you entered the Dark Realm. Instead of going north, go south. Take the warp to a room with a portal. If you have all 20 Cursed Skulls, the portal will open.
|
Level X: Blighted Abyss
| Item
|
Location
|
Screenshot
|
| Compass
|
At the first bend, go down the hole to your right. Go south. At the next fall down, go through the one just above where you entered the room. Go west again and beat the golem for a compass.
|
| Small Key
|
There is a room east of where you first fell with a shield you need to hit with an arrow with good timing. When you get to a room with pegs in an X shape, go south. Beat all the enemies for a key, and hit the switches for access to it.
|
| Small Key
|
Fall down the first small hole you come across. Then, push the blocks up and go to this hole. Follow east past a room with a platform maze with spikes and regenerating wizzrobes. Continue this path, and fall down the first hole you see. Right a screen is a room with the small key.
|
| Bloody Staff
|
Fall down the first small hole, and go right. Go down, and follow until you get to a room with moving tiles at the side. Use the Lens to make a staircase appear. Go to a room with small conveyers, and fall down. Kill all the enemies in this pit, then go right. Kill the Pols Voice, but DO NOT hit any of the crystal switches. You can use the Armos to block them. After doing so, you will be able to get the Staff.
|
| Small Key
|
Make hookshot targets in the main room of the dungeon. To do this, stay on the moving path you fell from to get the Staff. This will make the portals for you to hookshot to, so do so. Right where you land, go down the first two square holes. Follow the left path when you get to a fork. You should pass a room with spikes that rise and hookshots to get you to go right. At the next fork, go down. Pound all the pegs for a small key.
|
| Small Key
|
Take the main room hookshots. This time, fall down the small hole (wide, but only one square high) and go left. Follow this path the only available way to a room with sparks. Step on them all to get a Key.
|
| Map
|
Take the hookshots again. Instead of falling down, just go left. When you reach a room with rotating eye statues, either go down the stairs or walk until you appear down a screen. Beat everything here, go left, and beat everything again for the map.
|
| Note
|
There are 4 keys in this dungeon. Now that you have them all, go find your way around until you unlock all of them.
|
| Boss Door
|
From the start, use the hookshot targets to get across. Fall down the big hole twice. Go up, and if these blocks are unlocked, fall down the hall. If you only fall down one hole, work your way around to open up another one in the same place. After you do that, hit the spark switch to open the path to the boss door.
|
| Boss Key
|
Get back to where you unlocked the blocks previously. When you get to a fork in a room with invisible fire traps, take the southeast exit. There is a lone hole to go down. If you go, take the room to the north if you opened it. If so, go in. In this room is three golems. Use your Staff (and a potion or two) to beat everything for the boss key.
|
| Boss: Slumbering Horror: Tartaros
|
| Phase 1
|
There is a big cocoon in the middle-top of the field. The boss will appear just to its left, so if you stand at the bottom-left corner of the cocoon, you can get a free spin attack on him. First of all, the cocoon itself will attack sometimes. It might shoot streams of fire in some directions. It also likes to take a cue from Medusa and shoot a wave or two of bubbles so you can’t attack. The monster itself will do a lot of flying around the room. Sometimes, he will summon Fire Keese. These will turn into Vires (that turn into 2 fire keese when you kill them) and the keese like to try and avoid you. You’re in big trouble if Keese are on the field at the same time you are unable to use your items. He also shoots lasers in 4 directions. Sometimes they will rotate. It will be impossible to avoid this and the fire streams if they’re up at the same time. His last two attacks are to shoot two rows of fireballs at you, and to make rings of fire around himself when he moves.
|
| Phase 2
|
The cocoon is only hittable with its mouth open. Try to stand either below, right of, or left of it when you can, and shoot arrows at it. It will continue to throw fire streams and bubbles at you. Another attack it has it is to blow whirlwinds at you, or it can shoot one big white laser at you. Either one can be avoided by going from one position to another. The hardest part of this phase comes when it summons Stalfos. Those are not easy to kill without taking damage, so be careful.
|
| Phase 3
|
When Tartaros is at full size it will immediately summon death knights to get in your way. The only effective weapon to use against him are the light arrows. His attacks consist of wind sweeps, summoning death knights, fire streams, Big white Laser, Bubble waves, sending out a super whirlwind and firing a blast into the ceiling to rain debris on link. Just keep firing arrows at him until he is defeated.
|
sitemap
|
|
| Spin-offs
|
|
| Crossovers
|
|
| Japan-only
|
|
| [[Games]]
|


