Gallery:The Legend of Zelda Items: Difference between revisions

From Zelda Dungeon Wiki
Jump to navigation Jump to search
Want an adless experience? Log in or Create an account.
(added a few more descriptions)
No edit summary
(28 intermediate revisions by 9 users not shown)
Line 1: Line 1:
{{CD/Header|Equipment|}}
==Items==
{{CD|file=Wooden-Sword.png|link=Wooden Sword|desc=The Wooden Sword is the first [[Sword]] [[Link]] can obtain in ''[[The Legend of Zelda]]''. It is found in the cave on the [[Starting Screen]], and is given to Link by the [[Old Man]]. Inside the cave, the Old Man will say one of the most iconic lines of the [[The Legend of Zelda (Series)|series]], "It's dangerous to go alone! Take this." The Wooden Sword is the weakest sword in the game.}}
<center><gallery caption="Game Manual">
{{CD|file=White-Sword.png|link=White Sword|desc=The White Sword is the second obatinable sword in ''The Legend of Zelda''. It can be found in an [[Overworld]] cave on top of the waterfall. This screen is just one screen left and one screen up from the [[Lost Hills]]. However, Link cannot collect the sword until he has accumulated five [[Heart Container]]s. This can actually be done before entering the first [[Dungeon]], and is recommended to do so. The White Sword is slightly stronger than the Wooden Sword.}}
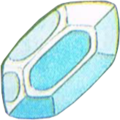
File:Wooden-Sword.png|[[Sword (The Legend of Zelda)|original Sword]]
{{CD|file=Magical-Sword.png|link=Magical Sword|desc=The Magical Sword is the third and final sword found in ''The Legend of Zelda''. It is the strongest sword in the game, and is capable of killing most [[Boss]]es in one to three hits. It is found underneath a grave in the [[Graveyard]]. This grave is in the top-right corner screen of the Graveyard, and is in the middle row and second to the left. However, the Old Man there will not give Link the sword until he has accumulated at least 12 Heart Containers.}}
File:White-Sword.png|[[White Sword]]
{{CD|file=Magic-Shield.png|link=Wooden Shield|desc=The Wooden Shield is the default [[Shield]] Link will use in ''The Legend of Zelda''. He starts the game with it, and will use it throughout the game unless he buys a Magical Shield. The Wooden Shield can block basics attacks; [[Octorok]] rocks, [[Moblin]] arrows, etc. However, it cannot block more advanced attacks, e.g. [[River Zora]] attacks, [[Wizzrobe]] attacks, etc. Also, it cannot be eaten by [[Like Like]]s.}}
File:Magical-Sword.png|[[Magical Sword]]
{{CD|file=Magic-Shield.png|link=Magical Shield|desc=The Magical Shield is the best shield available in ''The Legend of Zelda''. It is the only shield upgrade of the game, and replaces the Wooden Shield. The Magical Shield can be obtained by purchasing it in one of the [[Item Shop]]s found across [[Hyrule]]. The Magical Shield can be found on sale for either 160, 130, or 90 [[Rupee]]s, depending on which shop Link visits. Additionally, the Magical Shield can be eaten by Like-Likes, and if it is, that shield is gone forever. However, Link can always buy another one to replace it.}}
File:Magic-Shield.png|[[Wooden Shield]]
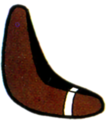
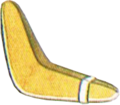
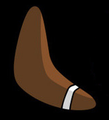
{{CD|file=Wooden-Boomerang.png|link=Boomerang|desc=The Boomerang is found in the first dungeon of ''The Legend of Zelda'', [[Level 1: The Eagle]]. It can be used to stun larger enemies, e.g. Moblins, or kill smaller ones, e.g. Keese. It can also be used to collect fallen Rupees, [[Clock]]s, or [[Bomb]]s that are faraway from Link. It will only travel half the screen, which limits its use. The Boomerang is gaurded by three [[Goriya]]s, which must be killed in order to obtain it.}}
File:Magic-Shield.png|[[Magical Shield]]
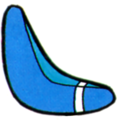
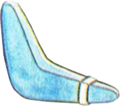
{{CD|file=Magical-Boomerang.png|link=Magical Boomerang|desc=The Magical Boomerang is the first and only upgrade to the Boomerang in ''The Legend of Zelda''. It does everything the Boomerang did, and also will travel the full length of the screen instead of half. It is found in [[Level 2: The Moon]], and is blue in color.}}
File:Wooden-Boomerang.png|[[Boomerang]]
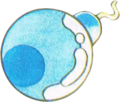
{{CD|file=Bombloz.png|link=Bomb|desc=The Bombs are one of the most common items in ''The Legend of Zelda'' series, making their debut in ''The Legend of Zelda''. They can be obtained by either buying them in shops or collecting them from killed enemies. They can be used to blow up walls, kill enemies, etc. They are needed for the Boss fight against [[Dodongo]]; Bombs are the only thing that hurts them. At first, Link can only hold up to eight bombs, but in both [[Level 5: The Lizard]] and [[Level 7: The Demon]] Link can pay the Old Man 100 Rupees for an upgrade. These upgrades will allow Link to carry up to 12 and 16 Bombs, respectively.}}
File:Magical-Boomerang.png|[[Magical Boomerang]]
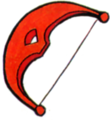
{{CD|file=Bow.png|link=Bow|desc=The Bow is a common item found in most ''The Legend of Zelda'' series games. In ''The Legend of Zelda'', the Bow is first found in Level 1: The Eagle, but it cannot be used until Link has purchased the Arrows from an Item Shop. Once Link has purchased them, he can use the Bow. Interestingly, there is no arrow inventory. Instead, Link will lose a Rupee every time he shoots and Arrow. The Bow is the only item capable of killing [[Gohma]].}}
File:Bombloz.png|[[Bomb]]
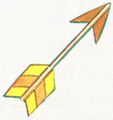
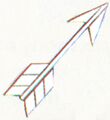
{{CD|file=Arrowloz.png|link=Arrow|desc=The Arrow is used by Link alongside his Bow. The arrows can be purchased from the [[Merchant]] for 80 Rupees. These deadly projectiles are capable of killing [[Pols Voice]]s in one shot, and are needed to defeat Gohma. There is no total amount of Arrows Link can hold; instead, Link will lose a Rupee every time he uses an Arrow.}}
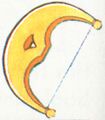
File:Bow.png|[[Bow]]
{{CD|file=Silver-Arrow.png|link=Silver Arrow|desc=The Silver Arrow is an alternate type of Arrow found in ''The Legend of Zelda''. Its primary use is to defeat [[Ganon]], as it is the only weapon capable of doing so. It is found deep inside [[Level 9: Death Mountain]], and can also be used to kill regular enemies such as a Pols Voice or [[Keese]].}}
File:Arrowloz.png|[[Arrow]]
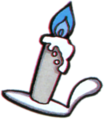
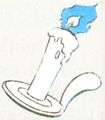
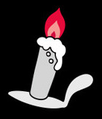
{{CD|file=Blue-Candle.png|link=Candle|caption=Blue Candle|desc=The Blue Candle is an item found exclusively in ''The Legend of Zelda''. It is used to either light dark rooms inside a dungeon, burn bushes hiding secret staircases, or even to kill enemies. It is sold by the Merchant in his Item Shop for 60 Rupees. However, it can only be used once per screen.}}
File:Silver-Arrow.png|[[Silver Arrow]]
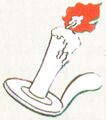
{{CD|file=Red-Candle.png|link=Candle|caption=Red Candle|desc=The Red Candle is the only upgrade to the Blue Candle in ''The Legend of Zelda''. It is found deep within [[Level 7: The Demon]], and has the same basic functions as the Blue Candle. The only difference is that the Red Candle can be used unlimited times in each screen, a major upgrade over the one per screen limit the Blue Candle had.}}
File:Blue-Candle.png|[[Blue Candle]]
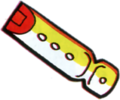
{{CD|file=Whistle.png|link=Recorder|desc=The Recorder is the only musical instrument found in ''The Legend of Zelda''. It is found inside [[Level 5: The Lizard]], and has three uses. Firstly, it is required to kill [[Digdogger (The Legend of Zelda)|Digdogger]], as it is the only item that can harm it while it's in its original form. Secondly, the Recorder is used to reveal the entrance to [[Level 7: The Demon]]. Lastly, if played in the Overworld, it will transport Link to the entrance of a dungeon that he has completed.}}
File:Red-Candle.png|[[Red Candle]]
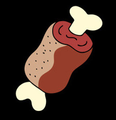
{{CD|file=Enemy-Bait.png|link=Food|desc=}}
File:Whistle.png|[[Recorder]]
{{CD|file=Letter.png|link=Letter|desc=}}
File:Enemy-Bait.png|[[Food]]
{{CD|file=Blue-Water-of-Life.png|link=Water of Life|desc=}}
File:Letter.png|[[Letter]]
{{CD|file=Red-Water-of-Life.png|link=2nd Potion|desc=}}
File:Blue-Water-of-Life.png|[[Life Potion]]
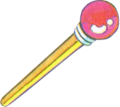
{{CD|file=Magic-Wand.png|link=Magical Rod|desc=}}
File:Red-Water-of-Life.png|[[2nd Potion]]
{{CD/End|}}
File:Magic-Wand.png|[[Magical Rod]]
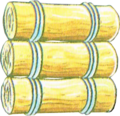
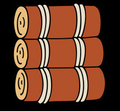
File:Raft.png|[[Raft]]
File:Magic-Book.png|[[Book of Magic]]
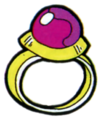
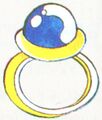
File:Blue-Ring.png|[[Blue Ring]]
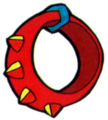
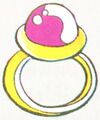
File:Red-Ring.png|[[Red Ring (The Legend of Zelda)|Red Ring]]
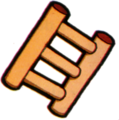
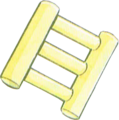
File:Ladder.png|[[Stepladder]]
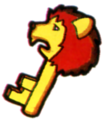
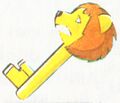
File:Magical-Key.png|[[Magical Key]]
File:Power-Bracelet.png|[[Power Bracelet]]
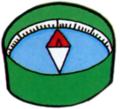
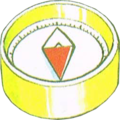
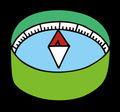
File:Compassloz.png|[[Compass]]
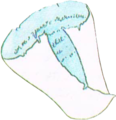
File:Dungeon-Map.png|[[Dungeon Map]]
File:Key.png|[[Small Key]]
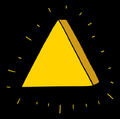
File:Link Triforce - TLOZ Instruction Booklet.png|[[Triforce Shard|Triforce Fragment]]
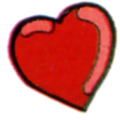
File:Thumb Recovery-Heart.png|[[Recovery Heart]]
File:Heart-Container-LoZ-Art.png|[[Heart Container]]
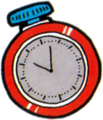
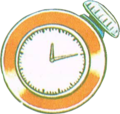
File:Clock.png|[[Clock]]
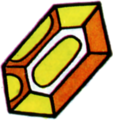
File:Orange-Rupee.png|[[Rupee]]
</gallery>


{{CD/Header|Inventory|}}
<gallery caption="[[The Legend of Zelda Tips & Tactics Strategy Guide]]">
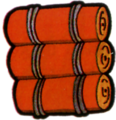
{{CD|file=Raft.png|link=Raft|desc=}}
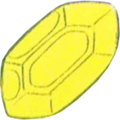
File:LoZ-Tips-and-Tactics-Yellow-Rupee.png|[[Yellow Rupee]]
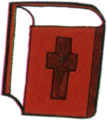
{{CD|file=Magic-Book.png|link=Book of Magic|desc=}}
File:LoZ-Tips-and-Tactics-Blue-Rupee.png|[[Blue Rupee]]
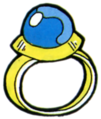
{{CD|file=Blue-Ring.png|link=Blue Ring (The Legend of Zelda)|caption=Blue Ring|desc=}}
File:LoZ-Tips-and-Tactics-Ladder.png|[[Ladder]]
{{CD|file=Red-Ring.png|link=Red Ring (The Legend of Zelda)|caption=Red Ring|desc=}}
File:LoZ-Tips-and-Tactics-Raft.png|[[Raft]]
{{CD|file=Ladder.png|link=Stepladder|desc=}}
File:LoZ-Tips-and-Tactics-Map.png|[[Map]]
{{CD|file=Magical-Key.png|link=Magical Key|desc=}}
File:LoZ-Tips-and-Tactics-Compass.png|[[Compass]]
{{CD|file=Power-Bracelet.png|link=Power Bracelet|desc=}}
File:LoZ-Tips-and-Tactics-Letter.png|[[Letter]]
{{CD/End|}}
File:LoZ-Tips-and-Tactics-Power-Bracelet.png|[[Power Bracelet]]
File:LoZ-Tips-and-Tactics-Magical-Clock.png|[[Clock|Magical Clock]]
File:LoZ-Tips-and-Tactics-Boomerang.png|[[Wooden Boomerang]]
File:LoZ-Tips-and-Tactics-Magical-Boomerang.png|[[Magical Boomerang]]
File:LoZ-Tips-and-Tactics-Bomb.png|[[Bomb]]
File:LoZ-Tips-and-Tactics-Recorder.png|[[Whistle]]
File:LoZ-Tips-and-Tactics-Bait.png|[[Bait]]
File:LoZ-Tips-and-Tactics-Water-of-Life.png|[[Life Potion]]
File:LoZ-Tips-and-Tactics-2nd-Potion.png|[[2nd Potion]]
File:LoZ-Tips-and-Tactics-Magic-Wand.png|[[Magical Rod|Magic Wand]]
File:LoZ-Tips-and-Tactics-Magic-Book.png|[[Book of Magic|Magic Book]]
File:LoZ-Tips-and-Tactics-Recovery-Heart.png|[[Recovery Heart]]
File:LoZ-Tips-and-Tactics-Heart-Container.png|[[Heart Container]]
File:LoZ-Tips-and-Tactics-Small-Key.jpg|[[Small Key]]
File:LoZ-Tips-and-Tactics-Magical-Key.jpg|[[Magical Key]]
File:LoZ-Tips-and-Tactics-Blue-Ring.jpg|[[Blue Ring]]
File:LoZ-Tips-and-Tactics-Red-Ring.jpg|[[Red Ring]]
File:LoZ-Tips-and-Tactics-Bow.jpg|[[Bow]]
File:LoZ-Tips-and-Tactics-Wooden-Arrow.jpg|[[Arrow|Wooden Arrow]]
File:LoZ-Tips-and-Tactics-Silver-Arrow.jpg|[[Silver Arrow]]
File:LoZ-Tips-and-Tactics-Blue-Candle.jpg|[[Blue Candle]]
File:LoZ-Tips-and-Tactics-Red-Candle.jpg|[[Red Candle]]
</gallery>


{{CD/Header|Dungeon|}}
<gallery caption="Arts and Artifacts Art">
{{CD|file=Compassloz.png|link=Compass|desc=}}
File:LoZ-Arts-and-Artifacts-Wood-Sword.png|[[Sword (The Legend of Zelda)|original Sword]]
{{CD|file=Dungeon-Map.png|link=Dungeon Map|desc=}}
File:LoZ-Arts-and-Artifacts-White-Sword.png|[[White Sword]]
{{CD|file=Key.png|link=Small Key|desc=}}
File:LoZ-Arts-and-Artifacts-Magical-Sword.png|[[Magical Sword]]
{{CD|file=Triforce-Shard-LoZ.png|link=Triforce Shard|desc=}}
File:LoZ-Arts-and-Artifacts-Shield.png|[[Shield]]
{{CD/End|}}
File:LoZ-Arts-and-Artifacts-Bow.png|[[Bow]]
File:LoZ-Arts-and-Artifacts-Arrow.png|[[Arrow]]
File:LoZ-Arts-and-Artifacts-Silver-Arrow.png|[[Silver Arrow]]
File:LoZ-Arts-and-Artifacts-Boomerang.png|[[Boomerang]]
File:LoZ-Arts-and-Artifacts-Magical-Boomerang.png|[[Magical Boomerang]]
File:LoZ-Arts-and-Artifacts-Magical-Rod.png|[[Magical Rod]]
File:LoZ-Arts-and-Artifacts-Book-of-Magic.png|[[Book of Magic]]
File:LoZ-Arts-and-Artifacts-Recorder.png|[[Recorder]]
File:LoZ-Arts-and-Artifacts-Red-Candle.png|[[Red Candle]]
File:LoZ-Arts-and-Artifacts-Blue-Candle.png|[[Blue Candle]]
File:LoZ-Arts-and-Artifacts-Blue-Ring.png|[[Blue Ring]]
File:LoZ-Arts-and-Artifacts-Red-Ring.png|[[Red Ring]]
File:LoZ-Arts-and-Artifacts-Bomb.png|[[Bomb]]
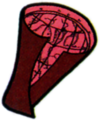
File:LoZ-Arts-and-Artifacts-Food.png|[[Food]]
File:LoZ-Arts-and-Artifacts-Letter.png|[[Letter]]
File:LoZ-Arts-and-Artifacts-Power-Bracelet.png|[[Power Bracelet]]
File:LoZ-Arts-and-Artifacts-Raft.png|[[Raft]]
File:LoZ-Arts-and-Artifacts-Stepladder.png|[[Stepladder]]
File:LoZ-Arts-and-Artifacts-Heart-Container.png|[[Heart Container]]
File:LoZ-Arts-and-Artifacts-Recovery-Heart.png|[[Recovery Heart]]
File:LoZ-Arts-and-Artifacts-Water-of-Life.png|[[Life Potion]]
File:LoZ-Arts-and-Artifacts-2nd-Potion.png|[[2nd Potion]]
File:LoZ-Arts-and-Artifacts-Yellow-Rupee.png|[[Rupee]]
File:LoZ-Arts-and-Artifacts-Blue-Rupee.png|[[Blue Rupee]]
File:LoZ-Arts-and-Artifacts-Compass.png|[[Compass]]
File:LoZ-Arts-and-Artifacts-Dungeon-Map.png|[[Dungeon Map]]
File:LoZ-Arts-and-Artifacts-Clock.png|[[Clock]]
File:LoZ-Arts-and-Artifacts-Small-Key.png|[[Small Key]]
File:LoZ-Arts-and-Artifacts-Magical-Key.png|[[Magical Key]]
File:LoZ-Arts-and-Artifacts-Triforce-Shard.png|[[Triforce Shard]]
</gallery></center>


{{CD/Header|Miscellaneous|}}
{{Galleries}}
{{CD|file=Thumb Recovery-Heart.png|link=Recovery Heart|desc=}}
 
{{CD|file=Heart-Container-LoZ-Art.png|link=Heart Container|desc=}}
 
{{CD|file=Clock.png|link=Clock|desc=}}
{{Cat|The Legend of Zelda Items| {{PAGENAME}}}}
{{CD|file=Orange-Rupee.png|link=Rupee|desc=}}
{{CD/End|}}

Revision as of 22:02, September 11, 2021

Items