Gallery:The Adventure of Link Bosses: Difference between revisions
Jump to navigation
Jump to search
Want an adless experience? Log in or Create an account.
mNo edit summary |
No edit summary |
||
| (2 intermediate revisions by one other user not shown) | |||
| Line 2: | Line 2: | ||
<center>{{Gallery}} | <center>{{Gallery}} | ||
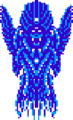
{{Gallery/Box|file=Horsehead-Sprite-AOL.png|link=Horsehead|caption=[[Horsehead]]}} | {{Gallery/Box|file=Horsehead-Sprite-AOL.png|link=Horsehead|caption=[[Horsehead]]}} | ||
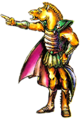
{{Gallery/Box|file=Helmethead (With Helmet).png|link= | {{Gallery/Box|file=Helmethead (With Helmet).png|link=Jermafenser|caption=[[Jermafenser]]}} | ||
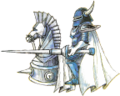
{{Gallery/Box|file=Ironknuckle-AoL-Sprite.png|link= | {{Gallery/Box|file=Ironknuckle-AoL-Sprite.png|link=Rebonack|caption=[[Rebonack]]}} | ||
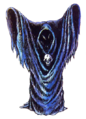
{{Gallery/Box|file=Carock-AoL-Sprite.png|link=Carock|caption=[[Carock]]}} | {{Gallery/Box|file=Carock-AoL-Sprite.png|link=Carock|caption=[[Carock]]}} | ||
{{Gallery/Box|file=Gooma-AoL-Sprite.png|link=Gooma|caption=[[Gooma]]}} | {{Gallery/Box|file=Gooma-AoL-Sprite.png|link=Gooma|caption=[[Gooma]]}} | ||
| Line 14: | Line 14: | ||
<center>{{Gallery}} | <center>{{Gallery}} | ||
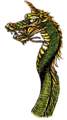
{{Gallery/Box|file=Horsehead.png|link=Horsehead|caption=[[Horsehead]]}} | {{Gallery/Box|file=Horsehead.png|link=Horsehead|caption=[[Horsehead]]}} | ||
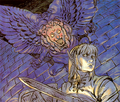
{{Gallery/Box|file=Helmethead-Art-AOL.png|link= | {{Gallery/Box|file=Helmethead-Art-AOL.png|link=Jermafenser|caption=[[Jermafenser]]}} | ||
{{Gallery/Box|file=IronKnuckleAoL(Art).png|link= | {{Gallery/Box|file=IronKnuckleAoL(Art).png|link=Rebonack|caption=[[Rebonack]]}} | ||
{{Gallery/Box|file=Carock.png|link=Carock|caption=[[Carock]]}} | {{Gallery/Box|file=Carock.png|link=Carock|caption=[[Carock]]}} | ||
{{Gallery/Box|file=Gooma.jpg|link=Gooma|caption=[[Gooma]]}} | {{Gallery/Box|file=Gooma.jpg|link=Gooma|caption=[[Gooma]]}} | ||