Gallery:Phantom Hourglass Characters: Difference between revisions
Jump to navigation
Jump to search
Want an adless experience? Log in or Create an account.
No edit summary |
mNo edit summary |
||
| (13 intermediate revisions by 2 users not shown) | |||
| Line 1: | Line 1: | ||
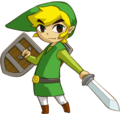
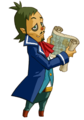
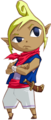
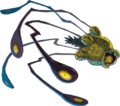
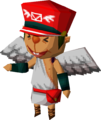
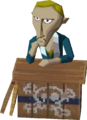
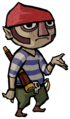
Below is a listing of all the characters that appear in ''[[The Legend of Zelda: Phantom Hourglass|Phantom Hourglass]]''. | |||
===Major Characters=== | ===Major Characters=== | ||
<center>{{Gallery}} | <center>{{Gallery}} | ||
| Line 27: | Line 29: | ||
{{Gallery/Box|file=Fuzo.png|link=Fuzo|caption=[[Fuzo]]}} | {{Gallery/Box|file=Fuzo.png|link=Fuzo|caption=[[Fuzo]]}} | ||
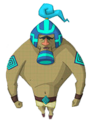
{{Gallery/Box|file=Golden-Chief-Cylos.png|link=Golden Chief Cylos|caption=[[Golden Chief Cylos]]}} | {{Gallery/Box|file=Golden-Chief-Cylos.png|link=Golden Chief Cylos|caption=[[Golden Chief Cylos]]}} | ||
{{Gallery/Box|file=Golden-Frog.png|link=Golden_Frogs|caption=[[Golden Frogs]]}} | |||
{{Gallery/Box|file=Gongoron.png|link=Gongoron|caption=[[Gongoron]]}} | {{Gallery/Box|file=Gongoron.png|link=Gongoron|caption=[[Gongoron]]}} | ||
{{Gallery/Box|file=Gonzo-Wind-Waker-HD-Art.png|link=Gonzo|caption=[[Gonzo]]}} | |||
{{Gallery/Box|file=Goron-Shop-Mistress.png|link=Goron_Shop_Mistress|caption=[[Goron Shop Mistress]]}} | {{Gallery/Box|file=Goron-Shop-Mistress.png|link=Goron_Shop_Mistress|caption=[[Goron Shop Mistress]]}} | ||
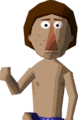
{{Gallery/Box|file=Goron-Phantom-Hourglass.png|link= | {{Gallery/Box|file=Goron-Phantom-Hourglass.png|link=Goron|caption=[[Goron]]s}} | ||
{{Gallery/Box|file=Anouki.png|link=Gumo|caption=[[Gumo]]}} | {{Gallery/Box|file=Anouki.png|link=Gumo|caption=[[Gumo]]}} | ||
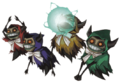
{{Gallery/Box|file=Ho-Ho-Tribe.png|link= | {{Gallery/Box|file=Anouki.png|link=Hintobo|caption=[[Hintobo]]}} | ||
{{Gallery/Box|file=Ho-Ho-Tribe.png|link=Ho Ho Tribe|caption=[[Ho Ho Tribe]]}} | |||
{{Gallery/Box|file=Ho-Ho-Tribe.png|link=Hoiger_Howgendoogen|caption=[[Hoiger Howgendoogen]]}} | |||
{{Gallery/Box|file=Imposter-Yook.png|link=Imposter_Yook|caption=[[Imposter Yook]]}} | {{Gallery/Box|file=Imposter-Yook.png|link=Imposter_Yook|caption=[[Imposter Yook]]}} | ||
{{Gallery/Box|file=Jolene-Battle.png|link=Jolene|caption=[[Jolene]]}} | {{Gallery/Box|file=Jolene-Battle.png|link=Jolene|caption=[[Jolene]]}} | ||
| Line 43: | Line 49: | ||
{{Gallery/Box|file=Max-Knight.png|link=Max|caption=[[Max|Knight Max]]}} | {{Gallery/Box|file=Max-Knight.png|link=Max|caption=[[Max|Knight Max]]}} | ||
{{Gallery/Box|file=Leaf-Art.png|link=Leaf|caption=[[Leaf]]}} | {{Gallery/Box|file=Leaf-Art.png|link=Leaf|caption=[[Leaf]]}} | ||
{{Gallery/Box|file=No_Image.png|link=Lucky_Lee|caption=[[Lucky Lee]]}} | |||
{{Gallery/Box|file=Mako.png|link=Mako|caption=[[Mako]]}} | |||
{{Gallery/Box|file=Man_of_Smiles.png|link=Man_of_Smiles|caption=[[Man of Smiles]]}} | {{Gallery/Box|file=Man_of_Smiles.png|link=Man_of_Smiles|caption=[[Man of Smiles]]}} | ||
{{Gallery/Box|file=Masked-Beedle.png|link=Masked_Beedle|caption=[[Masked Beedle]]}} | {{Gallery/Box|file=Masked-Beedle.png|link=Masked_Beedle|caption=[[Masked Beedle]]}} | ||
| Line 48: | Line 56: | ||
{{Gallery/Box|file=Mercay-Farmer-Model.png|link=Mercay_Farmer|caption=[[Mercay Farmer]]}} | {{Gallery/Box|file=Mercay-Farmer-Model.png|link=Mercay_Farmer|caption=[[Mercay Farmer]]}} | ||
{{Gallery/Box|file=Mercay-Shop-Mistress.png|link=Mercay_Shop_Mistress|caption=[[Mercay Shop Mistress]]}} | {{Gallery/Box|file=Mercay-Shop-Mistress.png|link=Mercay_Shop_Mistress|caption=[[Mercay Shop Mistress]]}} | ||
{{Gallery/Box|file=PH-Milk-Bar-Owner.png|link=Milk_Bar_Owner|caption=[[Milk Bar Owner]]}} | {{Gallery/Box|file=PH-Milk-Bar-Owner.png|link=Milk_Bar_Owner (Phantom Hourglass)|caption=[[Milk Bar Owner (Phantom Hourglass)|Milk Bar Owner]]}} | ||
{{Gallery/Box|file=Molida-Shop-Mistress.png|link=Molida_Shop_Mistress|caption=[[Molida Shop Mistress]]}} | {{Gallery/Box|file=Molida-Shop-Mistress.png|link=Molida_Shop_Mistress|caption=[[Molida Shop Mistress]]}} | ||
{{Gallery/Box|file=Neri-Art.png|link=Neri|caption=[[Neri]]}} | {{Gallery/Box|file=Neri-Art.png|link=Neri|caption=[[Neri]]}} | ||
{{Gallery/Box|file=Niko-Wind-Waker-HD-Artwork.png|link=Niko|caption=[[Niko]]}} | |||
{{Gallery/Box|file=Anouki.png|link=Nobodo|caption=[[Nobodo]]}} | |||
{{Gallery/Box|file=Nyave.png|link=Nyave|caption=[[Nyave]]}} | {{Gallery/Box|file=Nyave.png|link=Nyave|caption=[[Nyave]]}} | ||
{{Gallery/Box|file=Nyeve.png|link=Nyeve|caption=[[Nyeve]]}} | {{Gallery/Box|file=Nyeve.png|link=Nyeve|caption=[[Nyeve]]}} | ||
| Line 56: | Line 66: | ||
{{Gallery/Box|file=Old-Wayfarer.png|link=Old_Wayfarer|caption=[[Old Wayfarer]]}} | {{Gallery/Box|file=Old-Wayfarer.png|link=Old_Wayfarer|caption=[[Old Wayfarer]]}} | ||
{{Gallery/Box|file=PH-Postman.png|link=Postman|caption=[[Postman]]}} | {{Gallery/Box|file=PH-Postman.png|link=Postman|caption=[[Postman]]}} | ||
{{Gallery/Box|file=No_Image.png|link=Postmaster|caption=[[Postmaster]]}} | |||
{{Gallery/Box|file=Romanos.png|link=Romanos|caption=[[Romanos]]}} | {{Gallery/Box|file=Romanos.png|link=Romanos|caption=[[Romanos]]}} | ||
{{Gallery/Box|file=Romanos-Mother.png|link=Romanos's_Mom|caption=[[Romanos' Mom]]}} | {{Gallery/Box|file=Romanos-Mother.png|link=Romanos's_Mom|caption=[[Romanos' Mom]]}} | ||
| Line 63: | Line 74: | ||
{{Gallery/Box|file=Yook-White.png|link=Yook|caption=[[Yook]]}} | {{Gallery/Box|file=Yook-White.png|link=Yook|caption=[[Yook]]}} | ||
{{Gallery/Box|file=Zauz.png|link=Zauz|caption=[[Zauz]]}} | {{Gallery/Box|file=Zauz.png|link=Zauz|caption=[[Zauz]]}} | ||
{{Gallery/Box|file=Zuko.png|link=Zuko|caption=[[Zuko]]}} | |||
{{Gallery/Bottom}}</center> | {{Gallery/Bottom}}</center> | ||
{{Galleries}} | {{Galleries}} | ||
{{cat|Phantom Hourglass Characters| Gallery}} | |||
Revision as of 00:02, June 27, 2020
Below is a listing of all the characters that appear in Phantom Hourglass.