Gallery:Link's Awakening Bosses: Difference between revisions
Jump to navigation
Jump to search
Want an adless experience? Log in or Create an account.
mNo edit summary |
mNo edit summary |
||
| (3 intermediate revisions by one other user not shown) | |||
| Line 1: | Line 1: | ||
==Boss Sprites== | ==Boss Sprites== | ||
<center>{{Gallery}} | <center>{{Gallery}} | ||
{{Gallery/Box|file=Moldorm-Sprite-LA.png|link=Moldorm (Link's Awakening)|caption=[[Moldorm (Link's Awakening)|Moldorm]]}} | {{Gallery/Box|file=Moldorm-Sprite-LA.png|link=Moldorm (Link's Awakening)|caption=[[Moldorm (Link's Awakening)|Moldorm]]}} | ||
| Line 10: | Line 9: | ||
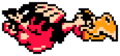
{{Gallery/Box|file=Evil Eagle.png|link=Evil Eagle|caption=[[Evil Eagle]]}} | {{Gallery/Box|file=Evil Eagle.png|link=Evil Eagle|caption=[[Evil Eagle]]}} | ||
{{Gallery/Box|file=Hothead-Sprite-LA.gif|link=Hot Head|caption=[[Hot Head]]}} | {{Gallery/Box|file=Hothead-Sprite-LA.gif|link=Hot Head|caption=[[Hot Head]]}} | ||
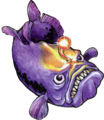
{{Gallery/Box|file=NightmareOfDethl.png|link= | {{Gallery/Box|file=NightmareOfDethl.png|link=Shadow Nightmares|caption=[[Shadow Nightmares]]}} | ||
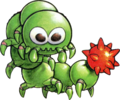
{{Gallery/Box|file=D.Poon-LA.png|link= | {{Gallery/Box|file=D.Poon-LA.png|link=Evil Orb|caption=[[Evil Orb]] (Optional)}} | ||
{{Gallery/Bottom}}</center> | {{Gallery/Bottom}}</center> | ||
| Line 26: | Line 25: | ||
{{Gallery/Box|file=Evil-Eagle.png|link=Evil Eagle|caption=[[Evil Eagle]]}} | {{Gallery/Box|file=Evil-Eagle.png|link=Evil Eagle|caption=[[Evil Eagle]]}} | ||
{{Gallery/Box|file=Hot-Head.png|link=Hot Head|caption=[[Hot Head]]}} | {{Gallery/Box|file=Hot-Head.png|link=Hot Head|caption=[[Hot Head]]}} | ||
{{Gallery/Box|file=Dethl.png|link= | {{Gallery/Box|file=Dethl.png|link=Shadow Nightmares|caption=[[Shadow Nightmares]]}} | ||
{{Gallery/Bottom}}</center> | {{Gallery/Bottom}}</center> | ||
{{Galleries}} | {{Galleries}} | ||
{{cat|Link's Awakening Bosses| Gallery}} | |||
Revision as of 00:05, June 27, 2020
Boss Sprites

Evil Orb (Optional)


Boss Official Artwork
All Artwork is from the Suzuna Art Works Japanese Strategy Guide.