Gallery:Hyrule Warriors Characters: Difference between revisions
Jump to navigation
Jump to search
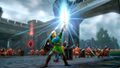
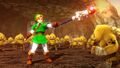
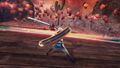
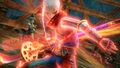
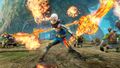
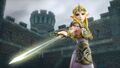
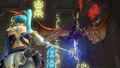
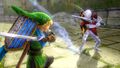
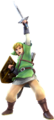
Link - Hylian Sword
Link - Magic Rod
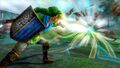
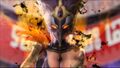
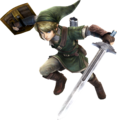
Link - Gauntlet
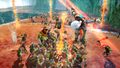
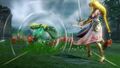
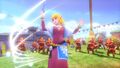
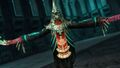
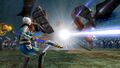
Impa - Giant Blade
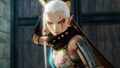
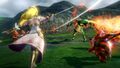
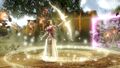
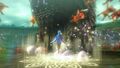
Zelda - Rapier
Zelda - Baton
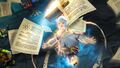
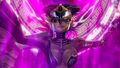
Lana - Book of Sorcery
Agitha - Parasol
Midna - Shackle
Fi - Goddess Blade
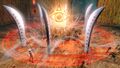
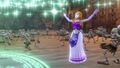
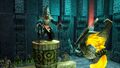
Ruto - Zora Scale


Want an adless experience? Log in or Create an account.
m (→Videos) |
(Added some images and Ruto's trailer.) |
||
| Line 10: | Line 10: | ||
{{Youtube|Jtvgfh-m_40|300|Midna - Shackle}} | {{Youtube|Jtvgfh-m_40|300|Midna - Shackle}} | ||
{{Youtube|0UVGireF02o|300|Fi - Goddess Blade}} | {{Youtube|0UVGireF02o|300|Fi - Goddess Blade}} | ||
{{Youtube|_wcGAG_Zgok|300|Ruto - Zora Scale}} | |||
{{Clear}} | {{Clear}} | ||
| Line 20: | Line 21: | ||
{{Gallery/Box|file=Hyrule Warriors Artwork Link Twilight Princess Costume.png|caption=[[Link]] from ''[[The Legend of Zelda: Twilight Princess|Twilight Princess]]''}} | {{Gallery/Box|file=Hyrule Warriors Artwork Link Twilight Princess Costume.png|caption=[[Link]] from ''[[The Legend of Zelda: Twilight Princess|Twilight Princess]]''}} | ||
{{Gallery/Box|file=Hyrule Warriors Artwork Link Skyward Sword Costume.png|caption=[[Link]] from ''[[The Legend of Zelda: Skyward Sword|Skyward Sword]]''}} | {{Gallery/Box|file=Hyrule Warriors Artwork Link Skyward Sword Costume.png|caption=[[Link]] from ''[[The Legend of Zelda: Skyward Sword|Skyward Sword]]''}} | ||
{{Gallery/Box|file=Hyrule Warriors Artwork Link Ocarina of Time Costume.png|caption=[[Link]] from ''[[The Legend of Zelda: Ocarina of Time|Ocarina of Time]]''}} | |||
{{Gallery/Box|file=Hyrule Warriors Artwork Zelda.png|caption=[[Zelda]]}} | {{Gallery/Box|file=Hyrule Warriors Artwork Zelda.png|caption=[[Zelda]]}} | ||
{{Gallery/Box|file=Hyrule Warriors Artwork Zelda Rapier.png|caption=[[Zelda]] with the [[Rapier]]}} | {{Gallery/Box|file=Hyrule Warriors Artwork Zelda Rapier.png|caption=[[Zelda]] with the [[Rapier]]}} | ||
| Line 25: | Line 27: | ||
{{Gallery/Box|file=Hyrule Warriors Artwork Zelda Twilight Princess Costume.png|caption=[[Zelda]] from ''[[The Legend of Zelda: Twilight Princess|Twilight Princess]]''}} | {{Gallery/Box|file=Hyrule Warriors Artwork Zelda Twilight Princess Costume.png|caption=[[Zelda]] from ''[[The Legend of Zelda: Twilight Princess|Twilight Princess]]''}} | ||
{{Gallery/Box|file=Hyrule Warriors Artwork Zelda Skyward Sword Costume.png|caption=[[Zelda]] from ''[[The Legend of Zelda: Skyward Sword|Skyward Sword]]''}} | {{Gallery/Box|file=Hyrule Warriors Artwork Zelda Skyward Sword Costume.png|caption=[[Zelda]] from ''[[The Legend of Zelda: Skyward Sword|Skyward Sword]]''}} | ||
{{Gallery/Box|file=Hyrule Warriors Artwork Zelda Ocarina of Time Costume.png|caption=[[Zelda]] from ''[[The Legend of Zelda: Ocarina of Time|Ocarina of Time]]''}} | |||
{{Gallery/Box|file=Hyrule Warriors Artwork Impa.png|caption=[[Impa]]}} | {{Gallery/Box|file=Hyrule Warriors Artwork Impa.png|caption=[[Impa]]}} | ||
{{Gallery/Box|file=Hyrule Warriors Artwork Impa Giant Blade.png|caption=[[Impa]] with the [[Giant Blade]]}} | {{Gallery/Box|file=Hyrule Warriors Artwork Impa Giant Blade.png|caption=[[Impa]] with the [[Giant Blade]]}} | ||
{{Gallery/Box|file=Hyrule Warriors Artwork Impa Naginata.png|caption=[[Impa]] with the [[Naginata]]}} | |||
{{Gallery/Box|file=Hyrule Warriors Artwork Midna.png|caption=[[Midna]]}} | {{Gallery/Box|file=Hyrule Warriors Artwork Midna.png|caption=[[Midna]]}} | ||
{{Gallery/Box|file=Hyrule Warriors Artwork Midna Shackle.png|caption=[[Midna]] with the [[Shackle]]}} | {{Gallery/Box|file=Hyrule Warriors Artwork Midna Shackle.png|caption=[[Midna]] with the [[Shackle]]}} | ||
{{Gallery/Box|file=Hyrule Warriors Artwork Lana.png|caption=[[Lana]]}} | {{Gallery/Box|file=Hyrule Warriors Artwork Lana.png|caption=[[Lana]]}} | ||
{{Gallery/Box|file=Hyrule Warriors Artwork Lana Book of Sorcery.jpg|caption=[[Lana]] with the [[Book of Sorcery]]}} | {{Gallery/Box|file=Hyrule Warriors Artwork Lana Book of Sorcery.jpg|caption=[[Lana]] with the [[Book of Sorcery]]}} | ||
{{Gallery/Box|file=Hyrule Warriors Artwork Lana Deku Stick.png|caption=[[Lana]] with the [[Deku Stick]]}} | |||
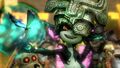
{{Gallery/Box|file=Hyrule Warriors Artwork Agitha.png|caption=[[Agitha]]}} | {{Gallery/Box|file=Hyrule Warriors Artwork Agitha.png|caption=[[Agitha]]}} | ||
{{Gallery/Box|file=Hyrule Warriors Artwork Agitha Parasol.jpg|caption=[[Agitha]] with the [[Parasol]]}} | {{Gallery/Box|file=Hyrule Warriors Artwork Agitha Parasol.jpg|caption=[[Agitha]] with the [[Parasol]]}} | ||
{{Gallery/Box|file=Hyrule Warriors Artwork Fi.png|caption=[[Fi]]}} | {{Gallery/Box|file=Hyrule Warriors Artwork Fi.png|caption=[[Fi]]}} | ||
{{Gallery/Box|file=Hyrule Warriors Artwork Fi Goddess Sword.png|caption=[[Fi]] with the [[Goddess | {{Gallery/Box|file=Hyrule Warriors Artwork Fi Goddess Sword.png|caption=[[Fi]] with the [[Goddess Blade]]}} | ||
{{Gallery/Box|file=Hyrule Warriors Artwork Ruto.png|caption=[[Ruto]]}} | |||
{{Gallery/Box|file=Hyrule Warriors Artwork Ruto Zora Scale.png|caption=[[Ruto]] with the [[Zora Scale]]}} | |||
{{Gallery/Box|file=Hyrule Warriors Artwork Darunia.png|caption=[[Darunia]]}} | |||
{{Gallery/Box|file=Hyrule Warriors Artwork Darunia Hammer.png|caption=[[Darunia]] with the [[Hammer]]}} | |||
{{Gallery/Box|file=Hyrule Warriors Artwork Sheik.png|caption=[[Sheik]]}} | |||
{{Gallery/Box|file=Hyrule Warriors Artwork Cia.png|caption=[[Cia]]}} | {{Gallery/Box|file=Hyrule Warriors Artwork Cia.png|caption=[[Cia]]}} | ||
{{Gallery/Box|file=Hyrule Warriors Artwork Valga.png|caption=[[Valga]]}} | {{Gallery/Box|file=Hyrule Warriors Artwork Valga.png|caption=[[Valga]]}} | ||
| Line 42: | Line 52: | ||
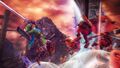
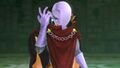
{{Gallery/Box|file=Hyrule Warriors Artwork Ghirahim.png|caption=[[Ghirahim]]}} | {{Gallery/Box|file=Hyrule Warriors Artwork Ghirahim.png|caption=[[Ghirahim]]}} | ||
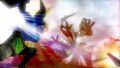
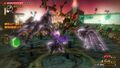
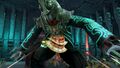
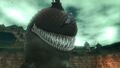
{{Gallery/Box|file=Hyrule Warriors Artwork The Imprisoned.png|caption=[[The Imprisoned]]}} | {{Gallery/Box|file=Hyrule Warriors Artwork The Imprisoned.png|caption=[[The Imprisoned]]}} | ||
{{Gallery/Box|file=Hyrule Warriors Artwork Gohma.png|caption=[[Gohma (Hyrule Warriors)|Gohma]]}} | |||
{{Gallery/Bottom}} | {{Gallery/Bottom}} | ||
| Line 78: | Line 89: | ||
{{Gallery/Box|file=Hyrule Warriors Screenshot Link Glove.jpg}} | {{Gallery/Box|file=Hyrule Warriors Screenshot Link Glove.jpg}} | ||
{{Gallery/Box|file=Hyrule Warriors Screenshot Link Glove Lift.jpg}} | {{Gallery/Box|file=Hyrule Warriors Screenshot Link Glove Lift.jpg}} | ||
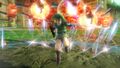
{{Gallery/Box|file=Hyrule Warriors Screenshot Link Twilight Princess Costume Gauntlet.jpg}} | |||
{{Gallery/Box|file=Hyrule Warriors Screenshot Link Twilight Princess Costume Gauntlet Spinning.jpg}} | |||
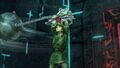
{{Gallery/Box|file=Hyrule Warriors Screenshot Link Skyward Sword Costume Hylian Sword.jpg}} | |||
{{Gallery/Box|file=Hyrule Warriors Screenshot Link Skyward Sword Costume Hylian Sword Skyward.jpg}} | |||
{{Gallery/Box|file=Hyrule Warriors Screenshot Link Ocarina of Time Costume Magic Rod.jpg}} | |||
{{Gallery/Box|file=Hyrule Warriors Screenshot Link Ocarina of Time Costume Magic Rod2.jpg}} | |||
{{Gallery/Box|file=Hyrule Warriors Screenshot Impa.jpg}} | {{Gallery/Box|file=Hyrule Warriors Screenshot Impa.jpg}} | ||
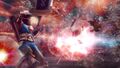
{{Gallery/Box|file=Hyrule Warriors Screenshot Impa Giant Blade 1.jpg}} | {{Gallery/Box|file=Hyrule Warriors Screenshot Impa Giant Blade 1.jpg}} | ||
| Line 89: | Line 106: | ||
{{Gallery/Box|file=Hyrule Warriors Screenshot Impa Giant Blade 9.jpg}} | {{Gallery/Box|file=Hyrule Warriors Screenshot Impa Giant Blade 9.jpg}} | ||
{{Gallery/Box|file=Hyrule Warriors Screenshot Impa Giant Blade 10.jpg}} | {{Gallery/Box|file=Hyrule Warriors Screenshot Impa Giant Blade 10.jpg}} | ||
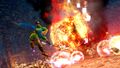
{{Gallery/Box|file=Hyrule Warriors Screenshot Impa Naginata.jpg}} | |||
{{Gallery/Box|file=Hyrule Warriors Screenshot Impa Naginata Focus Spirit.jpg}} | |||
{{Gallery/Box|file=Hyrule Warriors Screenshot Impa Naginata Dual.jpg}} | |||
{{Gallery/Box|file=Hyrule Warriors Screenshot Impa Naginata Four Copies.jpg}} | |||
{{Gallery/Box|file=Hyrule Warriors Screenshot Impa Naginata Sheikah Eye.jpg}} | |||
{{Gallery/Box|file=Hyrule Warriors Screenshot Impa Naginata Fire.jpg}} | |||
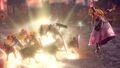
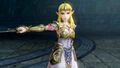
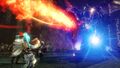
{{Gallery/Box|file=Hyrule Warriors Screenshot Zelda.jpg}} | {{Gallery/Box|file=Hyrule Warriors Screenshot Zelda.jpg}} | ||
{{Gallery/Box|file=Hyrule Warriors Screenshot Zelda Concentrate.jpg}} | {{Gallery/Box|file=Hyrule Warriors Screenshot Zelda Concentrate.jpg}} | ||
| Line 108: | Line 131: | ||
{{Gallery/Box|file=Hyrule Warriors Screenshot Zelda Wind Waker Cyclone.jpg}} | {{Gallery/Box|file=Hyrule Warriors Screenshot Zelda Wind Waker Cyclone.jpg}} | ||
{{Gallery/Box|file=Hyrule Warriors Screenshot Zelda Wind Waker Lightning.jpg}} | {{Gallery/Box|file=Hyrule Warriors Screenshot Zelda Wind Waker Lightning.jpg}} | ||
{{Gallery/Box|file=Hyrule Warriors Screenshot Zelda Twilight Princess Costume Light Arrow.jpg}} | |||
{{Gallery/Box|file=Hyrule Warriors Screenshot Zelda Twilight Princess Costume Light Arrow Shot.jpg}} | |||
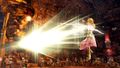
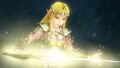
{{Gallery/Box|file=Hyrule Warriors Screenshot Zelda Skyward Sword Costume Baton.jpg}} | |||
{{Gallery/Box|file=Hyrule Warriors Screenshot Zelda Skyward Sword Costume Baton2.jpg}} | |||
{{Gallery/Box|file=Hyrule Warriors Screenshot Zelda Ocarina of Time Costume Magic.jpg}} | |||
{{Gallery/Box|file=Hyrule Warriors Screenshot Zelda Ocarina of Time Costume Rapier.jpg}} | |||
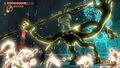
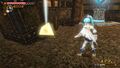
{{Gallery/Box|file=Hyrule Warriors Screenshot Midna.jpg}} | {{Gallery/Box|file=Hyrule Warriors Screenshot Midna.jpg}} | ||
{{Gallery/Box|file=Hyrule Warriors Screenshot Midna Shackle.jpg}} | {{Gallery/Box|file=Hyrule Warriors Screenshot Midna Shackle.jpg}} | ||
| Line 130: | Line 159: | ||
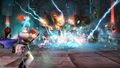
{{Gallery/Box|file=Hyrule Warriors Screenshot Lana Special Barriers.jpg}} | {{Gallery/Box|file=Hyrule Warriors Screenshot Lana Special Barriers.jpg}} | ||
{{Gallery/Box|file=Hyrule Warriors Screenshot Lana Special Finish.jpg}} | {{Gallery/Box|file=Hyrule Warriors Screenshot Lana Special Finish.jpg}} | ||
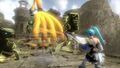
{{Gallery/Box|file=Hyrule Warriors Screenshot Lana Faron Woods.jpg}} | |||
{{Gallery/Box|file=Hyrule Warriors Screenshot Lana Deku Stick Small Deku Tree.jpg}} | |||
{{Gallery/Box|file=Hyrule Warriors Screenshot Lana Deku Stick Deku Leaf.jpg}} | |||
{{Gallery/Box|file=Hyrule Warriors Screenshot Lana Deku Stick Deku Tree Sprout.jpg}} | |||
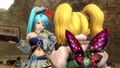
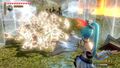
{{Gallery/Box|file=Hyrule Warriors Screenshot Agitha Butterfly.jpg}} | {{Gallery/Box|file=Hyrule Warriors Screenshot Agitha Butterfly.jpg}} | ||
{{Gallery/Box|file=Hyrule Warriors Screenshot Agitha Cornered.jpg}} | {{Gallery/Box|file=Hyrule Warriors Screenshot Agitha Cornered.jpg}} | ||
| Line 143: | Line 176: | ||
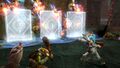
{{Gallery/Box|file=Hyrule Warriors Screenshot Fi Sealed Grounds.jpg}} | {{Gallery/Box|file=Hyrule Warriors Screenshot Fi Sealed Grounds.jpg}} | ||
{{Gallery/Box|file=Hyrule Warriors Screenshot Fi Singing.jpg}} | {{Gallery/Box|file=Hyrule Warriors Screenshot Fi Singing.jpg}} | ||
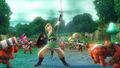
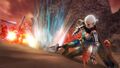
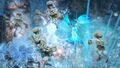
{{Gallery/Box|file=Hyrule Warriors Screenshot Ruto.jpg}} | |||
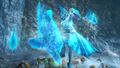
{{Gallery/Box|file=Hyrule Warriors Screenshot Ruto Zora's Domain.jpg}} | |||
{{Gallery/Box|file=Hyrule Warriors Screenshot Ruto Water Animals.jpg}} | |||
{{Gallery/Box|file=Hyrule Warriors Screenshot Ruto Waves.jpg}} | |||
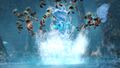
{{Gallery/Box|file=Hyrule Warriors Screenshot Ruto Water Spikes.jpg}} | |||
{{Gallery/Box|file=Hyrule Warriors Screenshot Ruto Water Vortex.jpg}} | |||
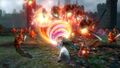
{{Gallery/Box|file=Hyrule Warriors Screenshot Sheik.jpg}} | |||
{{Gallery/Box|file=Hyrule Warriors Screenshot Sheik Harp.jpg}} | |||
{{Gallery/Box|file=Hyrule Warriors Screenshot Sheik Harp Fire.jpg}} | |||
{{Gallery/Box|file=Hyrule Warriors Screenshot Sheik Harp Water.jpg}} | |||
{{Gallery/Box|file=Hyrule Warriors Screenshot Sheik Throwing Knives.jpg}} | |||
{{Gallery/Box|file=Hyrule Warriors Screenshot Sheik Throwing Knives2.jpg}} | |||
{{Gallery/Box|file=Hyrule Warriors Screenshot Sheik Magical Release.jpg}} | |||
{{Gallery/Box|file=Hyrule Warriors Screenshot Cia.jpg}} | {{Gallery/Box|file=Hyrule Warriors Screenshot Cia.jpg}} | ||
{{Gallery/Box|file=Hyrule Warriors Screenshot Cia Profile.jpg}} | {{Gallery/Box|file=Hyrule Warriors Screenshot Cia Profile.jpg}} | ||
| Line 171: | Line 217: | ||
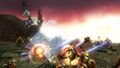
{{Gallery/Box|file=Hyrule Warriors Screenshot The Imprisoned Attacked.jpg}} | {{Gallery/Box|file=Hyrule Warriors Screenshot The Imprisoned Attacked.jpg}} | ||
{{Gallery/Box|file=Hyrule Warriors Screenshot The Imprisoned Stomp.jpg}} | {{Gallery/Box|file=Hyrule Warriors Screenshot The Imprisoned Stomp.jpg}} | ||
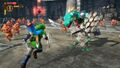
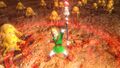
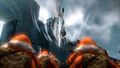
{{Gallery/Box|file=Hyrule Warriors Screenshot | {{Gallery/Box|file=Hyrule Warriors Screenshot Gohma Laser.jpg}} | ||
{{Gallery/Box|file=Hyrule Warriors Screenshot Gohma Attacked.jpg}} | |||
{{Gallery/Box|file=Hyrule Warriors Screenshot Gohma Guard.jpg}} | |||
{{Gallery/Box|file=Hyrule Warriors Screenshot Gohma Bow.jpg}} | |||
{{Galleries}} | {{Galleries}} | ||
Revision as of 16:42, July 25, 2014
Videos
Link - Hylian Sword
Link - Magic Rod
Link - Gauntlet
Impa - Giant Blade
Zelda - Rapier
Zelda - Baton
Lana - Book of Sorcery
Agitha - Parasol
Midna - Shackle
Fi - Goddess Blade
Ruto - Zora Scale
Artwork
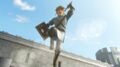
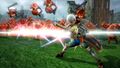
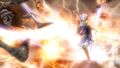
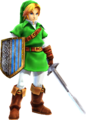
Link with the Hylian Sword
Link from Twilight Princess
Link from Skyward Sword
Link from Ocarina of Time

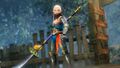
Zelda from Twilight Princess

Zelda from Skyward Sword

Zelda from Ocarina of Time
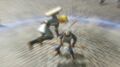
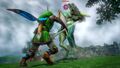
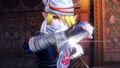
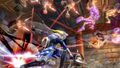
Impa with the Giant Blade

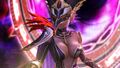
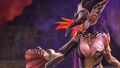
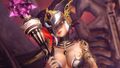
Ruto with the Zora Scale


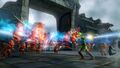
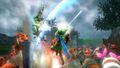
Screenshots


