Desert Temple (Tri Force Heroes): Difference between revisions
Jump to navigation
Jump to search
Want an adless experience? Log in or Create an account.
mNo edit summary |
m (Text replacement - "{{Infobox|dungeon" to "{{Infobox|scenario") |
||
| (One intermediate revision by the same user not shown) | |||
| Line 1: | Line 1: | ||
{{Stub}} | {{Stub}} | ||
{{Infobox| | {{Infobox|scenario | ||
| name = Desert Temple | | name = Desert Temple | ||
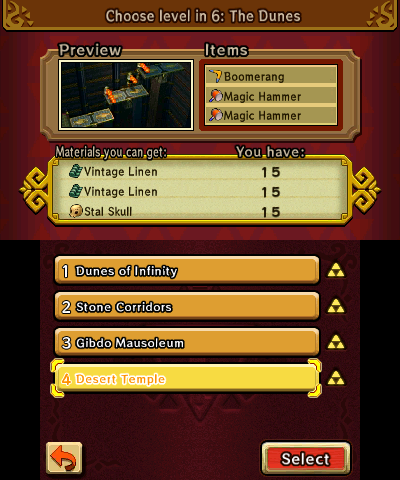
| image = | | image = [[File:TFH - 6 The Dunes - 4 Desert Temple.png]] | ||
| caption | | caption = | ||
| game = ''[[The Legend of Zelda: Tri Force Heroes|Tri Force Heroes]]'' | | game = ''[[The Legend of Zelda: Tri Force Heroes|Tri Force Heroes]]'' | ||
| location = [[The Dunes]] | | location = [[The Dunes]] | ||
| Line 9: | Line 9: | ||
| miniboss = | | miniboss = | ||
| enemies = | | enemies = | ||
| item = | | item = [[Boomerang]]<br/>[[Magic Hammer]] | ||
| materials = [[Vintage Linen]]<br/>[[Stal Skull]] | |||
| reward = | | reward = | ||
| walkthrough = | | walkthrough = | ||
Latest revision as of 21:13, October 13, 2022
| This article is a stub. You can help the Zelda Dungeon Wiki by expanding it. |
Desert Temple

Games | ||
Location | ||
Boss | ||
Items | ||
Materials | ||
The Desert Temple is the fourth and final level in The Dunes area of the Drablands in Tri Force Heroes.
In-depth guide:
6.4 Desert Temple |