Category:Skyward Sword Items: Difference between revisions
Jump to navigation
Jump to search
Want an adless experience? Log in or Create an account.
No edit summary |
(replace tabbed gallery with Galbox) Tag: Replaced |
||
| (20 intermediate revisions by 5 users not shown) | |||
| Line 1: | Line 1: | ||
Here is a listing of all of the items found within ''[[The Legend of Zelda: Skyward Sword]]''. | Here is a listing of all of the items found within ''[[The Legend of Zelda: Skyward Sword]]''. | ||
{{Galbox|Skyward Sword Items}} | |||
{{Cat|Items|Skyward Sword}} | {{Cat|Items|Skyward Sword}} | ||
{{Cat|Skyward Sword|Items}} | {{Cat|Skyward Sword|Items}} | ||
Latest revision as of 01:19, August 15, 2020
Here is a listing of all of the items found within The Legend of Zelda: Skyward Sword.
- Swords
- Equipment
- Quest
- Shields
- Bottled Items
- Medals
- Items
- Collection
- Dungeon
- Pick-Up


- [[Articles With Things To Do]]
- [[Skyward Sword]]
- [[Skyward Sword Items]]
- [[Items]]
Pages in category "Skyward Sword Items"
The following 149 pages are in this category, out of 149 total.
A
B
D
G
H
I
L
M
R
S
- Sacred Bow
- Sacred Flames
- Sacred Tear
- Sacred Water
- Sailcloth
- Scattershot
- Shield
- Silver Rupee
- Skyward Sword Bugs
- Skyward Sword Treasure
- Skyward Sword Upgrades
- Slingshot
- Small Bomb Bag
- Small Key
- Small Quiver
- Small Seed Satchel
- Small Wallet
- Spirit Vessel
- Squid Carving
- Stamina Fruit
- Stamina Potion
- Stamina Potion +
- Stone of Trials
T
Media in category "Skyward Sword Items"
The following 2 files are in this category, out of 2 total.
 Amber relic.jpg 160 × 120; 27 KB
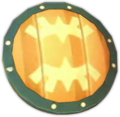 Banded Shield SS.png 311 × 302; 126 KB

