Category:Ocarina of Time Items: Difference between revisions
Jump to navigation
Jump to search
Want an adless experience? Log in or Create an account.
(Added Two Tabs and More Items) |
No edit summary |
||
| Line 10: | Line 10: | ||
{{Tab|7|Masks}} | {{Tab|7|Masks}} | ||
{{Tab|8|Quest}} | {{Tab|8|Quest}} | ||
{{Tab|9|Trading Sequence}} | |||
</div> | </div> | ||
<div class="tabcontent" style="clear:left;"> | <div class="tabcontent" style="clear:left;"> | ||
{{TabContent|1| | {{TabContent|1| <!-- Equipment --> | ||
{{Gallery|size=80|pad=5}} | {{Gallery|size=80|pad=5}} | ||
{{Gallery/Box|file=Kokiri Sword.png|link=Kokiri Sword|caption=[[Kokiri Sword]]}} | {{Gallery/Box|file=Kokiri Sword.png|link=Kokiri Sword|caption=[[Kokiri Sword]]}} | ||
{{Gallery/Box|file=Master Sword (Ocarina of Time).png|link=Master Sword|caption=[[Master Sword]]}} | {{Gallery/Box|file=Master Sword (Ocarina of Time).png|link=Master Sword|caption=[[Master Sword]]}} | ||
{{Gallery/Box|file=Biggoron'sSwordl.png|link=Biggoron's Sword|caption=[[Biggoron's Sword]]}} | {{Gallery/Box|file=Biggoron'sSwordl.png|link=Biggoron's Sword|caption=[[Biggoron's Sword]]}} | ||
{{Gallery/Box|file=Broken Giant's Knife.png|link=Giant's Knife|caption=[[Giant's Knife]]}} | |||
{{Gallery/Box|file=Deku Shield.png|link=Deku Shield|caption=[[Deku Shield]]}} | {{Gallery/Box|file=Deku Shield.png|link=Deku Shield|caption=[[Deku Shield]]}} | ||
{{Gallery/Box|file=Hylian Shield.png|link=Hylian Shield|caption=[[Hylian Shield]]}} | {{Gallery/Box|file=Hylian Shield.png|link=Hylian Shield|caption=[[Hylian Shield]]}} | ||
| Line 28: | Line 30: | ||
{{Gallery/Bottom}}}} | {{Gallery/Bottom}}}} | ||
{{TabContent|2| | {{TabContent|2| <!-- Items --> | ||
{{Gallery|size=80|pad=5}} | {{Gallery|size=80|pad=5}} | ||
{{Gallery/Box|file=FairyOcarina.png|link=Fairy Ocarina|caption=[[Fairy Ocarina]]}} | {{Gallery/Box|file=FairyOcarina.png|link=Fairy Ocarina|caption=[[Fairy Ocarina]]}} | ||
| Line 52: | Line 54: | ||
{{Gallery/Bottom}}}} | {{Gallery/Bottom}}}} | ||
{{TabContent|3| | {{TabContent|3| <!-- Inventory --> | ||
{{Gallery|size=80|pad=5}} | {{Gallery|size=80|pad=5}} | ||
{{Gallery/Box|file=Deku Seed Bullet Bag.png|link=Deku Seeds Bullet Bag|caption=[[Deku Seeds Bullet Bag]]}} | {{Gallery/Box|file=Deku Seed Bullet Bag.png|link=Deku Seeds Bullet Bag|caption=[[Deku Seeds Bullet Bag]]}} | ||
{{Gallery/Box|file=Big Deku Seeds Bullet Bag.png|link= | {{Gallery/Box|file=Big Deku Seeds Bullet Bag.png|link=Deku Seeds Bullet Bag|caption=[[Deku Seeds Bullet Bag|Big Deku Seeds Bullet Bag]]}} | ||
{{Gallery/Box|file=Biggest Deku Seeds Bullet Bag.png|link= | {{Gallery/Box|file=Biggest Deku Seeds Bullet Bag.png|link=Deku Seeds Bullet Bag|caption=[[Deku Seeds Bullet Bag|Biggest Deku Seeds Bullet Bag]]}} | ||
{{Gallery/Box|file=Quiver.png|link=Quiver|caption=[[Quiver]]}} | {{Gallery/Box|file=Quiver.png|link=Quiver|caption=[[Quiver]]}} | ||
{{Gallery/Box|file=Big Quiver.png|link=Big Quiver|caption=[[Big Quiver]]}} | {{Gallery/Box|file=Big Quiver.png|link=Big Quiver|caption=[[Big Quiver]]}} | ||
| Line 75: | Line 77: | ||
{{Gallery/Box|file=DekuStickex1.png|link=Deku Stick|caption=[[Deku Stick Upgrade 1]]}} | {{Gallery/Box|file=DekuStickex1.png|link=Deku Stick|caption=[[Deku Stick Upgrade 1]]}} | ||
{{Gallery/Box|file=DekuStickex2.png|link=Deku Stick|caption=[[Deku Stick Upgrade 2]]}} | {{Gallery/Box|file=DekuStickex2.png|link=Deku Stick|caption=[[Deku Stick Upgrade 2]]}} | ||
{{Gallery/Box|file=Card.jpg|link=Gerudo Membership Card|caption=[[Gerudo Membership Card]]}} | |||
{{Gallery/Box|file=Stone of Agony.png|link=Stone of Agony|caption=[[Stone of Agony]]}} | |||
{{Gallery/Bottom}}}} | {{Gallery/Bottom}}}} | ||
{{TabContent|4| | {{TabContent|4| <!-- Bottle --> | ||
{{Gallery|size=80|pad=5}} | {{Gallery|size=80|pad=5}} | ||
{{Gallery/Box|file=Bottle.png|link=Bottle|caption=[[Bottle]]}} | {{Gallery/Box|file=Bottle.png|link=Bottle|caption=[[Bottle]]}} | ||
| Line 89: | Line 93: | ||
{{Gallery/Box|file=RedPotion Large.png|link=Red Potion|caption=[[Red Potion]]}} | {{Gallery/Box|file=RedPotion Large.png|link=Red Potion|caption=[[Red Potion]]}} | ||
{{Gallery/Box|file=BluePotion Large.png|link=Blue Potion|caption=[[Blue Potion]]}} | {{Gallery/Box|file=BluePotion Large.png|link=Blue Potion|caption=[[Blue Potion]]}} | ||
{{Gallery/Box|file=LonLonMilk Large.png|link= | {{Gallery/Box|file=LonLonMilk Large.png|link=Lon Lon Milk|caption=[[Lon Lon Milk]]}} | ||
{{Gallery/Bottom}}}} | {{Gallery/Bottom}}}} | ||
{{TabContent|5| | {{TabContent|5| <!-- Pick-Up --> | ||
{{Gallery|size=80|pad=5}} | {{Gallery|size=80|pad=5}} | ||
{{Gallery/Box|file=HeartPiece.png|link=|caption=[[Heart Piece]]}} | {{Gallery/Box|file=HeartPiece.png|link=Piece of Heart|caption=[[Piece of Heart|Heart Piece]]}} | ||
{{Gallery/Box|file=RecoveryHeart.png|link=Recovery Heart|caption=[[Recovery Heart]]}} | {{Gallery/Box|file=RecoveryHeart.png|link=Recovery Heart|caption=[[Recovery Heart]]}} | ||
{{Gallery/Box|file=Magic Jar.png|link=Magic Jar|caption=[[Magic Jar]]}} | {{Gallery/Box|file=Magic Jar.png|link=Magic Jar|caption=[[Magic Jar]]}} | ||
| Line 103: | Line 107: | ||
{{Gallery/Bottom}}}} | {{Gallery/Bottom}}}} | ||
{{TabContent|6| | {{TabContent|6| <!-- Dungeon --> | ||
{{Gallery|size=80|pad=5}} | {{Gallery|size=80|pad=5}} | ||
{{Gallery/Box|file=Dungeon Map.png|link=Dungeon Map|caption=[[Dungeon Map]]}} | {{Gallery/Box|file=Dungeon Map.png|link=Dungeon Map|caption=[[Dungeon Map]]}} | ||
| Line 112: | Line 116: | ||
{{Gallery/Bottom}}}} | {{Gallery/Bottom}}}} | ||
{{TabContent|7| | {{TabContent|7| <!-- Masks --> | ||
{{Gallery|size=80|pad=5}} | {{Gallery|size=80|pad=5}} | ||
{{Gallery/Box|file=KeatonM.png|link=Keaton Mask|caption=[[Keaton Mask]]}} | {{Gallery/Box|file=KeatonM.png|link=Keaton Mask|caption=[[Keaton Mask]]}} | ||
| Line 124: | Line 128: | ||
{{Gallery/Bottom}}}} | {{Gallery/Bottom}}}} | ||
{{TabContent|8| | {{TabContent|8| <!-- Quest --> | ||
{{Gallery|size=80|pad=6}} | {{Gallery|size=80|pad=6}} | ||
{{Gallery/Box|file=Kokiri Emerald.png|link=Kokiri's Emerald|caption=[[Kokiri's Emerald]]}} | {{Gallery/Box|file=Kokiri Emerald.png|link=Kokiri's Emerald|caption=[[Kokiri's Emerald]]}} | ||
| Line 137: | Line 141: | ||
{{Gallery/Box|file=Weird Egg.png|link=Weird Egg|caption=[[Weird Egg]]}} | {{Gallery/Box|file=Weird Egg.png|link=Weird Egg|caption=[[Weird Egg]]}} | ||
{{Gallery/Box|file=Zelda's_Letter.png|link=Zelda's Letter|caption=[[Zelda's Letter]]}} | {{Gallery/Box|file=Zelda's_Letter.png|link=Zelda's Letter|caption=[[Zelda's Letter]]}} | ||
{{Gallery/Box|file=GoldSkulltulaG Large.png|link=Gold Skulltula Token|caption=[[Gold Skulltula Token]]}} | |||
{{Gallery/Bottom}}}} | |||
{{TabContent|9| <!-- Trading Sequence --> | |||
{{Gallery|size=80|pad=6}} | |||
{{Gallery/Box|file=WeirdEggG_Large2.png|link=Pocket Egg|caption = [[Pocket Egg]]}} | {{Gallery/Box|file=WeirdEggG_Large2.png|link=Pocket Egg|caption = [[Pocket Egg]]}} | ||
{{Gallery/Box|file=Large Cucco.png|link=Pocket Cucco|caption=[[Pocket Cucco]]}} | {{Gallery/Box|file=Large Cucco.png|link=Pocket Cucco|caption=[[Pocket Cucco]]}} | ||
| Line 148: | Line 157: | ||
{{Gallery/Box|file=Broken Goron's Sword.png|link=Broken Goron's Sword|caption=[[Broken Goron's Sword]]}} | {{Gallery/Box|file=Broken Goron's Sword.png|link=Broken Goron's Sword|caption=[[Broken Goron's Sword]]}} | ||
{{Gallery/Box|file=B ClaimCheck.gif|link=Claim Check|caption=[[Claim Check]]}} | {{Gallery/Box|file=B ClaimCheck.gif|link=Claim Check|caption=[[Claim Check]]}} | ||
{{Gallery/Bottom}}}} | {{Gallery/Bottom}}}} | ||
</div></onlyinclude> | </div></onlyinclude> | ||
Revision as of 04:02, December 3, 2012
Here is a listing of all of the items found within The Legend of Zelda: Ocarina of Time.
Pages in category "Ocarina of Time Items"
The following 122 pages are in this category, out of 122 total.
B
F
G
M
Q
S
Media in category "Ocarina of Time Items"
This category contains only the following file.
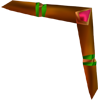 Boomerang.png 100 × 100; 5 KB
