Calamity Strikes: Difference between revisions
m (Text replacement - "{{References}}↵↵{{Listbox|" to "{{References}} {{clear}} {{Listbox|") |
|||
| (27 intermediate revisions by 7 users not shown) | |||
| Line 2: | Line 2: | ||
{{stub}} | {{stub}} | ||
{{Infobox|scenario | {{Infobox|scenario | ||
| image = | | image = [[File:Calamity-Strikes.jpg|400px]] | ||
| caption = | | caption = | ||
| number = Chapter 5-1 | | number = Chapter 5-1 | ||
| weaponavailable = | | weaponavailable = | ||
| game = ''[[Hyrule Warriors: Age of Calamity]]'' | | game = ''[[Hyrule Warriors: Age of Calamity]]'' | ||
| stage = | | stage = [[Hyrule Castle]] | ||
| previous = [[When Courage Fails]] | | previous = [[EX Guardian of Remembrance]] (story)<br/>[[When Courage Fails]] (gameplay) | ||
| next = [[Water and Fire]] | | next = [[EX The Princess and the King]] (story)<br/>[[EX To Zelda's Side]] (gameplay)<br/>[[Water and Fire]] (gameplay)<br/>[[Air and Lightning]] (gameplay) | ||
| simultaneous = | | simultaneous = | ||
| warriors = | | warriors = [[Link (Breath of the Wild)#Age of Calamity|Link]] (story)<br/>Any one unlocked ''except'' [[Mipha]], [[Daruk]], [[Revali]], [[Urbosa]], or [[Hestu]] (replay) | ||
| recommended level = Lv. | | allies = [[Link (Breath of the Wild)#Age of Calamity|Link]], [[Zelda (Breath of the Wild)#Age of Calamity|Zelda]], [[Impa]] (if not selected for play)<br/>[[Hylian Captain]] | ||
| conditions = | | recommended level = Lv. 38 | ||
| battlefield materials = | | conditions = Restricted Allies | ||
| boss = | | battlefield materials =[[Ironshell Crab]]<br/>[[Hearty Radish]]<br/>[[Summerwing Butterfly]]<br/>[[Hylian Shroom]]<br/>[[Rushroom]] | ||
| miniboss = | | boss =[[Guardian Scout I]]<br/>[[White-Maned Lynel]] | ||
| enemies = | | miniboss = [[Black Moblin]] (2×)<br/>[[Guardian Stalker]] (13×)<br/>[[Ice Wizzrobe]]<br/>[[Fire Moblin]] | ||
| enemies = [[Black Bokoblin]]<br/>[[Silver Bokoblin]]<br/>[[Silver Lizalfos]]<br/>[[Keese]] | |||
| characters = | | characters = | ||
| members = | | members = | ||
| Line 32: | Line 33: | ||
| gallery = | | gallery = | ||
}} | }} | ||
{{quote|.|In-game description}} | {{quote|Calamity Ganon has returned sooner than was predicted. The party fights desperately against monsters and Guardians as they escape from Hyrule Castle.|In-game description}} | ||
'''Calamity Strikes''' is the first [[Age of Calamity Scenarios|scenario]] of ''[[Hyrule Warriors: Age of Calamity|Age of Calamity]]'' Chapter 5. | '''Calamity Strikes''' is the first [[Age of Calamity Scenarios|scenario]] of ''[[Hyrule Warriors: Age of Calamity|Age of Calamity]]'' Chapter 5. | ||
*'''Victory Condition''': | *'''Victory Condition''': | ||
*'''Defeat Condition''': | *'''Defeat Condition''': | ||
==Objectives== | ==Objectives== | ||
| Line 43: | Line 44: | ||
==Cutscenes== | ==Cutscenes== | ||
===Calamity Strikes [text]=== | === The Turning Point === | ||
{{quote|.|In-game Gallery description}} | {{quote|The Royal Ancient Lab completes its analysis of the little Guardian, but Robbie and Purah are abruptly attacked by Yiga Clan infiltrators. Purah entrusts the Sheikah Slate to the little Guardian, who flees the lab in search of Zelda.|In-game Gallery description}} | ||
=== Calamity Strikes [text] === | |||
{{quote|Accompanied by Link and Impa, Zelda sets out for the Spring of Wisdom on Mount Lanayru to train. She steels herself, knowing that this is her last chance to awaken her powers. At the moment Zelda crosses the bridge, Calamity Ganon suddenly revives and descends on the castle.|In-game Gallery description}} | |||
=== Disastrous Interference === | |||
{{quote|On the way to their Divine Beasts, each of the Champions witnesses the sudden revival of Calamity Ganon. Matters are made worse as the Sheikah Towers simultaneously shut down due to Calamity Ganon's influence.|In-game Gallery description}} | |||
=== Duty === | |||
{{quote|The Guardians, now under the control of Calamity Ganon, begin to attack Zelda, Link, and the others. Just as one has the princess and her protector in its sights, King Rhoam arrives to save them. The king reminds Link of his duty to the princess then remains behind as the pair flee the castle.|In-game Gallery description}} | |||
=== In the Midst of Despair... === | |||
{{quote|Based on information from the little Guardian, Zelda learns that the Divine Beasts will also be taken over by Calamity Ganon. Frustrated by her own powerlessness, Zelda cries out in anguish. As her tears fall, the Guardian suddenly emits a strange light...|In-game Gallery description}} | |||
==Dialogue== | |||
{| class="wikitable" style="text-align:left;" | |||
!Character Speaking | |||
!Dialogue | |||
|- | |||
|<center>.</center> | |||
|. | |||
|- | |||
|} | |||
==Treasure Chests== | ==Treasure Chests== | ||
| Line 52: | Line 75: | ||
File:HWAoC-Calamity-Strikes-Chest-Map.png|<center>There are 9 treasure chests found in [[Calamity Strikes]].</center> | File:HWAoC-Calamity-Strikes-Chest-Map.png|<center>There are 9 treasure chests found in [[Calamity Strikes]].</center> | ||
</gallery></center> | </gallery></center> | ||
<center><gallery widths="400px" heights="220px"> | |||
File:HWAoC-Calamity-Strikes-Chest-01.jpg|<center>[[Amber]] x3</center><center>Behind a tree to the left just past the first outpost.</center> | |||
File:HWAoC-Calamity-Strikes-Chest-02.jpg|<center>300 [[Rupee]]s</center><center>In the Library on the balcony just before exiting toward the south.</center> | |||
File:HWAoC-Calamity-Strikes-Chest-03.jpg|<center>300 [[Rupee]]s</center><center>In the southwest corner of the Library.</center> | |||
File:HWAoC-Calamity-Strikes-Chest-04.jpg|<center>[[Royal Guard's Spear]]</center><center>After arriving at the Docks via the secret passage in the Sanctum, go up the stairs and the chest is between the deactivated [[Guardian]]s.</center> | |||
File:HWAoC-Calamity-Strikes-Chest-05.jpg|<center>[[Knight's Broadsword]]</center><center>After arriving at the Docks via the secret passage in the Sanctum, go to the furthest dock to the east to find the chest.</center> | |||
File:HWAoC-Calamity-Strikes-Chest-06.jpg|<center>[[Royal Guard's Claymore]]</center><center>In the Library, under the northern stairs in [[King Rhoam]]'s Study.</center> | |||
File:HWAoC-Calamity-Strikes-Chest-07.jpg|<center>[[Topaz]] x5</center><center>Use [[Remote Bomb (Rune)|Remote Bombs]] to destroy a wall in a hallway past the library.</center> | |||
File:HWAoC-Calamity-Strikes-Chest-08.jpg|<center>100 [[Rupee]]s</center><center>After the Library and through the long hallway, climb the stairs and the chest is on the balcony just before exiting the room.</center> | |||
File:HWAoC-Calamity-Strikes-Chest-09.jpg|<center>[[Ancient Overclock Unit]]</center><center>After exiting the Library and past the room with [[Bokoblin]]s, turn right to find the chest in the hallway.</center> | |||
</gallery></center> | |||
<section end=treasure /> | <section end=treasure /> | ||
| Line 66: | Line 92: | ||
{{See also|Age of Calamity Koroks}} | {{See also|Age of Calamity Koroks}} | ||
<section begin=koroks /> | <section begin=koroks /> | ||
<center><gallery widths="740px" heights="600px"> | |||
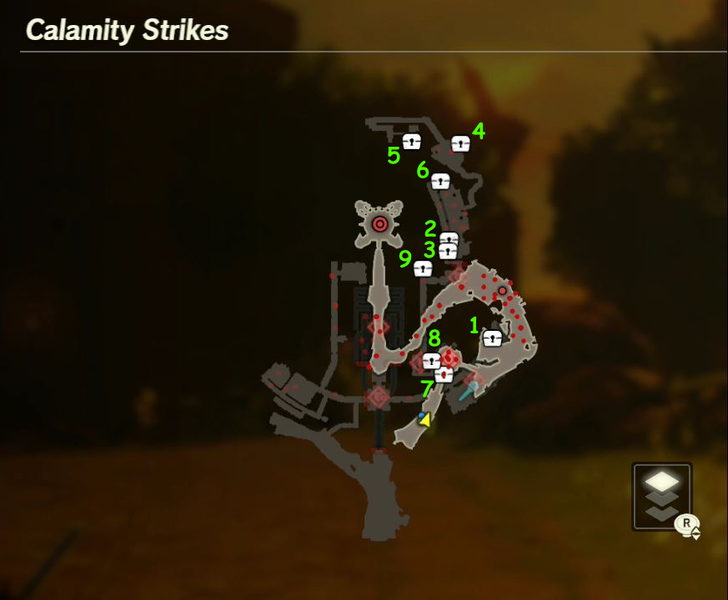
File:Calamity-Strikes-Map-1.png|<center>There are 7 Koroks found in [[Calamity Strikes]]</center> | |||
File:Calamity-Strikes-Map-2.png|<center>There are 7 Koroks found in [[Calamity Strikes]]</center> | |||
</gallery></center> | |||
<gallery widths="400px" heights="220px"> | |||
File:Calamity-Strikes-01.jpg|<center>After clearing the first outpost, turn to the left and you'll find a tree stump by the water.</center><!-- Set A --> | |||
File:Calamity-Strikes-02.jpg|<center>After going through the Hidden Passage, don't go up the stairs. Instead go down to the docks to find a pinwheel.</center><!-- Set A --> | |||
File:Calamity-Strikes-03.jpg|<center>Also down by the docks, cross the bridge and break the wooden create to find the Korok.</center><!-- Set A --> | |||
File:Calamity-Strikes-04.jpg|<center>After defeating the [[Guardian]]s in the Library, climb the steps to the second floor. The Korok is hiding in the crates at the southwest part of the room.</center><!-- Set A --> | |||
File:Calamity-Strikes-05.jpg|<center>After exiting the Library and climbing some steps, there are some hallways to travel through before reaching the Dining Hall. There are several cracked walls within the hallway. Use [[Remote Bomb (Rune)|Remote Bombs]] to reveal a pinwheel behind one of them.</center><!-- Set A --> | |||
File:Calamity-Strikes-07.jpg|<center>Examine the glowing spot just outside the large room with the White-Maned [[Lynel]] to the south.</center><!-- Confirmed --> | |||
File:Calamity-Strikes-06.jpg|<center>There is a room just northeast of the Dining Hall, at the end of the hallways. Examine the pinwheel to get the Korok.</center><!-- Set A --> | |||
</gallery> | |||
<section end=koroks /> | <section end=koroks /> | ||
| Line 83: | Line 115: | ||
{{References}} | {{References}} | ||
{{clear}} | |||
{{Listbox|Age of Calamity Scenarios}} | {{Listbox|Age of Calamity Scenarios}} | ||
{{Cat|Age of Calamity Scenarios}} | {{Cat|Age of Calamity Scenarios}} | ||
Latest revision as of 17:10, June 20, 2023
| Spoiler Alert! This article describes a subject that is sensitive to plot development. |
| This article is a stub. You can help the Zelda Dungeon Wiki by expanding it. |

Number | Chapter 5-1 | |
Games | ||
Stage | ||
Conditions | Restricted Allies | |
Previous | EX Guardian of Remembrance (story) | |
Next | EX The Princess and the King (story) | |
Boss | ||
Mini-bosses | ||
Enemies | ||
Battlefield-Specific Materials | ||
Warriors | ||
Allies | Link, Zelda, Impa (if not selected for play) | |
Recommended Level | Lv. 38 | |
"Calamity Ganon has returned sooner than was predicted. The party fights desperately against monsters and Guardians as they escape from Hyrule Castle."
Calamity Strikes is the first scenario of Age of Calamity Chapter 5.
- Victory Condition:
- Defeat Condition:
Objectives
Cutscenes
The Turning Point
"The Royal Ancient Lab completes its analysis of the little Guardian, but Robbie and Purah are abruptly attacked by Yiga Clan infiltrators. Purah entrusts the Sheikah Slate to the little Guardian, who flees the lab in search of Zelda."
Calamity Strikes [text]
"Accompanied by Link and Impa, Zelda sets out for the Spring of Wisdom on Mount Lanayru to train. She steels herself, knowing that this is her last chance to awaken her powers. At the moment Zelda crosses the bridge, Calamity Ganon suddenly revives and descends on the castle."
Disastrous Interference
"On the way to their Divine Beasts, each of the Champions witnesses the sudden revival of Calamity Ganon. Matters are made worse as the Sheikah Towers simultaneously shut down due to Calamity Ganon's influence."
Duty
"The Guardians, now under the control of Calamity Ganon, begin to attack Zelda, Link, and the others. Just as one has the princess and her protector in its sights, King Rhoam arrives to save them. The king reminds Link of his duty to the princess then remains behind as the pair flee the castle."
In the Midst of Despair...
"Based on information from the little Guardian, Zelda learns that the Divine Beasts will also be taken over by Calamity Ganon. Frustrated by her own powerlessness, Zelda cries out in anguish. As her tears fall, the Guardian suddenly emits a strange light..."
Dialogue
| Character Speaking | Dialogue |
|---|---|
| . |
Treasure Chests
- See also: Age of Calamity Treasure Chests
There are 9 treasure chests found in Calamity Strikes.

Amber x3 Behind a tree to the left just past the first outpost. 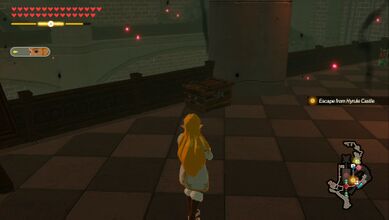
300 Rupees In the Library on the balcony just before exiting toward the south. 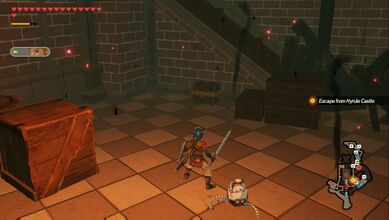
300 Rupees In the southwest corner of the Library. 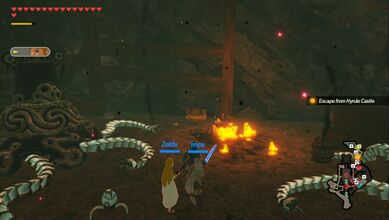
Royal Guard's Spear After arriving at the Docks via the secret passage in the Sanctum, go up the stairs and the chest is between the deactivated Guardians. 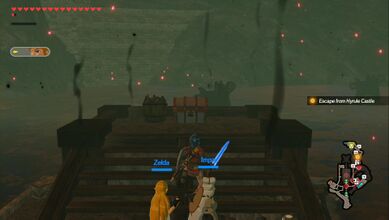
Knight's Broadsword After arriving at the Docks via the secret passage in the Sanctum, go to the furthest dock to the east to find the chest. 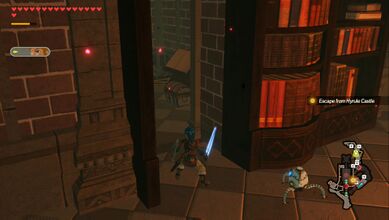
Royal Guard's Claymore In the Library, under the northern stairs in King Rhoam's Study. 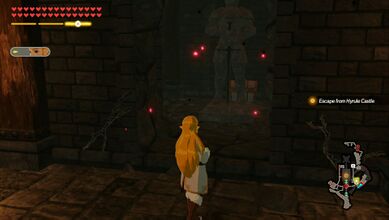
Topaz x5 Use Remote Bombs to destroy a wall in a hallway past the library. 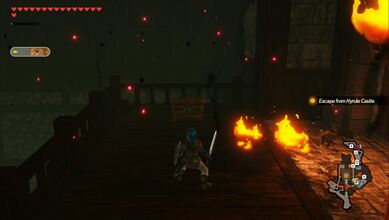
100 Rupees After the Library and through the long hallway, climb the stairs and the chest is on the balcony just before exiting the room. 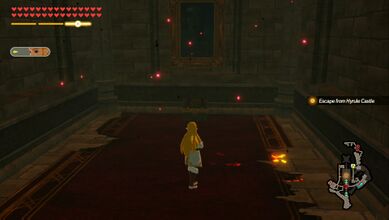
Ancient Overclock Unit After exiting the Library and past the room with Bokoblins, turn right to find the chest in the hallway.


Koroks
- See also: Age of Calamity Koroks
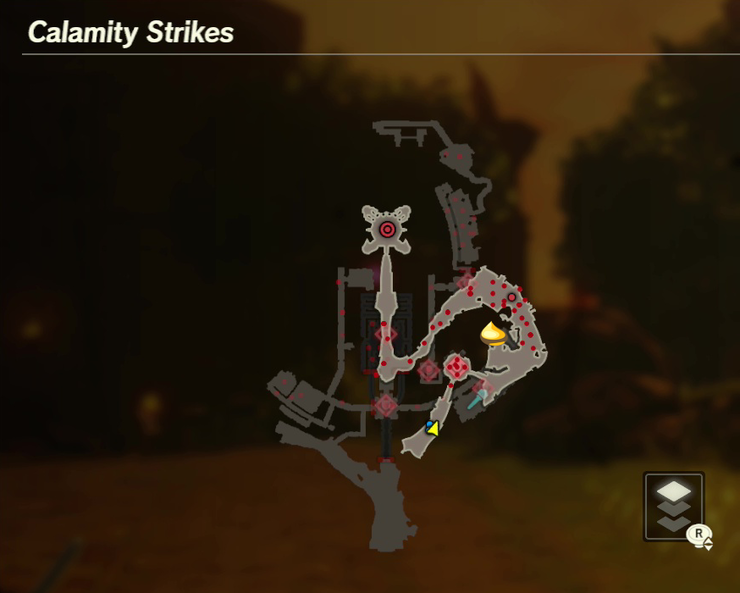
There are 7 Koroks found in Calamity Strikes 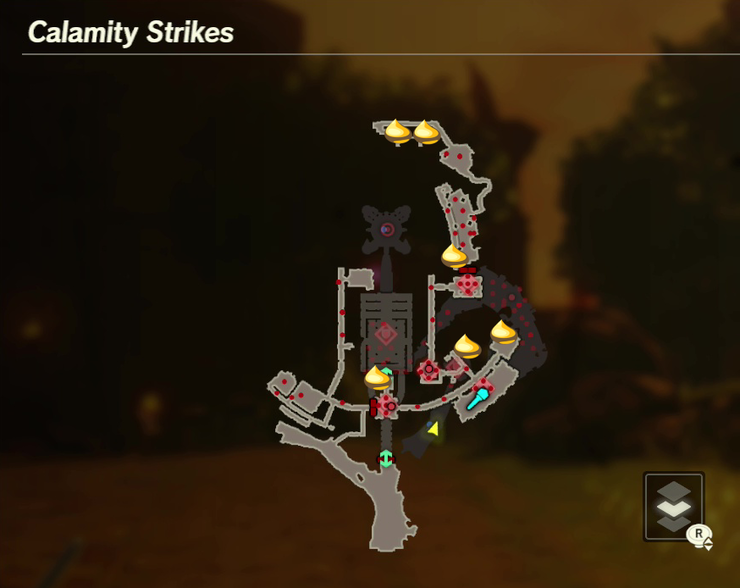
There are 7 Koroks found in Calamity Strikes


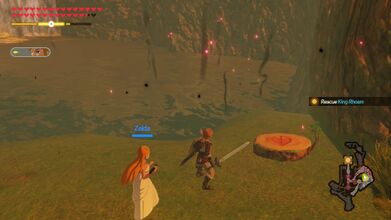
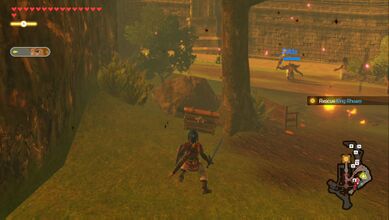
After clearing the first outpost, turn to the left and you'll find a tree stump by the water. 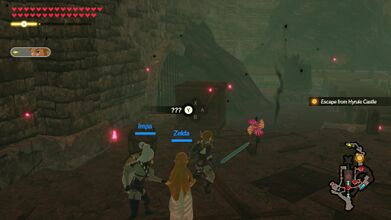
After going through the Hidden Passage, don't go up the stairs. Instead go down to the docks to find a pinwheel. 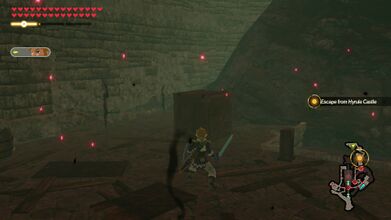
Also down by the docks, cross the bridge and break the wooden create to find the Korok. 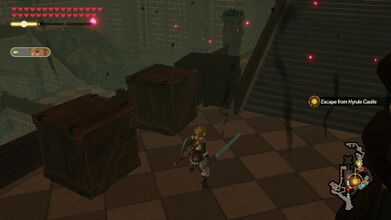
After defeating the Guardians in the Library, climb the steps to the second floor. The Korok is hiding in the crates at the southwest part of the room. 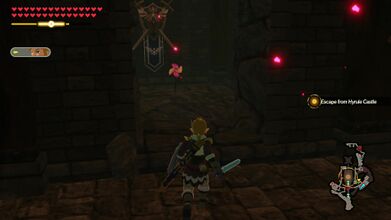
After exiting the Library and climbing some steps, there are some hallways to travel through before reaching the Dining Hall. There are several cracked walls within the hallway. Use Remote Bombs to reveal a pinwheel behind one of them. 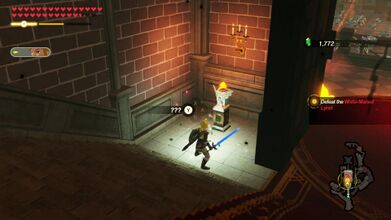
Examine the glowing spot just outside the large room with the White-Maned Lynel to the south. 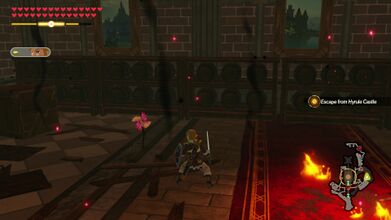
There is a room just northeast of the Dining Hall, at the end of the hallways. Examine the pinwheel to get the Korok.


