Bottle Grotto: Difference between revisions
Jump to navigation
Jump to search
Want an adless experience? Log in or Create an account.
m (Text replacement - "<br>" to "<br/>") |
|||
| (9 intermediate revisions by 6 users not shown) | |||
| Line 1: | Line 1: | ||
{{ | {{Infobox|dungeon | ||
|name = Bottle Grotto | |name = Bottle Grotto | ||
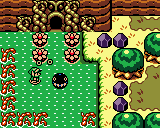
|image = [[File: | |image = [[File:BottleGrottoEntrance.png]] | ||
|boss = [[Genie]] | |boss = [[Genie]] | ||
|miniboss = [[Hinox]] | |miniboss = [[Hinox]] | ||
|location = [[ | |location = [[Goponga Swamp]] | ||
| | |item = [[Power Bracelet]]<br/>[[Heart Container]] | ||
|game = ''[[The Legend of Zelda: Link's Awakening|Link's Awakening]]'' | |game = ''[[The Legend of Zelda: Link's Awakening|Link's Awakening]]'' | ||
|reward = [[Conch Horn]] | |reward = [[Eight Instruments of the Sirens#Conch Horn|Conch Horn]] | ||
}} | }} | ||
'''Bottle Grotto''' is the second | '''Bottle Grotto''' is the second [[Dungeon]] in ''[[The Legend of Zelda: Link's Awakening|Link's Awakening]]''. | ||
== Layout == | |||
[[File:BottleGrotto.png|600px]] | |||
==Enemies== | ==Enemies== | ||
[[Stalfos]] <br> | [[Stalfos]] <br/> | ||
[[Stalfos Knight]] <br> | [[Stalfos Knight]] <br/> | ||
[[Mask-Mimic]] <br> | [[Mask-Mimic]] <br/> | ||
[[Hinox]] (Mini-Boss) <br> | [[Hinox]] (Mini-Boss) <br/> | ||
[[Vacuum]] <br> | [[Vacuum Mouth]] <br/> | ||
[[Boo Buddy]] <br> | [[Boo Buddy]] <br/> | ||
[[Shrouded Stalfos]] <br> | [[Shrouded Stalfos]] <br/> | ||
[[Pols Voice]] <br> | [[Pols Voice]] <br/> | ||
[[Genie]] (Boss) | [[Genie]] (Boss) | ||
{{MagicNavbox|Link's Awakening|Dungeons}} | |||
{{Cat|Link's Awakening Dungeons}} | {{Cat|Link's Awakening Dungeons}} | ||
{{Cat|Link's Awakening Locations}} | |||
Revision as of 13:44, January 30, 2015
Bottle Grotto

Games | ||
Location | ||
Boss | ||
Mini-bosses | ||
Items | ||
Rewards | ||
Bottle Grotto is the second Dungeon in Link's Awakening.
Layout

Enemies
Stalfos
Stalfos Knight
Mask-Mimic
Hinox (Mini-Boss)
Vacuum Mouth
Boo Buddy
Shrouded Stalfos
Pols Voice
Genie (Boss)