Beneath the Well: Difference between revisions
m (Text replacement - "Magic Hag's Potion Shop" to "Magic Hags' Potion Shop") |
mNo edit summary |
||
| (3 intermediate revisions by 3 users not shown) | |||
| Line 5: | Line 5: | ||
| item = [[Mirror Shield]] | | item = [[Mirror Shield]] | ||
| miniboss = [[Big Poe]] | | miniboss = [[Big Poe]] | ||
| boss = | | boss = | ||
| pointsint = [[Fairy Fountain]] | | pointsint = [[Fairy Fountain]] | ||
| reward = | | reward = | ||
| walkthrough = [https://www.zeldadungeon.net/majoras-mask-walkthrough/well-and-ikana-castle/#c11_2 Text Walkthrough] | | walkthrough = [https://www.zeldadungeon.net/majoras-mask-walkthrough/well-and-ikana-castle/#c11_2 Text Walkthrough] | ||
}} | }} | ||
| Line 51: | Line 51: | ||
==Enemies== | ==Enemies== | ||
<gallery widths=100 heights=100 caption="Enemies Beneath the Well" perrow=9> | |||
File:Big-Poe.png|link Big Poe|[[Big Poe]] | |||
File:Black Boe.png|link=Black Boe|[[Black Boe]] | |||
File:Withered-Deku-Baba-MM.png|link=Deku Baba|[[Deku Baba]] | |||
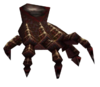
File:Dexihand.png|link=Dexihand|[[Dexihand]] | |||
File:Freezard.png|link=Freezard|[[Freezard]] | |||
File:Gibdo (Ocarina of Time).png|link=Gibdo|[[Gibdo]] | |||
File:Ice Keese.png|link=Ice Keese|[[Ice Keese]] | |||
File:Mini Baba.png|link=Mini Baba|[[Mini Baba]] | |||
File:Wallmaster.png|link=Wallmaster|[[Wallmaster]] | |||
</gallery> | |||
==Trivia== | ==Trivia== | ||
* The [[Gibdo]]s found | * The [[Gibdo]]s found Beneath the Well are harmless when [[Link (Ocarina of Time)#Majora's Mask|Link]] wears the [[Gibdo Mask]]. They also recover health if injured. | ||
* The [[Fairy Fountain]] in the | * The [[Fairy Fountain]] in the Beneath the Well area is the only fountain in [[Termina]] that is not a [[Great Fairy Fountain]]. | ||
* | * Beneath the Well is the only location in [[Termina]] that has [[Eye Switch#Flaming Eye Switch|Flaming Eye Switches]]. | ||
==Gallery== | ==Gallery== | ||
<gallery widths=160> | <gallery widths=160> | ||
File:Well Entrance - MM64.png|The | File:Well Entrance - MM64.png|The main entrance to the Well | ||
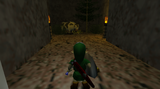
File:Beneath the Well.jpg|Interior entrance of the | File:Beneath the Well.jpg|Interior entrance of the Well | ||
File:Majora Cows - Beneath the Well Cow - MM64.png|The [[cow]] in the room needing [[Hot Spring Water]] to enter | File:Majora Cows - Beneath the Well Cow - MM64.png|The [[cow]] in the room needing [[Hot Spring Water]] to enter | ||
File:Fairy Fountain Beneath the Well - MM64.png|[[Fairy Fountain]] | File:Fairy Fountain Beneath the Well - MM64.png|[[Fairy Fountain]] | ||
</gallery> | </gallery> | ||
{{Listbox|Majora's Mask Locations}} | {{Listbox|Majora's Mask Locations}} | ||
{{Cat|Majora's Mask Locations}} | {{Cat|Majora's Mask Locations}} | ||
{{Cat|Majora's Mask Dungeons}} | |||
Latest revision as of 15:46, October 6, 2023

Overhead map of Beneath the Well, with labels (click to enlarge)
Games | ||
Mini-bosses | ||
Points of | ||
Items | ||
| Guides | ||
|---|---|---|
Walkthrough | ||
Beneath the Well, also referred to as the Empty Well, is a location in Majora's Mask. It contains the Mirror Shield, which is required to enter the Ancient Castle of Ikana.
The inside of the well centers around the premise of finding items for Gibdos that guard certain doorways. Completion requires the Gibdo Mask, Magic Beans that must be purchased at the Deku Palace or from a Business Scrub, a Blue Potion (or Red Potion in Majora's Mask 3D), and at least one Bottle that should already have been obtained from the Zora Egg quest in Great Bay. All other items, listed below, may be purchased ahead of time for convenience but can be obtained at specific places within the well.
For easier reference, a table and map has been listed showing each Gibdo's request as well as quantity needed. A link to the Text Walkthrough is also provided.
| Gibdo Location | Item Requested | Location Found | Note(s) |
|---|---|---|---|
| Room A | Blue Potion (N64) Blue OR Red Potion (MM3D) |
Magic Hags' Potion Shop (requires Magic Mushroom) Ikana Canyon Business Scrub |
Optional, but obtaining further items might require leaving the well. |
| Room A | Magic Bean (N64: ×5) | Deku Palace Southern Swamp Business Scrub |
Required To Complete |
| Room B | Fish | Room B | Leads to Hot Spring Water |
| Room B | Spring Water | Room B | Leads to Room C |
| Room C | Bug | Room C behind web | Optional, leads to a Fairy Fountain |
| Room C | Bug | Room C | Optional, leads to a chest with Purple Rupee |
| Room E | Fish | Room B | Required To Complete |
| Room E | Deku Nut (N64: ×10) | Room G | Leads to Room F |
| Room F | Hot Spring Water | Room D | Leads to Room K with a cow for milk |
| Room F | Bomb (N64: ×10) | Room C | Leads to a room with Big Poe |
| Room G | Bug | Rooms C, F or H | Optional, leads to a chest with Purple Rupee |
| Room G | Big Poe | Room J | Required To Complete |
| Room H | Milk | Room K (Use Epona's Song) or purchase elsewhere. | Required To Complete, leads to chest with Mirror Shield and exit |
Enemies
- Enemies Beneath the Well


Trivia
- The Gibdos found Beneath the Well are harmless when Link wears the Gibdo Mask. They also recover health if injured.
- The Fairy Fountain in the Beneath the Well area is the only fountain in Termina that is not a Great Fairy Fountain.
- Beneath the Well is the only location in Termina that has Flaming Eye Switches.
Gallery
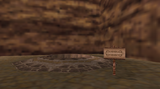
The main entrance to the Well
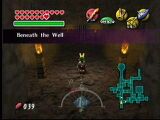
Interior entrance of the Well
The cow in the room needing Hot Spring Water to enter


