Barinade: Difference between revisions
No edit summary |
mNo edit summary |
||
| (10 intermediate revisions by 3 users not shown) | |||
| Line 1: | Line 1: | ||
{{Infobox|boss | {{Infobox|boss | ||
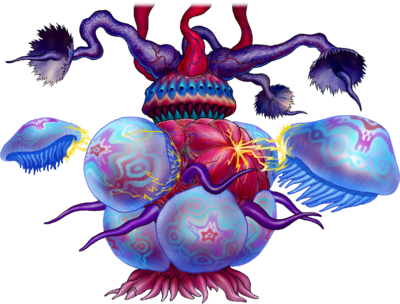
| image = [[File:Barinade-Ocarina.png| | | image = [[File:Barinade-Ocarina.png|400px]] | ||
| title = Bio-electric Anemone | | title = Bio-electric Anemone | ||
| threat = 5 | | threat = 5 | ||
| attack = {{H|0.25}} Electric Beam <br/> {{H|0.25}} Contact with jellyfish <br/> {{H|0.25}} Contact with main body | | attack = {{H|0.25}} Electric Beam <br/> {{H|0.25}} Contact with jellyfish <br/> {{H|0.25}} Contact with main body | ||
| game = ''[[The Legend of Zelda: Ocarina of Time|Ocarina of Time]]'' | | game = ''[[The Legend of Zelda: Ocarina of Time|Ocarina of Time]]'' | ||
| dungeon = [[ | | dungeon = [[Inside Jabu-Jabu's Belly]] | ||
| weapon = [[Boomerang]]<br/>[[Deku Stick]]<br/>[[Kokiri Sword]] | | weapon = [[Boomerang]]<br/>[[Deku Stick]]<br/>[[Kokiri Sword]] | ||
| reward = [[Heart Container]]<br/>[[Zora's Sapphire]] | | reward = [[Heart Container]]<br/>[[Zora's Sapphire]] | ||
| related = | |||
}} | }} | ||
{{Navi}} | {{Navi}} | ||
'''Bio-electric Anemone: Barinade''', more simply known as '''Barinade''', is | '''Bio-electric Anemone: Barinade''', more simply known as '''Barinade''', is the [[boss]] of [[Inside Jabu-Jabu's Belly]], the third [[dungeon]] in ''[[The Legend of Zelda: Ocarina of Time|Ocarina of Time]]''.{{Ref|''[[The Legend of Zelda: Encyclopedia]]'', pg. 165}} Defeating this creature results in [[Link (Ocarina of Time)|Link]] saving [[Ruto]] and eventually being gifted with one of the [[Spiritual Stones]], the [[Zora's Sapphire]]. | ||
==Strategy== | ==Strategy== | ||
This giant jellyfish-like creature appears as soon as Link enters the boss room. During the first phase, Link must detach Barinade from the ceiling with the aid of the [[Boomerang]]. This is done rather easily by targeting the tentacles and tossing the Boomerang. | This giant jellyfish-like creature appears as soon as [[Link (Ocarina of Time)|Link]] enters the boss room. During the first phase, Link must detach Barinade from the ceiling with the aid of the [[Boomerang]]. This is done rather easily by targeting the tentacles and tossing the Boomerang. | ||
Once Barinade is on the ground, the [[Bari]] that were attached | Once Barinade is on the ground, the [[Bari]] that were attached to the boss come off and begin spinning around it. At this point, Link can use the Boomerang on its vulnerable body, paralyzing it. Whenever Barinade is paralyzed, Link can either attack the Bari or directly strike Barinade's body. Link can attack with the [[Kokiri Sword]], using a jump attack to do more damage.{{Ref|OoT|756|Kokiri}} Hitting Barinade during this phase will also cause some of the nearby Bari to die. When all the Bari have been defeated, the second phase of the battle begins. | ||
Barinade rises out of the ground, revealing and releasing more Bari. It then begins to move quickly around the arena with the Bari spinning around it rapidly. Link needs to continuously throw the Boomerang at Barinade's body to eventually hit it and paralyze it yet again. Once it is paralyzed, Link can then either defeat the Bari or Barinade itself. This time, defeating the Bari weakens its defenses, as it creates a gap in the spinning circle that orbits Barinade when it chases Link. That gap makes it much easier and quicker to hit Barinade's body again once he is no longer stunned and resumes chasing Link. Continue to attack Barinades body until he has been defeated. | Barinade rises out of the ground, revealing and releasing more Bari. It then begins to move quickly around the arena with the Bari spinning around it rapidly. Link needs to continuously throw the Boomerang at Barinade's body to eventually hit it and paralyze it yet again. Once it is paralyzed, Link can then either defeat the Bari or Barinade itself. This time, defeating the Bari weakens its defenses, as it creates a gap in the spinning circle that orbits Barinade when it chases Link. That gap makes it much easier and quicker to hit Barinade's body again once he is no longer stunned and resumes chasing Link. Continue to attack Barinades body until he has been defeated. | ||
==Reward== | ==Reward== | ||
After Link is successful in defeating Barinade, Barinade's remains turn into a [[Heart Container]]. Once Link grabs it, he meets with Ruto, who then bestows upon him the third and final Spiritual Stone, Zora's Sapphire.{{Ref|OoT|1313|Ruto}}{{Ref|OoT|1314|Ruto}} | After Link is successful in defeating Barinade, Barinade's remains turn into a [[Heart Container]]. Once Link grabs it, he meets with Ruto, who then bestows upon him the third and final Spiritual Stone, Zora's Sapphire.{{Ref|OoT|1313|[[Ruto]]}}{{Ref|OoT|1314|[[Ruto]]}} | ||
==Gallery== | ==Gallery== | ||
<gallery> | ===''Ocarina of Time'' (N64)=== | ||
<gallery widths=160> | |||
File:Barinade.jpg | File:Barinade.jpg | ||
File:Barinade_1.png | File:Barinade_1.png | ||
| Line 30: | Line 32: | ||
</gallery> | </gallery> | ||
== | ===''Ocarina of Time 3D''=== | ||
<gallery widths=200 heights=120> | |||
File:Barinade-1.jpg | |||
File:Barinade-2.jpg | |||
File:Barinade-3.jpg | |||
File:Barinade-4.jpg | |||
File:Barinade-5.jpg | |||
File:Barinade-6.jpg | |||
</gallery> | |||
{{References}} | {{References}} | ||
{{clear}} | |||
{{Listbox|Ocarina of Time Bosses}} | |||
{{Cat|Ocarina of Time Bosses}} | {{Cat|Ocarina of Time Bosses}} | ||
Latest revision as of 20:42, February 4, 2024
Title | Bio-electric Anemone | |
Games | ||
Dungeons | ||
Rewards | ||
Threat | ||
Attacks |
| |
Effective | ||
Barinade |
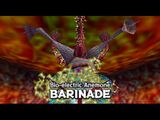
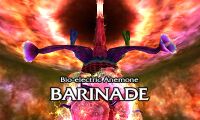
Bio-electric Anemone: Barinade, more simply known as Barinade, is the boss of Inside Jabu-Jabu's Belly, the third dungeon in Ocarina of Time.[1] Defeating this creature results in Link saving Ruto and eventually being gifted with one of the Spiritual Stones, the Zora's Sapphire.
Strategy
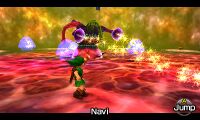
This giant jellyfish-like creature appears as soon as Link enters the boss room. During the first phase, Link must detach Barinade from the ceiling with the aid of the Boomerang. This is done rather easily by targeting the tentacles and tossing the Boomerang.
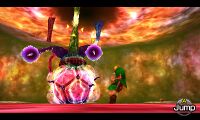
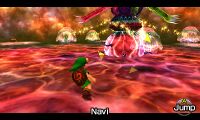
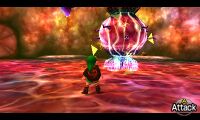
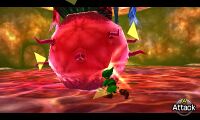
Once Barinade is on the ground, the Bari that were attached to the boss come off and begin spinning around it. At this point, Link can use the Boomerang on its vulnerable body, paralyzing it. Whenever Barinade is paralyzed, Link can either attack the Bari or directly strike Barinade's body. Link can attack with the Kokiri Sword, using a jump attack to do more damage.[2] Hitting Barinade during this phase will also cause some of the nearby Bari to die. When all the Bari have been defeated, the second phase of the battle begins.
Barinade rises out of the ground, revealing and releasing more Bari. It then begins to move quickly around the arena with the Bari spinning around it rapidly. Link needs to continuously throw the Boomerang at Barinade's body to eventually hit it and paralyze it yet again. Once it is paralyzed, Link can then either defeat the Bari or Barinade itself. This time, defeating the Bari weakens its defenses, as it creates a gap in the spinning circle that orbits Barinade when it chases Link. That gap makes it much easier and quicker to hit Barinade's body again once he is no longer stunned and resumes chasing Link. Continue to attack Barinades body until he has been defeated.
Reward
After Link is successful in defeating Barinade, Barinade's remains turn into a Heart Container. Once Link grabs it, he meets with Ruto, who then bestows upon him the third and final Spiritual Stone, Zora's Sapphire.[3][4]
Gallery
Ocarina of Time (N64)
Ocarina of Time 3D
References
- ↑ The Legend of Zelda: Encyclopedia, pg. 165
- ↑ "Hey, let's work on some moves! To jump sideways while (Z) Targeting, press (A) as you move right or left. To do a backflip while (Z) Targeting, press (A) as you move backwards. To do a roll attack while (Z) Targeting, press (A) as you move forward. While you roll, you can avoid damage. If you have your sword ready while (Z) Targeting, you can do a jump attack by pressing (A)! A jump attack does double damage! You can use (Z) Targeting on the stone next to me, so let's practice!" — Kokiri, Ocarina of Time.
- ↑ "You mean the Spiritual Stone of Water, Zora's Sapphire, don't you?" — Ruto, Ocarina of Time.
- ↑ "My mother gave it to me and said I should give it only to the man who will be my husband. You might call it the Zora's Engagement Ring! All right! I'll give you my most precious possession: Zora's Sapphire!" — Ruto, Ocarina of Time.


