We Chat With Award-Winning Cosplayer HikikoMuri About Bringing Princess Zelda To Life In A Stunning Photo-Shoot
Posted on May 24 2019 by Judy Calder
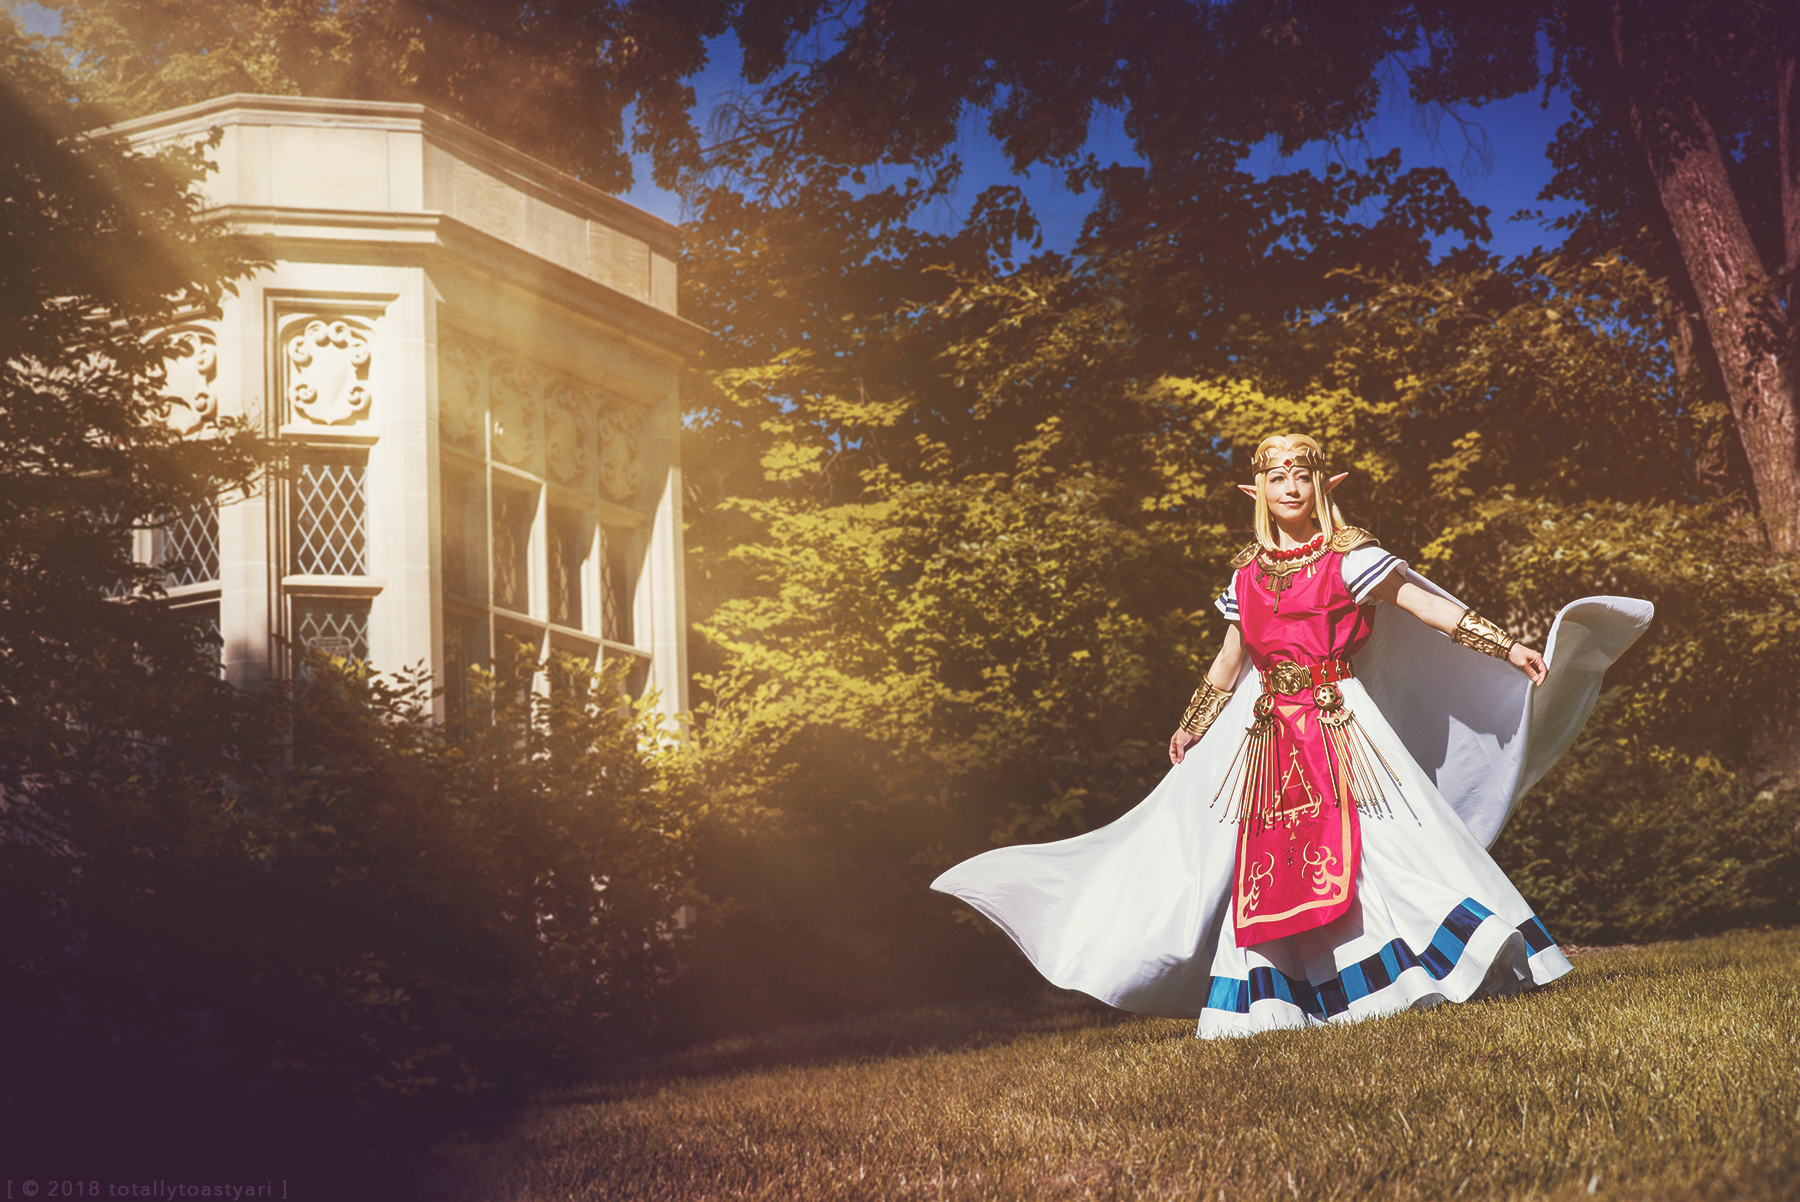
Award winning cosplayer, HikikoMuri recently brought our favorite princess to life in a The Legend of Zelda themed photo-shoot, with the help of photographer, Arielle Somberg. Princess Zelda is a staple in the cosplay world, with many attempting to do her character justice over the years, and it looks as though HikikoMuri has certainly pulled it off! The Chicago area cosplayer told us all about her passion for the Zelda series, and how one of her favorite games, A Link to the Past, influenced this cosplay photo-shoot.


What made you want to cosplay as Princess Zelda?
As a small child, I really loved The Legend of Zelda, and I especially loved that the game was named after the princess. I always wanted to dress up and pretend to be her, but it wasn’t until A Link to the Past that I fell completely in love. She was even the princess that I drew the most fanart of! She’s been on my list since the very beginning!
What time went in to creating the costume?
Because A Link to the Past is my favorite Princess Zelda design, I wanted to make sure that my skills were good enough to make the outfit to the best of my ability. Upon the announcement of the first Twitch Cosplay Contest at TwitchCon, I felt this costume would be well-suited for it, and now was as good a time as ever to get started! However, I didn’t work on this costume for one big block of time, as I had a bunch of other deadlines to meet — and miss! The total work time was about seven to eight months. I spent around four months through the summer of 2016 but was unable to finish the costume in time for that year’s contest. I then spent around four months on the costume in the summer of 2017, when I was able to finish it just eight hours before the judging for that year. I won second place overall!
Did you come up against any artistic challenges when creating this cosplay?
I’d say most of the costume presented challenges for me. Underlining the dress panels with silk organza was much harder than expected. I ended up basting it all by hand because I couldn’t get the silk to hold still while using my machine! Patterning the cape was pretty difficult too, because among other things, I wanted to add some pleats in the back for embellishment. I actually tried to skip the mock up in the interest of time in 2016, but it really blew up in my face in the end! I had to start all over again on the patterns, and buy more fabric, but the end result turned out much better than it would have before. I definitely didn’t skip the mock up the second time!
I ran into a problem with how I was sculpting the models for the armor pieces and belt buckle. I was using ‘Super Sculpey’ over a wire-form base, but since Super Sculpey shrinks about two percent in the oven, it caused the wire-form to flatten in places. Once the models were molded and ready to be slush cast, I had to reform things as they were curing, which was very challenging and lots of trial and error was involved. Thankfully, this method worked for this costume, but suffice to say, I will not be using it for future costumes.
The belt had it’s challenges too. It had been about five years since I’d done any leather work, and I’d bought a very ‘hairy’ belt blank for this costume on sale. I had to shave it down the inside to avoid having it shed all over my dress, which took much longer than expected. I also couldn’t find a leather dye that came in the color I wanted, so I ended up airbrushing it with Createx Airbrush Paint, which has proven to be quite flexible.
The tabard also gave me trouble. Satin stitching complex curves are not for the faint of heart, and I ended up redoing many areas to get smooth lines. I also had to be careful with what adhesive I used for the red triforce pieces too. They were silk dupioni, and simply using Heat ‘n’ Bond causes the texture of the adhesive to penetrate and be visible on the outside of the fabric. In the end I went with smooth fusible adhesive, which was undetectable from the outside. After the appliqué was all stitched down though (twenty to thirty hours of work), sewing on the lining and casing at the waist was a breeze.
For the bottom dress trim, I believed that if I just cut the dupioni pieces on the bias, I would easily be able to form them to the curve of the bottom of the dress. I was wrong! So I had to go back and painstakingly take in the top portion of the trim for each square. After that though, it was perfectly formed to the bottom of the dress.
I sculpted and cast all the tiny bead pieces for the necklace and belt, and then drilled the holes for eyelets. This ended up being very time-consuming and tedious work but I was very happy with the result.
I made the last minute decision that I wanted a skin cap for my wig, and I wanted to ventilate a hairline so it would look natural. So I bought a skin cap wig and cut out the front half of the cap, replacing it with wig lace. I thought that I would have no problem getting this done in a day or two, and it took me twenty hours, with very few breaks, but I did manage to get it done in that amount of time. I really, really don’t recommend doing that, because my left shoulder ached so much afterwards!
I also made my own ear prosthetics for the first time for this costume. I believe that I recast the ears two or three times before I was satisfied with the cast. Sadly, those molds were ruined in one of my final attempts, and the models I had sculpted for it were scrapped in the de-molding process. What I learned from that is to never touch the surface of a silicon mold while casting silicon, as the only barrier between the two is a layer of mold release, meaning they will permanently bond to one another!
Did you enjoy the photo-shoot? What went well, and what didn’t?
For me, the most enjoyable part was getting the chance to collaborate with the photographer, Ari. We bounce ideas off of each other, and she tells me when a pose isn’t working, or how to adjust myself to improve a shot. She’s definitely among my favorite photographers to work with!
We were shooting at the Morton Arboretum, which is a very beautiful place with a pretty strict photo policy. This meant we could only shoot for one hour, and with the shoot falling on a Sunday, the latest we could shoot was 5:00pm. This meant that we didn’t quite get the golden hour lighting that we wanted, so we used a reflector pretty much throughout this shoot to counteract the harsh shadows from the sunlight. Inspiration-wise, we were mostly just trying to recreate a sense of being on castle grounds or gardens, so ahead of time I chose areas of the arboretum that I felt reflected that. There was one building I really wanted to shoot inside of, but it was off-limits to photography, sadly.
Another tough part about the time constraint is that I am notorious for being late if I have to put a costume on! Sure enough, we arrived with only twenty minutes to shoot. Thankfully, Ari is a wizard and can easily do a full shoot in fifteen to twenty minutes, and the arboretum is so big, we were able to stay a little longer without the staff really noticing.
Just being among all the plants, trees and stonework is very soothing, even when there are mosquitoes around! We had made preparations for the mosquitoes and the heat, which hit 85 degrees Fahrenheit that day. I made sure that I brought a holding fan and made several passes with the setting spray to keep my make up from melting. Once we entered the Reading Garden at the end of the day, we were attacked by a barrage of mosquitoes! At one point there was a mosquito just sucking away at my foot, and when I swatted it away, it left a bloody streak across my shoe! Thankfully, Ari swooped in and helped me clean my shoe before the blood dried. I think I left that garden with roughly twenty or so mosquito bites, but I knew the shoot was worth it.

- TwitchCon finalist, HikikoMuri
- TwitchCon finalist, HikikoMuri


After speaking with HikikoMuri, we got the low down on what goes on behind the camera lens from photographer Arielle Somberg.
Tell us what went on behind the scenes at this photo-shoot. Did you enjoy bringing this character to life with HikikoMuri?
Michelle and I are old friends, having met at Acen 2008. We did our first shoot together in her Twilight Princess Zelda soon after (shot with car headlights believe it or not!) and many more in the years to follow! Now that we live close by, we are finally able to collaborate more like we used to!
I was already inspired to shoot this cosplay because I got to watch her power through this costume and achieve such a milestone with it at the Twitchcon contest. So, it was an absolute yes when she asked me to do a location shoot! The Morton Arboretum was the perfect backdrop for us, since we both live close by, and the structures throughout the gardens had that Hyrule Castle feel. My artistic background is actually in painting, which I think carried over this theme of narrative that often shows up in my work. But this really works with cosplay photography and was further enforced by our fitting location.
Unfortunately, our time-slot was bit early so we had to shoot in direct sun most of the time. I prefer to work with all natural lighting when shooting outdoors, so we utilized the reflector to bounce light onto the subject. This helped to pop her out of the background, as well as to diffuse harsh light and shadows in close up shots. This allowed me to get an airy softness in the photos, despite such high contrast conditions — my husband makes for a skilled and avid lighting assistant! I solely shot with my new 85mm lens, which was mostly because it’s shiny and new, but also because it gives a shallow depth of field to portraits and really brings out details.
Michelle’s deep understanding of the character is always what brings magic into our photo-shoots. She’s able to bring their emotions to life in such a natural, graceful way that it’s easy to capture a cinematic feeling moment. It’s inspiring during the shoot and often leads us to create something truly special and beyond what we originally had envisioned! I wanted to focus a lot on the details of the costume, but also make the photos feel as if they could be stills. I always prepare for shoots by researching the character a bit, and a simple google image search usually gets the gears moving! But also knowing the parts of the costume that Michelle worked the hardest on or that were the most intricate helped dictate a number of the shots. The final set is composed of a mix of full body, atmospheric, and detail shots. To me, that’s what makes cosplay photography so fulfilling — collaborating with a cosplayer to showcase the full story of the costume, not just the character!
As much as I love shooting in the moment, I really love the editing process. I am quite slow (regardless of always being busy) because I take a lot of time to perfect one photo. Luckily for me, Michelle’s make-up required very little retouching, despite a very sweaty afternoon. So that was already a lot of time I could spend on the coloring, light, and little details in each photo. I tried to keep the coloring pretty consistent through the entire set so that together they tell a story, even though each can stand on their own. Overall, I am pretty pleased with how the shoot turned out and it was fantastic to jump back into cosplay photography in such a collaborative way!
Thanks to cosplayer HikikoMuri for taking the time to chat with us! To see more of her work, check out her Facebook, Instagram and Twitter.
Thanks also to photographer Arielle Somberg for giving us the low down on what goes on behind the scenes of a cosplay shoot! To see more of her work, check out her website, Flickr, Instagram and Facebook.
What do you think of this A Link to the Past cosplay? Let us know in the comments below!
Judy Ann Calder is the Managing Editor at Zelda Dungeon. She joined the ranks back in 2018, bringing some good old British charm to the table.
Contact: judy.calder@zeldadungeon.net
