This chapter covers the original version of Link’s Awakening DX for the Game Boy Color. If you are playing on the Nintendo Switch version, check out the Turtle Rock Walkthrough.
- Chapter 1 – Tail Cave
- Chapter 2 – Bottle Grotto
- Chapter 3 – Key Cavern
- Chapter 4 – Angler’s Tunnel
- Chapter 5 – Catfish’s Maw
- Chapter 6 – Face Shrine
- Chapter 7 – Eagle’s Tower
- Chapter 8 – Turtle Rock
- Chapter 9 – The Awakening
8.1 From Sea to Shining Sea
Once you appear back outside of Eagle’s Tower, you’ll notice your friendly blue rooster has gone missing! No worries, the rooster is fine and we can see it in just a few moments. Jump off the ledge that is on the right side of the screen. Walk right a screen and enter the cave found here. Backtrack through this cave and exit on the left side. Back outside, go left a screen, enter the cave, and make your way through this one as well.
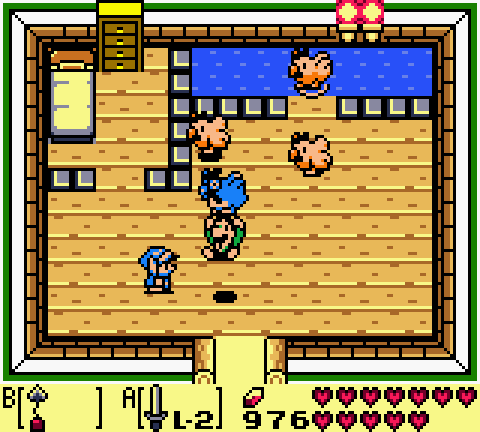
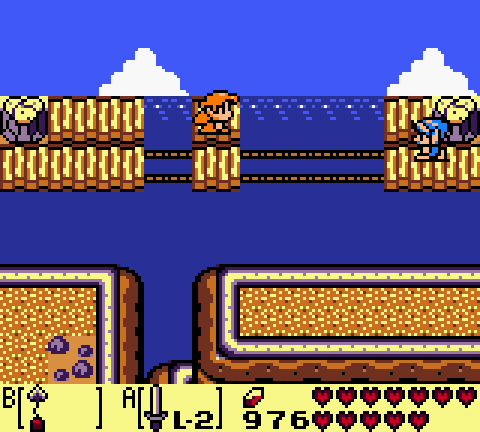
Back outside, walk left a screen and climb the large set of stairs. Continue walking left two screens and then enter the building found here. You’ll see that the blue rooster has found a new friend and he is safe here. Leave the house and go right two screens, using Roc’s Feather to jump over the gap. Move the rocks out of the way and continue walking right a screen. Walk all the way to the right and then back left and the photographer will appear. The photographer will back up and fall off the bridge and take a photo in the process. This photograph is called ‘Close Call.’ This is now the final photograph in the series, so you can see all your pictures at the photograph shop later on. For now, backtrack to the house with the rooster.
From the house with the rooster, walk left and use the hookshot to get across the broken bridge. Continue left a screen and you’ll bump into Marin! Use the hookshot to get across the bridge and save Marin in the process. Marin is about to say something to Link, but Tarin shows up and the two run off. The owl will then appear and talk to you about how the Ballad of the Wind Fish is a Song of Awakening. The owl will give you a hint on how to awaken the unliving stones and he will then fly off. Continue to the left a screen, slash at the bush, and head down the stairs.
If you haven’t gotten piece of heart #11, now is certainly the time to do so. Just place a bomb against the wall at the south end of the room to reveal a hole. Follow the path right a screen and you’ll find that piece of heart that we saw much earlier in the game but could never reach. Afterwards, head back left a screen and up a screen.
From the entrance of the cave, walk left a screen, jump off the ledge, and head down the stairs. Walk to the left a screen and use the hookshot to get across the large gap in the room. Continue left a screen and then exit the cave.
Back outside, walk left a screen, climb the steps, head right a screen, and then up a screen. Walk to the left a screen and you can open the treasure chest found here to get 50 rupees! Afterwards, lift the nearby rock to find a staircase. Walk down the steps and you’ll reach the final upgrade from Mad Batter, this one being for your arrows. Sprinkle some magic powder just like before and Mad Batter will curse you by now allowing you to carry up to 60 arrows! That’s more arrows than you’ll ever need. Exit the cave to get back outside.

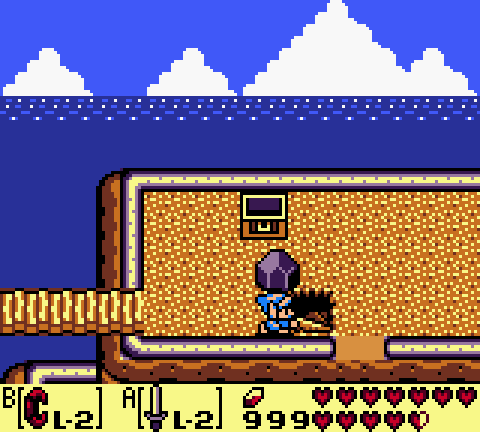
Once outside, walk left a screen, and then jump off the ledge. You will notice a part of the wall at the top of the screen is cracked, so walk over to it and place a bomb to blow it up. Enter the cave that is revealed.
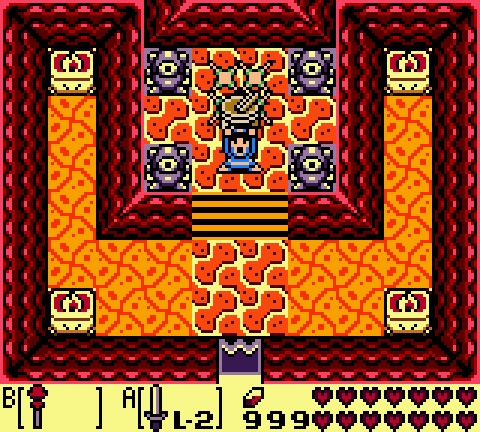
Walk up a screen and pull out your Mirror Shield. Your new shield will allow you to block the fireballs that are shooting towards you. Just hold the shield as you walk up and once you get past the fireballs, head up the staircase.
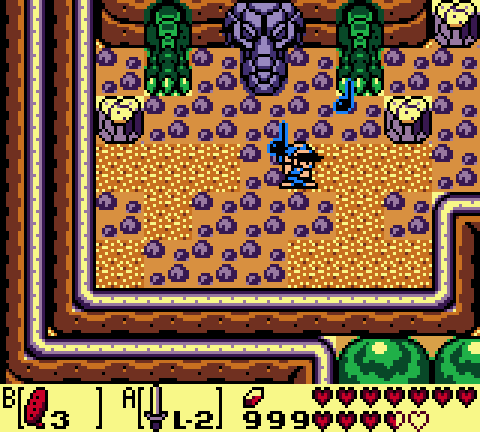
Back outside once again, walk left a screen, down a screen, and left two screens to find a Giant Turtle. This is the creature that the owl was referring to and we’ll need to bring it back to life. Pull out the Ocarina and play the Frog’s Song of Soul to bring the turtle to life. The turtle will move its head left and right, occasionally dashing towards you. Just run up and slash away with your sword. After 8 hits with the level 2 sword, the turtle head will be defeated, revealing the entrance to the next dungeon. Walk inside to take on the 8th and final dungeon, Turtle Rock.
8.2 Turtle Rock
Turtle Rock is probably the longest and most non-linear dungeon in the entire game. There are multiple pathways you can go right off the bat, but I will guide you through what I consider the fastest route.
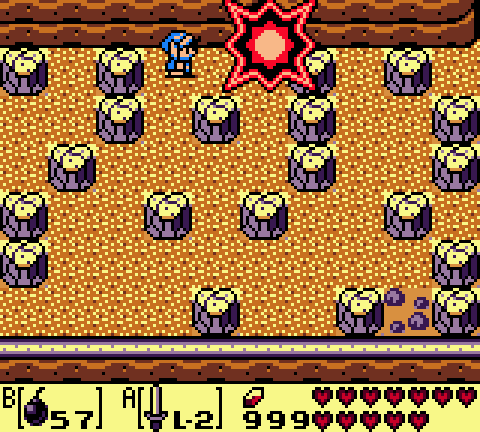
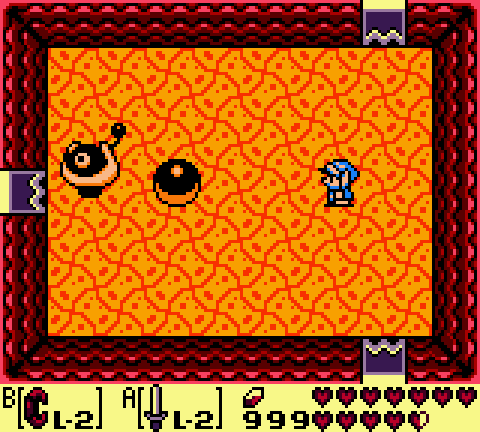
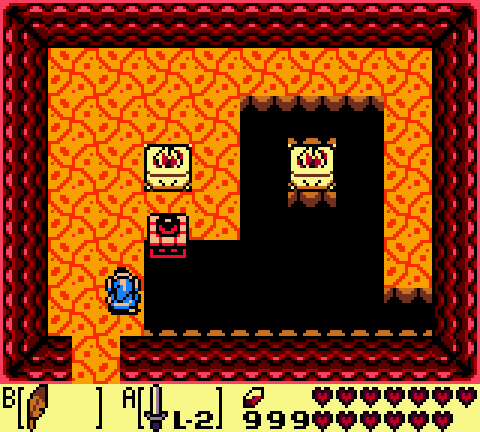
From the start of the dungeon just head up a screen and you’ll immediately find yourself facing a new enemy, a Vire. This fellow can be quite difficult to defeat as it will constantly try to avoid you. The vire will fly around the room shooting blue power balls out at you. These balls can be slashed at with your sword, or you can jump over them using Roc’s Feather. The vire will occasionally dash towards you, at which point you have a change to hit him with your sword. The vire will take two hits with your level two sword to defeat. The much easier way to defeat him is if you toss the boomerang at him, defeating him with just one hit. After the vire has been defeated, walk through the door that opens on the left.


Defeat the three Ropes that are found in this room and then head up a screen through the door that opens up. You’ll find a blue hinox in this room. Just toss your boomerang and hit him four times to defeat him. Grab the fairy that he leaves behind and then head through the door that opens on the left.
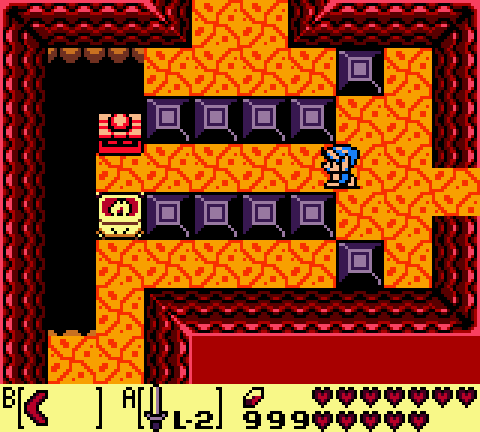
There is a moveable block in this room and once you start moving it, you can control it using the d-pad. Push it to the left four blocks, then up two, left one, and down five so that it covers all the tiles in the room. If done successfully a treasure chest will appear in this room containing 20 rupees! Collect the rupees from the treasure chest then head down a screen.
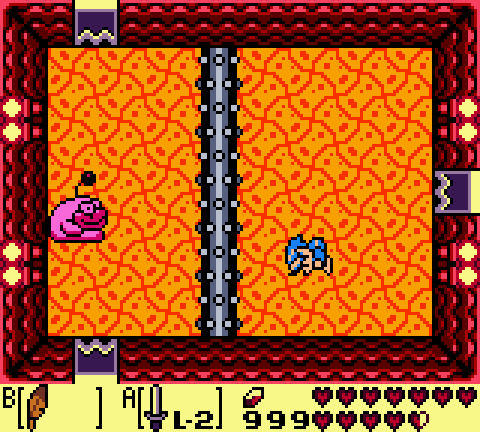
There are two sparks in this room and you can defeat each of them by using the boomerang. Open the treasure chest in this room to get some more rupees and then head left a screen. Here you will find Rolling Bones, the mini-boss from all the way back in Tail Cave. Just jump over the rolling spiked log and hit him once with the boomerang to defeat him. Once Rolling Bones is defeated, head up a screen.
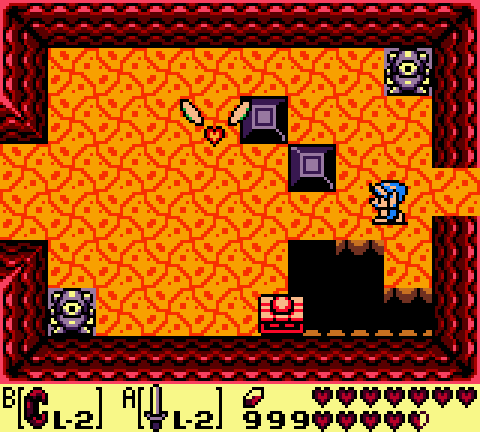
You’ll find another vire in this room, along with a single bubble. Use the boomerang to defeat the vire and then collect the key that is left for you. After getting the small key, head down two screens.
There is a green zol in this room along with a vacuum in the bottom-right corner. You can defeat the vacuum and then open the treasure chest in this room to get the Compass. At this point you can play Manbo’s Mambo if you’d like to warp back to the dungeon entrance. Otherwise, you’ll have some backtracking to do. From the room with the compass, head up a screen, right a screen, up a screen, right a screen, down a screen, and right a screen to get back to the room with the first vire.


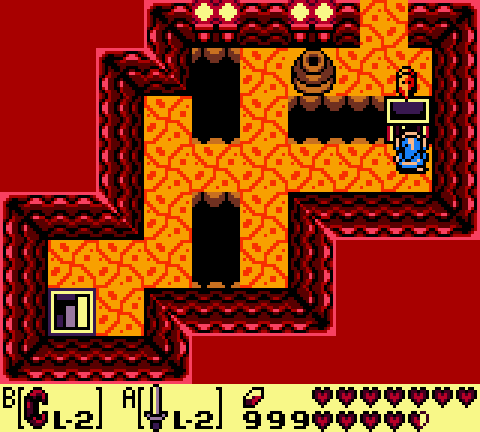
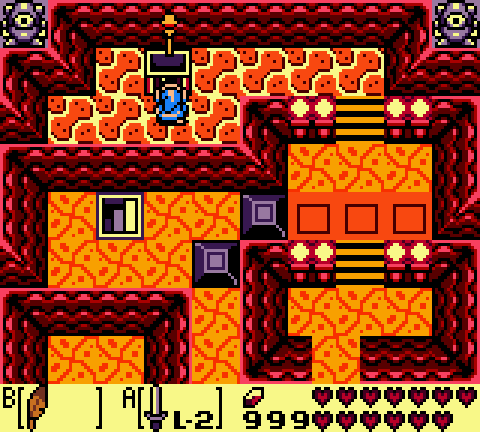
From here, jump over the lava and head up a screen. Continue right a screen and you’ll see another moving platform that you can push. Push it up two blocks and left two blocks. Follow the path that you created and head left a screen. You’ll find a treasure chest, but it is behind three blocks. Push the top and bottom block to the left, and then push the middle block down. Walk over and open the treasure chest to get the Dungeon Map.
In the same room with the dungeon map, you’ll see a crack on the north wall. Place a bomb and this will blow open an entrance to the room above. Walk through the entrance and then head down the steps on the left side of the screen.
You’ll now find yourself in an underground side-scrolling area with fireballs coming up from underground. Carefully use Roc’s Feather and jump over the gaps. Do the same thing on the next screen, using the ladders as well, and then climb the large ladder to resurface.
Once you resurface you will be in a room with four ropes. Use the power bracelet to lift up the pots and defeat the ropes in this room. Open up the treasure chest to get the Stone Beak and then head up a screen.
You’ll find Smasher in this room, yet another mini-boss from a previous dungeon and this time it is from Face Shrine. Use the power bracelet to pick up his large ball and toss it at him. After four hits, smasher will be defeated. You can go up a screen and speak with the owl statue here to get some advice on those moveable platforms. The statue tells you to fill all the holes and you’ll get a special gift. There is a staircase in this room but there is no need to go through it as it leads to an unnecessary part of the dungeon. Step on the switch that is underneath the pot on the left and head back down a screen.
From the room where you defeated Smasher, head left a screen. There is another moving platform in this room, and this one is a big more tricky than the previous ones. We need to cover all the blocks in this room and you’ll have to push it in a precise pathway in order to do so. You have to push the block left twice, up one, left one, up one, left one, up one, and left two to get to the top-left corner. Then continue down one, right one, down one, right one, down one, right one, down one, right one, down one, right one, up one, right one, down one, and right one to reach the bottom-right corner. Collect the small key that drops.
Also in this same room, if you pull out your sword and tap it against the wall at the north end of the room, you’ll hear a strange noise. This indicates a bombable wall, so blow it up to reveal a hole in the wall. In the room above you’ll find a crystal switch, but don’t bother hitting it just yet. We will be returning to this room much later in the dungeon. You can place another bomb along the left side of the room to reveal another hole. Walk to the left a screen, climb the steps at the bottom, and head down a screen.
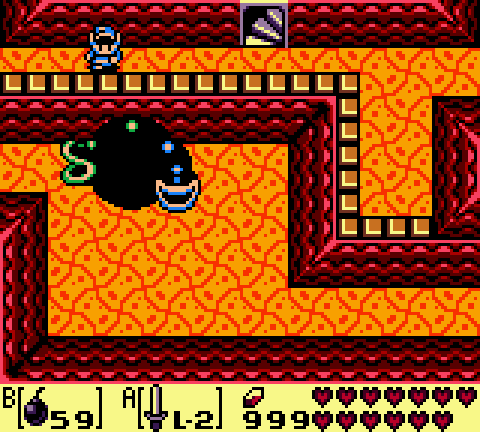
Jump off the ledge and you’ll find a treasure chest right here. You can open it if you’d like, but it is a fake treasure chest only containing a green zol. Walk left a screen to reach a room with some magic powder. You can lift the pots and use Roc’s Feather to collect the magic powder if you’d like. You can also fill up your hearts by using the boomerang on the spark. Afterwards, head left a screen to get back to the first room with the vire.
From here, again head up a screen and right a screen. We once again want to push the moving block, but this time we want to push so that it lands right between the two blocks at the top of the room. You can push the moving platform up once, right twice, and up three times. Follow the path and then push the block on the right to the right, causing it to fall into the lava. Continue up a screen.


Use one of your small keys on the locked block and then head right a screen to find yet another vire. Defeat it using a boomerang and use another small key and head right a screen.
In this next room you’ll find a staircase, some blade traps, and a one-way door. Avoid the blade traps and ignore the staircase for now. Just walk up through the one-way door to get to the next screen. This next room has several green zol and some floating bombs. Grab the bombs, defeat the zol, and talk to the owl statue in this room. It tells you, ‘To defeat the monsters who hold the key, attack them from a higher place.’ This piece of advice will be useful in just a few moments. For now, just head up a screen.
In this room you’ll find two Gibdos walking around. Use your boomerang to defeat them, but note that the ground below you is cracked. You have to continuously be moving, otherwise you’ll fall through holes in the ground. Each gibdo will take three hits with the boomerang to defeat. Once both have been done away with, grab the small key that is left behind and then head left a screen.
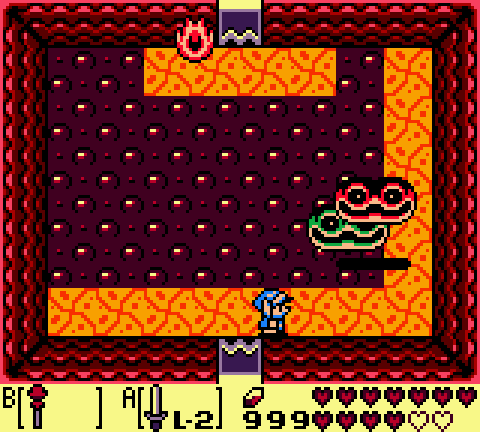
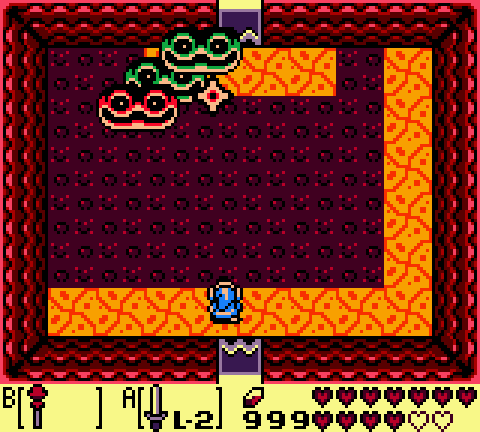
You will find two dodongo snakes, but don’t bother defeating them. If you do so, a treasure chest will appear, but at the top portion of the room that we cannot reach. By the time we reach the top area, the dodongo snakes will have respawned and the treasure chest will disappear. This is exactly what the owl statue was referring to, in that we have to defeat these enemies from a higher place. Ignore the snakes and head left a screen.
In this next room you’ll find a locked door to the left, but don’t bother using a small key as we can skip that all together. Instead, head up a screen and then use the hookshot to grab onto the treasure chest. Open it up to get the secret medicine. You can only hold one of these at time, so if you have one already, this treasure chest pretty much does nothing. Jump off the ledge to the right, grab any goodies that you’d like, and then head up a screen. Walk up the steps to reach a side scrolling area.
In the side-scrolling area, walk right a screen and there will be a pit of lava. Climb the ladder on the left side and then use the hookshot to latch onto the bowser statue at the top-right of the room. Climb down the steps to find yourself back in a familiar room with some spikes.
Back in the room with the spikes, once again head up through the one-way door. One thing we overlooked in this room is that all the blocks in the room are cracked. Use your bombs to blow up all the cracked blocks and you’ll notice that the background of the floor shows an arrow pointing to the left. Place a bomb against the wall on the left side of the room to reveal a secret door and then head through it.
This room is dark, so you can light the torches if you’d like. Jump over the gap in the room, use a small key on the locked block, and then head left a screen. There isn’t anything at all of importance in this room for now, so just defeat the rope and continue left a screen.
There are two ropes and a peahat in this darkened room. Defeat the ropes as they can be annoying and then use some magic powder on the two torches in this room. Doing so will light up the room and allow you to see a crack in the wall on the left side of the room. Place a bomb to blow it open and then head left a screen.
You can talk to the owl statue in the room and it gives you a hint to shoot the statue with the bow. Well, pull out the bow and arrow and shoot the eye statue that is in the center of the room. Doing so will cause a small key to drop, so walk on over and collect it. You can go down a screen if you’d like as you will find a number of items to fill up your inventory. Afterwards, travel to the left a screen from the room with the eye statue.


There is a treasure chest in this room with a number of blocks. Push the block to the left of the treasure chest up one, and then push the adjacent block to the left. Open up the treasure chest to get a small key. After you get the small key, head back right a screen and then up a screen.
You’ll find yourself in a room with two ropes and a vire. Defeat all three of the enemies and the door to the left will open up. Walk to the left a screen, climb the steps, and then head right a screen. Use the hookshot to reach the treasure chest and open it up to get some more rupees. Jump off the ledge and head up the steps to get back outside of the dungeon.
You’ll now find yourself outside and if you look at the map, you are at the furthest northwest part of Koholint Island. There are two enemies around, but they shouldn’t be much of a problem. More importantly, at the top of the steps you’ll find a piece of heart! This is Piece of Heart #12 and once you get it, it will increase your total life bar to 13 total heart containers!
From the heart piece, you can head right a screen and you’ll find the final warp location. This particular location has very little use, but it’s a good idea to enter it just to activate it in case you’d like to come back, since otherwise it is a pain to reach Turtle Rock once again. Walk to the right a screen and enter the door here to find yourself at another part of Turtle Rock.
Once you’ve re-entered Turtle Rock, you’ll immediately find yourself back in the room with the two Dodonogo Snakes. However, you are now on the higher ledge. If you remember what the owl statue stated earlier, this is exactly where you want to be. You need to use a bomb, pick it up, and toss it down towards the Dodongo Snakes. Just like before, the dodongo snakes have to gobble it up for it to be effective. There are a few tips that you can use here. One, it’s best to throw the bombs at their mouths directly as opposed to tossing them on the ground and hoping they walk over them. Two, you can stand along the right side of the room and hold a bomb above your head. Just before it goes off, you can toss it against the wall on the right and pick it up again, resetting the bomb timer in the process. Three, if a Dodongo snake ever goes to the bottom-right part of the room, this is a perfect opportunity to toss bombs right at him.
You have to hit each of the dodongo snakes with three bombs apiece. Once both of the snakes have been defeated, open the treasure chest that appears to get a small key. You should have at least 2 keys on hand now, or three keys if you never used one on that useless locked door I mentioned. With those keys in hand, our next destination is that crystal switch we saw earlier in the dungeon. So pull out your Ocarina and play Manbo’s Mambo to warp back to the original entrance of Turtle Rock.
From the entrance, head up two screens and right a screen to get back to the room with the moving platform. Push the moving platform up once and then all the way to the right, allowing you to head right a screen. In this next room, if you bombed the wall earlier, you should be able to continue to the right another screen. If not, pull out your sword and tap against the wall near the middle part of the right side of the room. You’ll hear a strange noise, signifying that you can place a bomb. Do so and head right a screen.
Hit the crystal switch that is found here and this will cause blocks at a later part of the dungeon to switch. From the room with the crystal switch we now need to backtrack left a screen, down a screen, and left two screens to get back to that first room with a vire.
From this room yet again, once more head up a screen and right a screen to reach the moving platform. Push it up once, right twice, and up five times once again so it lands right between those two blocks. Push the block to the right and head up a screen once again. Continue right two screens and then up through the one-way door.
You’ll now find yourself back in the room that had an owl switch, a floating bomb, and where you revealed an arrow on the floor after getting rid of the cracked blocks. From this room, you can walk to the left three screens through the dark rooms. You can light the torches if you’d like, but then climb the steps, and use one of the small keys on the locked block. Continue right a screen.
There is a locked block and a staircase at the bottom part of the room. Use the hookshot to get over to that higher platform, use a key, and then head down the steps.
In the underground side-scrolling area, use Roc’s Feather to jump across the moving platform while avoiding the fireballs. Continue to the next room to find more of the same and then resurface using the large ladder on the right. Once you resurface, jump off the ledge and head down a screen to take on Blaino, the dungeon mini-boss.
Blaino wears a pair of boxing gloves and will try to punch at you. For the most part his punches are fairly harmless as he rarely even gets close enough to hit you. However, while you are trying to hit him, you might find yourself taking some damage. Blaino does have a windup punch and if he hits Link, Link will be stunned momentarily. Blaino also has a huge windup punch attack. It’s quite slow and you see Blaino prepare for it before delivering it. If Blaino hits the huge windup punch, it will send Link flying all the way back to the dungeon entrance, so be careful!
The key to defeating Blaino is to hit him from the top or the bottom. Whenever he sets up for a windup punch, quickly move up to avoid it, and then deliver a few sword slashes as he recoils. It’s always better to move up, since the huge windup punch comes from below. Alternatively, you can equip Roc’s Feather and your sword simultaneously. Hold your sword for a spin attack and then jump towards Blaino, releasing the spin attack when you get close. Just keep hitting him until Blaino has been defeated.

Afterwards, collect the fairy that is left behind and then head up a screen. Climb the steps and the blocks should be lowered if you hit the crystal switch earlier as stated in the walkthrough. Open the treasure chest to get the dungeon item, the Magic Rod.
Next, jump off the ledge and head back down the steps. Go through the side-scrolling sequence just as before and resurface in the darkened room. Jump off the ledge and head left three screens and then down a screen.
You will appear on a higher ledge. This is a room which we were able to access much earlier in the dungeon, but we couldn’t do much in it. Now that we have the magic rod, you can use it to light up the two torches and a treasure chest will appear. Open it up to get a small key! Note: If you didn’t use a small key on that optional locked door earlier in the walkthrough as mentioned, then you won’t even need this key.
We now need to get back to the room with the first vire near the entrance of the dungeon. You can play Manbo’s Mambo if you’d like. Otherwise, just head down a screen, right a screen, down a screen, and right a screen. From this familiar room, yet again head up a screen and right a screen to reach the room with the moving platform.


Our next destination is the staircase at the bottom-right part of the room. Push the moving platform so that you can reach the staircase and then head up it. In this side-scrolling area, use the Magic Rod to burn through the ice obstacles and defeat the goombas. Continue left a screen to find some more ice obstacles. This time equip the Roc’s Feather as well as the magic rod. Jump up and use the magic rod on the higher row of ice. Then jump onto the lower row of ice and walk over to the staircase. Go down the steps to resurface at a new part of the dungeon.
Walk down the steps and head left through the locked door. Here you will find Cue Ball, yet another mini-boss from a previous dungeon. Wait until Cue Ball comes towards you, then jump over him with Roc’s Feather, and deliver a sword slash to the back of its head. Repeat this process four times with the level two sword to defeat him. Go up through the door that opens up.
Here you will find the final moving platform puzzle in this dungeon and it is the longest one yet! Push the platform up three, right two, down one, right one, up one, and right two to reach the top-right part of the room. From here go down three, left one, up one, left one, down one, left one, up one, left one, down two, and right five to finish off the puzzle. Open the treasure here to get the Nightmare Key! We are now ready to take on the dungeon boss!
From the room with the Nightmare Key head down a screen, right two screens, and down two screens. Collect some of the goodies and then push the blocks into the lava. Jump over the gap and head right two screens. Go down a screen and push the lone block into the lava. Jump over the lava to the right and then push the adjacent block into the lava. Walk to the right a screen, climb the steps, jump off the ledge, and climb up the staircase at the top-right portion of the room.
Equip Roc’s Feather and the magic rod. Jump up and climb the steps on the right side. Use the magic rod to clear the ice to the left, and then the ice block just above. Jump up and use the magic rod to clear the ice blocks to the left. Stand above one of the columns of ice, jump up, and aim the magic rod down to get rid of more ice. Once you have fallen, aim up and get rid of the next column of ice. You need to repeatedly maneuver around this area, fall down from the top and try to use the magic rod to melt the ice block at the left part of the screen. Once you’ve done so, climb up, jump over to that ledge using Roc’s Feather, and continue left a screen.
Climb down the steps and use the magic rod to melt the bottom row of ice. Then walk just below the second column from the right of ice. There should be three blocks directly above you. Use the magic rod to melt this ice. Climb the steps and you should now have a clear path to make it to the left side of the room. Jump over the ice and head down the steps to resurface at another part of the dungeon.
You are now ready to take on the dungeon boss, Hot Head. So once you’ve prepared yourself, use the Nightmare’s Key and head up through the door.


Hot Head jumps in and out of the lava that is in the room and its only attack is the splash of fire. Unfortunately it is quite a damaging attack doing four full hearts of damage if you have the original tunic. The fire always splashes diagonally each time Hot Head lands in the lava so the pattern is easy to avoid. Just walk over and stand directly south of where he lands.
As Hot Head jumps in and out of the lava, you want to time a shot so that you can hit him with the magic rod. Once you finally land a shot with the magic rod, hot head will start moving rapidly around the room and you can hit him with more shots of the magic rod. You can launch a number of shots immediately following one another for consecutive hits against hot head. Once he’s been hit a number of times, his shell will break off revealing a smaller head. Continue the same process utilizing the magic rod and hot head will be dead in no time.

After Hot Head has been defeated, he’ll leave you with the final words that you cannot wake the Wind Fish. Hot Head reminds Link that he too is within the dream. Collect the Heart Container to raise your overall health to 14 full heart containers. Jump over the lava and head up a screen to collect the eighth Instrument of the Sirens, the Thunder Drum!

| “…EGG…. The Egg on the mountain calls!” |
