This chapter covers the original version of Link’s Awakening DX for the Game Boy Color. If you are playing on the Nintendo Switch version, check out the Tail Cave Walkthrough.
- Chapter 1 – Tail Cave
- Chapter 2 – Bottle Grotto
- Chapter 3 – Key Cavern
- Chapter 4 – Anglers Tunnel
- Chapter 5 – Catfish’s Maw
- Chapter 6 – Face Shrine
- Chapter 7 – Eagle’s Tower
- Chapter 8 – Turtle Rock
- Chapter 9 – The Awakening
1.1 The Boy on the Shore


By defeating Ganon and saving the land of Hyrule, Link fulfilled the Hyrulian Prophecy and became a legendary hero. However, it was not long before Hyrule’s citizens began to worry about the potential return of the Evil King. To better prepare for such an event, Link embarked on a journey across sea, searching for new lands where he could train and hone his skills. In the midst of his voyage, Link found himself caught in a vicious storm. The hero held on with all his might as violent waves crashed against his ship. In a flash, lightning struck the small boat, knocking Link unconscious. The hero unknowingly washed upon the shores of the mysterious Koholint Island where a young girl found him and took him back to her house to recover.
On the main screen, enter your selected name to create a save file. If you enter your name as “ZELDA”, the background music at the file selection screen will change. It does not directly affect the outcome of the game, but the music does sound pretty cool.

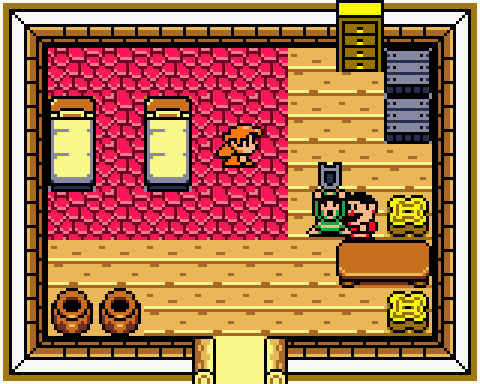

After creating a save file, we find Link in a bed inside of Marin’s House, tossing and turning in his sleep as though he’s suffering from a nightmare. When he finally awakens, he sees a girl named Marin, but mistakenly believes she is Princess Zelda. After Marin explains where Link is and how she found him, you can take control over Link. Get out of the bed and walk over to Tarin, Marin’s father, who will give you back your Shield that was lost during the shipwreck. Marin also informs you that shortly after you had been found, strange monsters began to appear throughout the entire island. After obtaining your shield, exit the house to explore Mabe Village.
One screen down from Marin’s House, you will find a Telephone Booth. Walk up to the phone and it will make a call to Ulrira, a resident of Mabe Village who lives one screen to the west of this Telephone Booth. He admittedly doesn’t like being talked to in person but will gladly offer any advice that may help Link along in his journey when being called from one of the many Telephone Booth locations throughout Koholint Island.


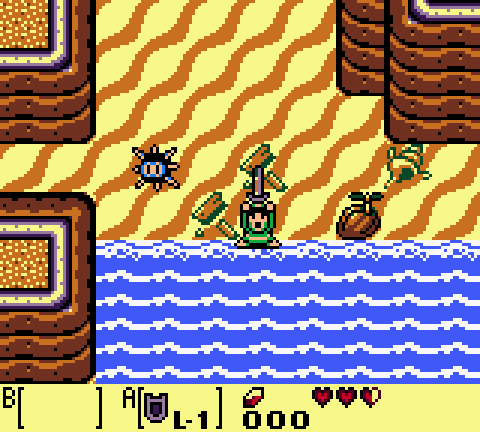
From Marin’s House, head left two screens and down five screens to reach the Toronbo Shores. Use your shield to protect yourself from the Octorocks and Leevers, and then head right two screens. Hold out your shield and walk towards the Sea Urchin to push it out of the way. Once the path is clear, walk over to your Sword that is in the water. Before you can grab it, an Owl will appear and reveal some strange information regarding Koholint Island. Apparently, Link cannot leave the island until he awakens the “Wind Fish“. The owl then tells you to travel north to the Mysterious Forest where he will meet us again. Hoot!
| “Hoot! Hoot! So you are the lad who owns the Sword… Now I understand why the monsters are starting to act to violently… A courageous lad has come to wake the Wind Fish… It is said that you cannot leave the island unless you wake the Wind Fish… You should now go north, to the Mysterious Forest. I will wait for you there! Hoot!” |


Grab your sword to the tune of some awesome music which triggers the classic Legend of Zelda theme. With your trusty sword in hand, walk back to the left two screens where you can now defeat the Octoroks and Leevers. Also, if you press and hold the button in which your sword is equipped, Link will charge up and release a spin attack. Now head back north towards Mabe Village, defeating the Octoroks along the way.
There are two boys tossing a ball back and forth on this first screen. The building found here is the Library and it has a number of instructional books, giving you the rundown on some of the basic features in the game. Feel free to stop in if you’d like, but then head up a screen.


There is a small well found on this screen and in order to enter it, you must fall down from the higher ledge above. Cut down the bushes and jump down into the well. Inside you’ll find the first of 12 pieces of heart! Like in A Link to the Past, these act as quarter hearts and when you collect four of them, you will add one full heart container to your health. Walk up the steps to get back outside. Walk up two screens to enter the Mysterious Forest.
1.2 Mysterious Forest

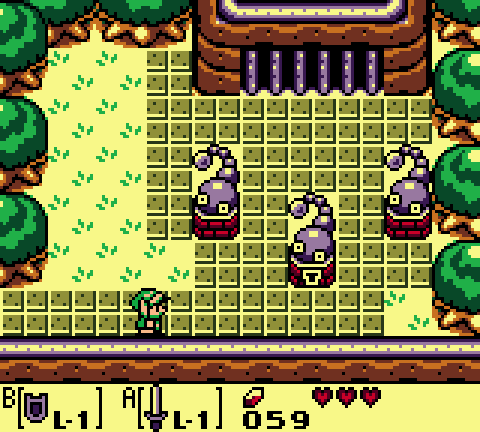
Once you enter the Mysterious Forest you will once again be confronted by the Owl who will tell you some more about Koholint Island. The owl gives you a message to a find a key that will allow us to enter Tail Cave. After he flies away head up one screen and you’ll encounter some enemy Moblins. Defeat them with two sword slashes. Continue through the forest by heading right a screen, up a screen and then right one more screen. Get rid of the Moblin found here and then enter the cave on the right.


Inside the cave you’ll encounter enemy Keese, which resemble bats and will fly around trying to harm you. You’ll also notice that there are some cracks on the floor. Be sure to move quickly over these squares, because the ground will crumble if you stand on them for too long. Fight off the Keese and slash at the blue crystals that are within the cave. Push the stone that is in front of the treasure chest and then open it to get 50 Rupees.
Go up a screen and kill the Green Zols that appear. Walk left a screen and you’ll find a heart piece. Unfortunately we cannot reach it just yet, but you will be returning at a later point to pick this piece up. Push some of the stone blocks out of your path and exit the cave below.


Back outside you’ll see a strange item on the left. Walk on over and pick it up to get the Toadstool. Go back into the cave and move the stone blocks again. This time it is a bit trickier. Just push all the blocks that you can to the right and then push the block at the top-right of the room up once to clear the path. Make your way through the next two screens and exit the cave.
Back outside once again, head up a screen and then right one screen. Here you will find a Fairy Fountain where you can restore your health whenever it is low. Go back left one screen, then up one screen, and right two screens to leave the Mysterious Forest.


You’ll see another piece of heart on this screen, but we cannot reach this one either. Don’t worry about it for now and just head down a screen. You’ll find two new enemies here in the form of a River Zora and a Buzz Blob. Just walk right passed these creatures and head down a screen. Continue right one screen and then enter the Witch’s Hut.
Assign the Toadstool to one of your buttons, and then give it to the Witch. After some mixing, she’ll give you some Magic Powder. Magic Powder can be used to light torches, but also can be used as a weapon against most enemies. Exit the hut and go back left one screen, and up one screen. Just for the fun of it, sprinkle some Magic Powder on the Buzz Blob to turn it into a Cukeman. This is an alternate version of a Buzz Blob. They still hurt you, but unlike other enemies they say various things to you. Anyway, go up one screen and left one screen to re-enter the Mysterious Forest.


From the entrance to the forest, go left one screen, down two screens, left one screen, and up one screen to reach an area with a Raccoon. At this point if you try to go up another screen you’ll get lost in the forest, as the screens are all scrambled. To get through, simply sprinkle some Magic Powder on the Raccoon to discover that it actually is Tarin! After some small talk go up a screen and open the chest to get the Tail Key! You’ll then be joined once again by our good ole friend, the Owl. Get used to it, as he pops up throughout the entire quest.


The Owl instructs you to take the key and travel to the Tail Cave, where you will find one of the Instruments needed to wake the Wind Fish. Go back down two screens, left a screen, and down two more screens to exit the Mysterious Forest.
1.3 Side-quests in Mabe Village
There’s plenty to do in Mabe Village at the moment and the first thing is to find the Fisherman. He is located one screen to the west, and two screens north of Marin’s House. Speak to the fisherman and he’ll charge you 10 rupees to fish. Make sure you have at least 25 Rupees, to ensure you catch all the important fish. You need to use the left and right buttons on the d-pad to aim the cast, and once you catch a fish, rapidly hit the A and B buttons to reel it in.
The smaller fish are easier to catch and are worth 5 Rupees. The larger fish are worth 20 Rupees, but usually you can’t get them without first catching the smaller ones that are in the way. The large fish directly under where Link is standing will also give you Piece of Heart #2! Once you catch the large fish with the Piece of Heart, you can stop the fishing mini-game.


Our next stop is in the east portion of Mabe Village on the screen just to the right of Marin’s House. The screen is full of grass and bushes, but if cut down the bushes with your sword, you’ll uncover Secret Seashell #1! There are 26 of these Seashells to be found in the overworld, but you only actually need to catch 20 of them to get the reward.
Just for the fun of it, there are Cuccos in Mabe Village. These seemingly harmless chickens can become deadly if you attack them. Hit them with the sword about 35 times and a whole army of chickens will attack you, but they will stop if you go to another screen. You will also find some Mutts in Mabe Village. They’ll bite you if you hit them with the sword. Sprinkle some Magic Powder on the cucco and mutt to slay them without retribution.
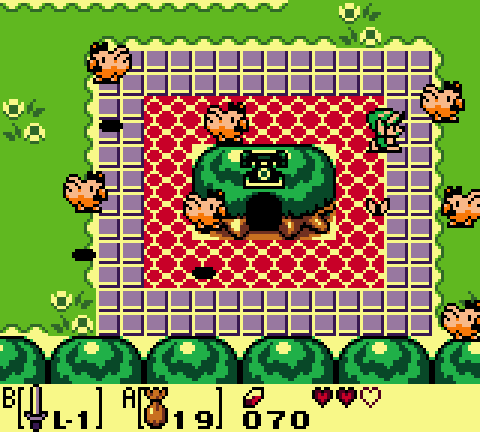

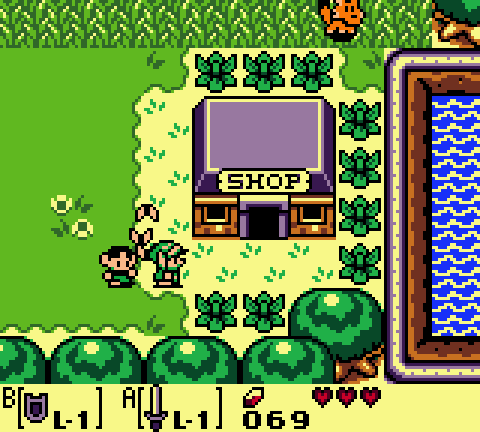
At the bottom-right part of Mabe Village, you’ll find a building titled ‘shop’. This is the Trendy Game and you’ll need at least 10 rupees to play. Enter the game and speak to the man in charge. To play this game, use the A and B buttons. Trick is, you can only press the A and B button once, so first press and hold the B button until it reaches the center of the game area, then hold the A button until the shadow of the crane is directly over the Yoshi Doll. Once the crane has dropped, it will grab the Yoshi Doll and bring it over to the left side. Pick it up to get the first Item in the Trading Sequence.
You can play the Trendy Game over and over to collect tons of rupees. Position the crane at the top-left of the rotating platform. Time the drop so that it releases once the Rupee is close to the middle on the right side of the moving platform. If timed correctly the crane will pick up the rupee which gives you 30 Rupees! You can leave the shop and play this over and over to really rack up some money. If you want to spend some time at the trendy game collect 210 rupees so you can get the shovel and bombs at the shop.


From the Trendy Game, go up three screens and then left a screen to enter the large house in the Village. Speak to the mother who is carrying the baby and she’ll ask you for the Yoshi Doll. Of course you should give it to her, and in return she’ll give up the Ribbon, the second item in the Trading Sequence. You can speak to the husband to find some curious information in that he claims he will be lost at a later point in the quest…strange.


Once you’ve got the ribbon, leave and go back to the house just west of Marin’s House…the one with the Chain Chomp outside. Go into the smaller house on the right and speak to the Small Chain Chomp. She’ll tell you about her love for accessories…make-up, jewelry, dresses… She’ll want your ribbon, so agree to give it to her and in return, she will give you some Dog Food. The dog food marks the third item in the Trading Sequence.
That’s all we really want to do in Mabe Village, but there still is another item in the Trade Quest that we can collect and it is back on Toronbo Shore. Make your way down to the sandy area at the south-west part of Koholint Island. Once you reach the sandy area, go right three screens and enter the house. The Crocodile will want the dog food that you have and will gobble it down in one piece…while it is still inside the can. In exchange for the dog food, he will give you some Bananas, the fourth item in the trading sequence. With those in hand we’ve finished this portion of the trading sequence and are now ready to take on the Tail Cave.


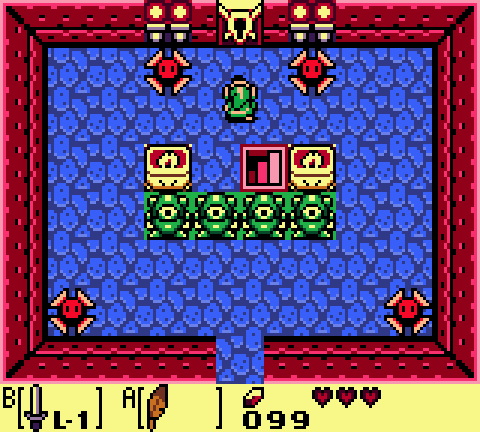
To reach Tail Cave, leave Toronbo Shore, go right a screen, up two screens, right two screens, down and back left a screen, down a screen and right a screen. Once you’ve reached the entrance, walk up to the center statue and use your key to open the gate. Then enter the first dungeon: Tail Cave.
1.4 Tail Cave
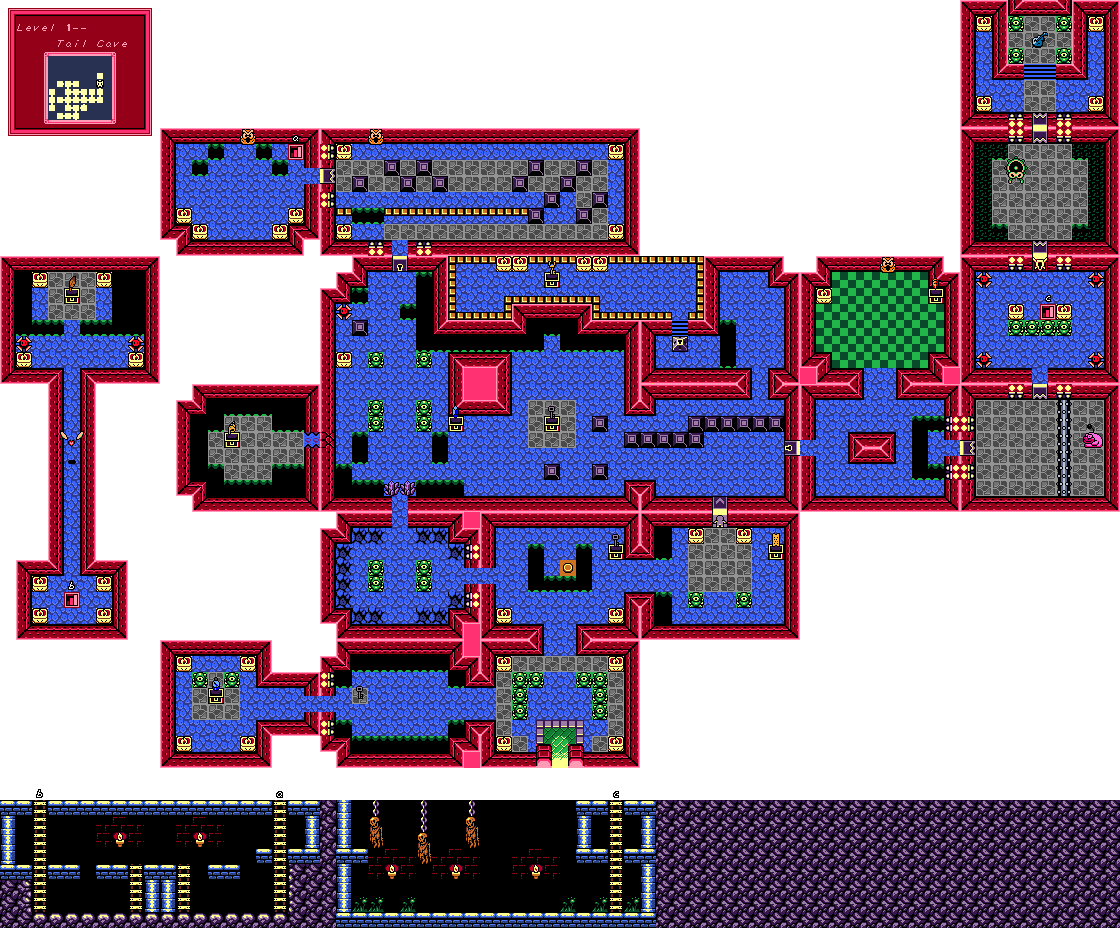
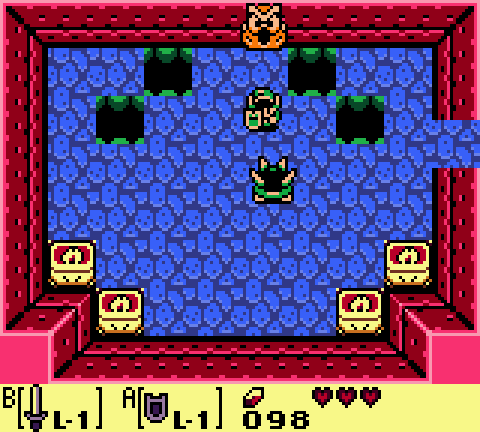
Tail Cave is without a doubt the easiest dungeon in the game. It consists of weak enemies, easy puzzles, and is the smallest of all the dungeons. From the dungeon entrance, head to the screen to the left. The new enemies here are known as Hardhat Beetles and you cannot defeat them. Instead, the only way to get rid of them is to swipe at them with your sword, eventually causing them to fall of the ledge into the abyss. Once both of them have been done away with, grab the Small Key and head left a screen.


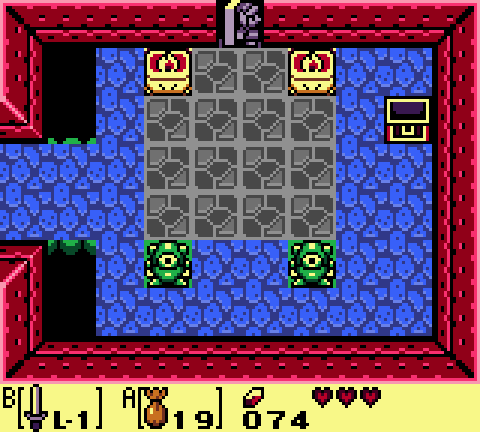
Beware of the torches in this room as they’ll occasionally shoot out fireballs towards you. Defeat the four Green Zols and then open the treasure chest to get the Compass. The Compass shows the locations of all the treasure chests, as well as the room with the dungeon boss when you take a look at the map. Additionally, whenever you enter a room that has a small key, you’ll hear a short jingle, signifying there is a small key. With the compass in hand, go back to the first room of the dungeon.
Go up a screen and defeat hardhat beetle and gel that are walking around. Step on the switch in the center of the room and a treasure chest will appear. Open up the treasure chest to get a Small Key, and then head right a screen.


The two Stalfos in this room will jump away when you try to slash at them. Corner them and deliver two sword slashes to defeat them. Defeat the two keese as well to make a treasure chest appear. Open it up to get the Dungeon Map. Go up a screen through the one-way door.
Defeat the enemies in this room and then head through the locked door to the right. (Note: You could skip this next step as it is completely optional. It just gives you one of the dungeon items that is not necessarily required.)
Avoid the Sparks in this room and then head up a screen. The strange looking enemies here are conveniently known as Three-of-a-Kind. You need to strike them so that the suite on their body is the same for all of them, whether that is a heart, diamond, spade, or club. It can be rather difficult, but you have to watch for the pattern that the suites change. Once you’ve slashed all three of them while they are the same suite, a treasure chest will appear. Open it up to get the Stone Beak.


Whenever you see an Owl Statue within a dungeon, you can walk up to it with the stone beak to get a hint. There is an owl statue in this room and if you speak to it, it will give you a hint of having to use a shield to turn over the spine creatures. We’ll be using this information in just a bit. Note: If you are playing the original Gameboy version, there are no stone beaks, just Stone Slabs. For now, let’s head down a screen, and then two screens to the left.
There is a Mini-Moldorm crawling around the ground here. Defeat it with a few sword slashes while trying to avoid getting hit by the sparks. Once it has been defeated carefully open up the treasure chest in this room to get another small key, and then head left a screen.


Defeat the Mini Moldorm here and a chest with 20 rupees will appear. You might notice there is a crack in the wall on the left side of the room. We need Bombs in order to access the room and we won’t be getting those until later in the game. Thus, we will be returning to this dungeon even after we have already completed it. Go up a screen and be sure to avoid the Blade Trap by pushing the block up one square. Use the small key we just got and go through the locked door.
Go right a screen and maneuver through the blocks, trying to avoid the sparks and defeating the Gels. Walk back to the left along the top part of the screen and you’ll find another spark. There is also an owl statue here and if you talk to it, it gives you a hint on what you need to do (NOTE: If you are playing the original, this particular owl statue won’t exist). Push the lone block to the right and the door will open up, so head through it.


There is another owl statue here, but it tells you the same thing the first one did…use the shield to flip over these spike enemies. Pull out your shield and hold it out so that the spiked beetles will run into you. The shield will cause these enemies to flip over, allowing you to defeat them easily with your sword. Once both of the beetles have been defeated, a staircase will appear, so let’s head down.
In this side scrolling area, you’ll find some…Goombas? Yes indeed, apparently these foes have made their way from the Super Mario Bros series into the Zelda franchise. Slash at them with your sword or fall on top of them from a higher ledge to defeat them. Whenever you hit them on their head, they will always leave a recovery heart, so keep that in mind for the future. Continue one screen to the left, defeating another Goomba before climbing the stairs.


Walk up two screens avoiding the blade traps that will try to squish you. Open the treasure chest here to find the dungeon item, Roc’s Feather! This feather will allow Link to jump! You can use this to jump over pits, reach floating items, jump on top of enemies, or to evade enemy attacks. Go back down a screen and you can now use Roc’s Feather to reach the floating recovery heart. Go down a screen and backtrack through the side-scrolling area with the Goombas.
Continue backtracking right a screen, but now you can take a shortcut and jump over the pit here with Roc’s Feather. Continue down two screens and right a screen to get back to the room with the sparks and a treasure chest that contained a small key. Walk to the right a screen but along the upper pathway.
Go up a screen and you’ll encounter a hardhat beetle. It’s a bit annoying to hit this beetle into the abyss, so just avoid him and jump over the gap. Use a small key on the locked block here and then walk left a screen. Open the treasure chest found here to get the Nightmare Key. This is the key that will allow you to enter the boss room of the dungeon.


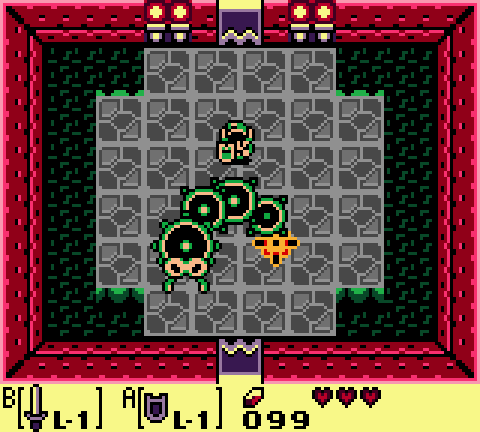
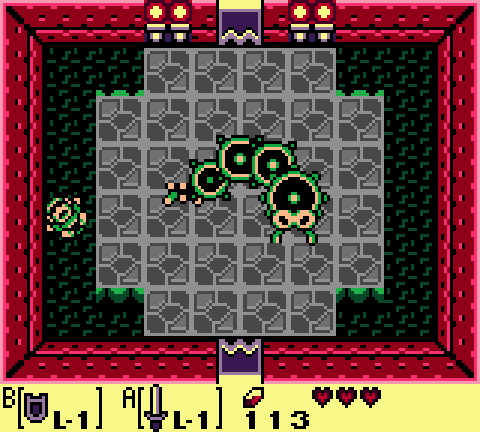
We are now ready to move deeper into the Tail Cave, so backtrack right a screen, down a screen, left, right along the lower portion of the room, and then right once again. We are now back in the room with multiple sparks, but this time we can jump over the gap on the right side with Roc’s Feather. Do just that to take on the dungeon mini-boss, Rolling Bones.
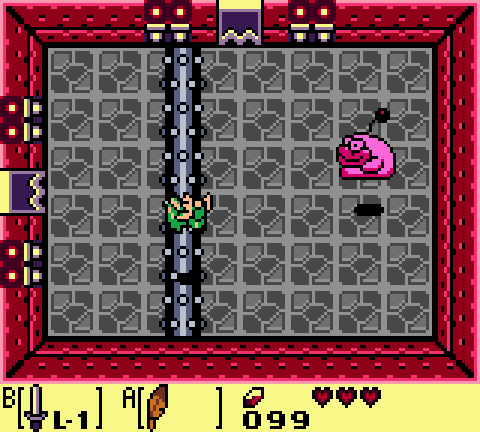

Rolling Bones has a huge spiked log that he will roll across the room. After rolling the log, he’ll jump over to the other side of the room and will roll it back once again. All you have to do is use Roc’s Feather to jump over the rolling log and slash away with your sword. If you notice, Rolling Bones always jumps in the same diagonal pattern, so use that to your advantage in planning your attack. Once you’ve hit him eight times with your sword, he will be defeated, leaving behind a fairy. Additionally, a warp portal will appear and if you step into it, it will take you back to the entrance of the dungeon. Likewise, you can now reach the mini-boss room easily through the portal at the entrance of the dungeon. Once you have recovered your hearts with the fairy, head up a screen.
There is a staircase here, but there is no need to go down it. Instead, we are now ready to take on the dungeon boss, Moldorm. So avoid the blade traps and head through the locked door.


Moldorm will crawl around the room and try to harm Link. Each time Moldorm makes contact with Link, it will bump you away, so try not to fall off the ledge. Moldorm’s weakness is its glowing tail, which you must strike four times with your sword in order to defeat him. However, each time you hit Moldorm’s tail, he will swiftly move across the room, trying to knock you down.
The easiest method to defeat Moldorm is to use Roc’s Feather to jump over him whenever he gets close. When you are in the air after using Roc’s Feather, you can still slash your sword to hit its tail. If that method gives you trouble, you could just walk around the room, charging right at Moldorm while slashing with your sword. Alternatively, you can equip the shield and try to stay against the bottom wall, so if he bumps against your shield, you’ll just back up into the wall. Whatever the method, it will take four standard sword slashes to defeat Moldorm. At any point if you fall off the ledge, you will be taken to an underground area and will have to climb the steps and start the battle all over again.
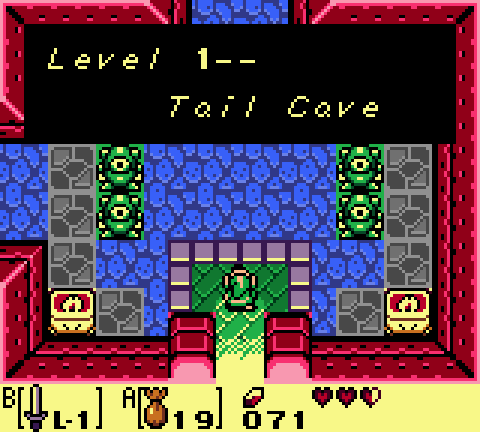
After defeating the Boss, pick up the Heart Container that is left behind. Walk up a screen and collect the first Instrument of the Siren, the Full Moon Cello.
