
Location of Shrine
- View location on the Breath of the Wild Interactive Map.
- Located within the Korok Forest, just near where you find the Master Sword.
Video Guide
Walkthrough
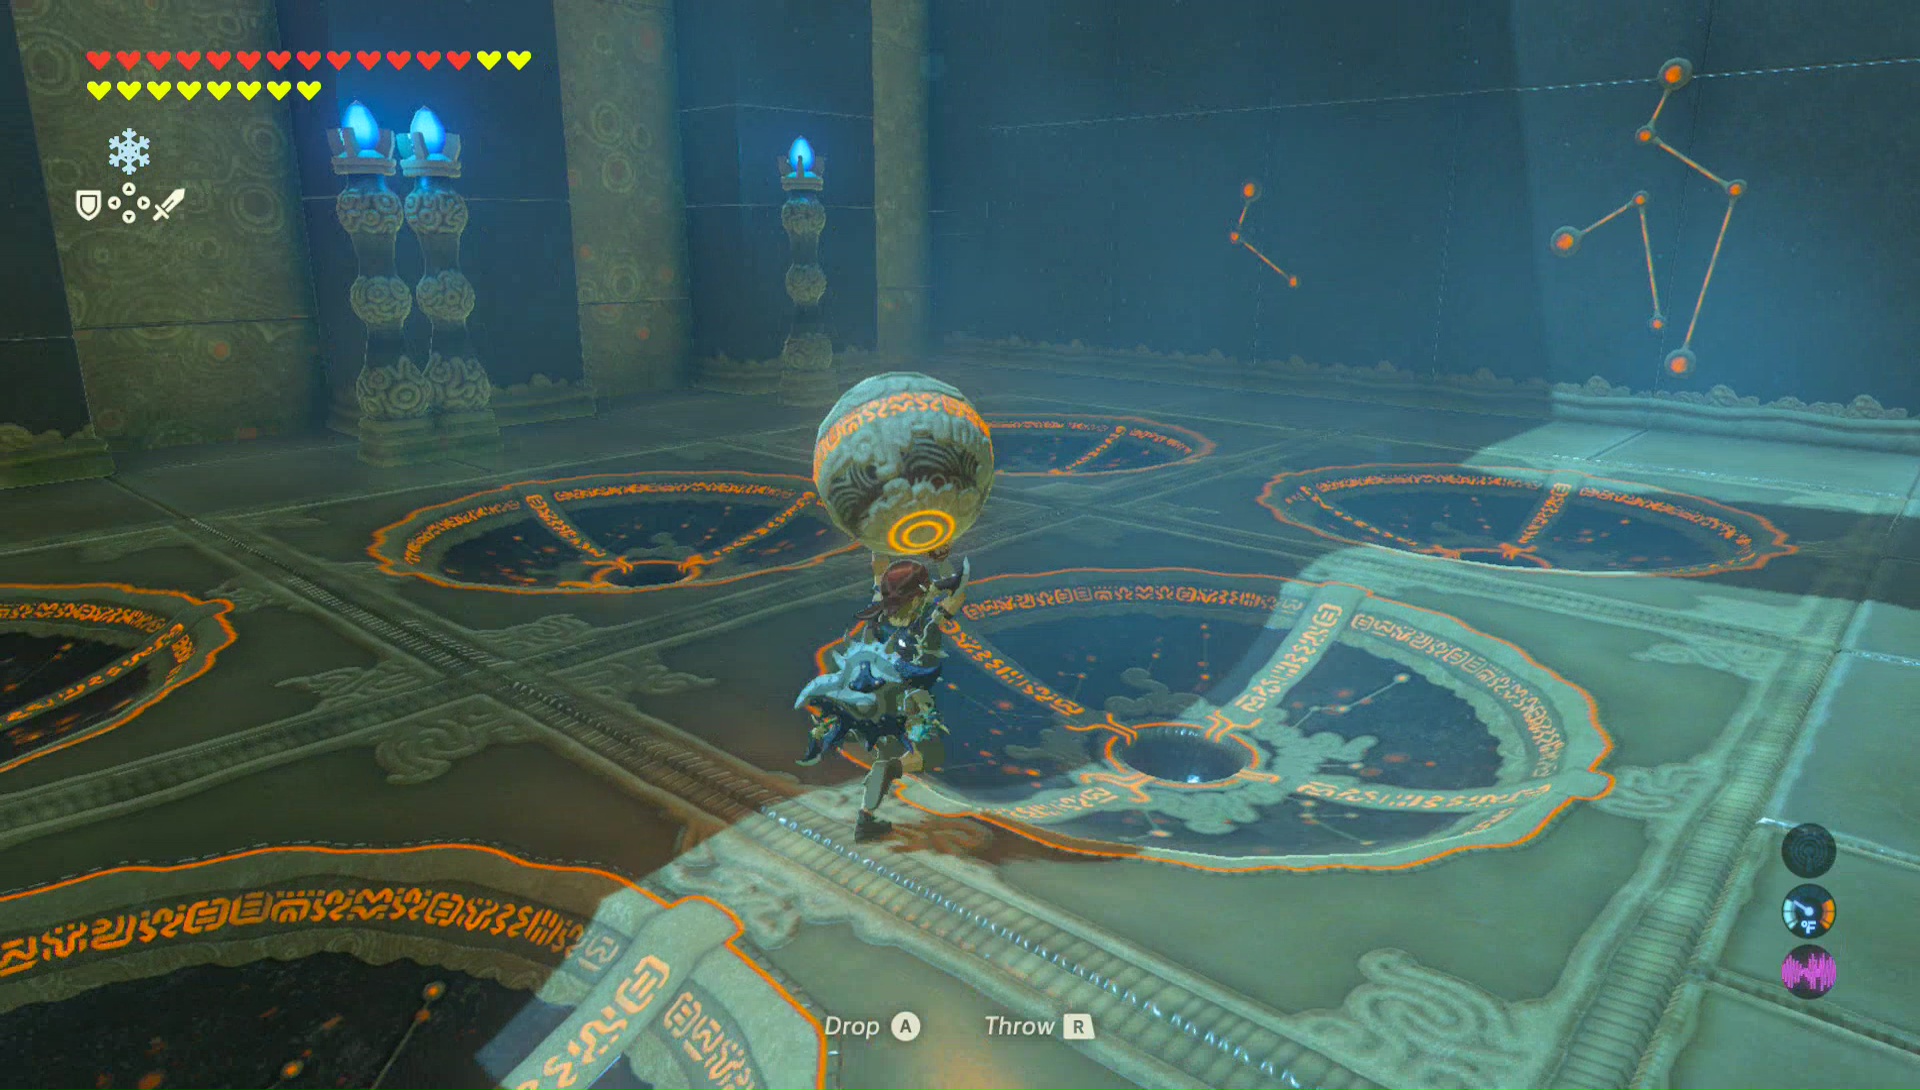
The solution to this puzzle is within the picture of the constellations above. If you glance around the room, the rows of the room are determined by the number of torches on the sides, going from 1 to 5. The columns are then determined by the specific type of constellation.
If you look at the stars, you will see the same four constellations, some of them more than others. You have to count up how many of each constellation there is. From left to right, the solution to this puzzle is 5 – 3 – 1 – 2. So you’ll need to move the orbs so that they are on those respective locations. Doing so will open the gate ahead.
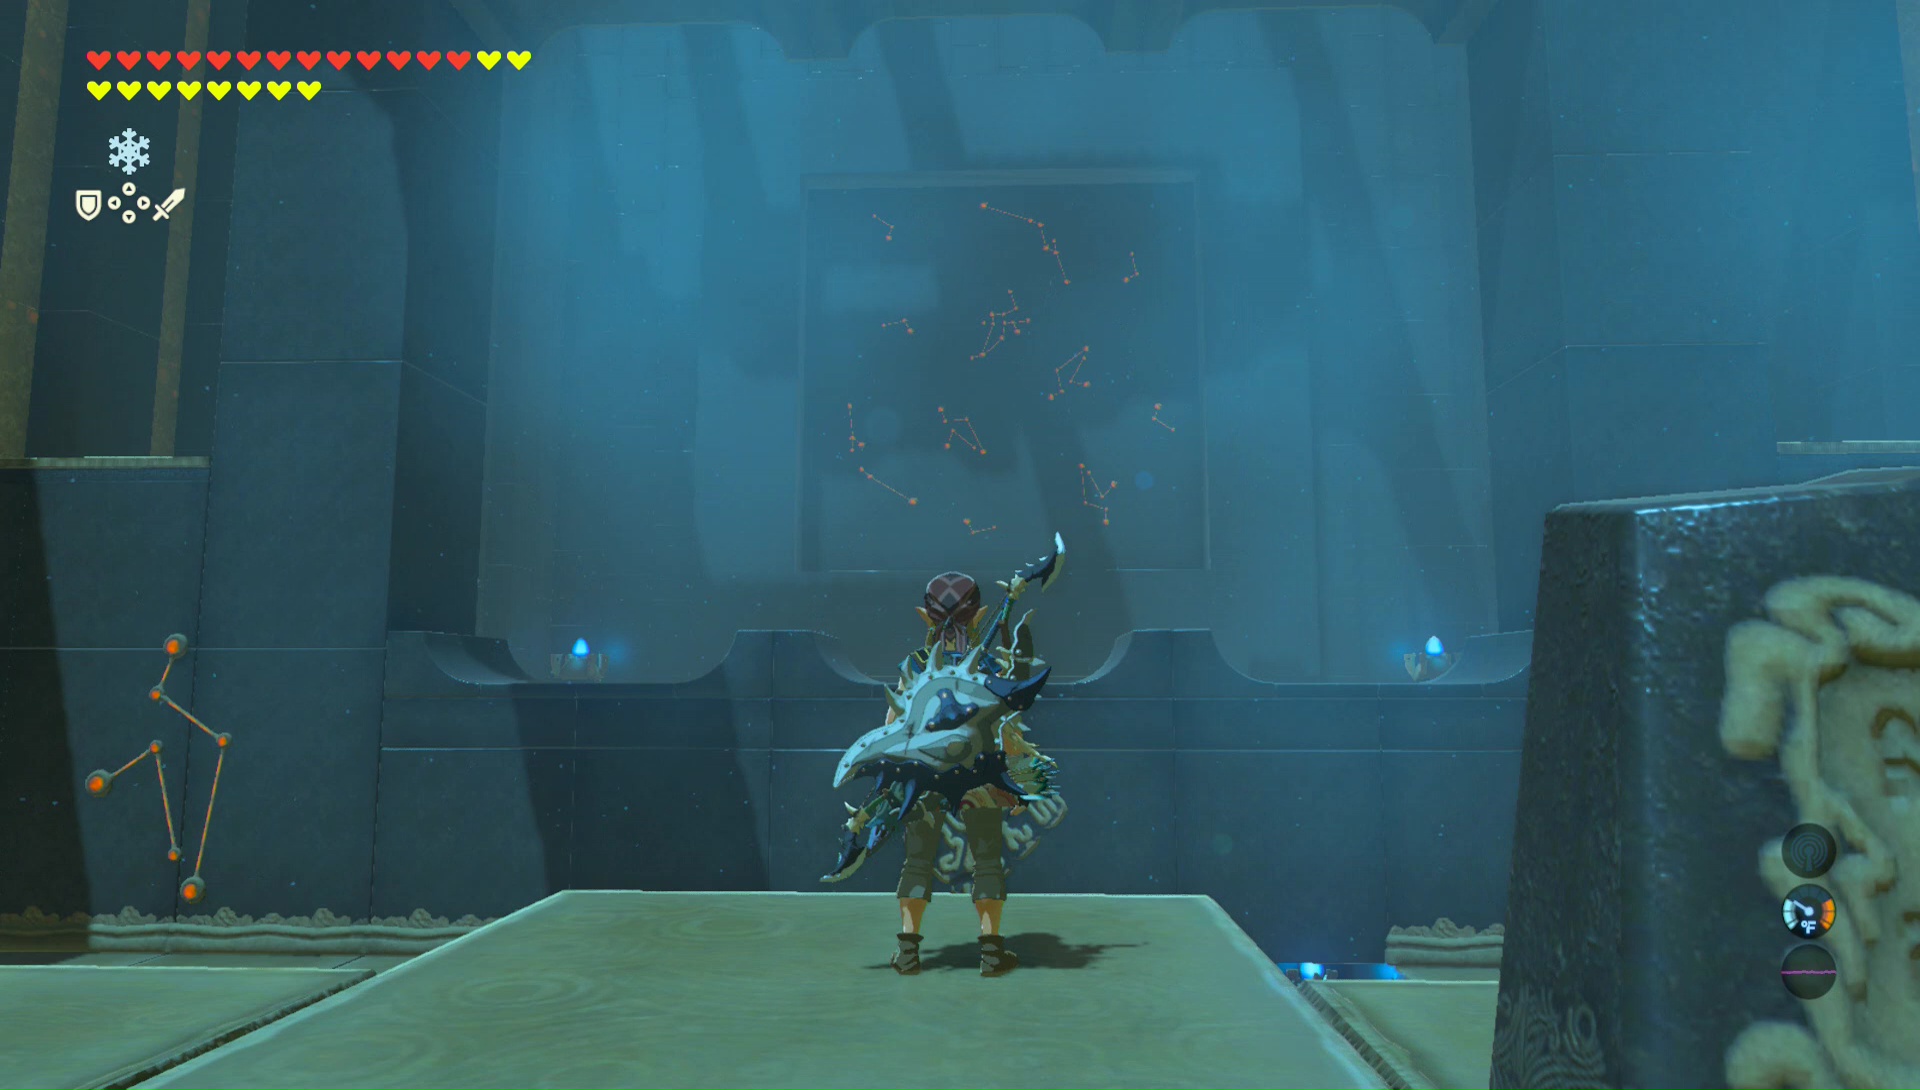

Before completing the dungeon, there is one more puzzle. Just to the right of the Monk, if you turn around you’ll see another set of constellations on the wall. You need to re-arrange the orbs to fit this puzzle. The solution this time around, from left to right is 4 – 2 – 2 – 1.

Run over to the Monk, Keo Ruug, and he will reward you with a Spirit Orb.
